Static Route Configuration
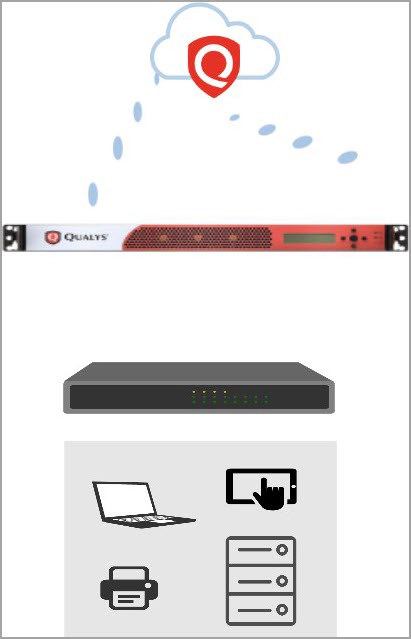
Qualys allows configuring static routes on both virtual and physical scanners. This allows the scanner to direct non-local traffic to the appropriate gateway address when this address is not the default gateway. This configuration may be useful when a scanner is placed on a transit network with multiple routers serving different destinations, such as remote facilities or business partner networks.
Required Information
To configure your appliance with static routes, you need the following information:
Gateway IP address – The scanner-facing IP address of the router or gateway. There is no requirement for uniqueness; the same gateway may be used for multiple target networks.
Target network address in CIDR format – The gateway/target network pair must be unique. The same gateway/target network pair cannot be defined in another static route configuration for the same appliance. The target network must have a valid starting IP address for the provided target mask.
A route name to identify the static route configuration in the static routes list.
Limitations
Public/Private cloud provider distributions, as well as offline scanner appliances, do not support static routes.
Physical scanners support up to 4094 static IP routes for devices with a serial number over 29000 and up to 99 static IP routes for devices with a serial number under 29000.
Virtual scanners (except public/private cloud provider and offline scanner images) support up to 4094 static IP routes.
For more information about the currently supported Virtual and Cloud platforms, see Qualys Virtual Scanner Appliance: Platform Qualification Matrix.
Configure Static Routes in the UI
To configure static routes from the Qualys Enterprise TruRisk™ Platform, perform the following steps:
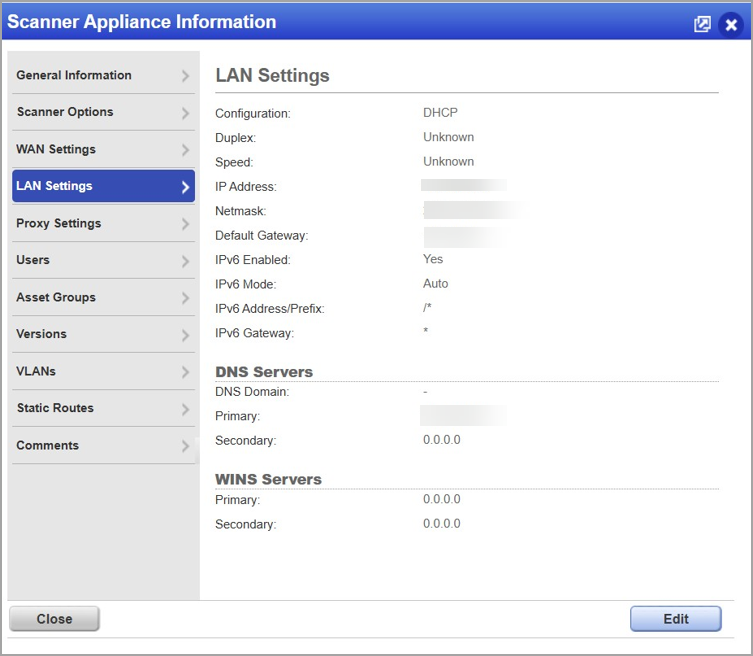
- Log in to Qualys as a Manager, go to Scans > Appliances, select the appliance, and choose Info from the Quick Actions menu.
The Info page displays the scanner's network configuration.
Within the LAN and WAN settings sections, you can view the following information for each network interface:-
Assigned IP address
-
Netmask
-
Default gateway
-
Configured DNS servers
Before proceeding to the next step and adding static routes to the scanner, review the following routing behavior and design considerations.
Route Selection Behavior
The Qualys scanner determines the path to a destination network or IP address based on standard routing principles. When multiple routes are available, the scanner selects the route that has the most specific match, known as the longest prefix match, from its routing table.
DNS and Gateway Route Validation
The Qualys scanner is designed to ignore any static route configurations received from the Qualys TruRisk platform if any of the following addresses fall within a configured static route:
- LAN DNS servers
- WAN DNS servers
- LAN default gateway
- WAN default gateway
- Proxy IP address
This behavior applies even when the DNS server addresses are located outside the corresponding LAN or WAN subnet.
According to the rules mentioned above, the static routes in the following examples are rejected:
Example 1
Scanner’s LAN configurationLAN subnet: 192.168.10.0/24Gateway IP:
192.168.10.1Static route created via TruRisk platform:Destination network: 192.168.10.0/28Next hop: 192.168.10.4Explanation
The gateway
IP (192.168.10.1)falls within the destination network(192.168.10.0/28, range192.168.10.0–192.168.10.15). Qualys would reject this configuration because the LAN gateway IP is contained within the static route network.Example 2
Scanner’s LAN DNS configuration

DNS servers:10.20.30.5310.40.20.4Static route created via TruRisk platform:Destination network: 10.40.20.0/24Next hop: 10.40.20.1Explanation
The DNS server
IP (10.40.20.4)belongs to the destination network(10.40.20.0/24). Therefore, the DNS server is located within the address range covered by the static route, and the Qualys scanner would reject this configuration. -
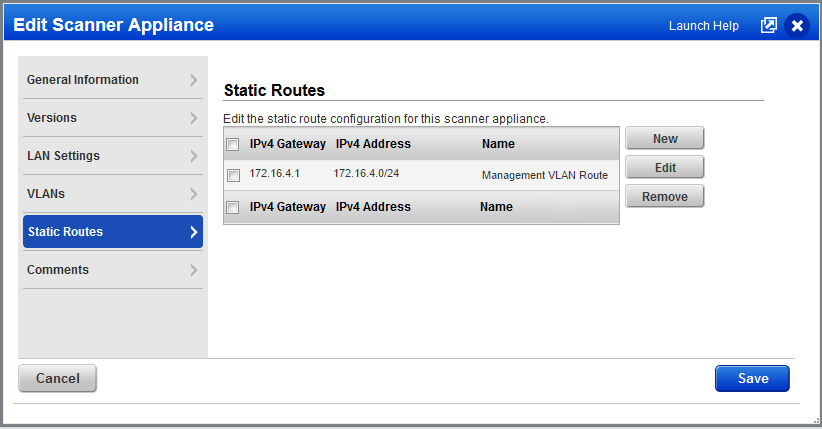
- From the Quick Actions menu, select the Static Routes tab on the left. Click New, then click OK once you have read and understood the warning.
To ensure static routes are applied successfully, verify that no configured static route overlaps with the scanner's DNS server or default gateway addresses.
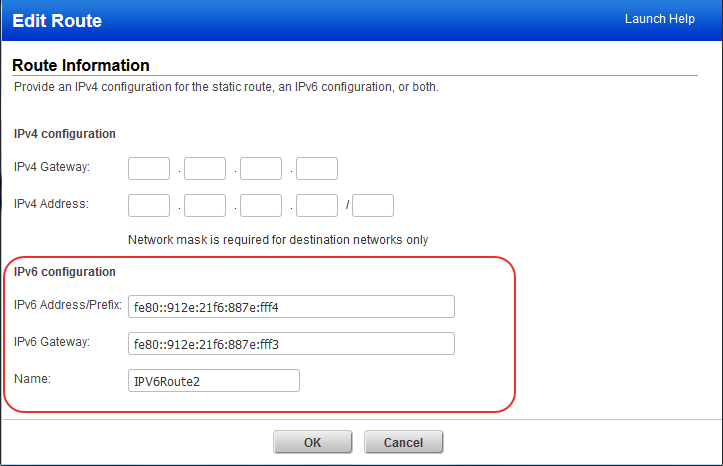
- When the Edit Route dialog box is displayed, enter the required information and click OK.
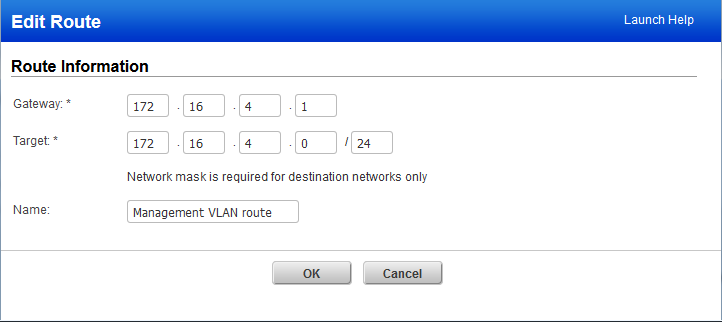
- Click Save once all your Add/Change/Delete operations are completed.
IPv6 Support for Static Routes
The IPv6 Scanning feature must be enabled for your account. Contact Qualys Support or your Technical Account Manager if you would like to have this feature turned on.
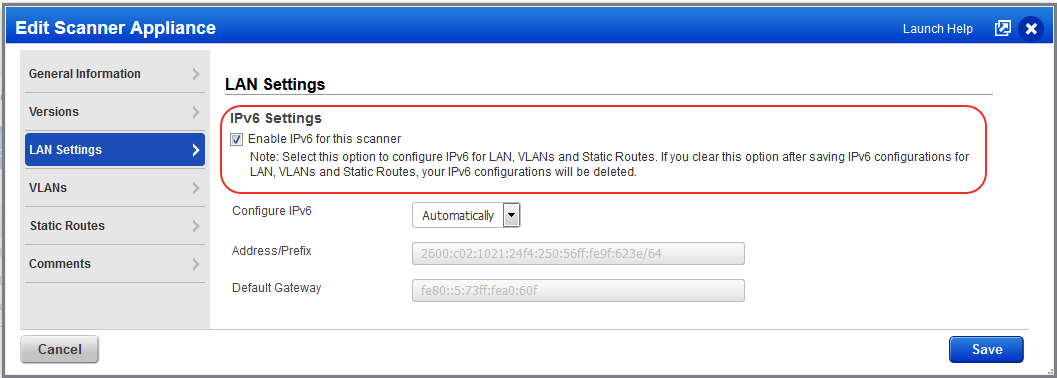
You must enable IPv6 on the scanner to add IPv6 configurations. Select Enable IPv6 for this scanner on the LAN Settings tab.
On the Static Routes tab, you can view IPv4 and IPv6 configurations configured for the appliance.
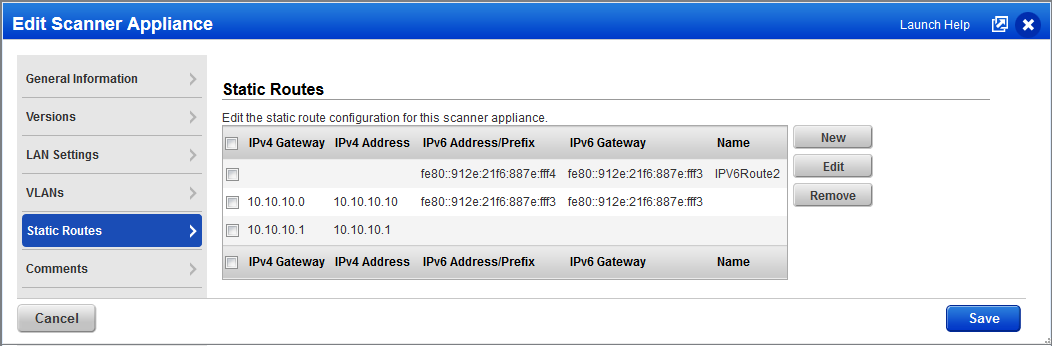
When you create or edit a static route, you can add IPv4 details, IPv6 details, or both.