Deploy Scanner
The Qualys Virtual Scanner Appliance can be deployed using the Nutanix Web Console or via Acropolis Command Line (acli).
Deploy Scanner Using the Nutanix Web Console
Perform the following steps to deploy the scanner in the Nutanix Web Console
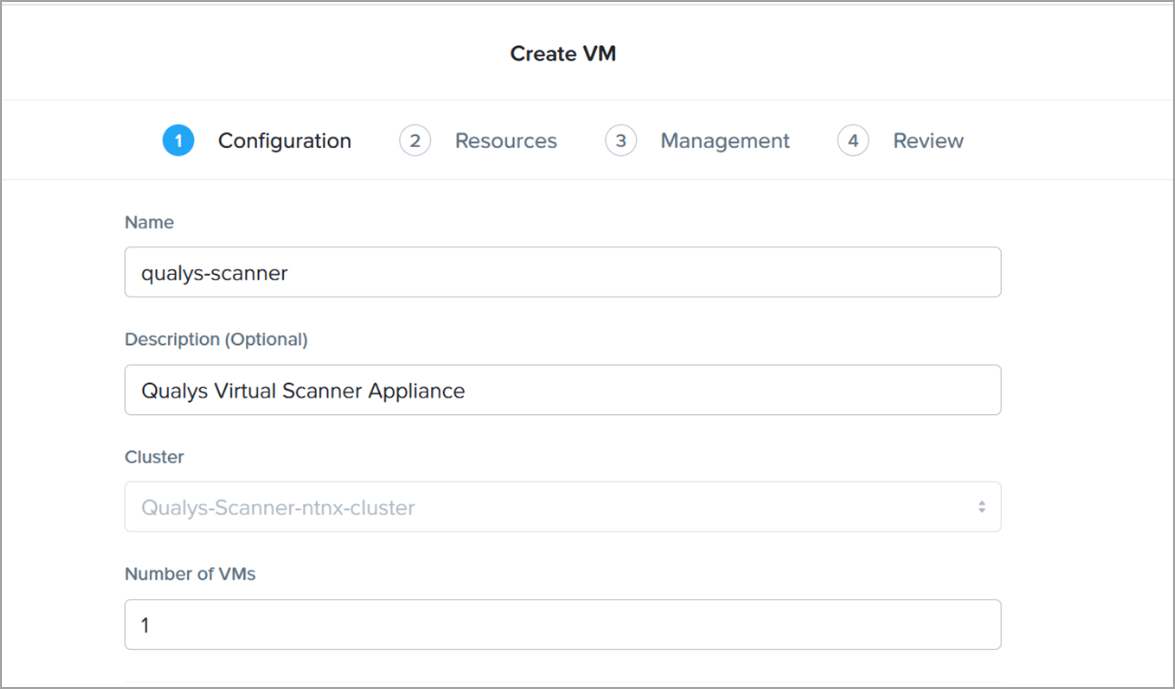
- From the Nutanix Web Console, go to VM and click on Create VM.
- For General Configuration, enter values for the Name and Description (optional).
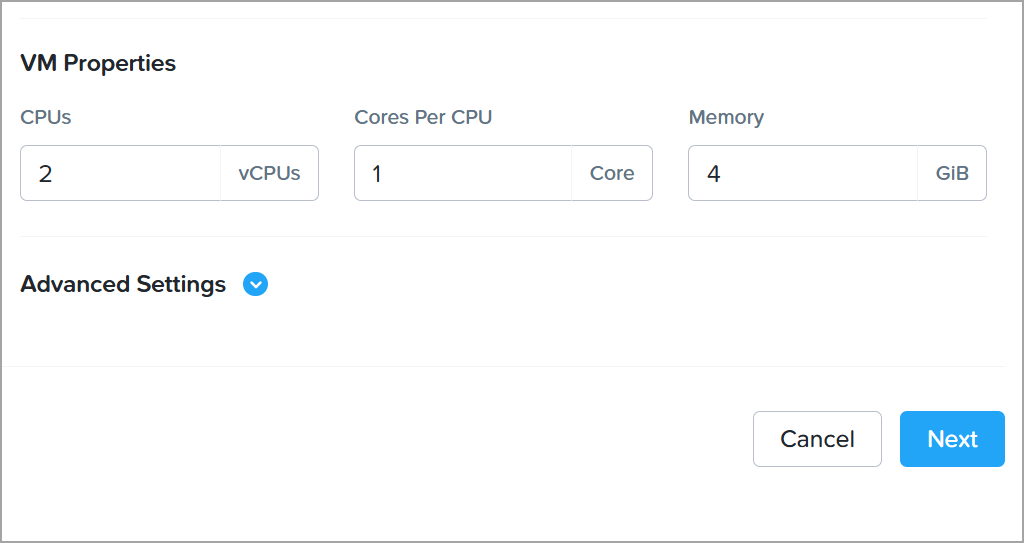
- In VM Properties, enter values for vCPU(S), Cores Per vCPU and Memory and click Next.
For optimal performance of the Qualys virtual scanner, the CPU to RAM ratio must be is either 1:2 or 1:3.
-
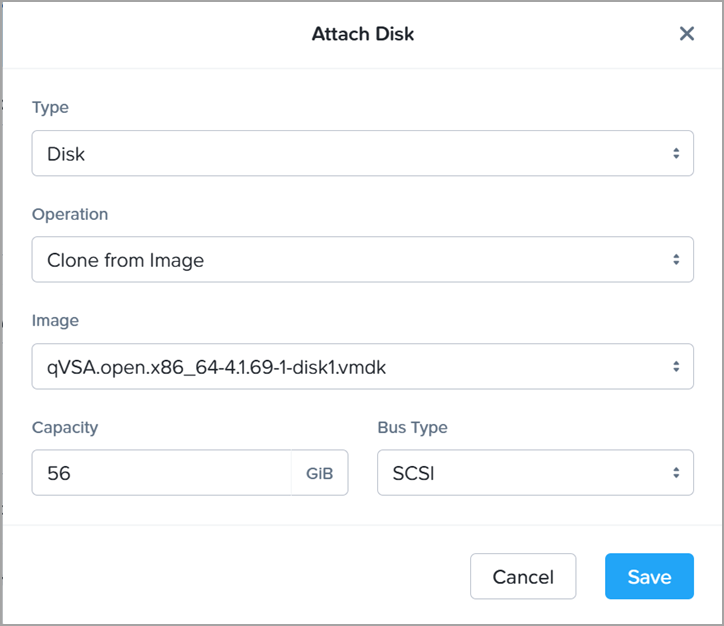
Attach the Disk to your VM.
Make the following settings, and then click Save.
- Type: DISK
- Operation: Clone from Image
- Bus Type: SCSI
- Image: select the uploaded Qualys Virtual Scanner Appliance image. You can choose either vmdk or qcow2 file format.
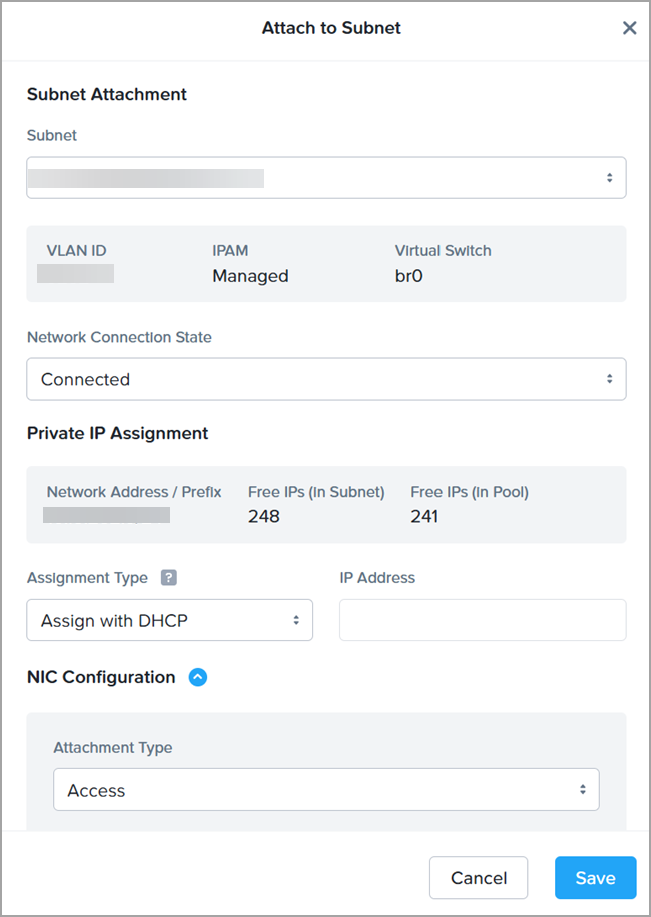
- Configure the network for your VM.
Depending on your requirements, you can configure your scanner's network interfaces with either a static or dynamic (DHCP) IP address. The screenshot below shows an example of assigning an IP address via DHCP on the scanner’s LAN interface.
If you're deploying the scanner in Split Networking mode, you'll need to connect a separate subnet to the WAN interface. Note that the WAN interface is not enabled by default and must be manually activated through the TAGGER User Interface after the scanner is deployed.
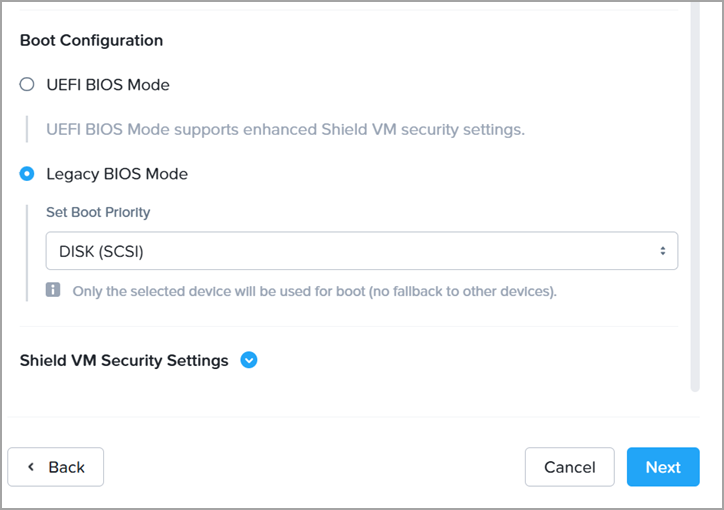
- Complete Boot Configuration.
The qVSA image does not yet support UEFI-compliant firmware, Secure Boot, or vTPM-protected Measured Boot.
Choose Legacy BIOS Mode and select DISK(SCSI) for Set Boot Priority, then click Next
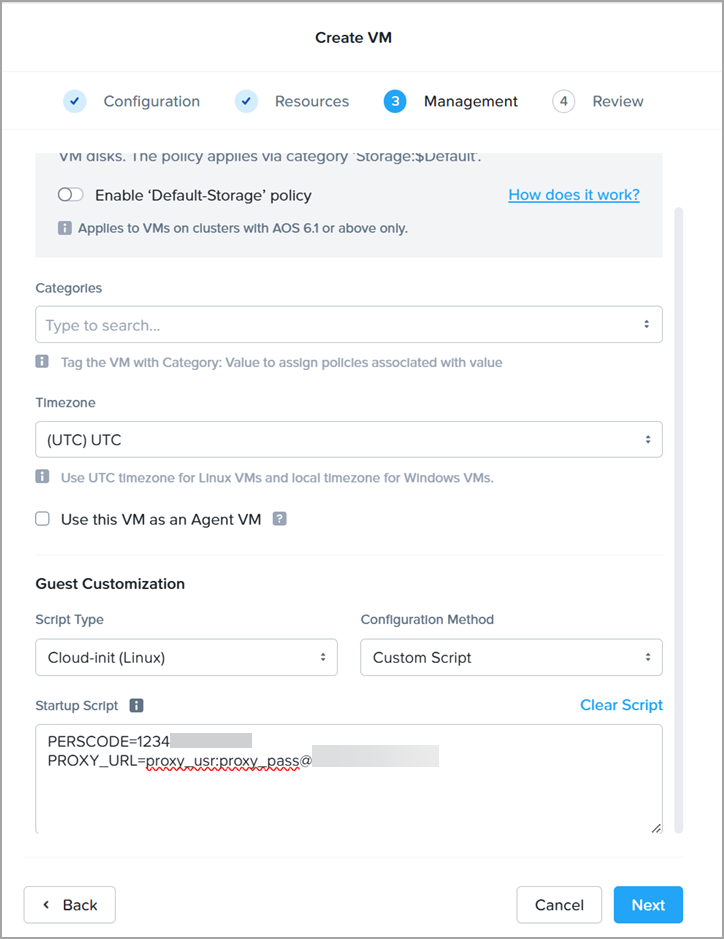
- Complete Time Zone and Startup Script configuration.
-
Timezone:
Qualys Scanner Appliances do not use Network Time Protocol (NTP) for time synchronization. Instead, the scanner's time is automatically synced with the Qualys Platform through APIs. Therefore, configuring the timezone for the Qualys Scanner VM is optional and does not impact the scanner’s normal operation.
-
Custom script:
Nutanix supports a maximum size of 32 KB for VM guest customization script. This script can include personalization code, proxy settings, and static IP configuration for the VM's network interface. However, once the VM is deployed, the customization script cannot be modified. Instead, it's recommended to use the Scanner UI to configure these settings, as it allows changes at any time and provides greater flexibility. Also, please note that any changes made through the Scanner user interface will override the corresponding values defined in the original custom script.
-
-
The example below shows how to pass PERSCODE and PROXY_URL via the custom script.
Additionally, you can add a Static IP configuration for your Scanner’s network interface.
Here is the list of all supported settings that can be configured in the custom script upon the VM deployment.
PERSCODE=
PROXY_URL=
IPADDR=
NETMASK=
GATEWAY=
DNS1=
DNS2=
Deploy Scanner via Acropolis Command Line Interface (acli)
Perform the following steps to deploy Command Line Interface (acli):
- Log in to the Nutanix Controller VM with a valid user.
- Create a userdata file with the following info.
- PERSCODE – 14 digits personalization obtained from Qualys
- PROXY_URL (Optional) – You can configure the Qualys Scanner to use SSL proxy for all outbound communication with the Qualys Enterprise TruRisk™ Platform. We support both IP and FQDN for the proxy server configuration.
Provide optional proxy configuration in one of the following formats:
proxy://<host>:<port> (No auth proxy)
proxy://<user>:<password>@<host>:<port> (Auth proxy)
proxy://<domain\user>:<password>@<host>:<port> (Auth proxy with domain user)
-
Static IP Configuration (Optional) – The following parameters are applicable for static IP configuration:
- IPADDR: Static IPv4 address assigned to the scanner instance
- NETMASK: IPv4 netmask
- GATEWAY: IPv4 gateway address
- DNS1: DNS server
- DNS2: DNS server
Example of user-data file, /home/nutanix/userdata.txt
PERSCODE=99999999999999

	## Optional for proxy-configuration:

	PROXY_URL=joe:[email protected]:8080

	## Optional for static IP configuration:

	IPADDR=10.10.0.143

	NETMASK=255.255.255.0

	GATEWAY=10.10.0.1

	DNS1=10.10.0.10

DNS2=10.10.0.11 - Invoke acli by typing ‘acli’ into the prompt
-
Run command to create vm:
uhura.vm.create_with_customize <vm name> num_cores_per_vcpu= num_vcpus= vCPUs> memory= cloudinit_userdata_path=file:/// userdata file>
Example:
uhura.vm.create_with_customize qualys-scanner num_cores_per_vcpu=1 num_vcpus=1 memory=4G cloudinit_userdata_path=file:///home/nutanix/userdata.txt - Run the command to attach image disk to vm:
vm.disk_create <vm name> clone_from_image=<image name of uploaded Qualys Virtual Scanner Appliance>
Example:
<acropolis> vm.disk_create qualys-scanner clone_from_image=qVSA.X.X.xx-x - Run command to attach a network interface:
vm.nic_create <vm name> network=<VLAN/network name>
Example:
<acropolis> vm.nic_create qualys-scanner network=10.10.0-network - Power on the vm:
vm.on <vm name>
Example:
<acropolis> vm.on qualys-scanner