Deploy Scanner Instance Using Launch Instance Wizard via OpenStack Application
Launch the scanner instance using the OpenStack Launch Instance wizard. The scanner instance can be launched using dashboard or command line.
Launch the Scanner Instance Using the Dashboard
To launch the scanner instances using dashboard, provide the basic details, network configuration, security group, and configuration.
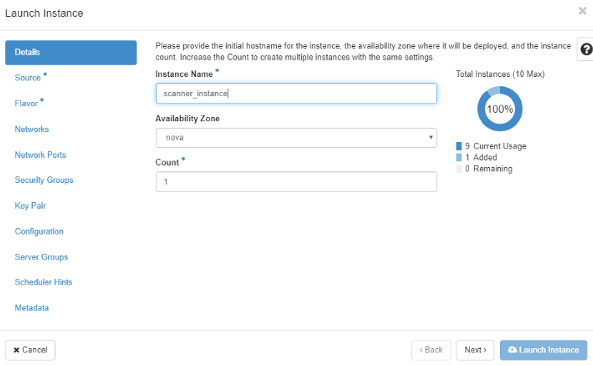
Basic Details
- Click the Launch Instance under Instances.
- Enter a name for your instance.
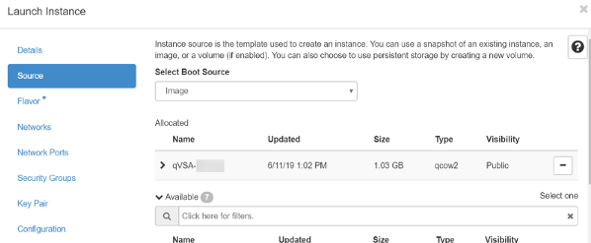
- Select the scanner image.
The scanner instance needs at least 56 GB of free disk space, 2 GB of memory, and network connectivity to the outside world.
Qualys Scanner Appliance supports up to 16 GB RAM and 16 CPU cores.
- Select the flavor.
You must choose the flavor with the capacity mentioned in the previous step. You can use medium or large flavors if you are using the default flavors.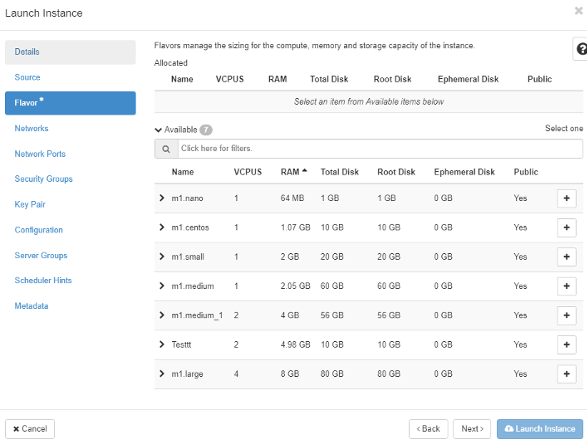
You can assign an IP through the Networks section or the Network Ports option.
If assigning through the Network section, select the network from the given networks and proceed to the Security Groups option.
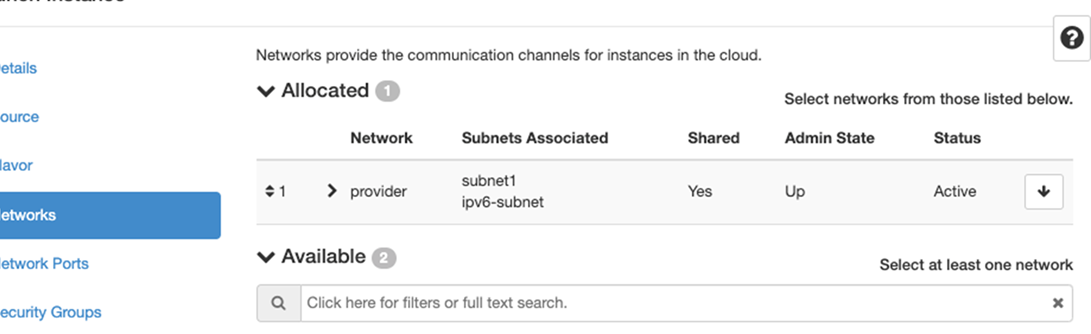
Network Configuration
qVSA image version 3.10 and above supports Dual-Stack mode, meaning the Scanner VM LAN interface can receive IPv4 and IPv6 addresses if the attached network interface is dual-stack capable.
- Select the network from the given networks and proceed to the Security Groups option.
- Select the network which has connectivity to the outside world.
Optional Network Configuration
Proxy ConfigurationProxy Configuration
Scanner Instance supports IP and FQDN for the proxy server configuration. Proxy can be configured using the following methods:
- Method #1: via Scanner Console
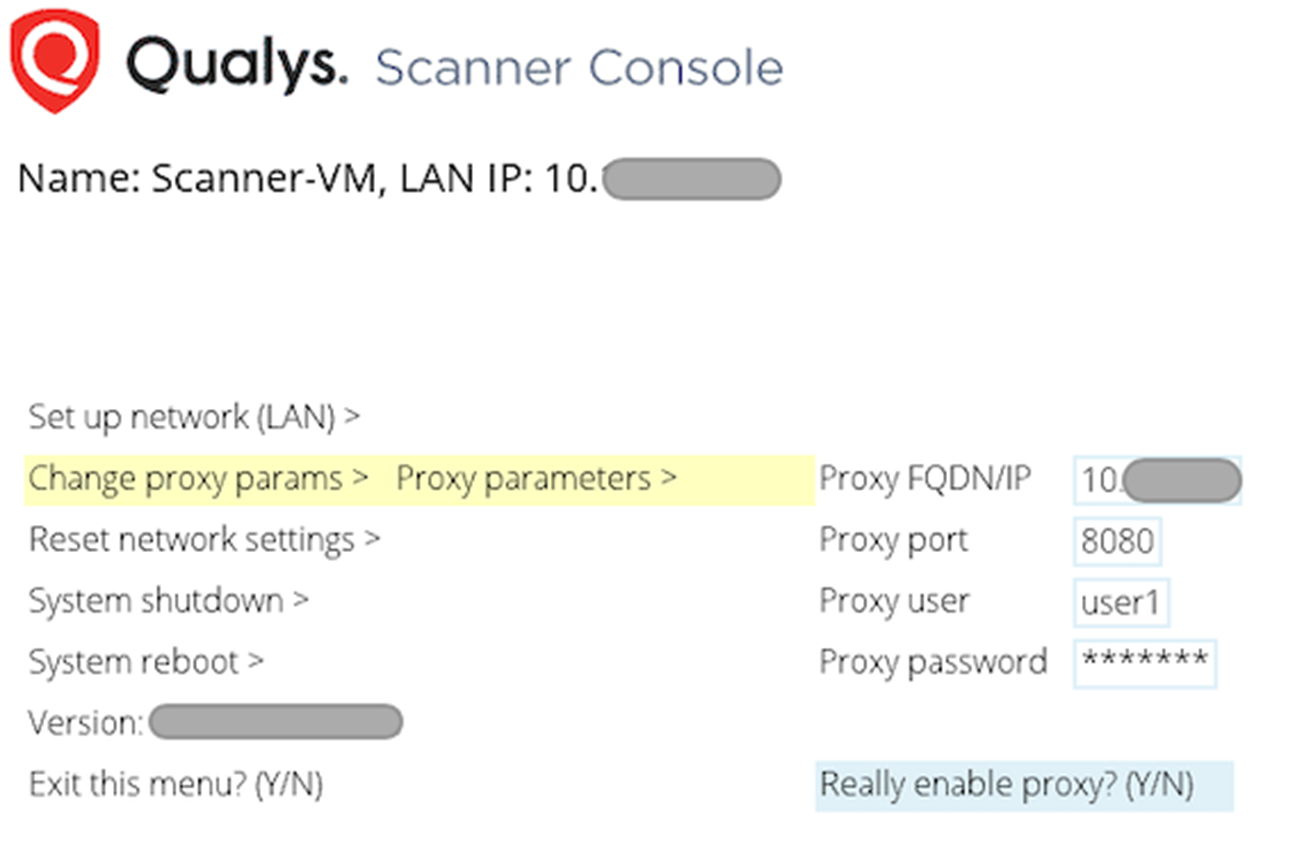
After the Scanner Instance is deployed, the Proxy can be configured by selecting the Enable Proxy option on the Scanner Console. Refer to Optional Network configuration via Scanner Console after the Instance is deployed
- Method #2: via customization script
During Scanner instance deployment using the dashboard, OpenStack customization script can be used to enable proxy by providing a PROXY_URL variable.
PROXY_URL = username:password@proxyhost:portMake sure to check the Configuration Drive option when using a Customization Script for setup.
Formatting:
If you have a domain user, the format is domain or username:password@proxyhost:port
If authentication is not used, the format is proxyhost:portwhere proxyhost is the IPv4 address or the FQDN of the proxy server, port is the port the proxy server is running on
Examples:
jdoe:[email protected]:3128
jdoe:[email protected]:3128
ntlm\jdoe:[email protected]:3128
customization script example Optional Proxy Configuration
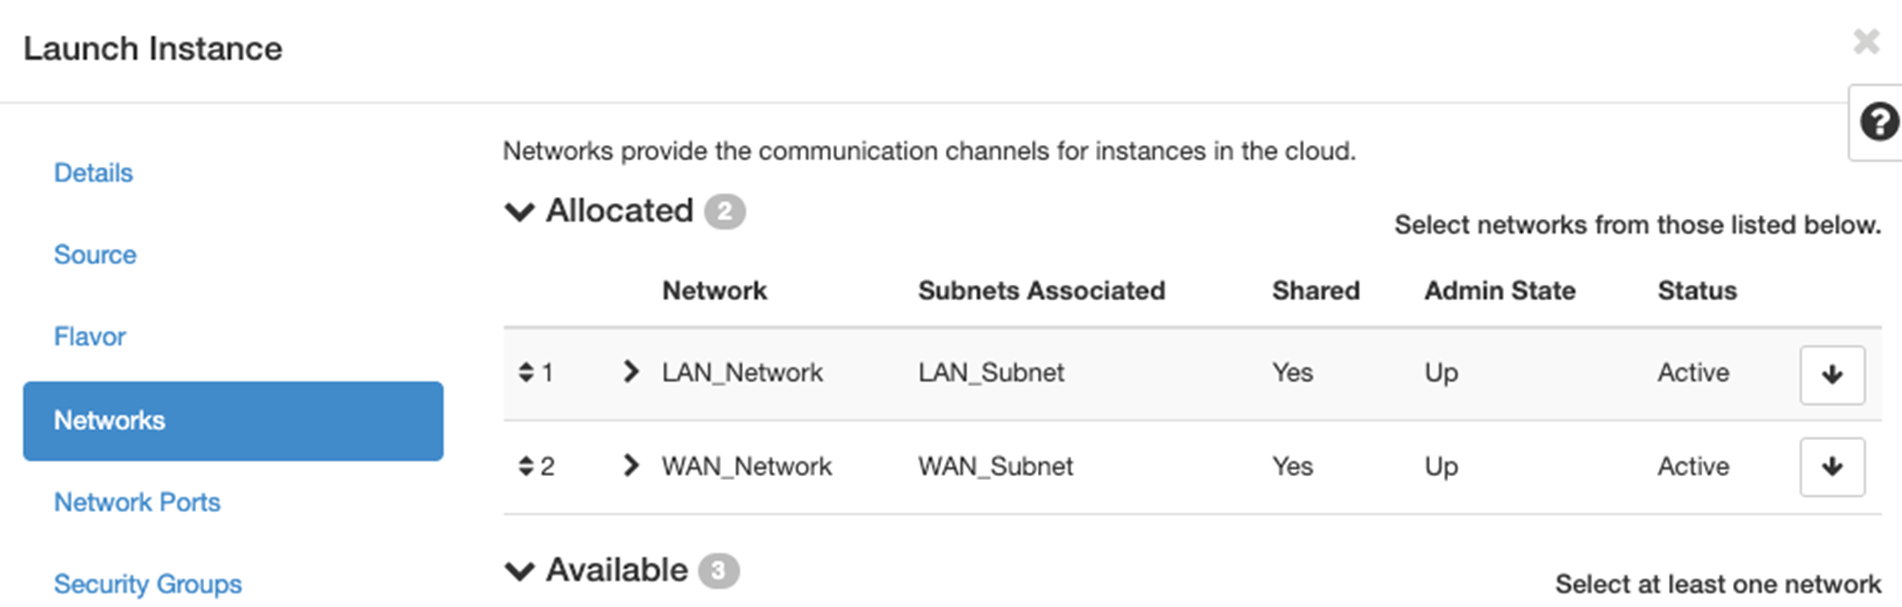
WAN/Split Network ModeWAN/Split Network Mode
The qVSA image version 3.10 and above supports WAN/Split Network configuration. With two network adapters attached to the Scanner Instance, the WAN interface can be enabled using the following methods:
-
Method #1: via Scanner Console
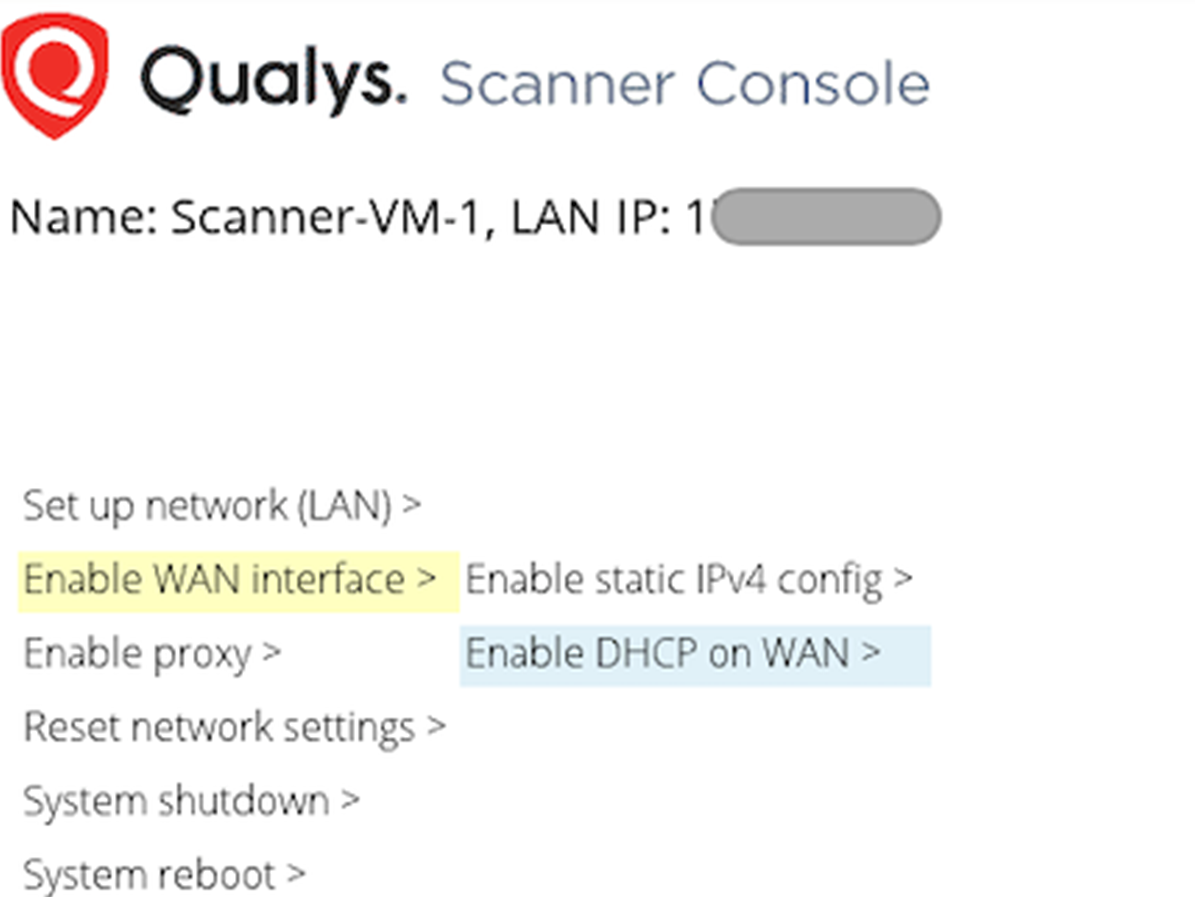
With two network interfaces attached to Scanner Instance VM, Scanner Console has an option to enable the WAN interface. Refer to Optional Network configuration via Scanner Console after the Instance is deployed
-
Method #2: via customization script
During Scanner instance deployment using the dashboard, the OpenStack customization script can be used to enable the WAN interface. Provide the ENABLE_WAN variable in the customization script and set it to True.
Make sure to check the Configuration Drive option when using a Customization Script for setup.
For example,
ENABLE_WAN=True.
customization script example WAN/Split Network Mode Configuration
The qVSA image version 3.10 and above supports IPv6-only mode. This mode is supported only in a single network mode. LAN interface have only an IPv6 address. IPv6-only mode can be enabled using the following methods:
- Method #1: via Scanner Console
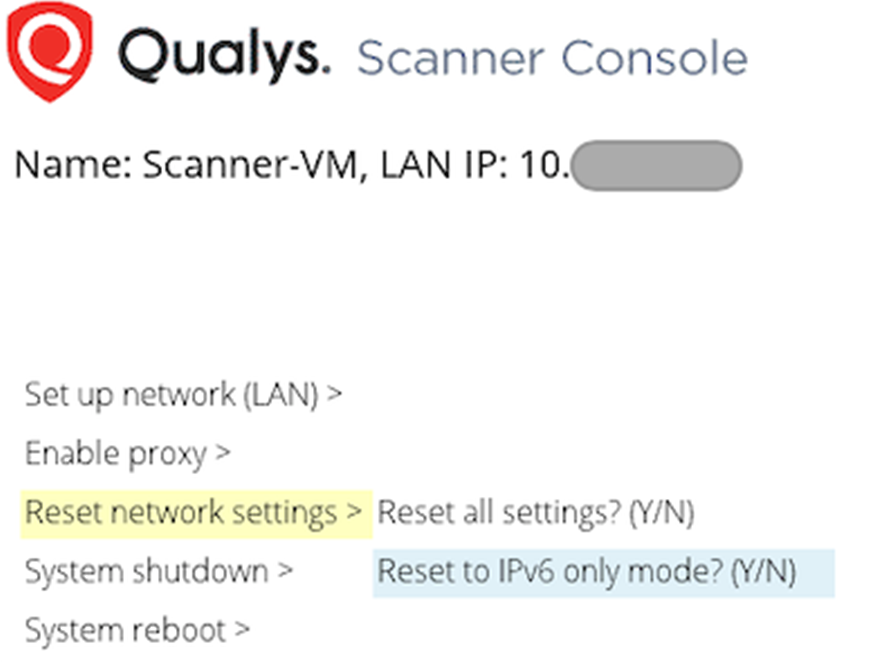
After the Scanner instance is deployed, IPv6-only mode can be enabled by selecting the Reset to IPv6-only mode option under Reset network settings.
Optional Network configuration via Scanner Console after the Instance is deployed
-
Method #2: via customization script
OpenStack customization script can enable IPv6-only mode by providing the IPV6_ONLY variable and setting it to True.
Customization script example Optional IPv6 Only mode configuration.
Make sure to check the Configuration Drive option when using a Customization Script for setup.
VLAN on LAN InterfaceVLAN on LAN Interface
The qVSA image version 3.10 and above supports VLAN configuration on LAN interface. VLAN can be configured via Scanner Console by selecting the Enable VLAN on LAN option in Setup Network (LAN).
Make sure to check the Configuration Drive option when using a Customization Script for setup.
Security Group
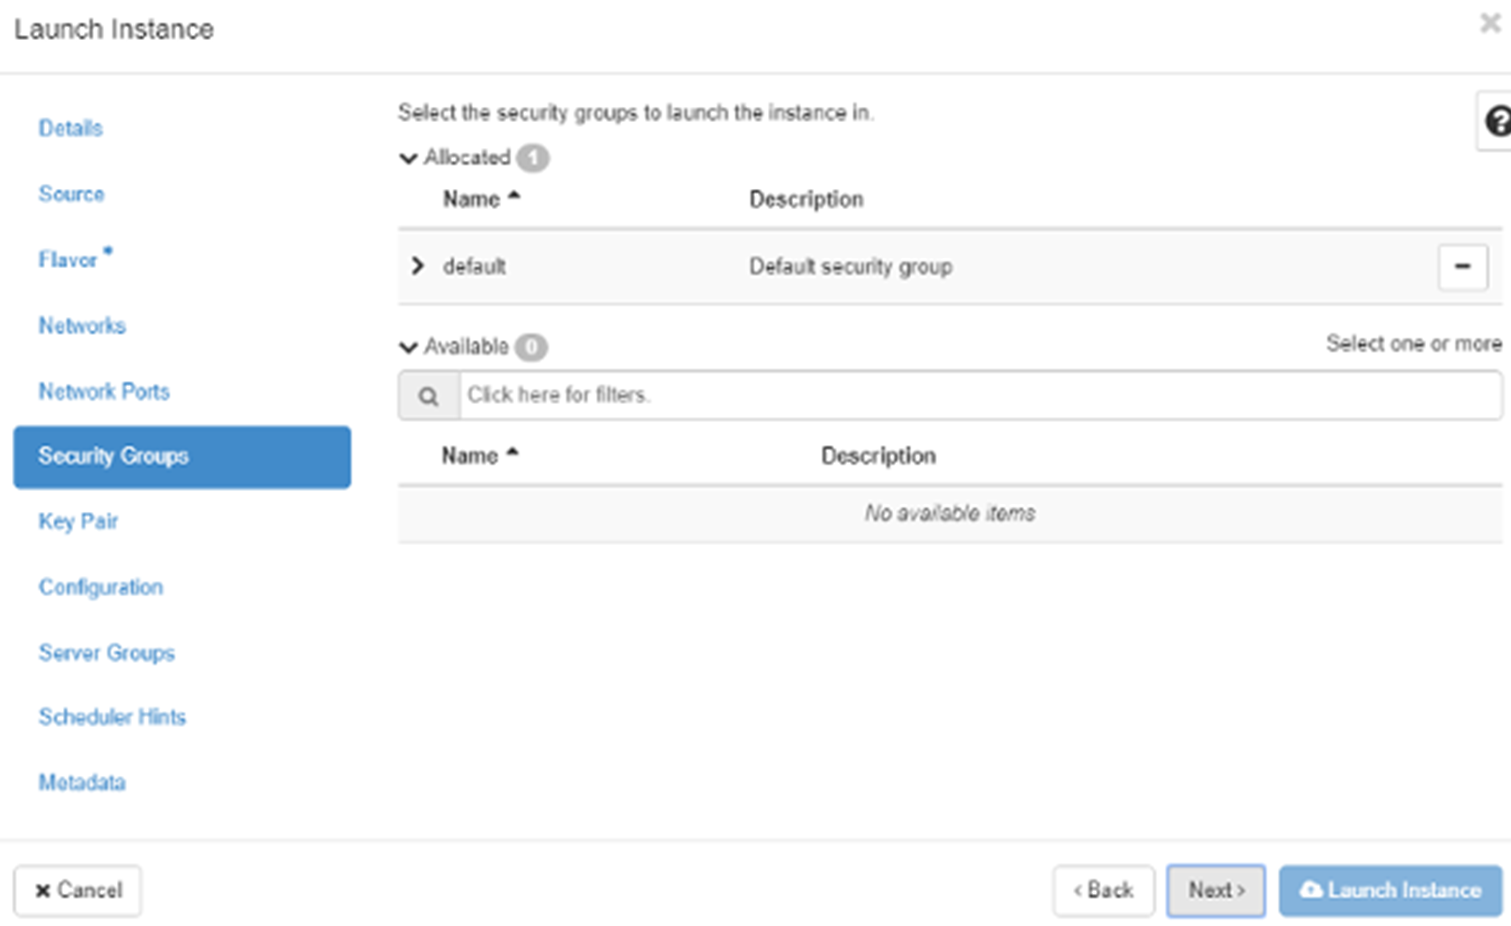
Skip the Key Pair Step - Since you are not allowed to log in to the Scanner Instance, you do not need the key. Proceed to Configuration.
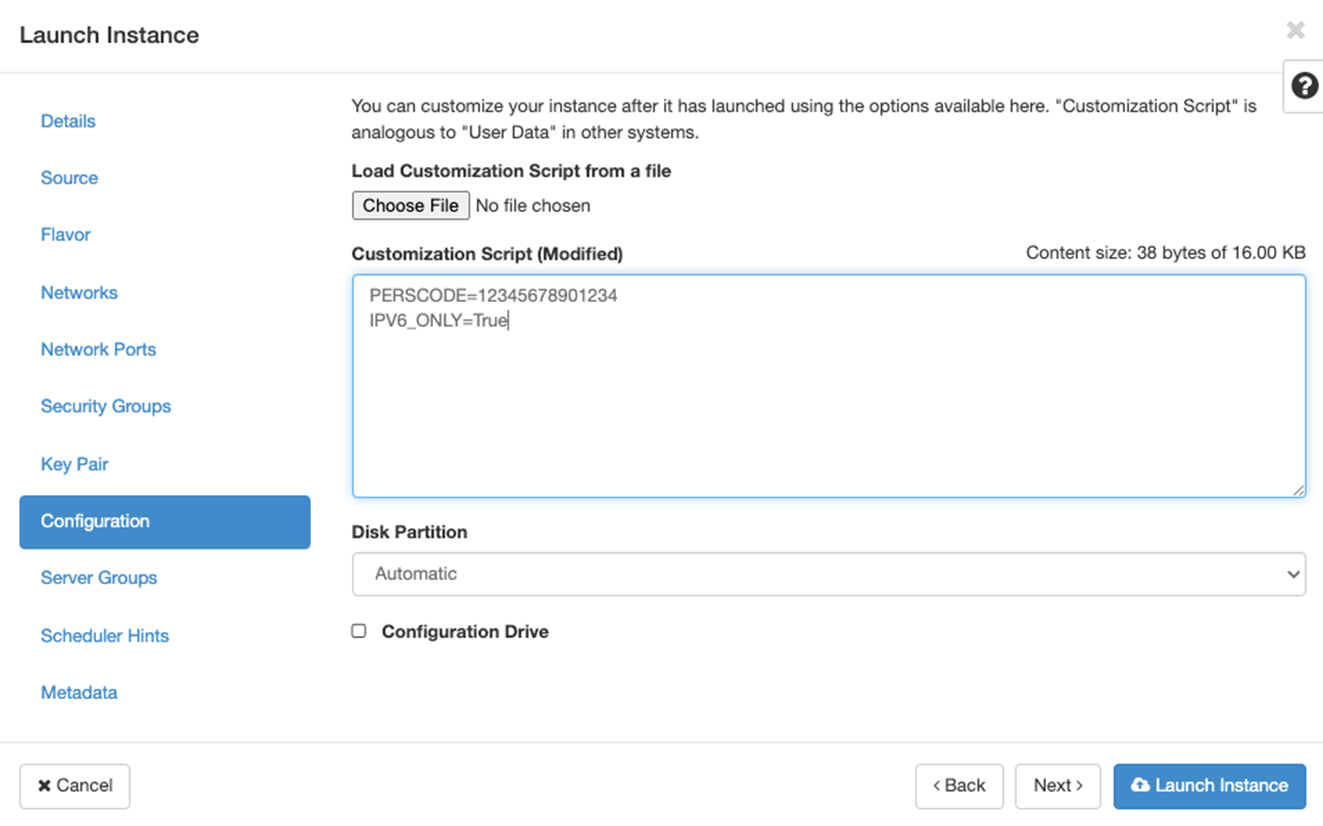
Configuration
The Scanner Instance VM can be customized using the customization script. In the Customization Script, enter the personalization code you obtained from the Qualys Enterprise TruRisk™ Platform, check Configuration Drive, and click Launch Instance.

Customization script supports optional configurations such as Proxy, WAN/Split network mode, and IPv6-only mode.
Optional Proxy ConfigurationOptional Proxy Configuration
We support IP and FQDN for the proxy server configuration.
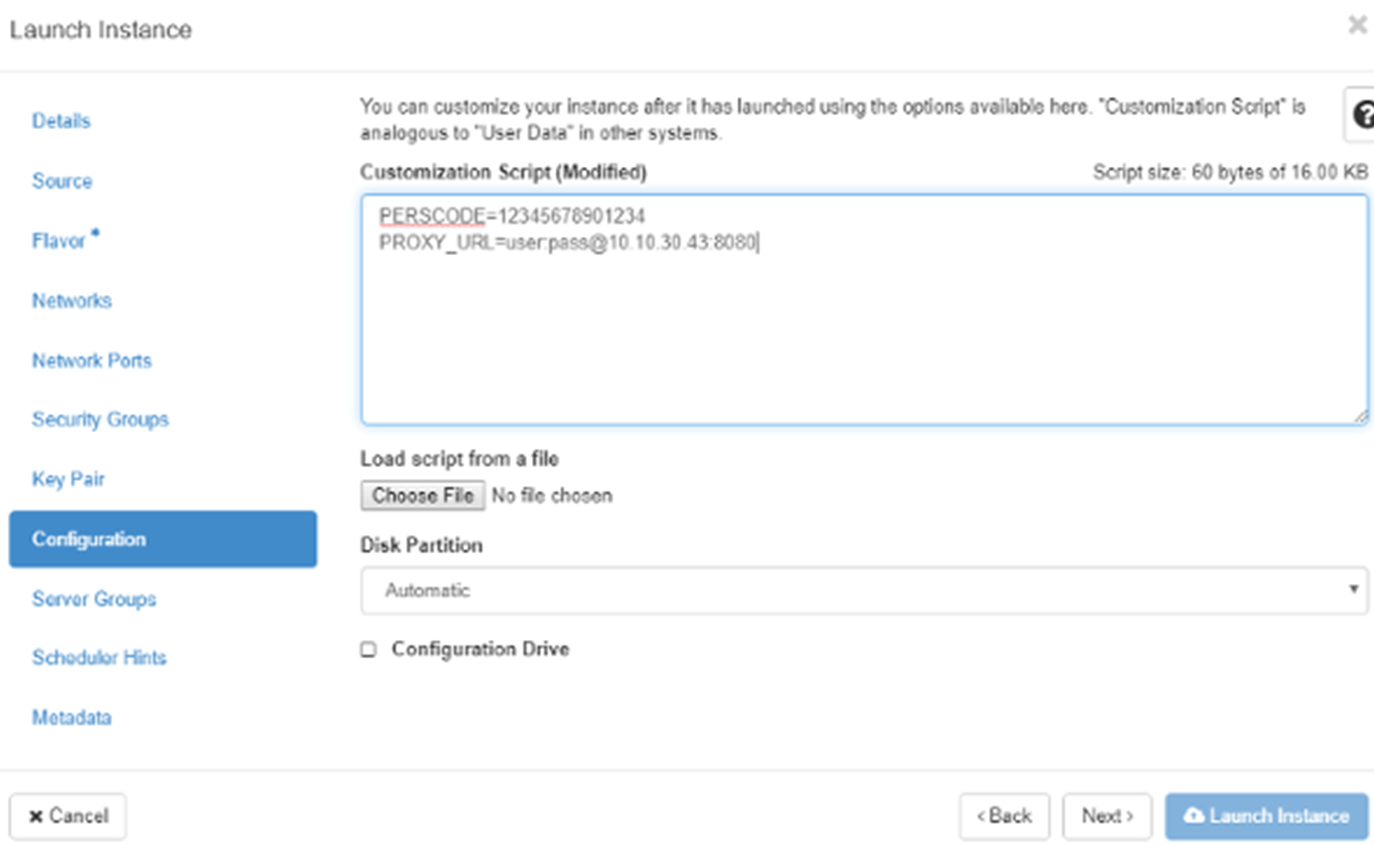
In the Customization Script, add the following information:
PERSCODE = xxxxxxxxxxxxxx
PROXY_URL = username:password@proxyhost:port
Formatting:
If you have a domain user, the format is domain\username:password@proxyhost:port
If authentication is not used, the format is proxyhost:port
where proxyhost is the IPv4 address or the FQDN of the proxy server, port is the port the proxy server is running on
Examples:
jdoe:[email protected]:3128
jdoe:[email protected]:3128
ntlm\jdoe:[email protected]:3128
Optional WAN/Split Network Configuration
Optional IPv6 Only Mode ConfigurationOptional IPv6 Only Mode Configuration
The qVSA image version 3.10 and above supports IPv6 Only mode where Scanner Instance boots up in IPv6 mode (LAN interface with only IPv6 address) if IPV6_ONLY is set to True in customization script.
-
You can enter the personalization code via Scanner Console even after launching the instance.
-
Proxy information can be provided during Instance creation (via customization script) or via Scanner Console after launching the Instance.
-
WAN interface can be enabled during Instance creation (via customization script) or via Scanner Console after launching the Instance.
-
IPv6-onlymode can be enabled during Instance creation (via customization script) or via Scanner Console after launching the Instance.
Skip the Metadata Step - To launch the Scanner Instance, you do not need to provide any metadata.
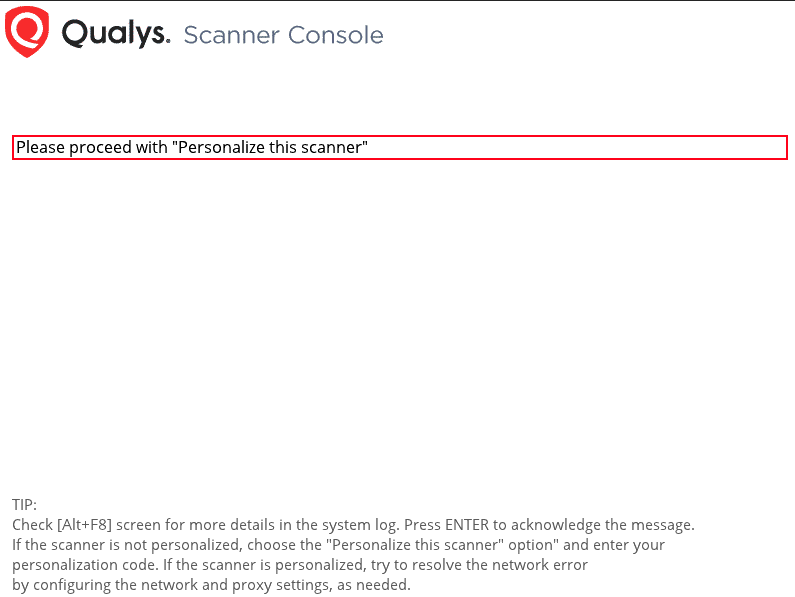
After downloading all the packages, the Scanner Console displays 'Welcome to Qualys Virtual Scanner.
After this section and the screenshot, add the following section:
If the Personalization Code (Perscode) is not included in the customization script during the deployment of the Scanner instance, the following message is displayed in the Scanner console. To proceed, press Enter in the console and manually enter the Perscode in the Personalization Code field.
Optional Network Configuration via Scanner Console after the Instance is Deployed
Configure Proxy via Scanner ConsoleConfigure Proxy via Scanner Console
Configure IPv6-only mode via Scanner ConsoleConfigure IPv6-only mode via Scanner Console