Configuration Settings
You might need to customize your configuration so that your scanner can connect to our Qualys Enterprise TruRisk™ Platform - this is required for successful activation.
Network Settings
You can choose multiple network settings for your virtual scanner, such as a static IP address, proxy server, and VLAN tag (for 802.1q trunked port). Just enter the network settings using the Scanner Console.
If you face trouble personalizing your scanner, you may need to configure network settings first. See the sections that follow for details.
Configure Static IP Address
You can configure your appliance with a static IP address instead of DHCP.
- Access the Scanner Console.
- Select Set up network (LAN), then press the Right arrow to select Enable static IPv4 config.
- Press the Right arrow again and enter the settings.
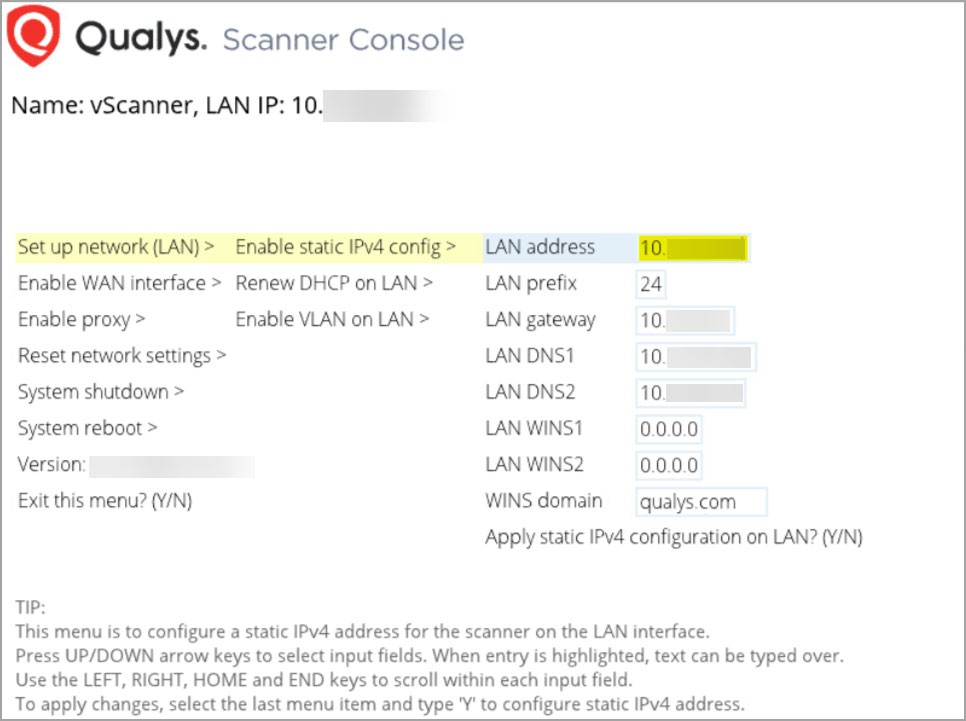
Enter Settings Menu
Perform the following steps to enter the Settings menu:
- Press the Up and Down arrows to select input fields.
- Press the Right and Left arrows to scroll within fields.
- When you are done, select the last item, for example, Apply static IPv4 configuration on LAN?, and type Y to confirm (or type N to cancel).
If you use IPv6-only mode, refer to Network Settings in IPv6-only Mode.
To configure a static IP using Amazon EC2, refer to Deploy Virtual Scanner Appliance.