Report Schedule Roles and Permissions
Receiving dashboard reports as per your required schedule eases the task of visualizing dashboard data. You can create and customize schedules and download these schedules in PDF format. In UD, we have Report Scheduling and Report Schedule options that allows you to create, generate and view dashboard reports individually or collectively.
The Report Schedule Permissions are assigned to the Unit Manager, Scanner, and Reader roles by default. You can change the permissions assigned to these default roles per your organization's requirement and can also set the permissions according to the roles defined in your organization.
To access the Report Scheduling and Report Schedule option you are required to have the following permissions:
Create, Edit, Delete, and Download reports for your own schedules
Default User Role: Unit Manager and Scanner
The Create, Edit, Delete, and Download reports for your own schedules permission allows the users with the required roles to perform the following actions:
- Create a new dashboard schedule that requires access based on the tag scope.
- Edit and delete the schedules created by the user.
- Download the latest generated reports for the schedules created by the user.
Edit Schedules
Default User Role: Unit Manager
Users with the required role have the permission to edit schedules for the following:
- Schedules created by the user with the required role.
- Schedules created by any user.
- Schedules for the dashboards the user has access to.
Delete Schedules
The Delete Schedules permission allows the user to delete schedules for the following:
- Schedules created by the user with the required role
- Schedules created by any user.
- Schedules for the dashboards the user has access to.
Download Schedules
Default User Role: Unit Manager, Scanner and Reader
The Download Schedules permission allows the user to download the latest reports of the schedules created by them or by any other user.
Assigning Report Schedule Permissions
To assign Report Schedule Permissions to a New Role perform the following steps in the Qualys Administration application:
- From the Role Management tab, click New Role.
- In the Role Creation window, provide the Role Details.
- Click Continue.
- In the Permissions step, select how users would access the application. For this example, we have selected UI Access and API Access.
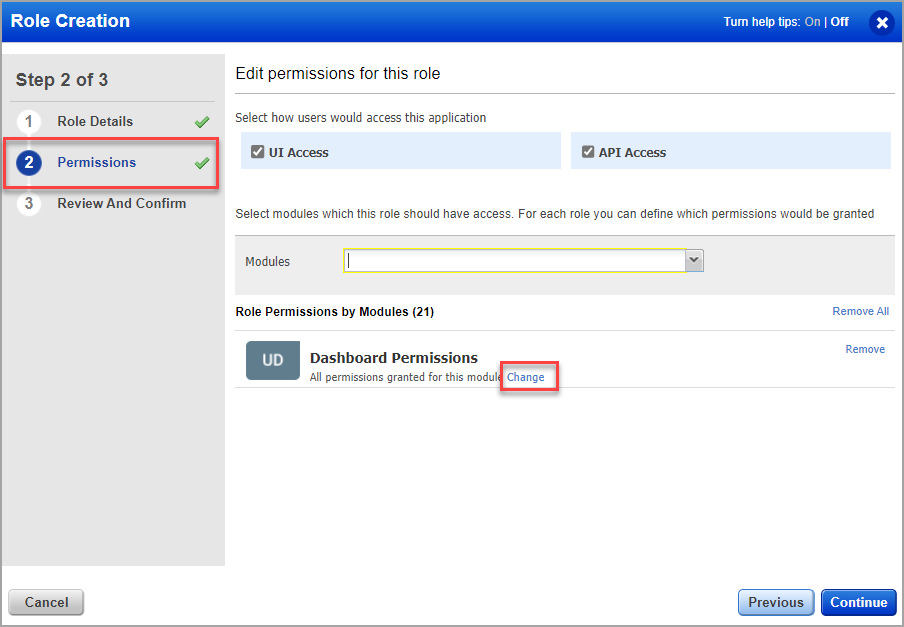
- From the Modules drop-down, select Dashboard Permissions and click Change. Refer to the following screenshot as an example:
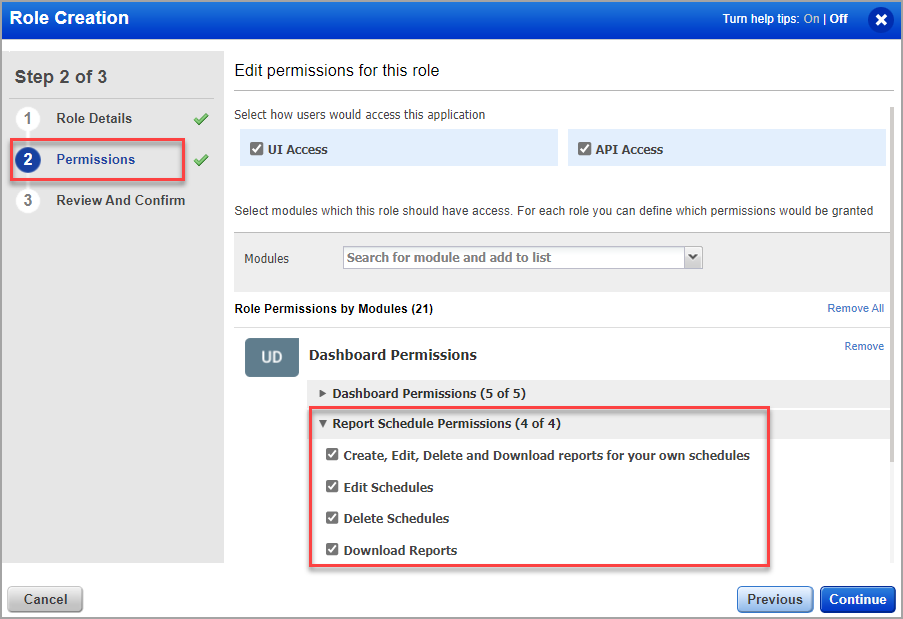
- Expand the Report Schedule Permissions and select the permissions for the new role.
- Click Continue.
- Review and Confirm the changes and click Finish.
The new role created will be listed under the Role Management tab.