Tell me about Asset Search Reports
Search your scanned assets by various attributes and create a report with the search results.
You can create Asset Search Reports in two ways:
- From the Reports section, you can run a report that you can save and share with others.
- From the Assets section, you can run a one-time report for taking action on assets.
Run a report to save and share
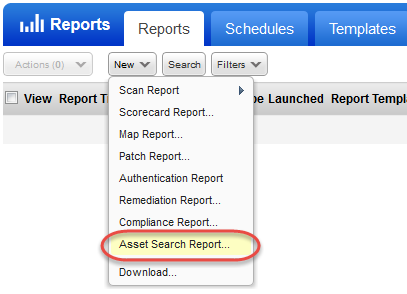
Go to Reports > New and click Asset Search Report.
There are various ways to search the assets and create reports like using the network, open ports, running services, asset category, QIDs, scan dates, first found date and the list goes on.
Run a one-time report for taking action
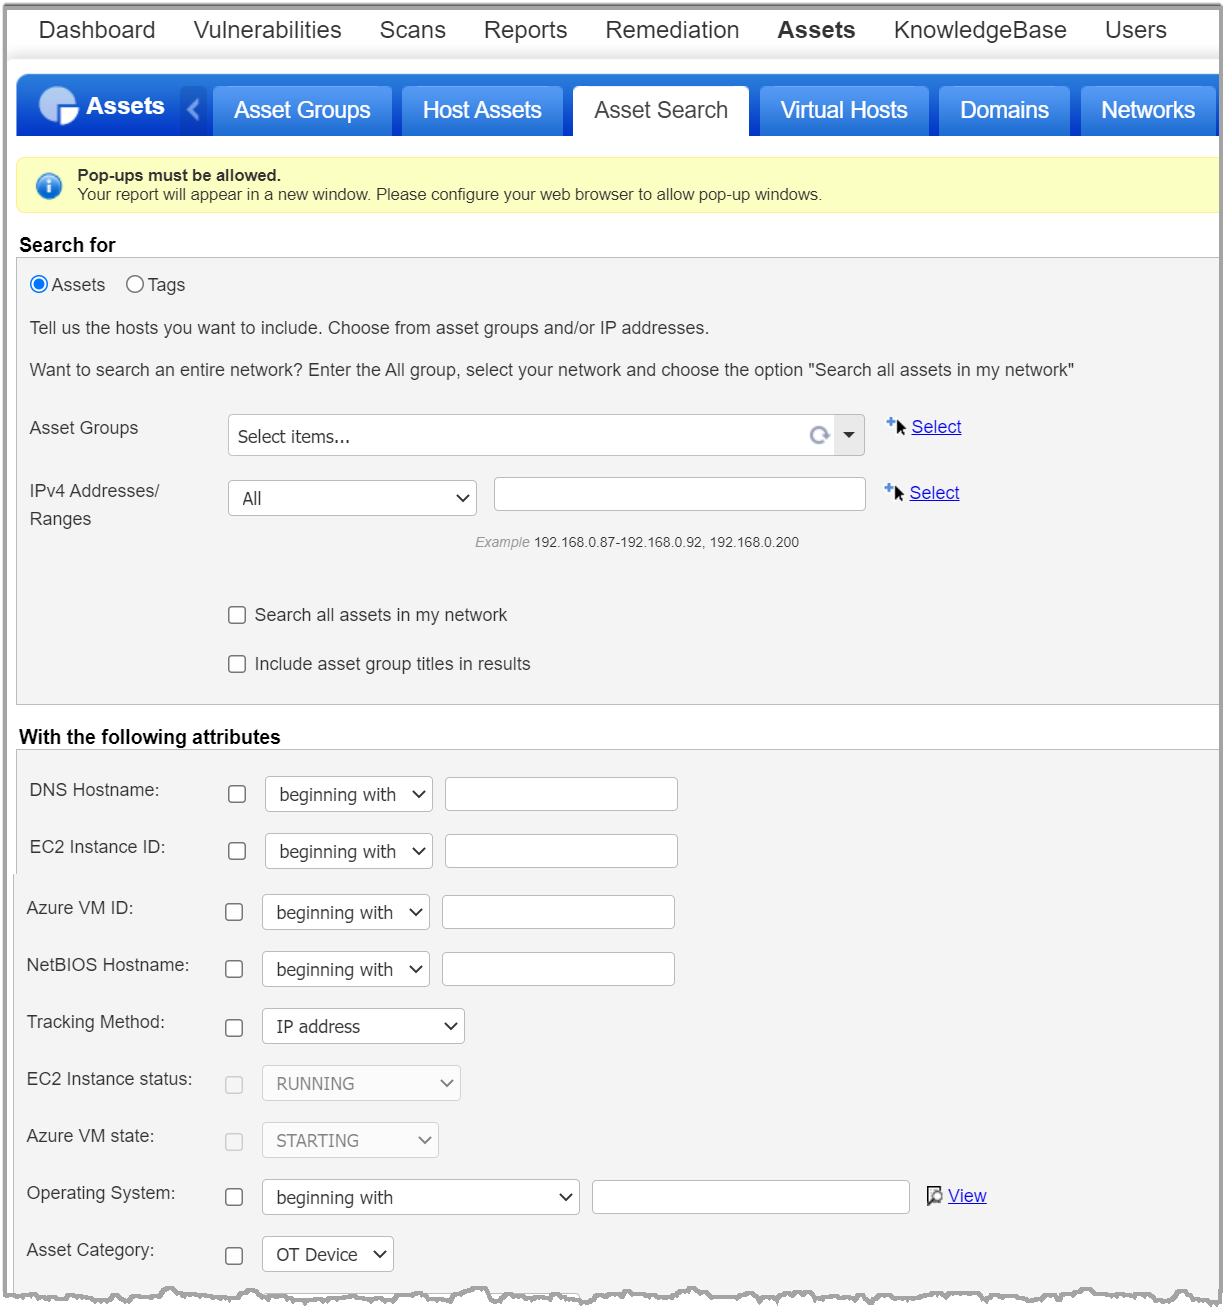
Go to Assets > Asset Search . Enter your search criteria, and click Search.
Using networks?
You can search across all assets in a network or limit the search to certain IPs/ranges. Do one of the following: 1) Enter the "All" asset group, choose a network and select the option "Search all assets in my network". 2) Enter the IPs or IP ranges you want to search and choose a network.
If you have multiple network interfaces, then you can search with common data of these assets. You can search for such assets by host id or hostname in the Asset Search Report.
The host ID gets updated based on the scan, and if a new IP is reported for this host, it will update the IP.
Search by ports and/or services
Enter up to 10 ports and 10 services. You can also select services from the list provided. Assets with at least one of the ports/services will be included in the report.
Search by Asset Category
Select the Asset Category as OT Device. OT assets will be included in the report.
Search by QID
Use this option to find assets with specific vulnerabilities (QIDs) detected. Enter up to 20 QIDs or select from the list of QIDs. Any asset with at least one of the QIDs will be included in the report. Learn how to perform remediation actions
Search by DNS Hostname
Enter the DNS hostname by selecting the options provided in the list. When asset groups contain only DNS hostnames, sub-users assigned to those groups will not have access to the associated hosts, as asset group access is determined based on IP addresses. To ensure sub-users have proper access to hosts identified by DNS names, the asset group must include the corresponding IP addresses along with the DNS hostnames.
Want to find EC2 hosts by Instance status?
Quickly find all of your Amazon EC2 assets with a particular status (running, terminated, stopped, etc.) and take action. For example, find EC2 instances that are terminated to purge or remove them from your account. Choose the status you’re interested in and click Search. (Only works with EC2 tracking method also selected.)
Don't see this option? The EC2 Scanning feature must be enabled for your subscription. Contact your Technical Account Manager or Support if you would like to have this feature turned on.
Search by scan date
Use scan date filters to find assets that have been scanned within (or not within) a certain number of days. The scan date filters available to you depend on the modules enabled for your subscription (VM, PA, SCA, SCAP). For example, if you have VM, you can search by VM scan date. If you have PA, then you can search by PA scan date.
Hosts with cloud agents
When a Manager runs the Asset Search Report on the "ALL" asset group, then all host assets are included in the results. This includes hosts with cloud agents installed (tracking method: AGENT) even if they are not added to the VM/PA license. For these hosts, the results are based on host data collected from Cloud Agent assessments. Note that this is different from host-based scan reports on the "ALL" asset group. For host-based scan reports, only hosts that are added to the VM license are included. You'll need to run host-based scan reports on asset tags to get AGENT tracked hosts that are not in VM.
Why does an asset remain visible in Asset Search after it is purged?
An asset may continue to appear in Asset Search results after a purge operation.
When an asset tracked by an agent is purged from Asset Search, only the vulnerability data may be removed, while the asset entry remains visible.
To verify or resolve this behavior:
- If the asset should no longer appear in ASR, Asset needs to be uninstalled from CA-UI module.
- Allow time for the system to update the search results.
If the asset continues to appear, contact Qualys Support for assistance.
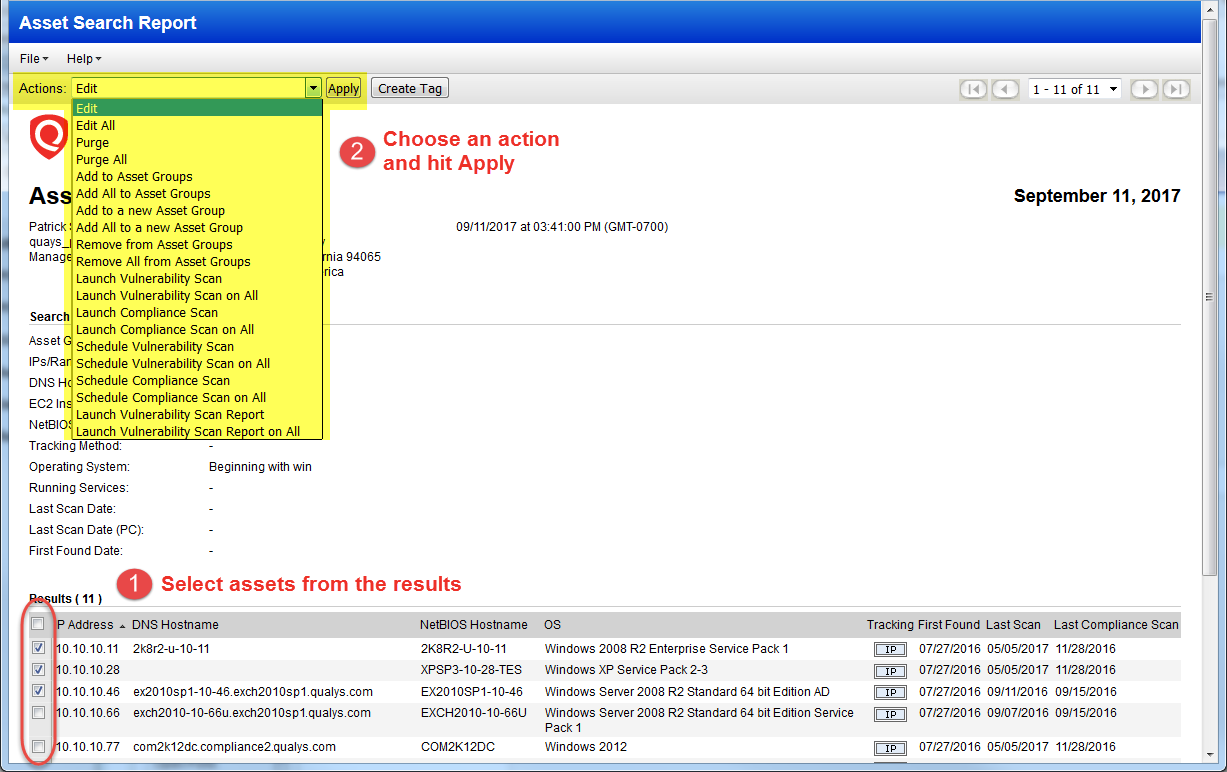
Take actions on your assets
Applicable when you run the report from Assets > Asset Search.
Take actions like start a scan, add to asset groups, launch a scan report, etc. Simply select the check box next to each asset you want include in the action and choose an action from the Actions menu (at the top of the report). Want to take an action on all assets in the report? Choose an appropriate action like Edit All, Purge All, etc.
Have hosts with cloud agents? You can report on these hosts and we'll base the results on host data collected from Cloud Agent assessments. Certain report actions will not be available unless the hosts are added to your VM/PA license. Learn more
Do you have AGMS?
Please see the AGMS Help to understand changes you'll see when Asset Group Management Service (AGMS) is enabled for your subscription.
Purge SwCA Vulnerabilities
Users can purge Software Composition Analysis (SwCA) vulnerabilities identified in the Asset Search report, either for specific agent hosts or all agent hosts containing SwCA vulnerabilities for a specific network.
Enabling SwCA for your account often led to a sudden increase in detected vulnerabilities, which in turn impacted a users TruRisk score. There was no option to remove or manage these findings once detected. Therefore, with purging, users can either purge specific or all the SwCA vulnerabilities for selected agent hosts or for all applicable agent hosts.
- When SwCA purging is initiated, no SwCA purging alerts are triggered to Continuous Monitoring.
- To purge SwCA vulnerabilities, your account must have VMSP enabled, the SwCA module activated, and you must have Manager-level user permissions.
- To prevent SwCA vulnerabilities from being detected repeatedly, deactivate SwCA from the Cloud Agent or Activation Key before performing the SwCA purge.
- Once the SwCA vulnerabilities are purged, the changes are reflected immediately in the Host Based reports once the purge operation is completed. However, for other modules such as TruRisk reports or the VMDR Dashboard/Vulnerabilities tab, changes are reflected post the next Vulnerability Management (VM) Agent Scan.
To purge the detected SwCA vulnerabilities, navigate to:
- Assets > Asset Search > Search for vulnerabilities based on the different fields and click Search.
The Asset Search Report is displayed. - Select from the results for specific agent hosts list to be purged and select Purge SwCA Vulnerabilities.
OR
To purge all agent hosts from the results, select Purge All SwCA Vulnerabilities.

Note - If we select Purge All SwCA Vulnerabilities option, the SwCA assets can be purged only if they belong to the same network. This limitation applies to network-enabled subscriptions where hosts are distributed across different networks. - Click Apply.
A confirmation message asking for your confirmation to do the purge is displayed. - Click Yes.
The Purge Host Information window is displayed. - Under SwCA Vulnerabilities will be purged for the following hosts:, verify the IP addresses and click Purge.
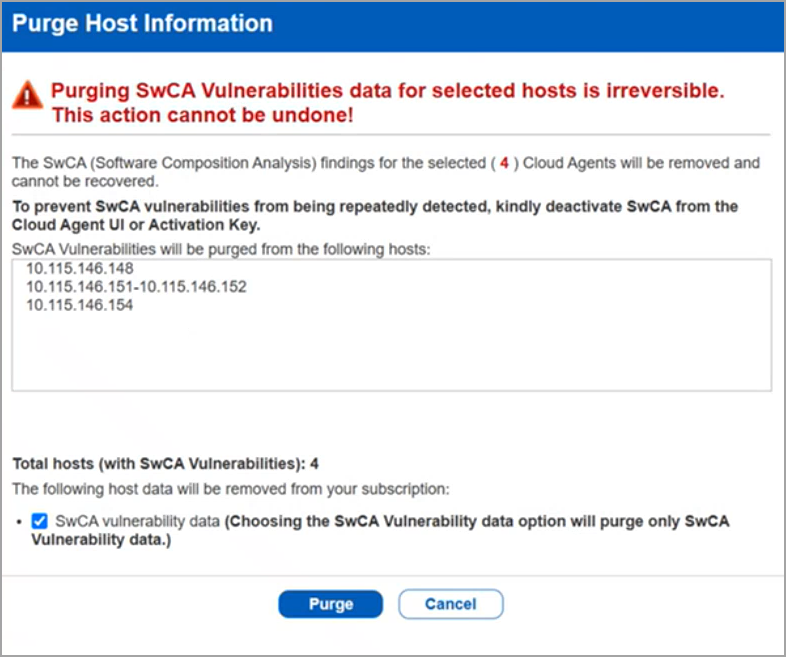
The SwCA vulnerabilities are purged
You might observe a difference between the scanned IP and the IPs listed in the Asset Search Report or the authentication report. This might occur when using a host with multiple IPs or multiple Network Interface Cards (NICs) or scanning different IPs through VM and PC with agentless tracking enabled.
Qualys highly recommends that you launch a scan on all the IPs or use the same IPs for both VM and PC authentication scan, or ensure you are aware that these IPs belong to the same host. With this approach, you can view the latest scanned IP from the same host in the scan report.
Example:
Consider a scenario where you are using both VM and PC, and multiple IPs or Network Interface Cards (NICs) are configured for the same host.
For example, you have a single host with multiple network cards with different IPs, like 10.xx.xxx.17, 10.xx.xxx.18, 10.xx.xxx.19, and 10.xx.xxx.20. You perform a Vulnerability Management (VM) authenticated scan on 10.xx.xxx.17 and alternately perform Policy Compliance (PC) authenticated scan on 10.xx.xxx.19. Since these IPs belong to the same host, a single agent id is reported for both scans. With agentless tracking and asset merging enabled, the system continuously updates the IPs depending on the scan launched on the latest IPs, and the host’s authentication record is updated with the most recent IP used. To know more, refer to Agentless Tracking Identifier.