Deploy Cloud Agent Using Qualys Scanner
You can deploy Qualys Cloud Agent with the help of Qualys Scanner without relying on third-party tools to deploy the cloud agent. The scanner can deploy Cloud Agent on Windows/Linux assets that have the following platform types:
- Windows-X86-32/64
- Linux-X64-RPM
- Linux-X64-DEB
Pre-requisites
- Storage Setup must be enabled to proceed with Cloud Agent deployment.
- The target host should be up during the scan.
- The Unix target host should have the SSH service running during the scan. Ensure SSH (TCP 22) is reachable from the scanner to the target host.
- The Windows target host should have SMB service and Windows Remote Management service running during the deployment. Ensure SMB (TCP 445) and WinRM over HTTP (TCP 5985) are reachable from the scanner to the target host.
- PC/SCA authentication records (Windows or Unix) should be available for the hosts where the Cloud Agent will be deployed to ensure accurate deployment. Ensure that the provided authentication credentials are correct. To learn more about what privileges and login credentials are required for Windows and Unix authentication records, refer to the following online help topics:
- Ensure to create an activation key.
- Ensure that the activation key and authentication records are located within the same network.
Benefits
- Significantly streamlines the Cloud Agent installation process.
- Reduces deployment time and effort as there is no need to rely on third-party tools to install Cloud Agents.
- Enhances operational capabilities by simplifying the Cloud Agent deployment workflow that is integrated with Qualys Cloud Platform.
- Secured deployment by allowing to configure Cloud Agent to use a proxy server for communication with Qualys Cloud Platform.
Cloud Agent Deployment Workflow
Complete the following steps to install Cloud Agent via Qualys Scanner:
- Navigate to Scans > Setup > Cloud Agent Deployment and then select the Enable Cloud Agent Deployment checkbox. Click Save.
This option to enable the deployment of cloud agents is only available to Manager (both the primary contact and non-primary contact) and Unit Manager users.
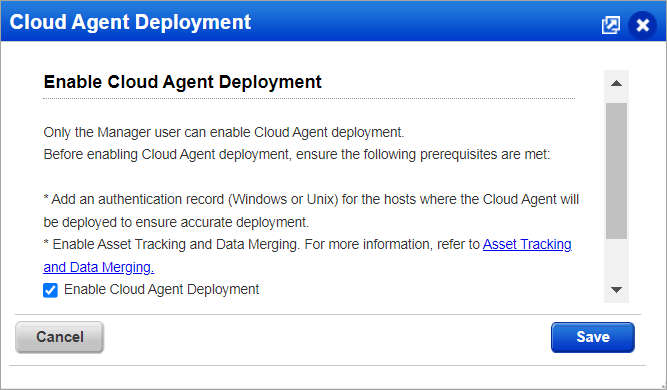
If Cloud Agent Deployment is already enabled by a Manager, Unit Manager can also launch deployment scans directly and the other way around.
- Navigate to Scans > New > Agent Deployment. The Launch Agent Deployment dialog box appears as shown in the following image:
Once the Enable Cloud Agent Deployment option is enabled as per step 1, the user with the Manager and Unit Manager role can deploy Cloud Agents. Manager user should be CA Manager with CA API access.
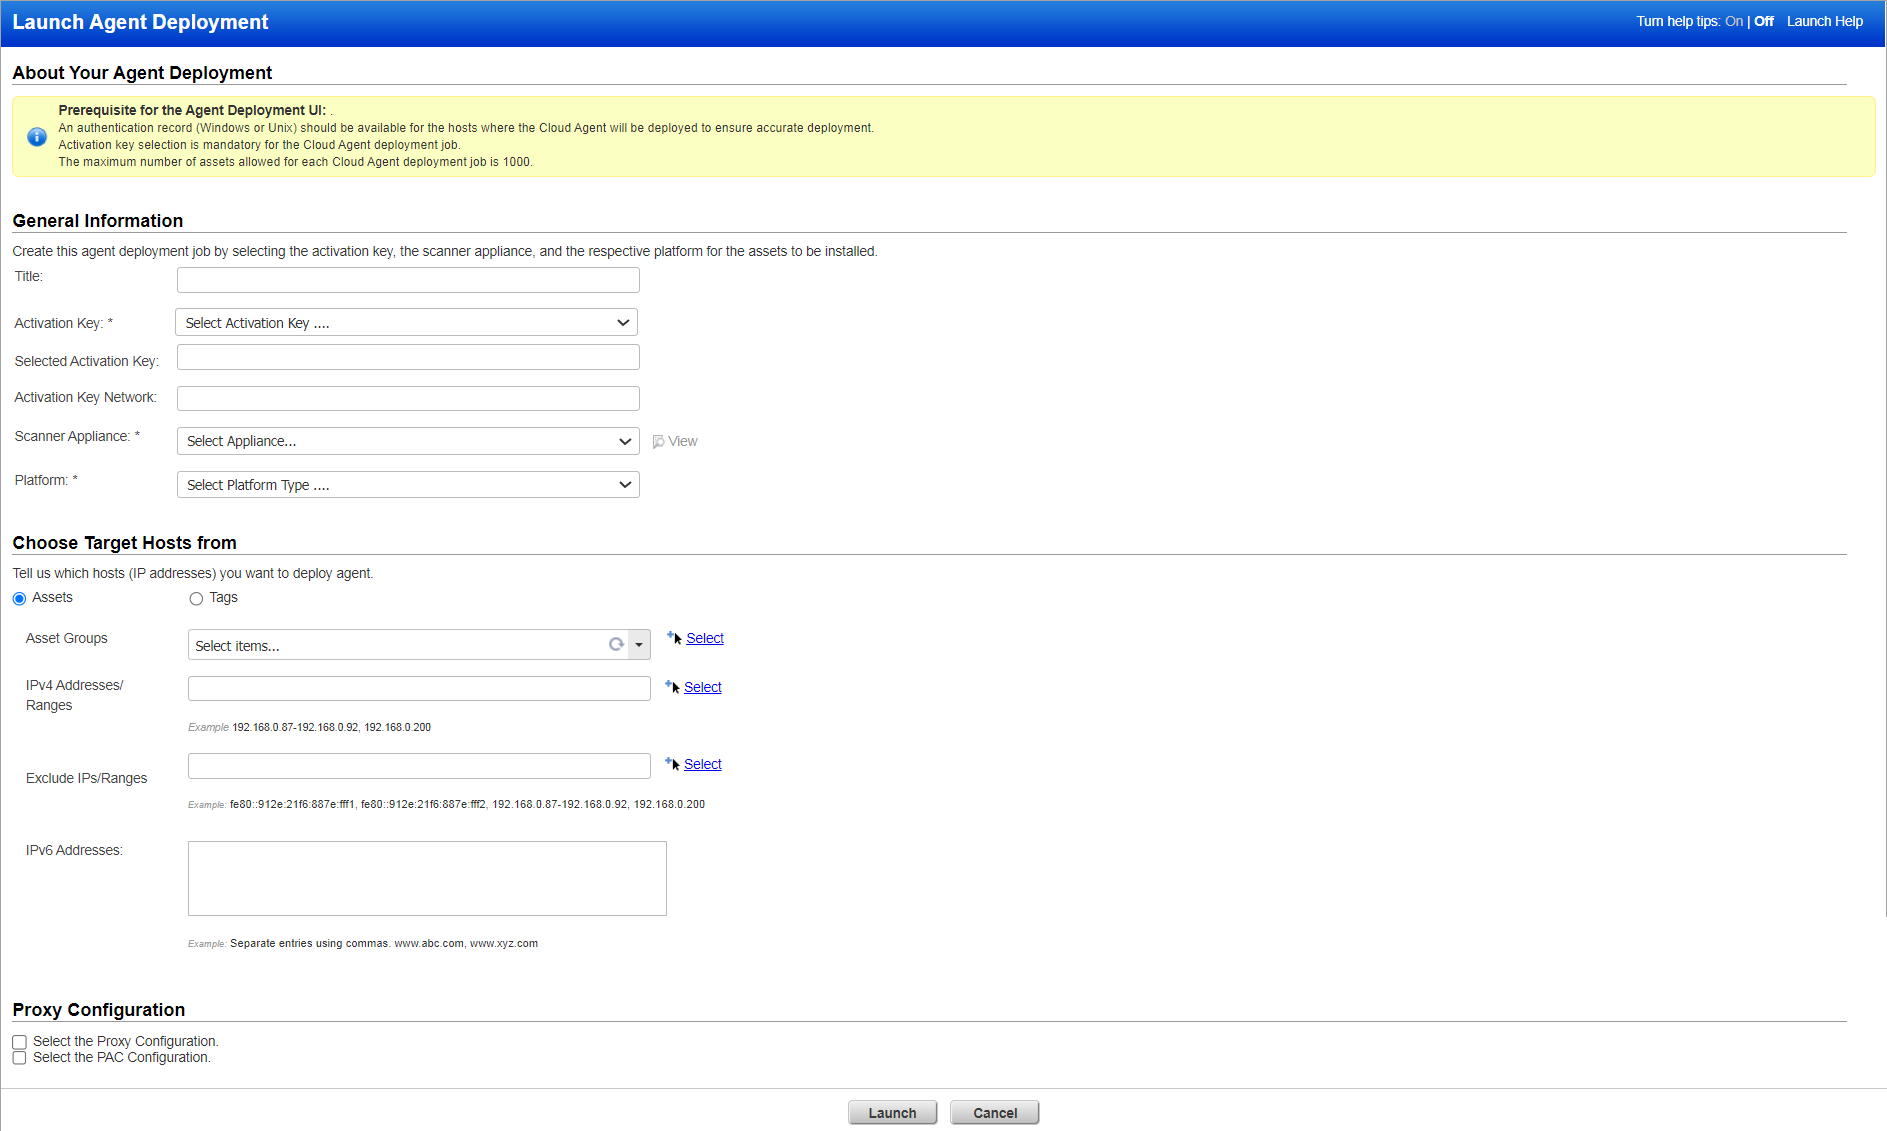
- Fill in the following details:
Field Description General Information Title Give your agent deployment job a title to identify it later easily. Activation Key Select an activation key to install agents.
- All the activation keys available for the subscription are displayed here for you to choose from.
-The configuration profile associated with the selected activation key is applied during cloud agent deployment.Selected Activation Key Displays the selected activation key. This field gets auto populated on selecting the Activation Key. Activation Key Network Displays the network associated with the activation key. This field gets auto-populated based on the selected Activation Key. Scanner Appliance Select a virtual scanner for Cloud Agent deployment. The Pre-Authorized AWS EC2 Scanner does not support Cloud Agent Deployment, thus it does not appear in the Scanner Appliance drop-down list.
Platform
Select the platform on which you desire to install cloud agent. Choose Target Hosts from Choose target hosts from Assets (IPv4, IPv6 addresses, asset groups, FQDNs) or from Tags to specify target hosts for agent deployment.
The maximum number of target hosts for Cloud Agent deployment is 1000.
The field details required are similar to those needed for launching a vulnerability scan. Refer to step 3, Tell Us What To Scan, in the online help topic, Scan for Vulnerabilities.Proxy Configuration Select the checkbox, Select the Proxy Configuration if you wish to configure Cloud Agent to use a proxy server for communication with Qualys Cloud Platform. Proxy Host Hostname or IP address of the proxy server. Port The port number on which the proxy server is listening. Username/Password Username and password for proxy authentication. If the proxy server requires authentication. Select the checkbox, Select the PAC Configuration if you wish to automatically configure a web browser's proxy settings. PAC File URL A PAC (Proxy Auto-Configuration) file URL is a URL that points to a PAC file. A PAC file is a text file with a ".pac" extension that contains JavaScript functions used by web browsers to automatically configure proxy settings.
- Fill in the following details:
- To initiate the deployment of the Cloud Agent, click Launch. Your deployment job appears in the Scans list.
- Once the deployment job is launched, you cannot pause or resume it.
- Relaunching the existing deployment job is not supported.
-Scheduling an agent deployment job is not supported.
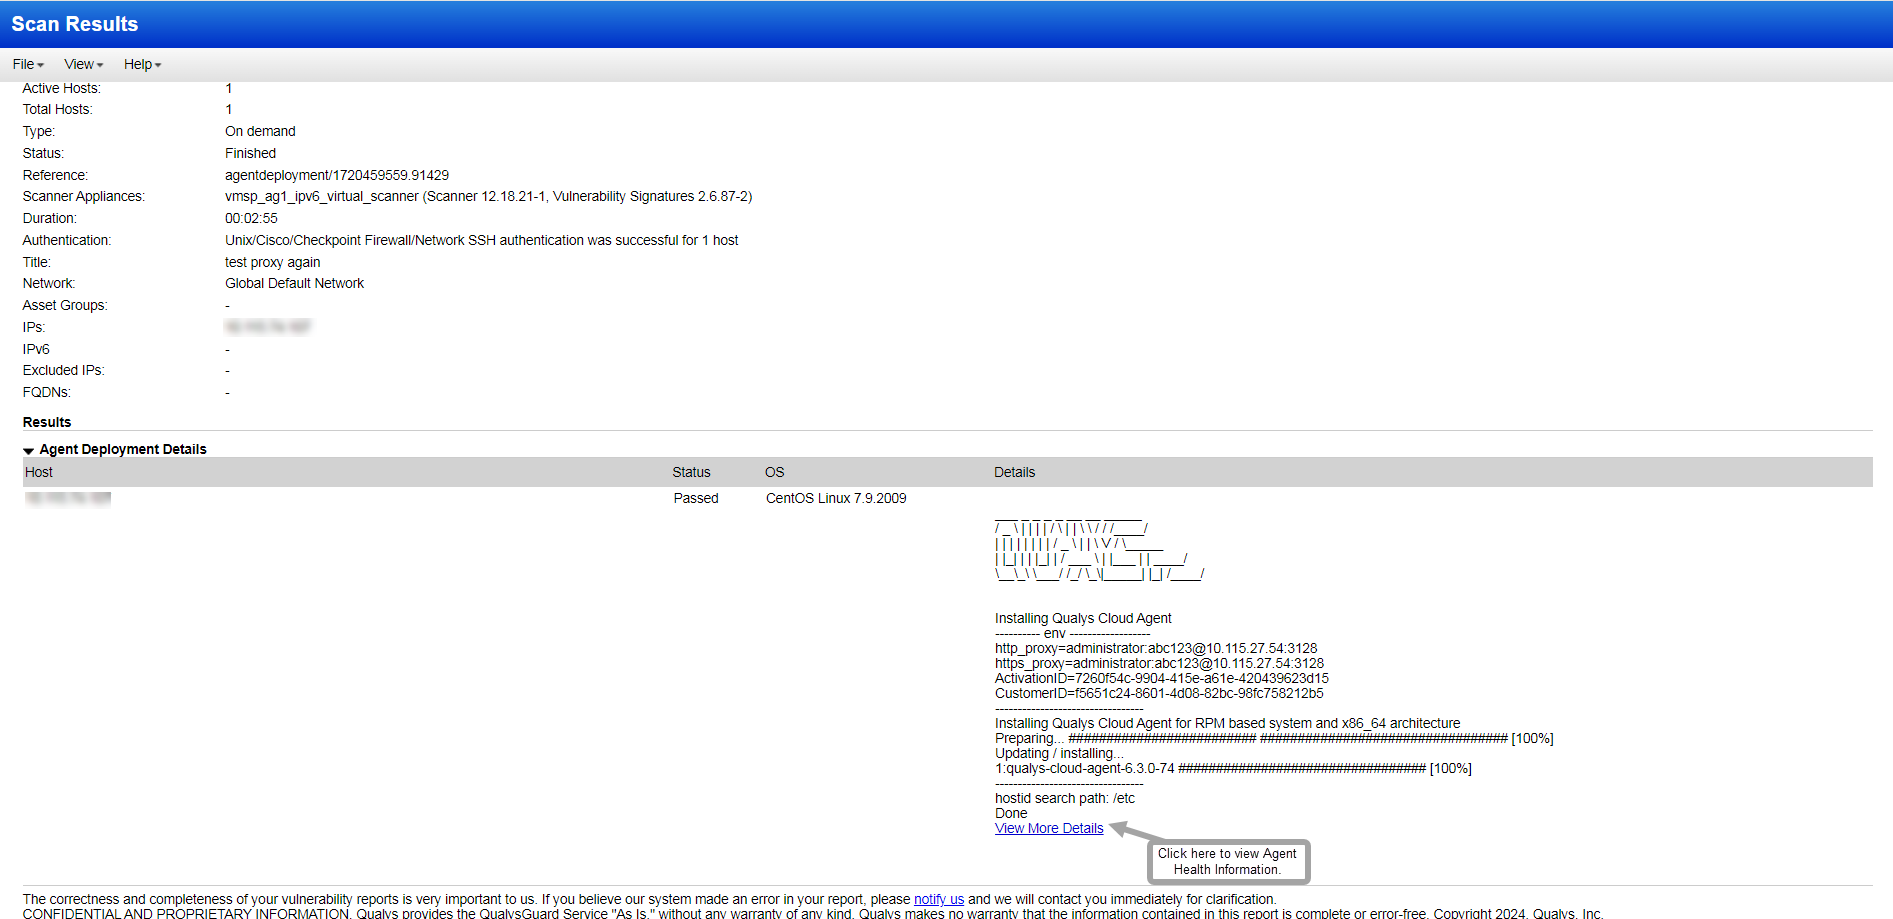
- Email notification is not available for the agent deployment. - To check the Cloud Agent deployment status, navigate to the scans list on the Scans tab. Status icons next to the deployment job in the list indicate whether it is Running or finished.
- Navigate to the scans list on the scans tab and then select View from the Quick Actions menu to view the result of the Cloud Agent deployment job. Once the deployment is complete, the agent gets provisioned for the hosts.
Supported report formats are HTML, PDF, and CSV.