Release 10.27
May 14, 2024
What’s New?
Qualys Vulnerability Management (VM)
Scan (VM, PC) Virtual Machines in GCP Cloud using Cloud Perimeter Scanning
With this enhancement, you can now scan all public facing virtual machines in GCP cloud using Cloud Perimeter Scan to detect vulnerabilities in your cloud environment for securing Google Cloud Platform. This enhancement is available only to VMSP subscriptions. To use this feature reach out to Qualys support to enable Cloud Perimeter GCP Compute Engine for your subscription.
This feature requires Qualys Cloud Platform v3.18.0.
Create /Update Cloud Perimeter Scan Job for GCP
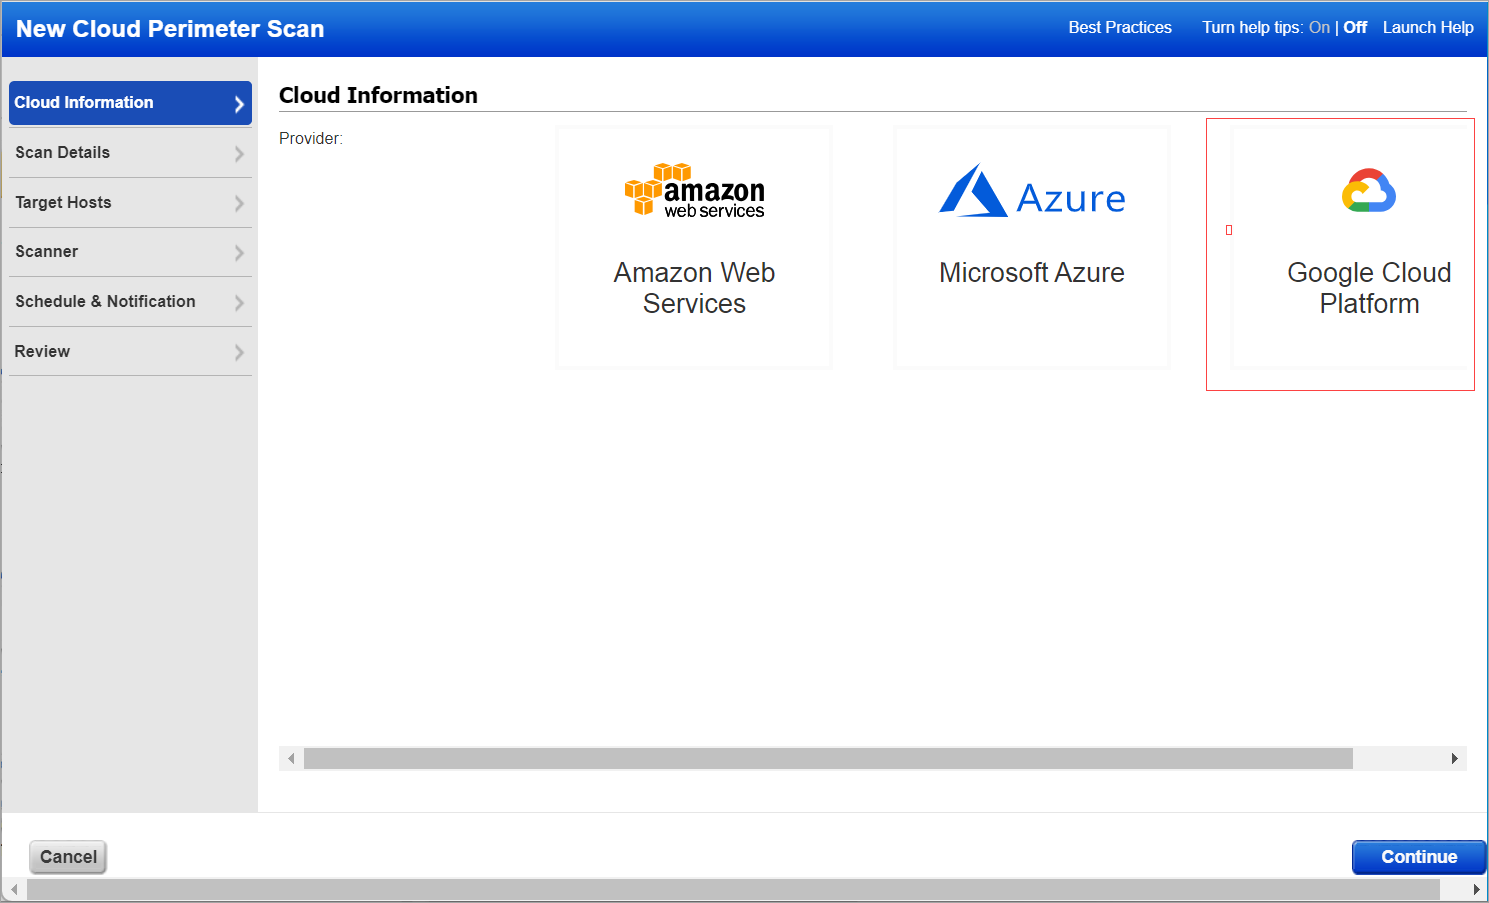
- Go to Scans > New > Cloud Perimeter Scan.
- In the Cloud Information tab, you can now see GCP cloud provider. Select the Google Cloud Platform icon to scan the GCP VM machines. Click Continue.
- On the Scan Details tab enter the following information and then click Continue:
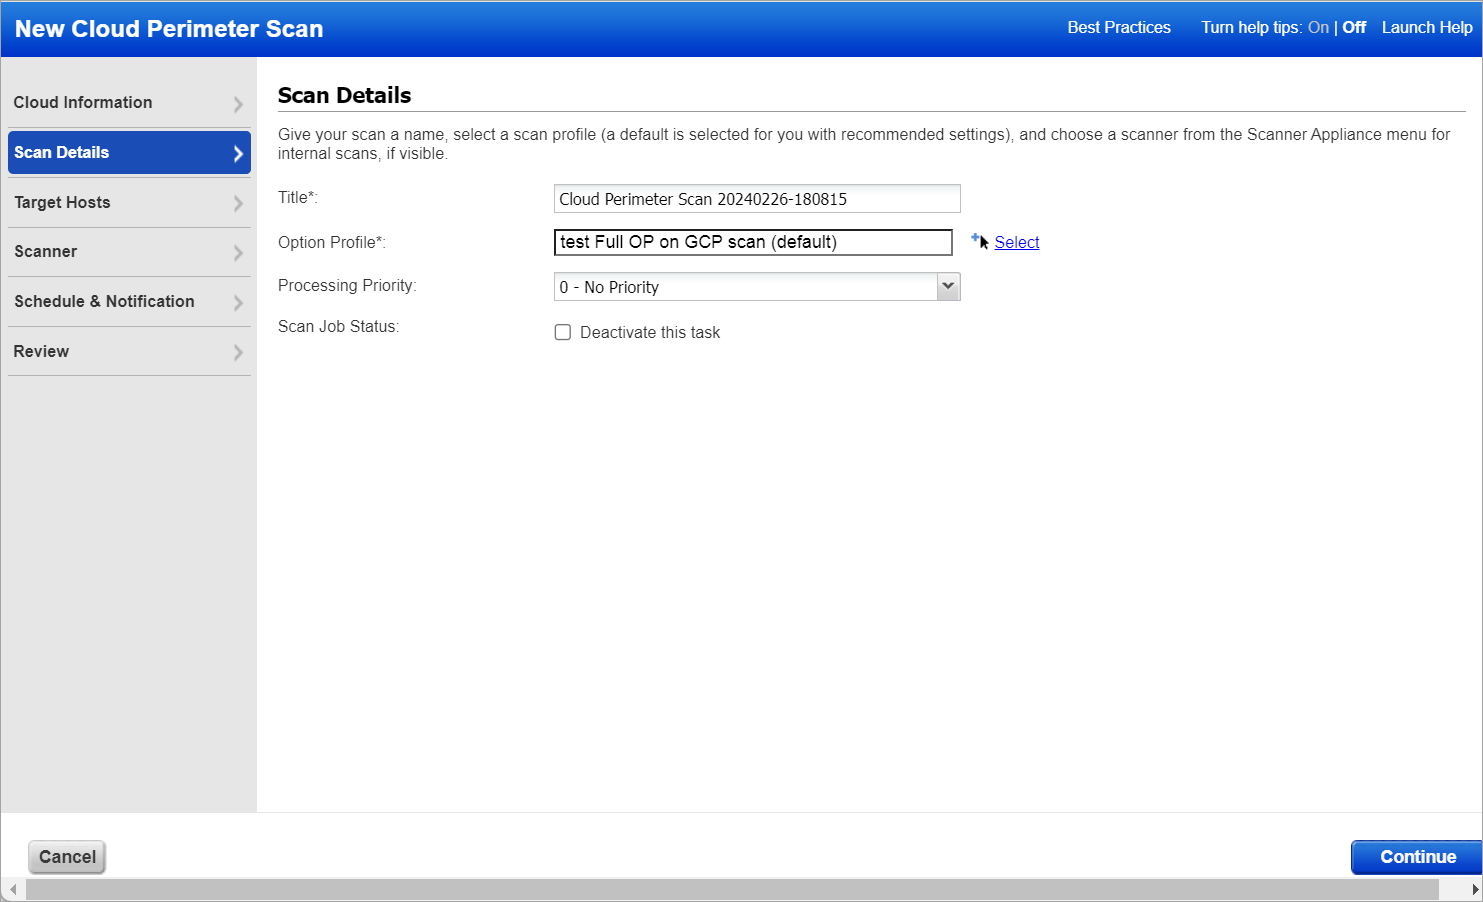
- Give the scan a name
- Select the option profile as you do for EC2 scans.
- Select scan processing priority if there are multiple scans.
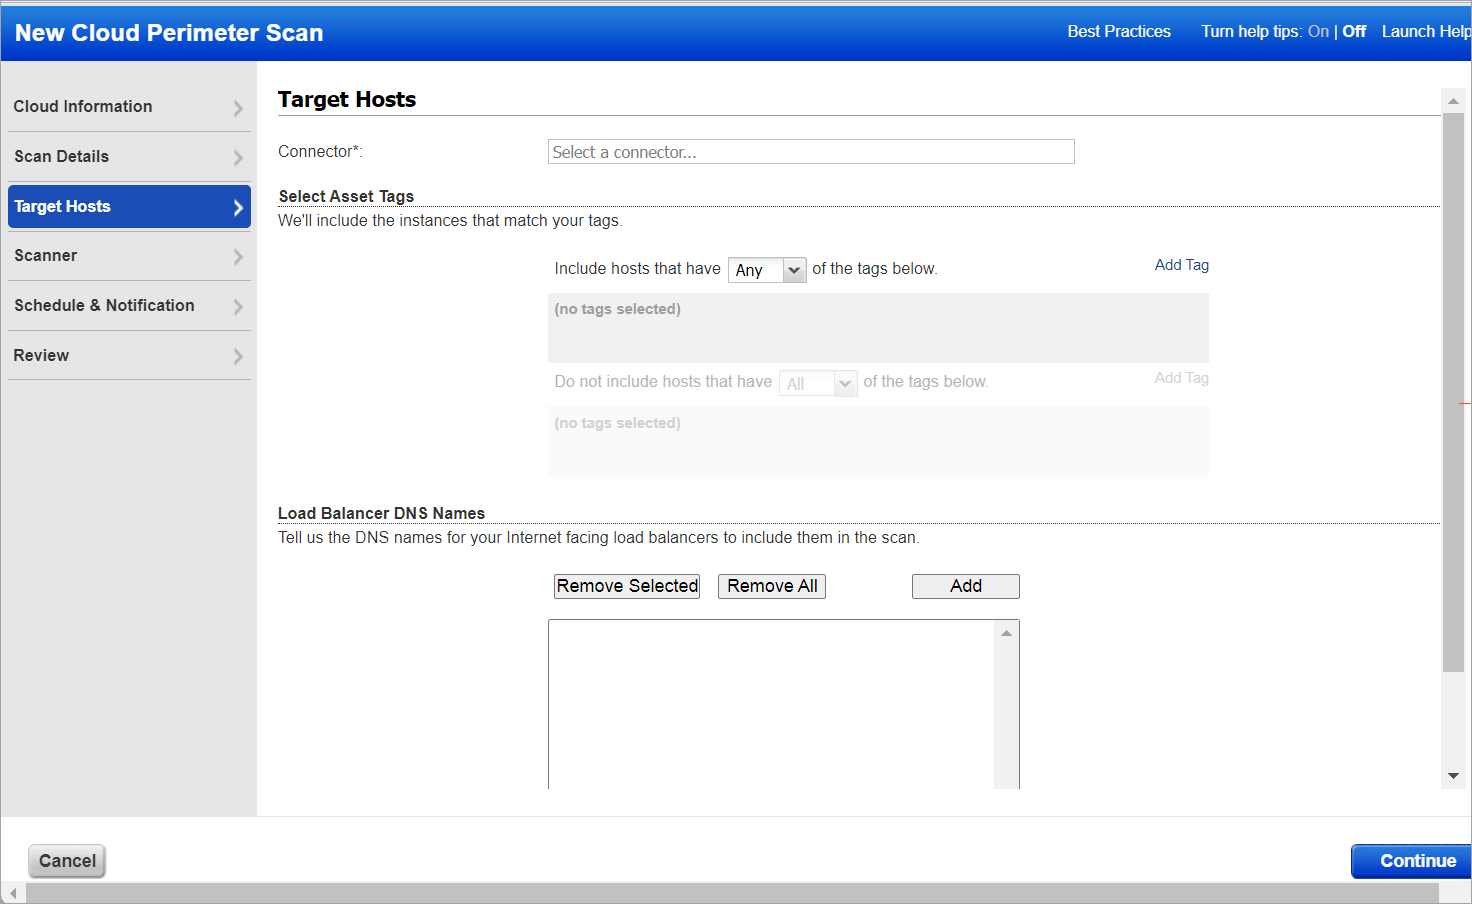
- On the Target Hosts tab to select the public facing GCP VM machines on which you want to run the Cloud Perimeter scan. From the Connectors drop-down, select an GCP connector. The Connector drop-down lists the connectors that you have configured in Total Cloud. Select asset tags to further filter the GCP VM assets fetched from the GCP connector. For load balancers, manually add the DNS names of internet facing load balancers. Click Continue.
- On the Scanner tab, select internal/external scanner. Click Continue.
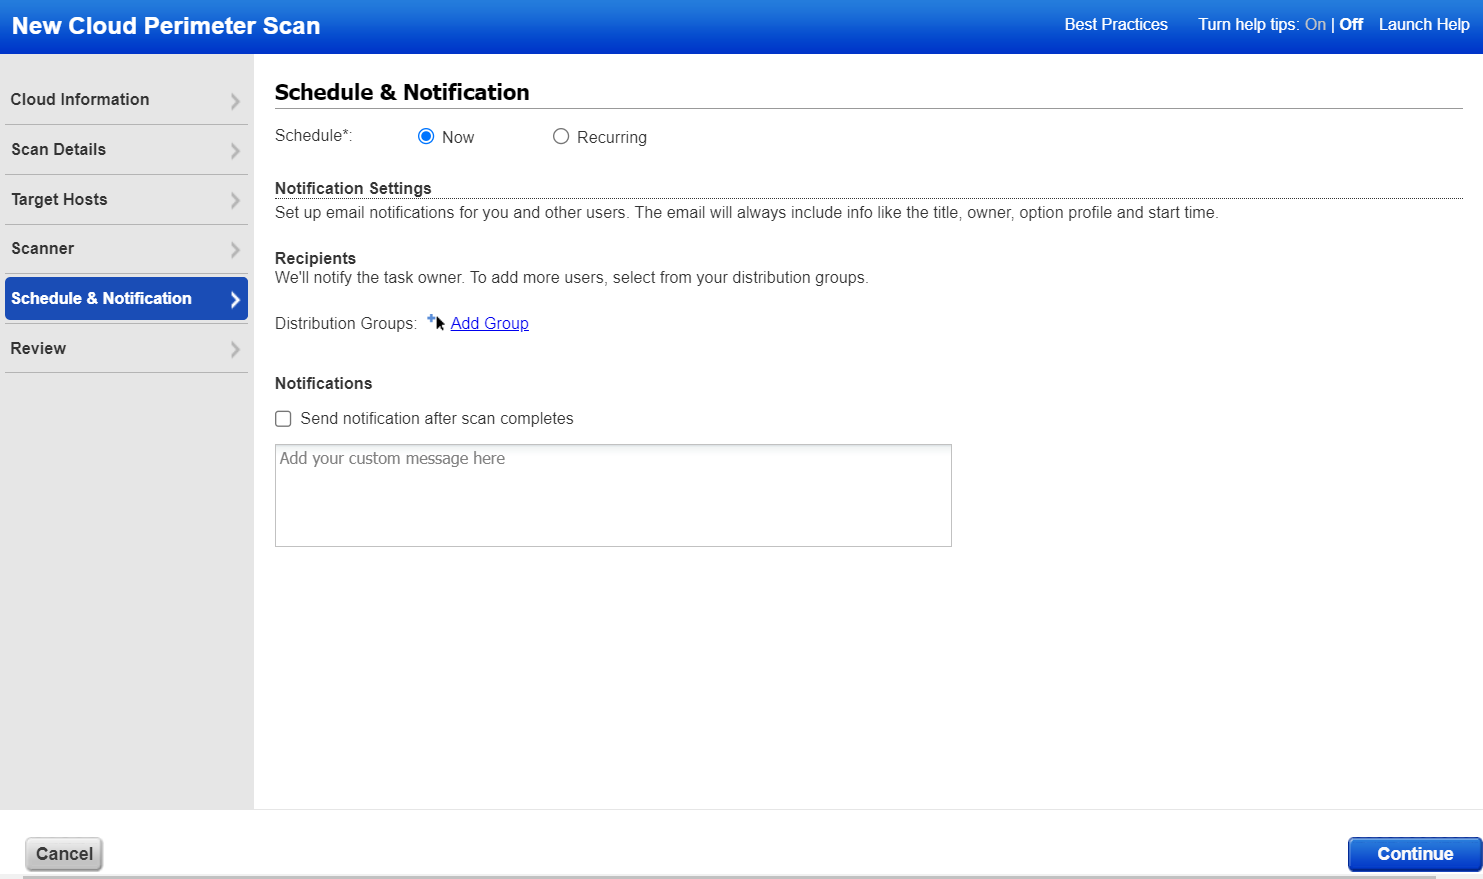
By default cloud perimeter scans use Qualys External Scanners. For Private Cloud Platforms - Your subscription may be configured to allow scanner appliances to be used for cloud perimeter scan jobs. In this case, choose one or more scanner appliances from the list (use the Build my list option). - On the Schedule & Notification tab, specify when you want the scan to run - Now or Recurring. When you choose Now your scan may not start immediately. The Qualys system checks for new scan requests every few minutes. If a scanner is available and you haven't reached your concurrent scan limit then the system launches the scan. If scanners are not available or you have reached your limit then the scan will be launched at the next opportunity. When you choose Recurring you also set scheduling and notification options. These are the same settings as other scan schedules. Click Continue.
- On the Review tab, the Target Hosts section, displays for your review:
- Public-facing GCP assets that are fetched from the connector.
- Assets that are qualified for the scan and out of the qualified assets, how many assets are activated in VM on which the scan will be launched.
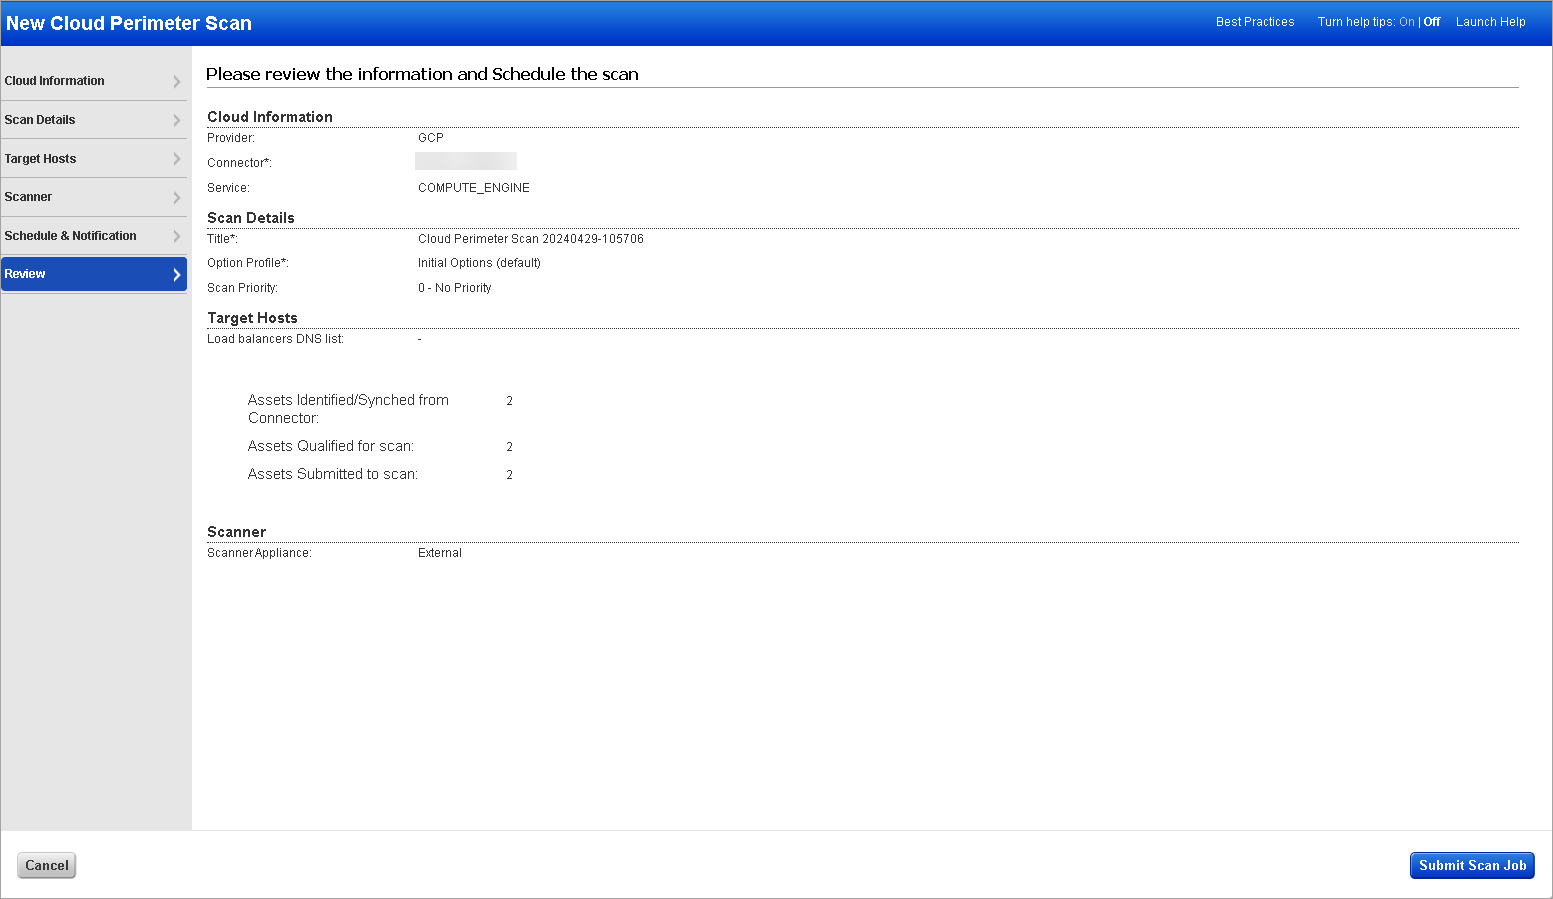
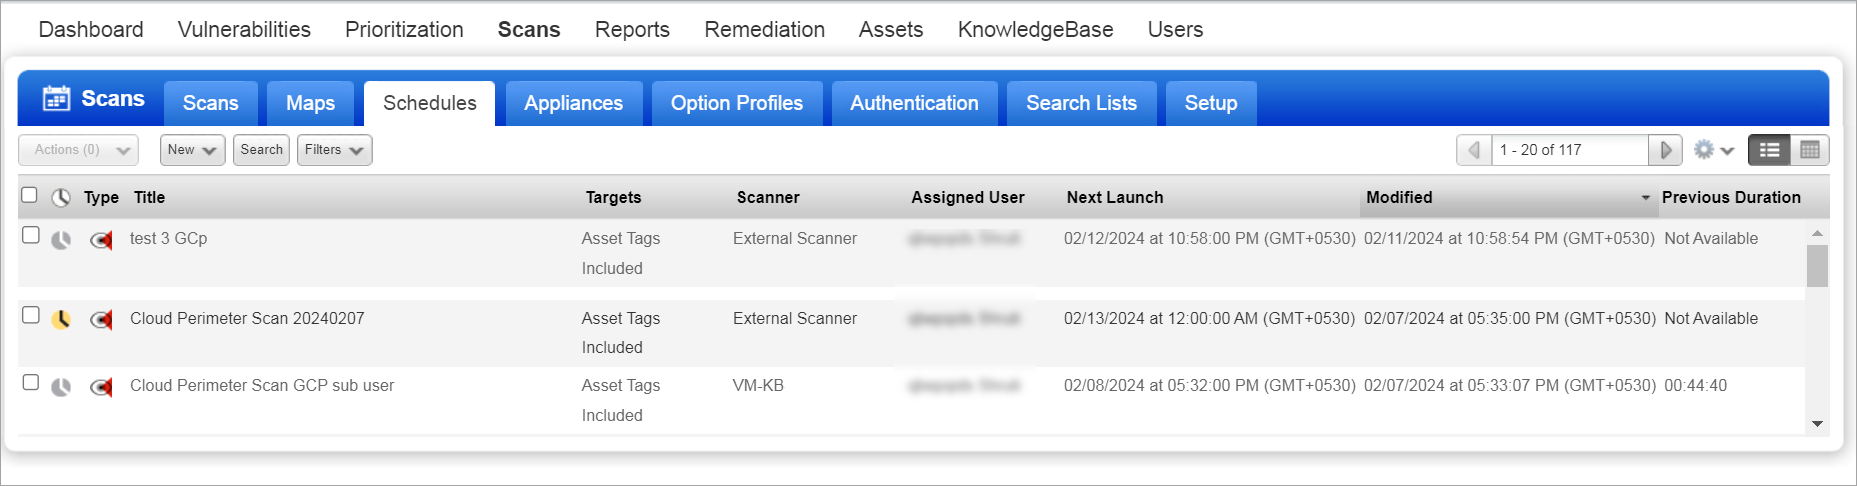
When your scan starts it appears on the Scans list. Like with other scans, you can take actions like cancel or pause the scan, view the scan status, and download the results.
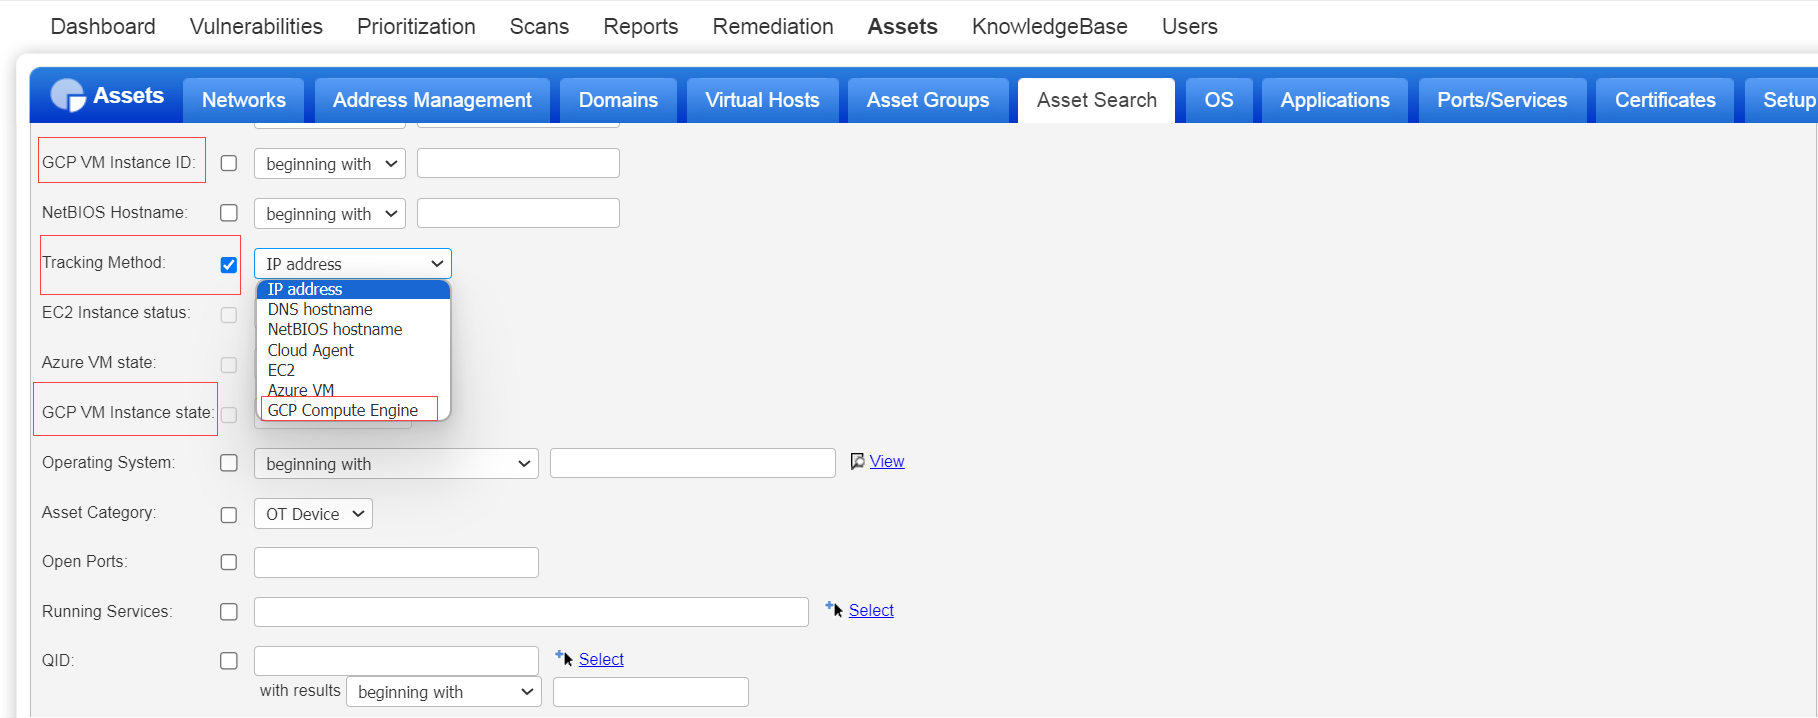
Generate Asset Search Report on GCP Assets
Go to Assets > Asset Search. Enter your search criteria, and click Search. We have added the following new filter parameters:
- GCP VM Instance ID
- GCP VM Instance state
- Tracking Method: GCP Compute Engine
Qualys API Support
Due to this enhancement, we made a few changes to the following APIs. For more information, refer to Cloud Platform 10.26 API release notes.
- Create/Update Cloud Perimeter Scan Job /api/2.0/fo/scan/cloud/perimeter/job/
- Schedule Scan List /api/2.0/fo/schedule/scan/?action=list
- Host List Detection /api/2.0/fo/asset/host/vm/detection/
- Host List /api/2.0/fo/asset/host/
- Asset Search Report /api/2.0/fo/report/asset/?action=search
- Host Based Scan Reports /api/2.0/fo/report/
Content Security Policy
With this enhancement, we have implemented a Content Security Policy (CSP) to enhance security. As a part of this enhancement, we have added a Content-Security-Policy HTTP response header with default-src 'self'. The CSP header defines a policy that restricts which origins or types of content can be executed or loaded, thereby reducing the risk of certain types of attacks like cross-site scripting (XSS) and data injection. It helps you to reduce XSS risks on modern browsers by displaying which dynamic resources are allowed to load. This CSP is compatible with all browsers, Google Chrome, Mozilla Firefox, Microsoft Edge, Safari, and Opera.
Content Security Policy (CSP) is also implemented for all the Qualys APIs. For more information, refer to Cloud Platform 10.27 API release notes.
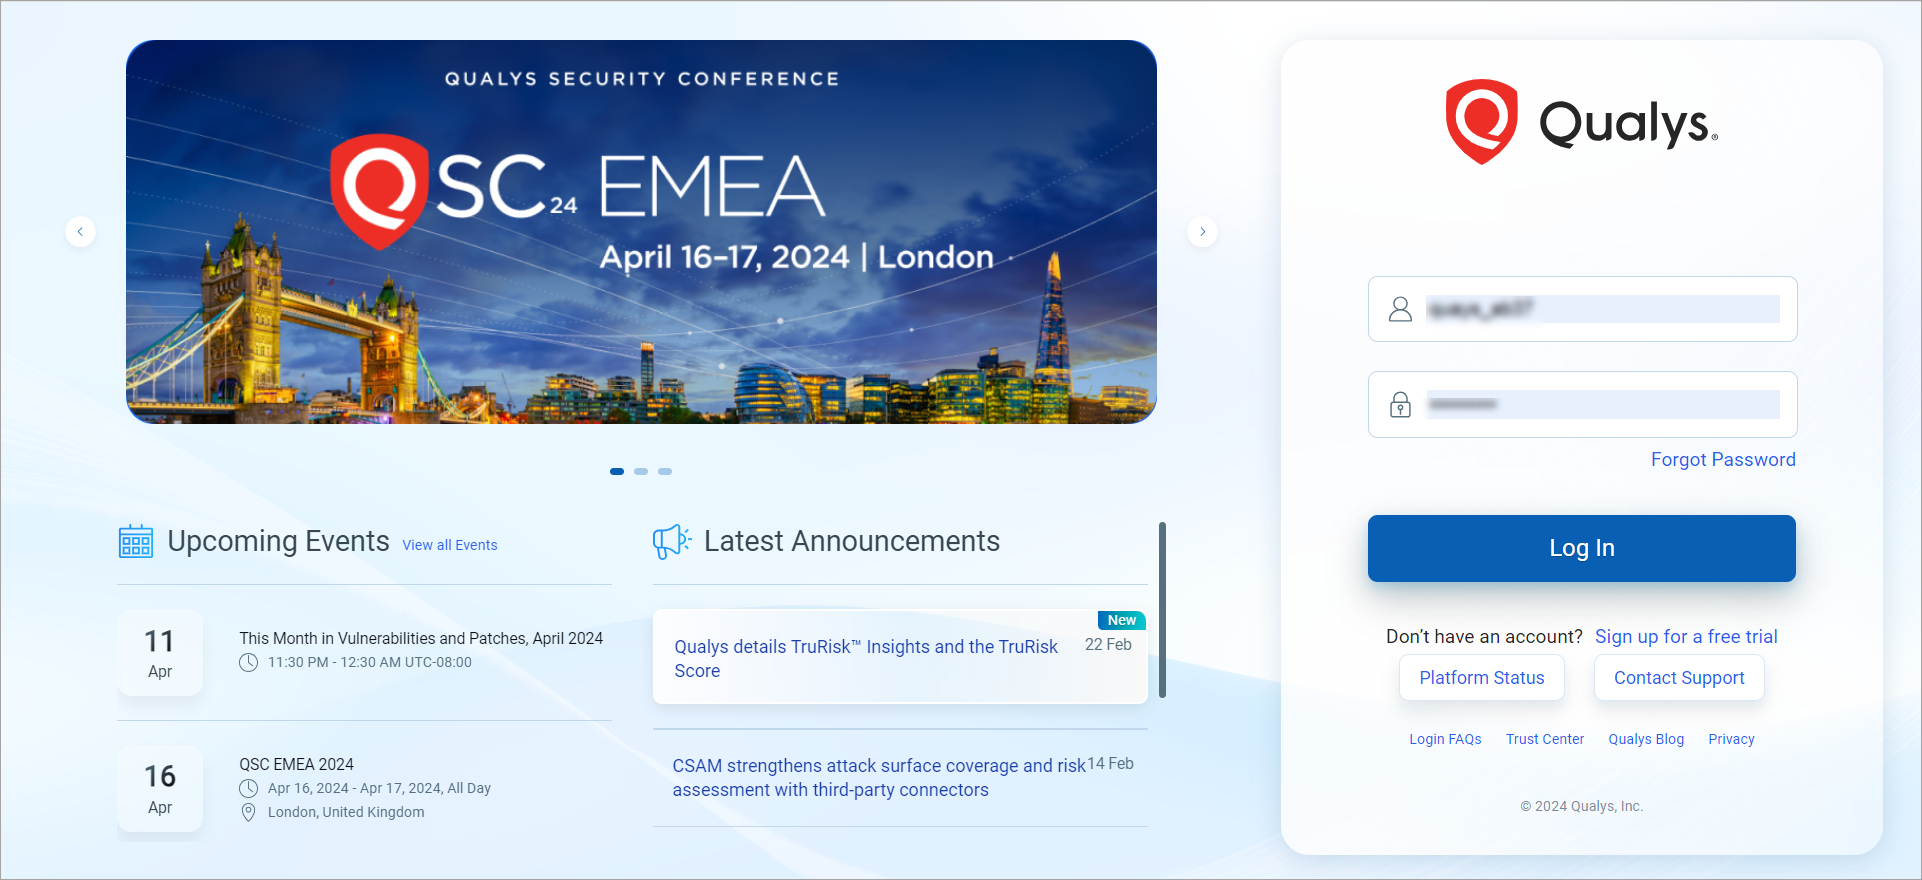
Enhanced Login Page
With this enhancement, you can now access the new login interface, which has a modern look and provides links to additional information such as:
- Upcoming events
- Latest announcements about new features and other developments
- Link to Qualys Security Blogs
- Login FAQs
- Platform status
- Contact support
- Forgot password to reset your password
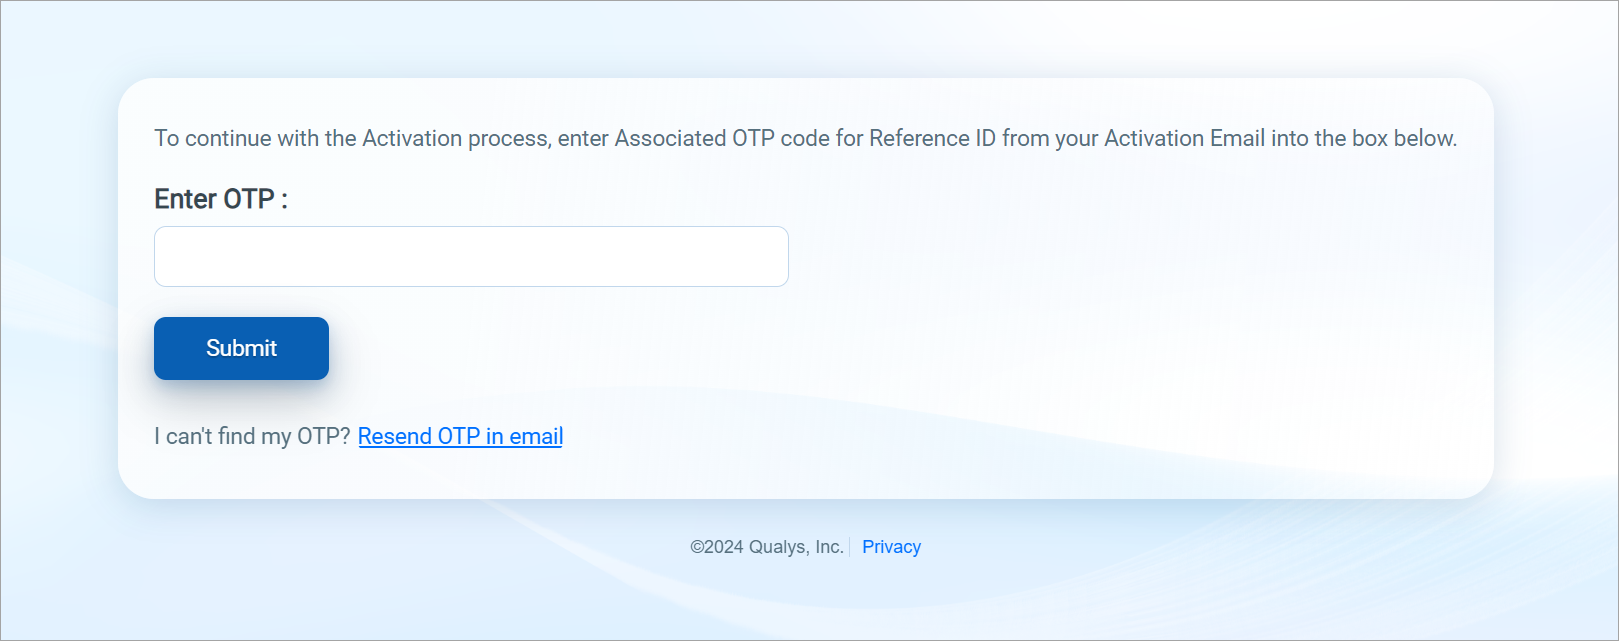
There is a new user interface for the Qualys login, Forgot Password, and OTP confirmation page.
Qualys Login Page
Forgot Password Page

Account Activation OTP Page
- There is no change in other existing Qualys login pages. The login page user interface has not been enhanced for the following Qualys login pages:
• https://qualysguard.qg1.apps.qualys.in /fo/login.php
• https://qualysguard.qg1.apps.qualys.in /fo/user_login.php
- Due to the introduction of the new login page, the HTML attributes for locating elements (HTML locator) have also been updated. These HTML attribute changes may impact the automation. To mitigate these impacts, Qualys recommends updating Qualys Login automation scripts, if any, with these HTML attribute changes in mind.
-The new login page is compatible with the following browser versions:
• Google Chrome (stable, latest)
• Mozilla Firefox (stable, latest)
• Safari (latest)
• Microsoft Edge (latest)
For more information, refer to the Qualys blog published on the 7th of March.
User Experience (UX) Optimization
Our goal is to continuously improve user interaction with the Qualys Cloud Platform through UX optimization enhancements. With this release, we have implemented the following UX enhancements:
- Scan Report
- False Positive Review
- KnowledgeBase Enhancements
- Scanner Appliance Troubleshooting Link
- User Interface Enhancements
Scan Report
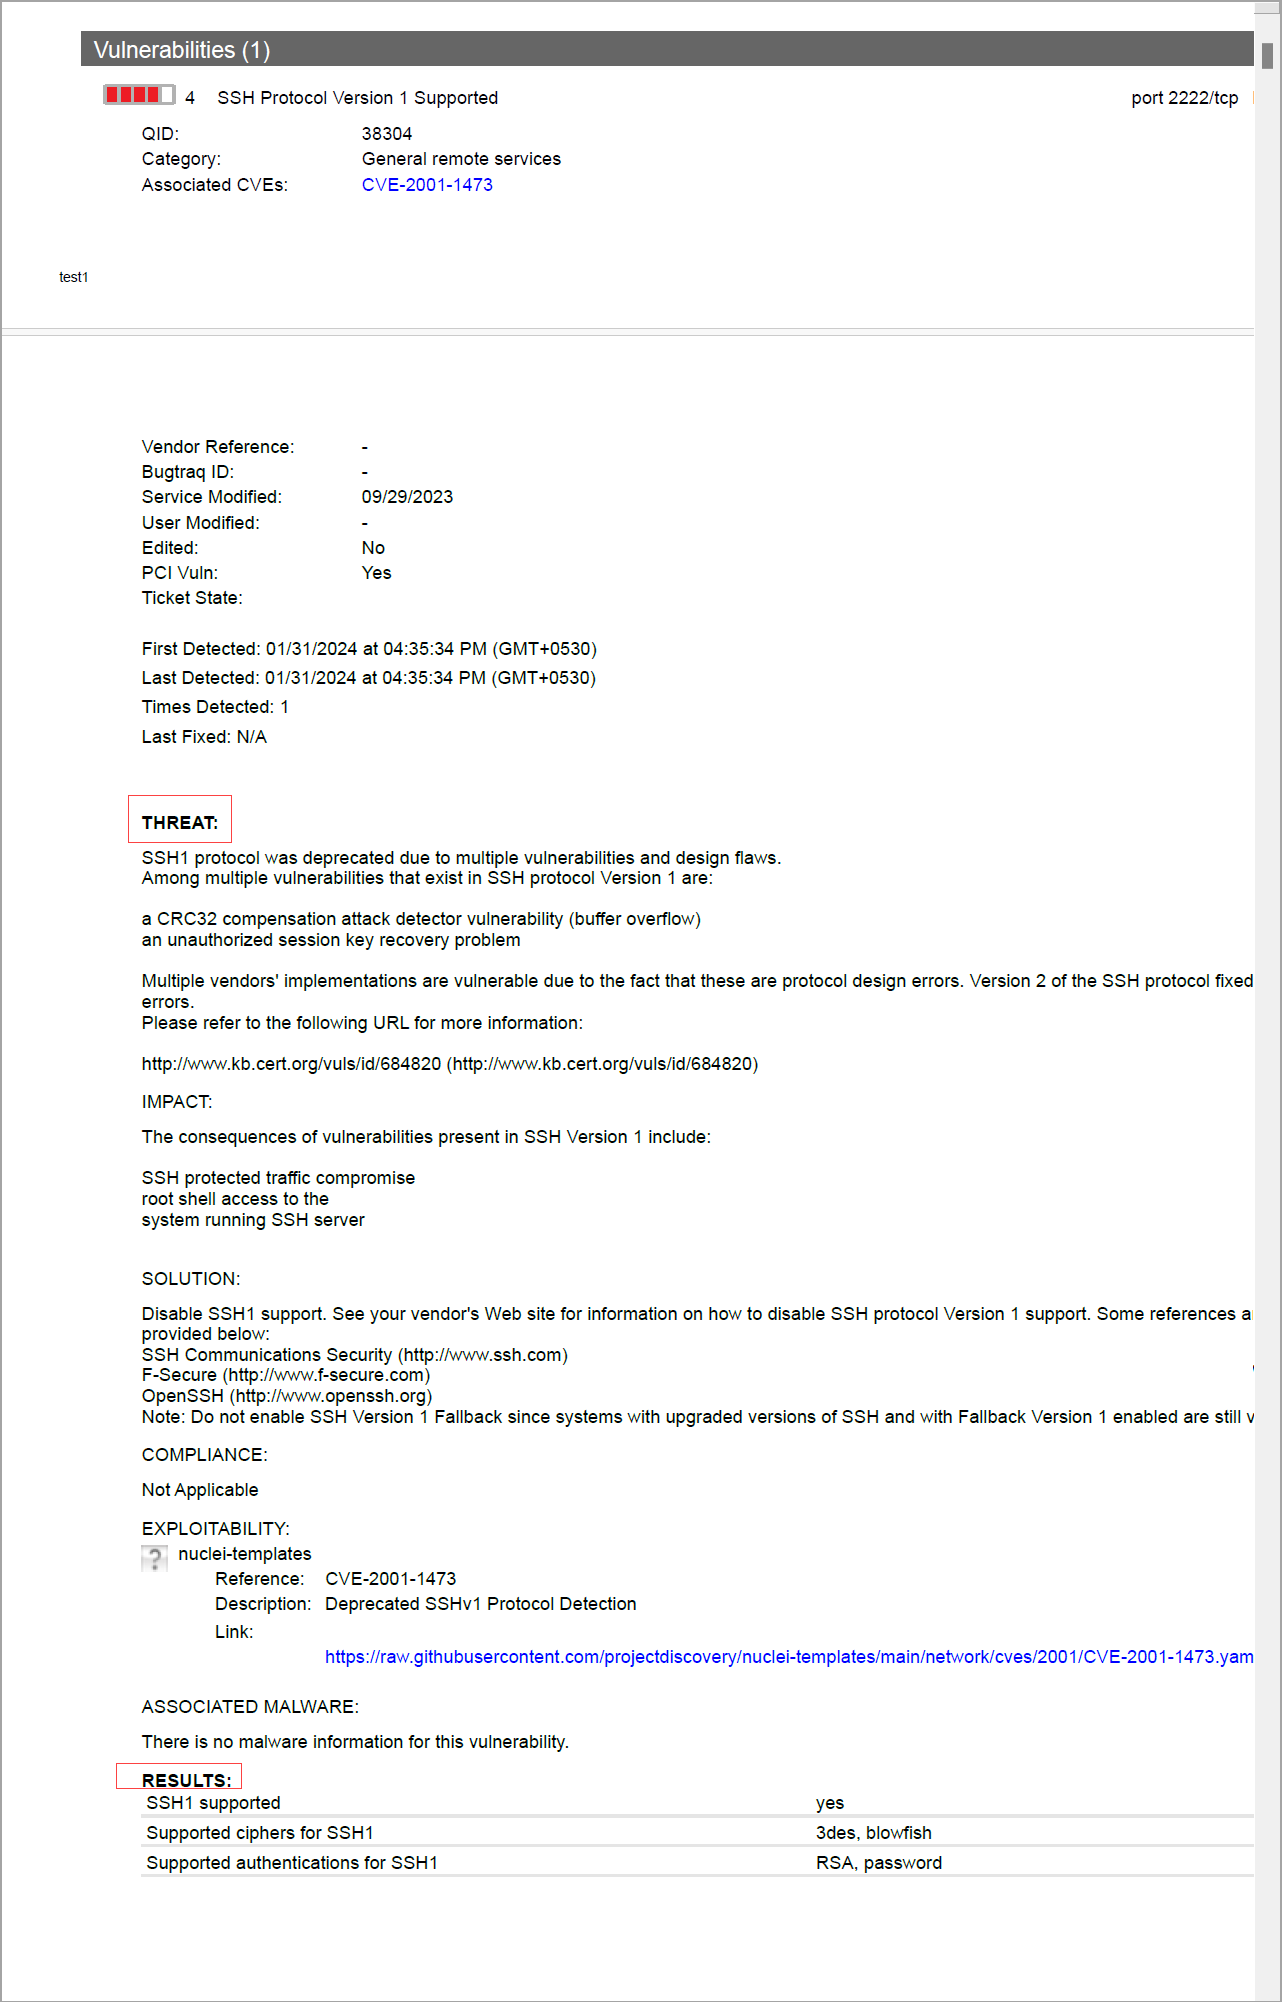
To enhance the readability and make it easier to identify, implemented bold formatting to the titles of the THREAT and RESULTS sections in the Scan report for the PDF format. These sections of the report help to understand how Qualys Cloud Platform detects and flags the QIDs.
False Positive Review
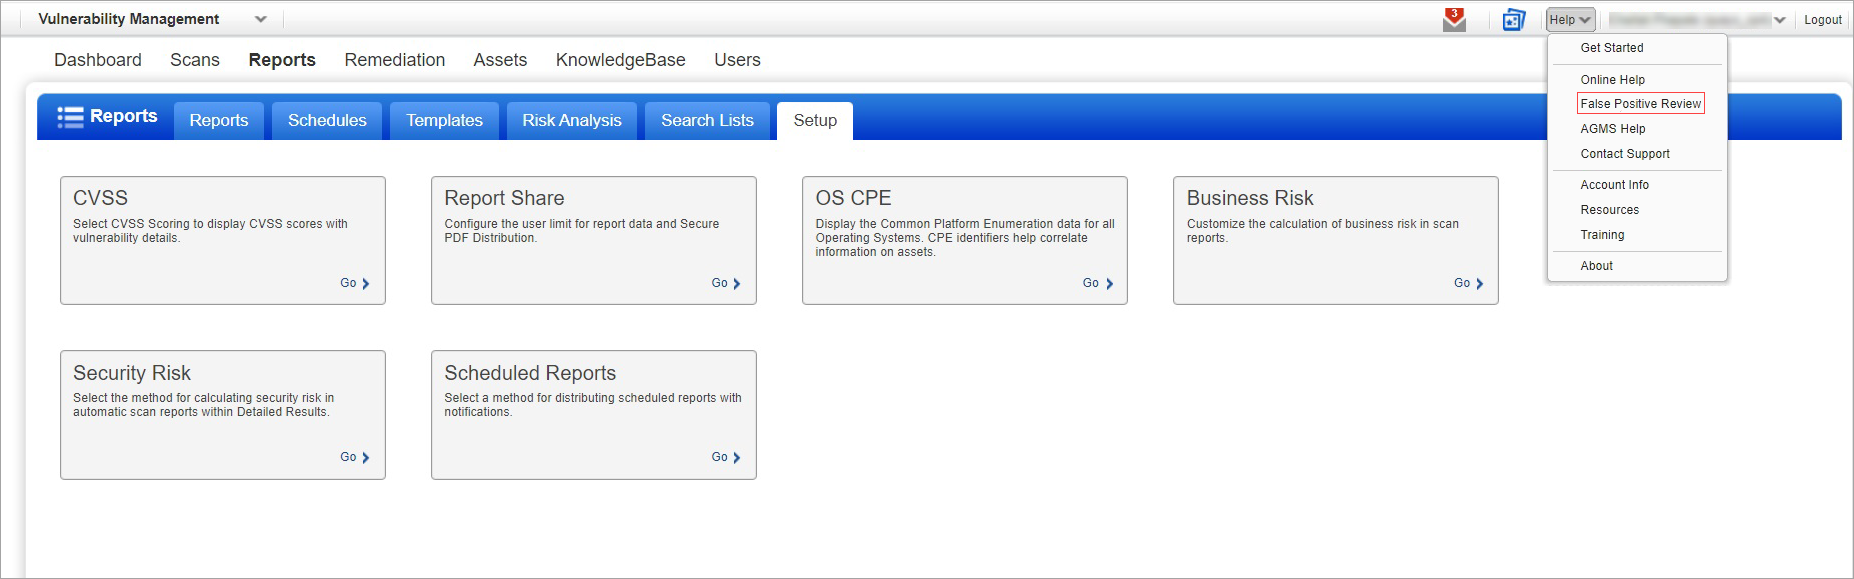
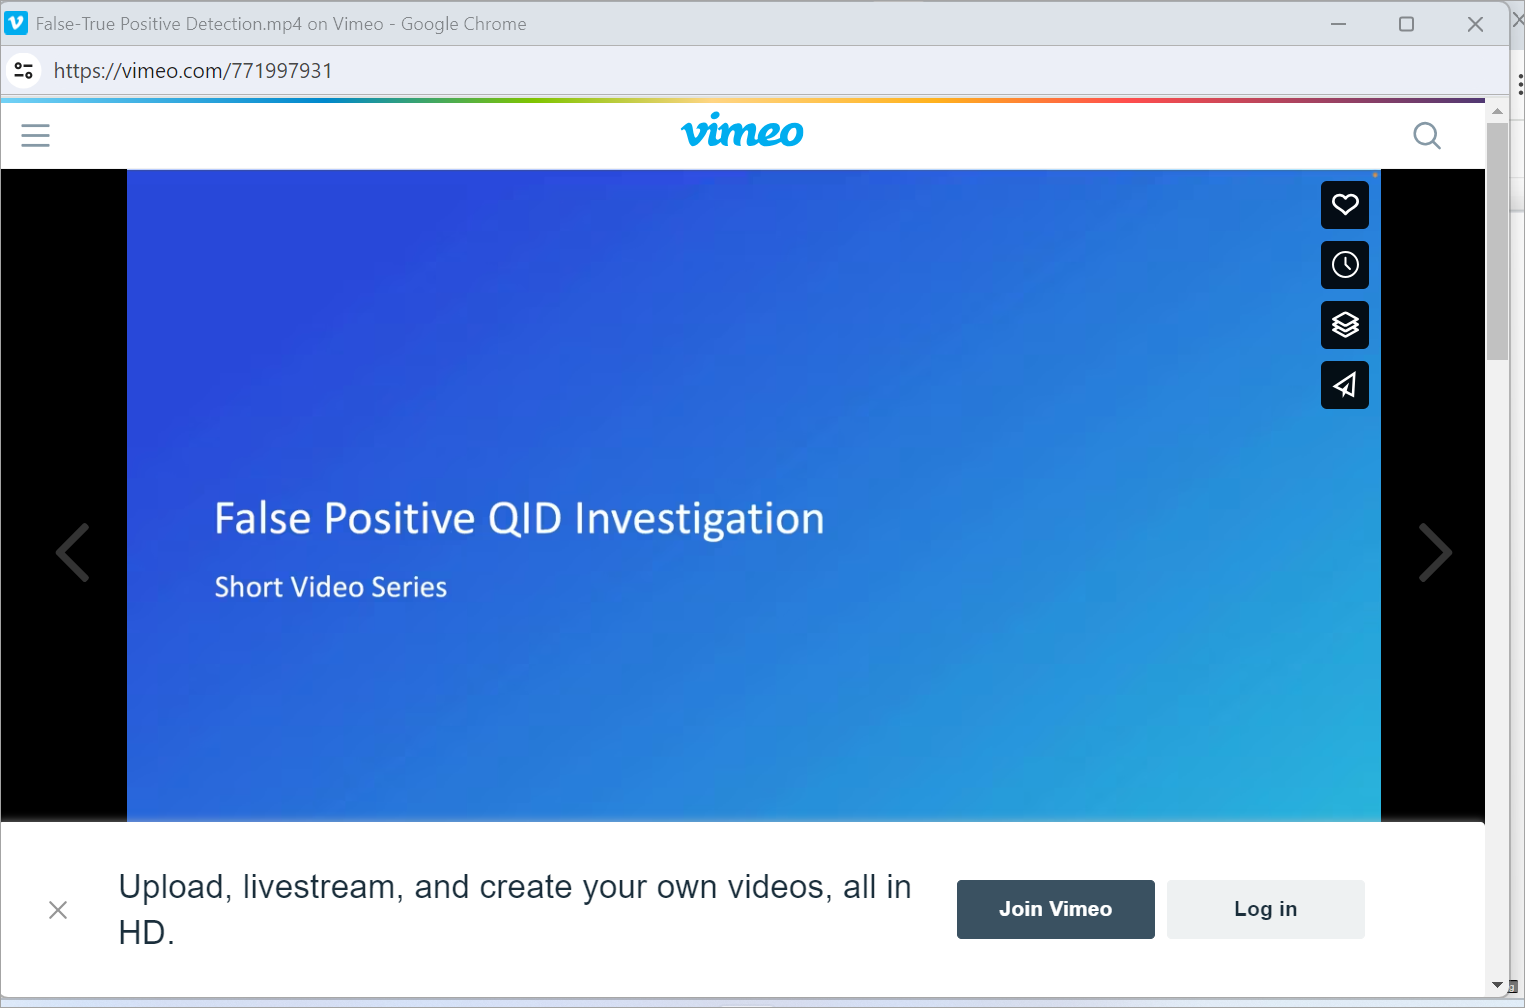
A new feature to enable you to verify false positives detected in a vulnerability scan. To access this feature, go to the UI and click Help > False Positive Review. Clicking False Positive Review redirects you to a video about false positives in vulnerability scans. False Positives are when the host is not vulnerable, yet Qualys reports vulnerabilities on it. This new feature helps you better understand the QID detection logic and assist you in verifying false positives.
KnowledgeBase Enhancements
Information Segment-Threat (detection logic)
A new Threat (detection logic) information segment has been added within the KnowledgeBase preview to help you understand the detection logic used to identify or flag a QID.
- Navigate to VM> KnowledgeBase > KnowledgeBase tab.
- Click the desired QID and the preview appears at the bottom with new Threat (detection logic) information, as shown in the following image:
.png)
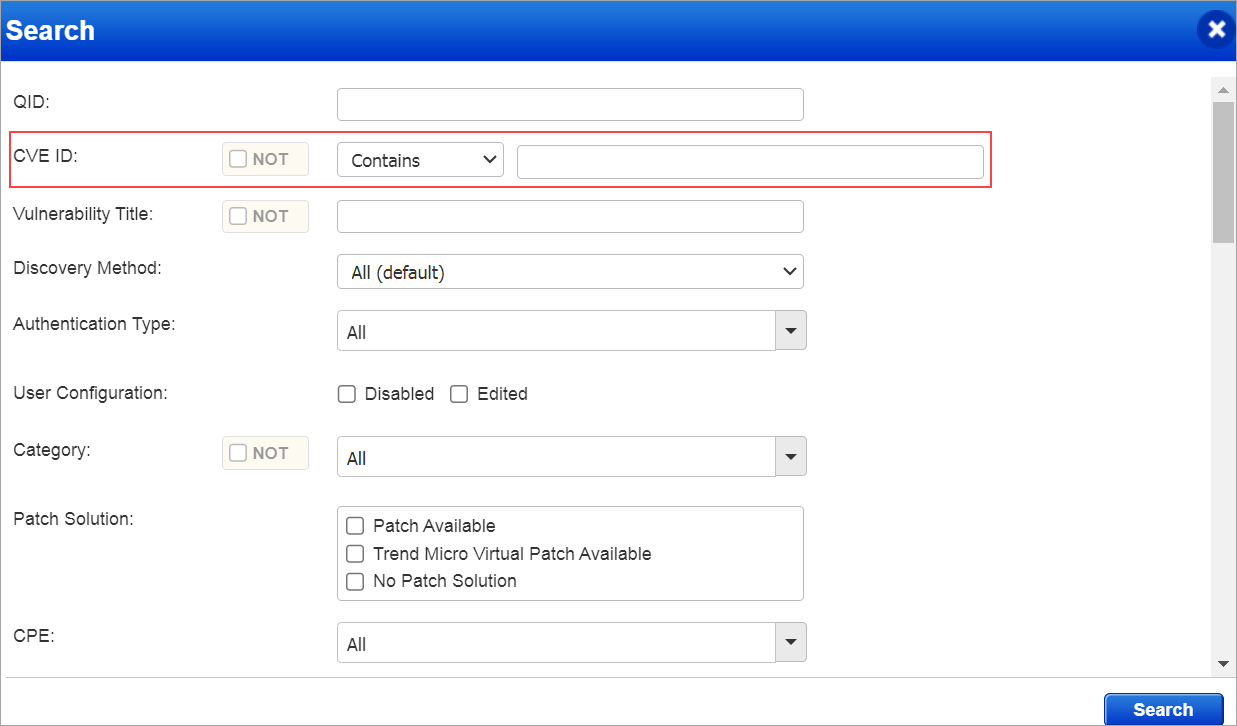
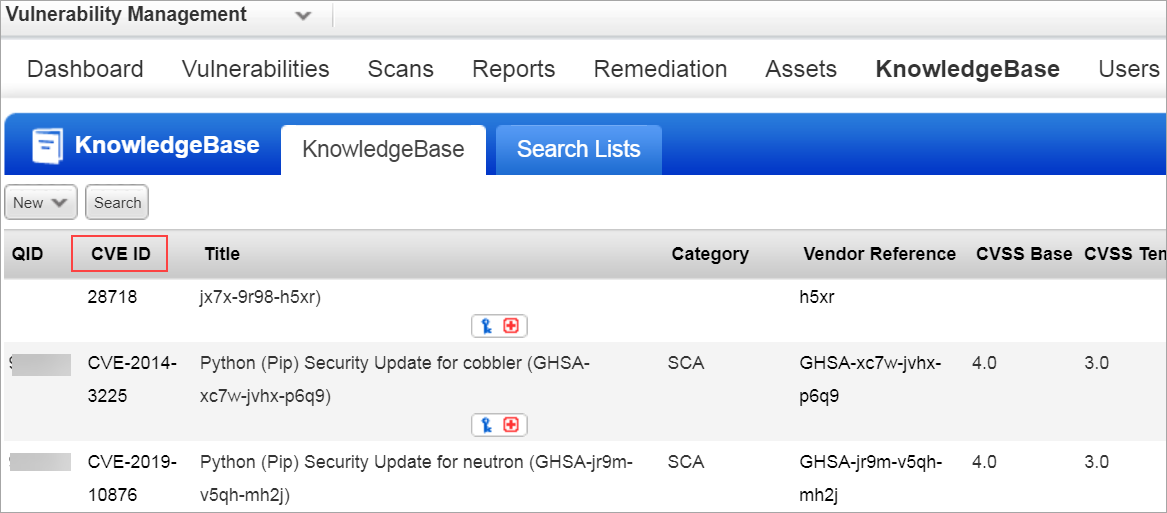
CVE ID Section Position Changed on the Search Page
To enhance the searchability and make it easier to identify, the CVE ID section in the KnowledgeBase is moved below the QID on the Search page and besides the QID on the search list page. This is applicable even if the QID service is enabled and disabled. This helps to identify the availability of the CVE ID easily. The following screenshots show the CVE ID position on the search page.
Scanner Appliance Troubleshooting Link
To enable users to resolve common issues related to scanner appliances, a link is added to the warning sign that when selected displays a window containing a list of articles and videos that help resolve issues related to scanner appliances.
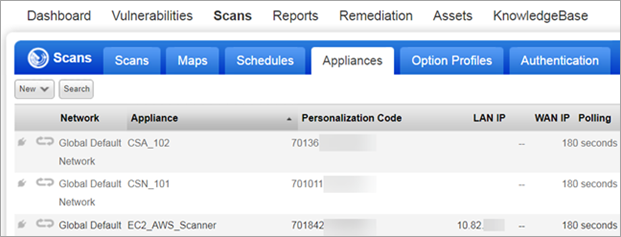
- Navigate to VM > Appliances.
- Select the appliance displaying the warning sign. Information of the appliance is displayed in the preview pane.
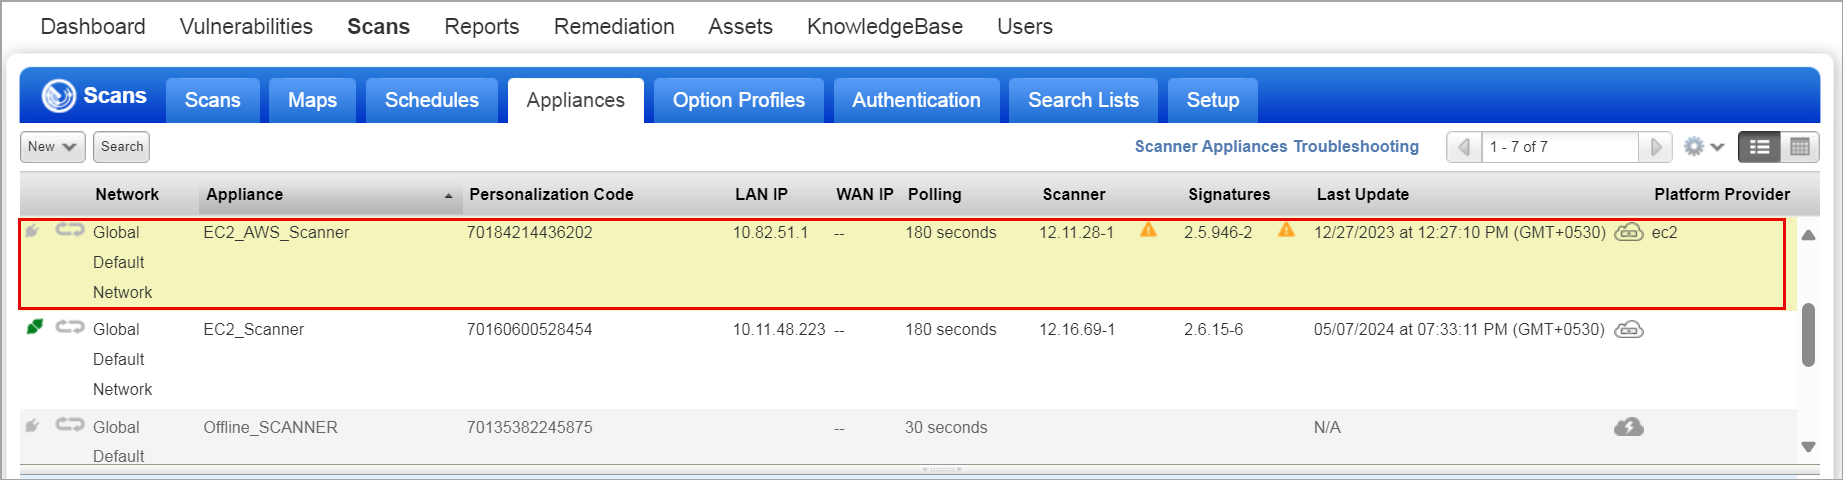
- In the preview pane, select the warning sign.

The Scanner Appliances Troubleshooting window is displayed. The window consists of several Articles and videos which you can refer to resolve scanner appliances issues.

User Interface Enhancements
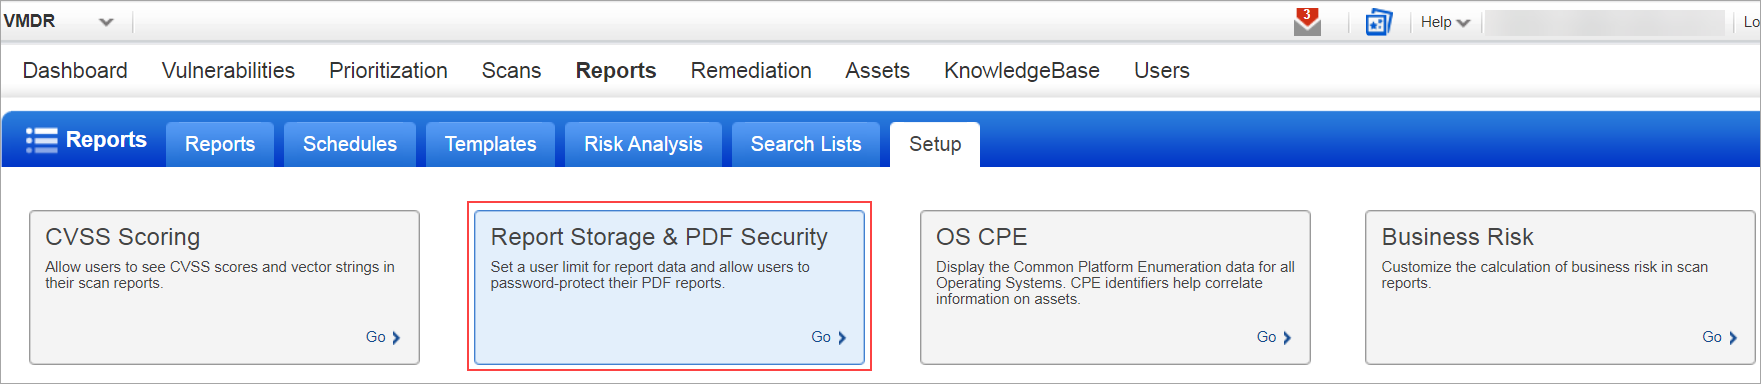
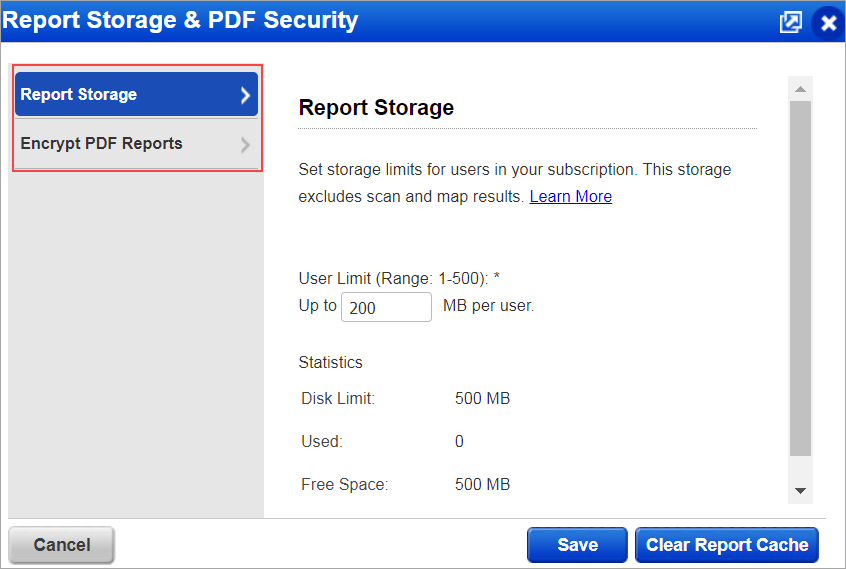
Report Storage and PDF Security
To enhance the user experience, implemented a change in the tab name, text in the description, and header names in the Report Setup tab(Go to VM > Reports > Setup > Report Storage and PDF Security). Earlier, the tab name was Report Share, now, it is renamed to Report Storage and PDF Security. The header name inside the tab is changed to Report Storage and Encrypt PDF Reports. This helps you to identify the functionality of the tab and generate their reports accordingly.
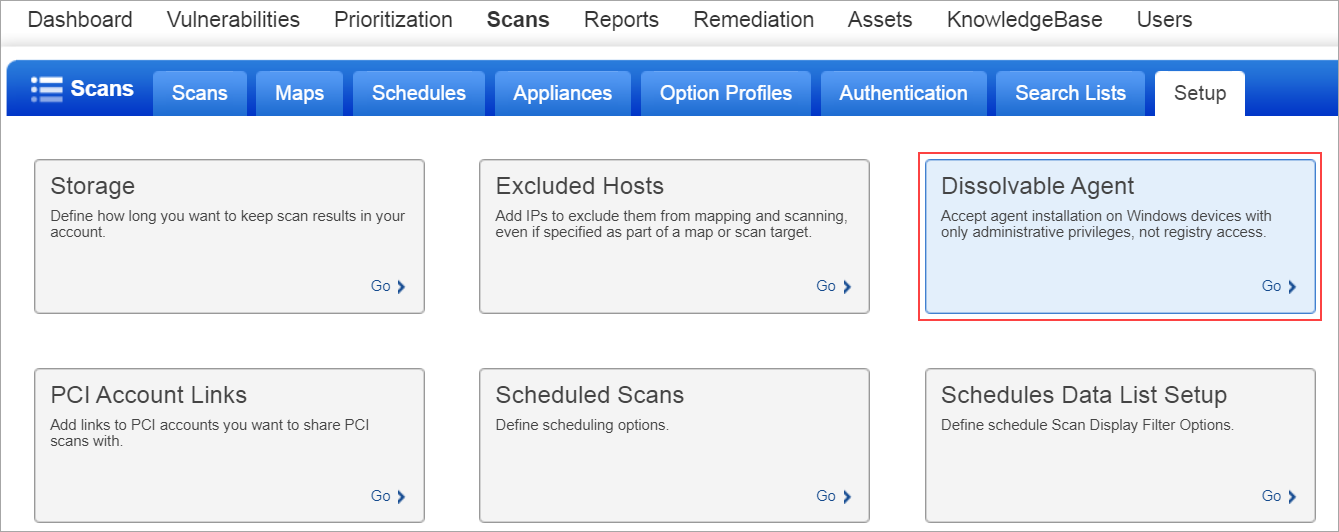
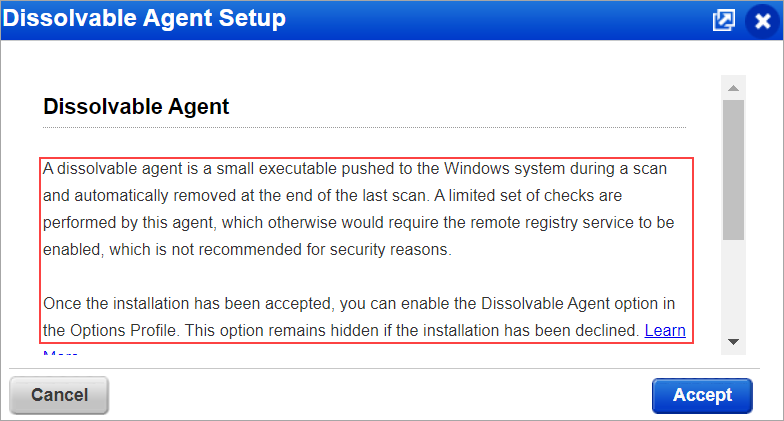
Dissolvable Agent
To enhance the user experience, we have improved the UI text on the Dissolvable Agent tab and the setup (Go to VM > Scans > Setup > Dissolvable Agent > Dissolvable Agent Setup). This helps you to understand a few key capabilities on Windows devices for which a dissolvable agent is required. With this, you can follow the text to accept the agent installation and perform the scans.
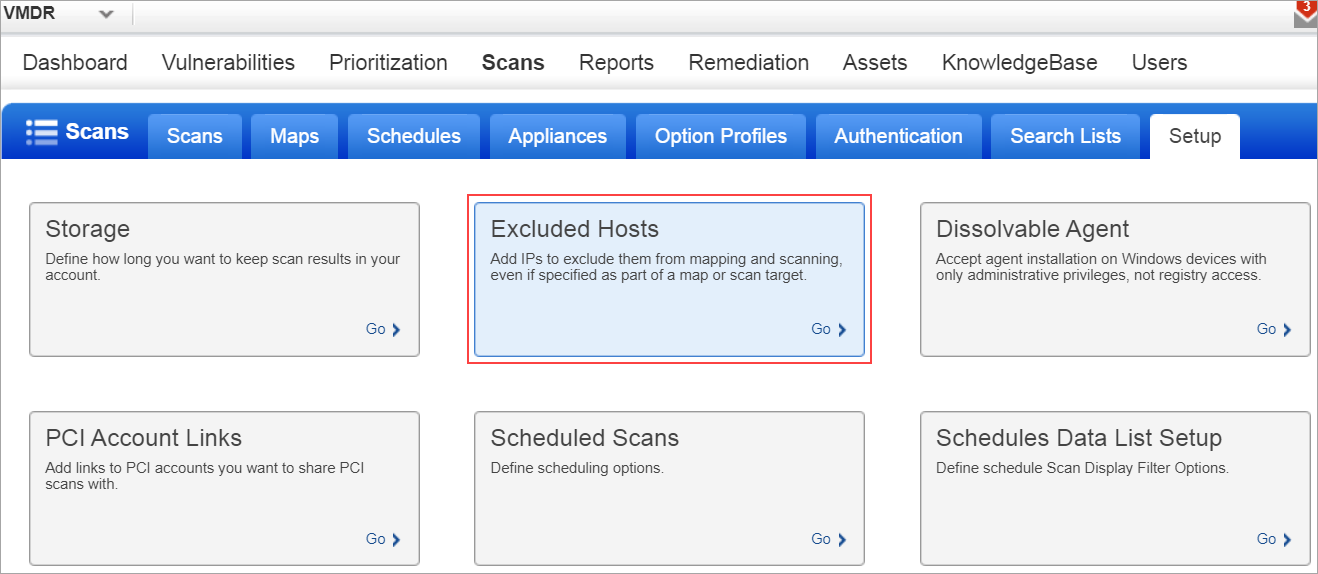
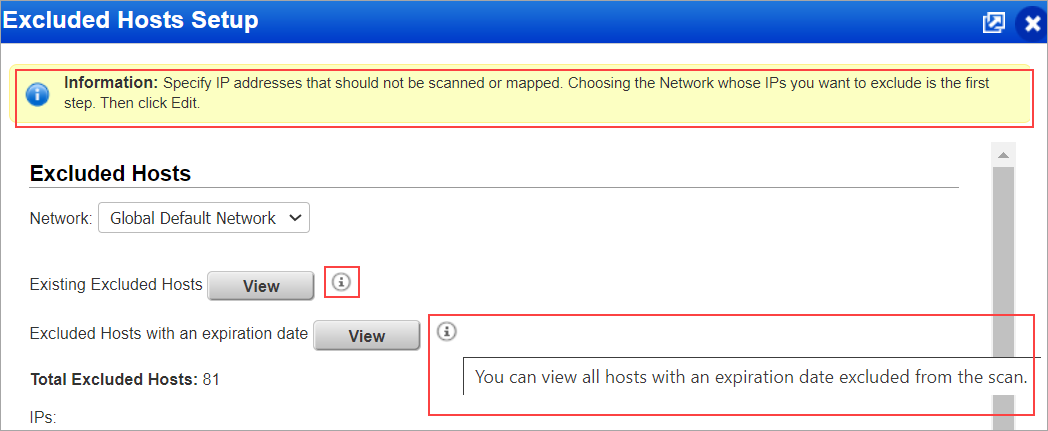
Excluded Hosts
To enhance the user experience, we have improved the UI text on the Excluded Host tab. The following improvements can be viewed, which can help you with easy navigation:
- Text information is provided on the Excluded Hosts tab to proceed further.
- An icon is provided in the fields next to Existing Excluded Hosts View and Excluded Hosts with an expiration date View to provide the functionality of the fields when you place your cursor.
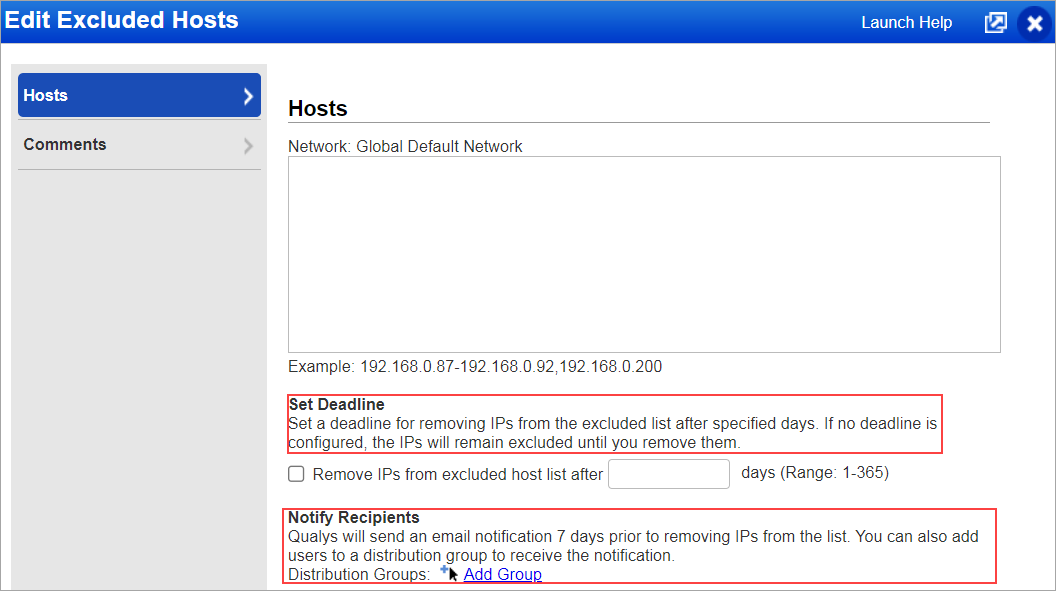
- Information regarding setting deadlines and notifying recipients is provided when you edit the Excluded Hosts Setup.
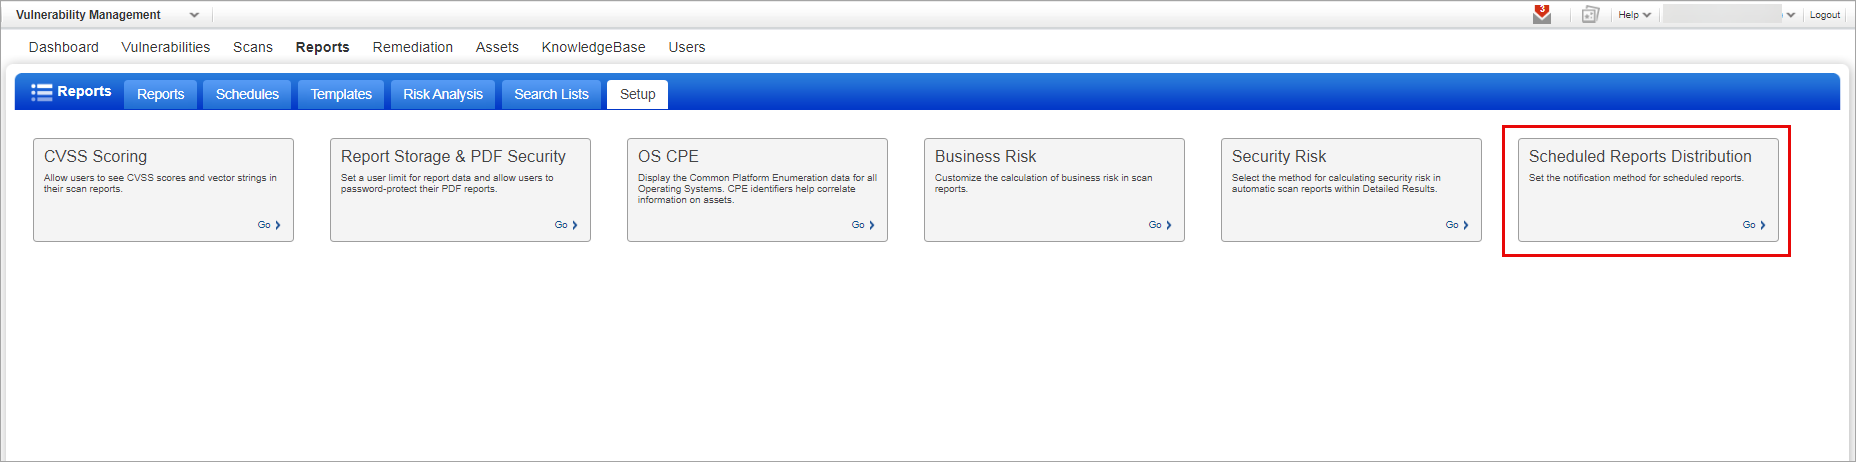
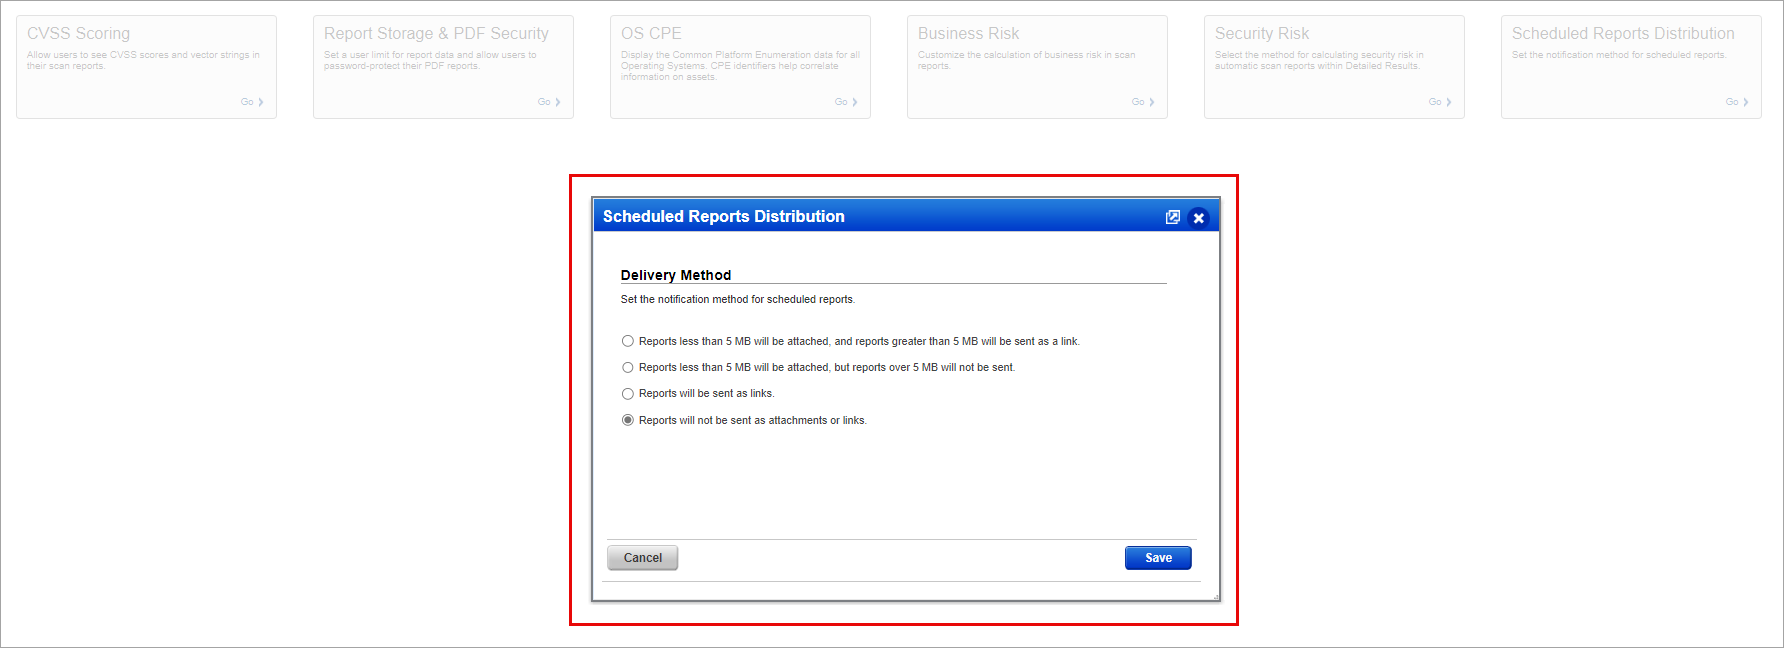
Schedule Reports Distribution for Reports
To enhance the user experience, we have changed the display name of Schedule Reports to Schedule Reports Distribution. The functionality of Schedule Reports Distribution remains the same, wherein you will be able to set the delivery method for notifications related to scheduled reports.
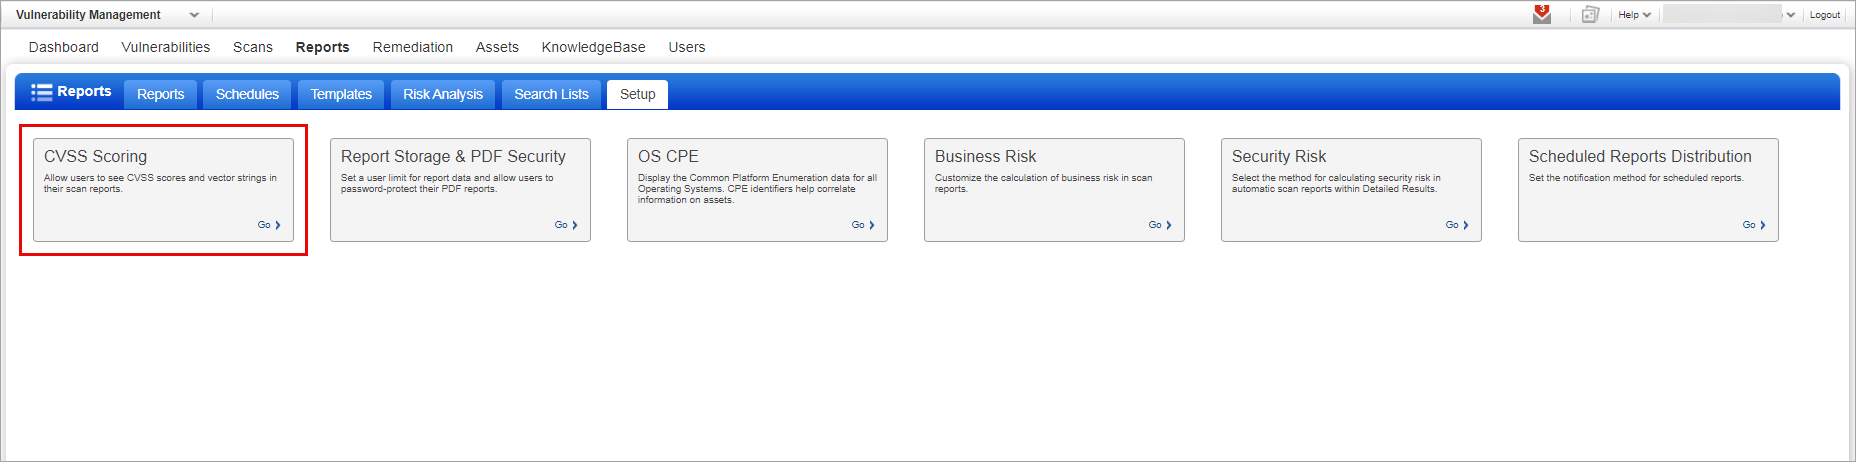
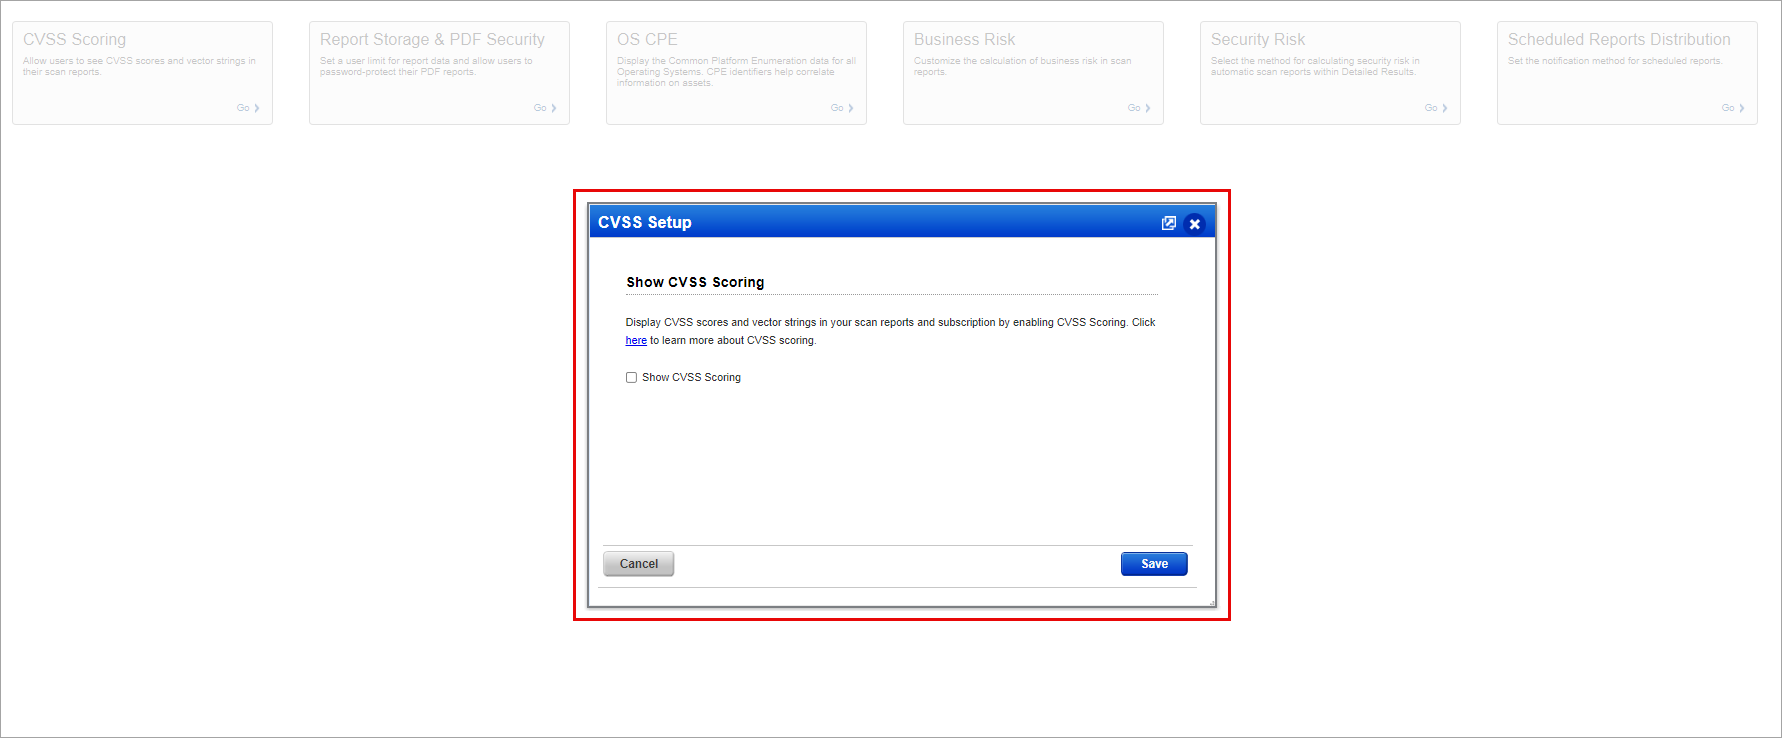
CVSS Scoring for Reports
To enhance the user experience, we have changed the display name of CVSS to CVSS Scoring. The functionality of CVSS Scoring remains the same, wherein you will be able to select the checkbox to enable the display of CVSS scores and vector strings in your scan reports and subscription.
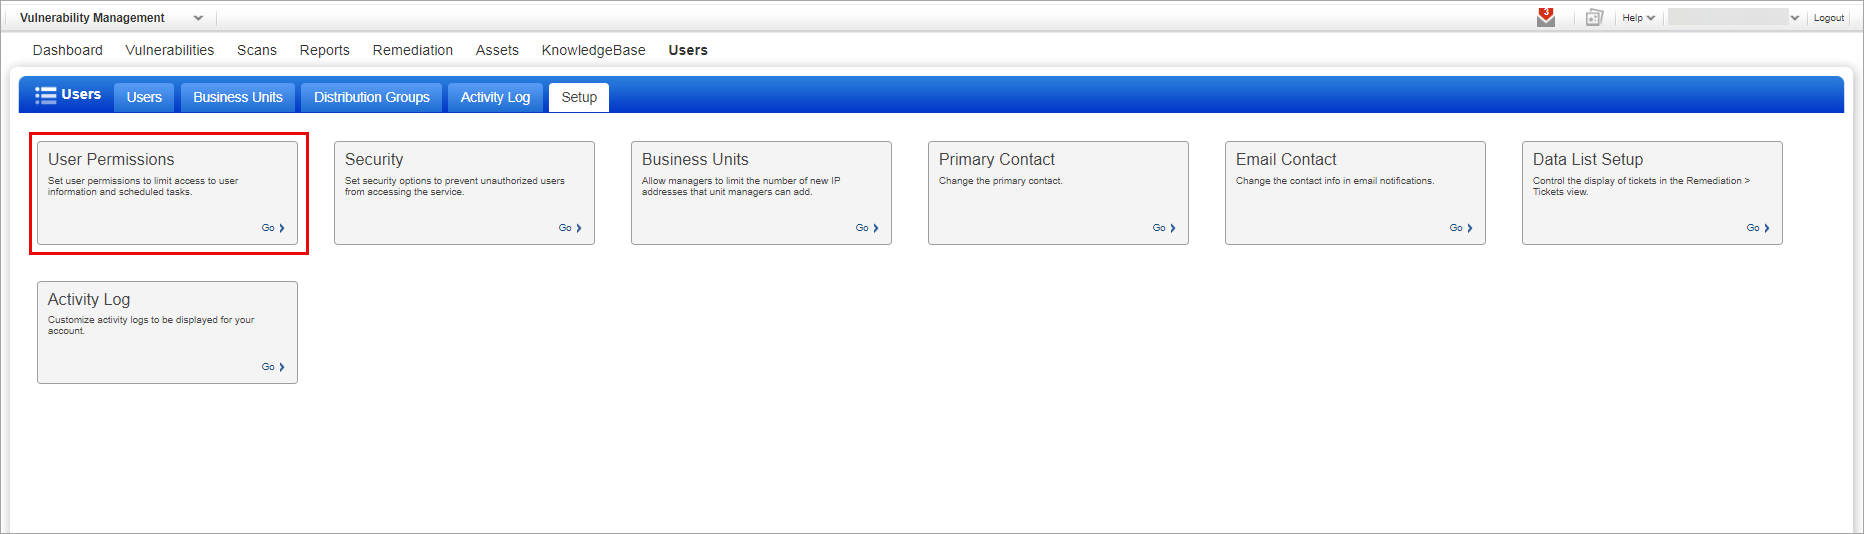
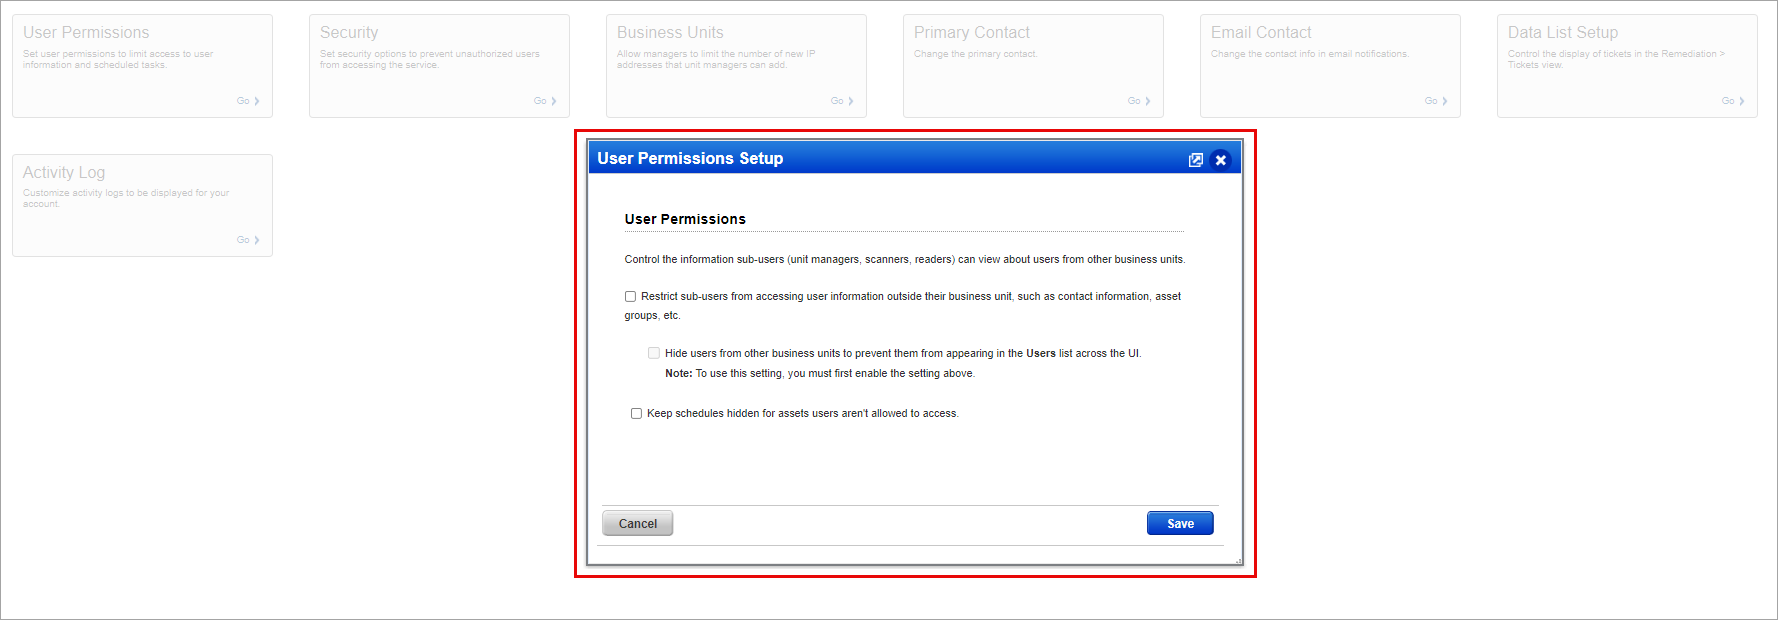
User Permissions
To enhance the user experience, we have updated the descriptions for the User Permissions tab. The new description enables a clear understanding of the functionality of the tab, which is to set user permissions to limit access to user information and scheduled tasks.
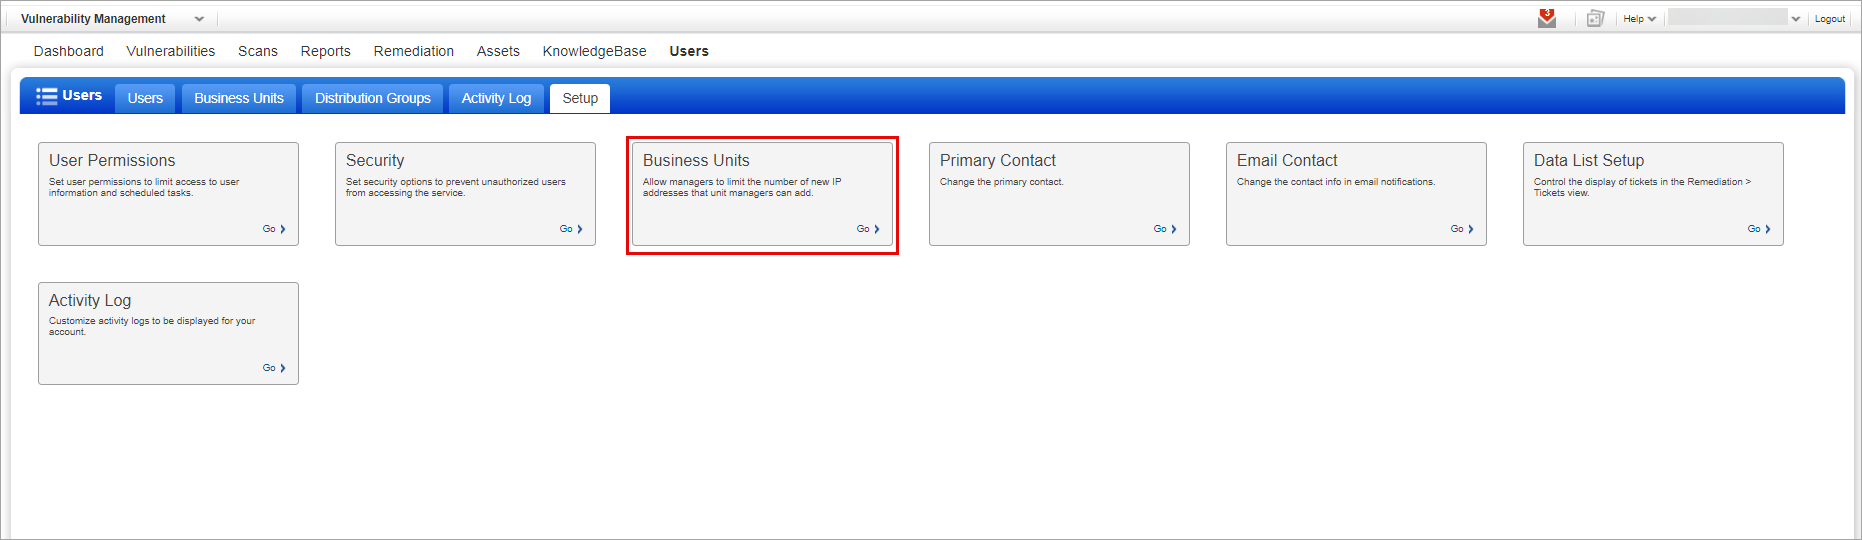
Business Units
To enhance the user experience, we have updated the descriptions for the User Permissions tab. The new description enables a clear understanding of the functionality of the tab, which is to Limit the number of IPs that unit managers can add to the subscription with Add Assets permission.

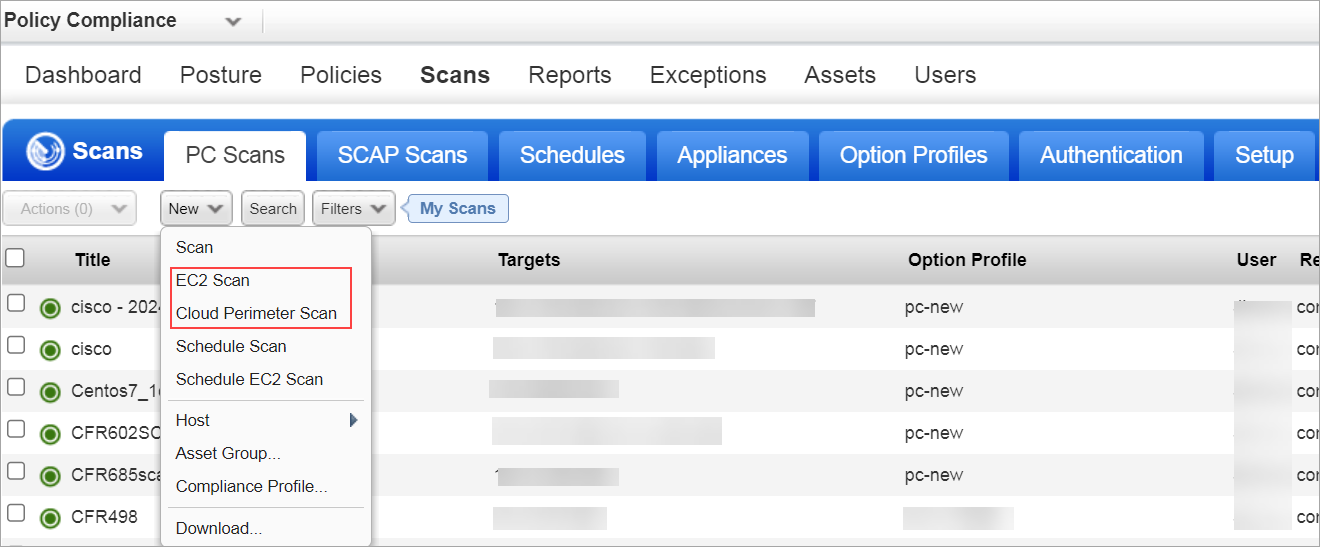
Allowing Scanner Users to Launch the Scans
With this release, we are providing support to Scanner users to launch an EC2 and Cloud Perimeter scan. This is applicable to both VM and PC. These scans are supported both in UI and API. Earlier, only managers and unit managers were able to launch the EC2 and Cloud Perimeter Scan. Now, it is extended to scanner users as well. If the Asset Group is assigned to scanner users, the users can scan all the assets and analyze the scan result to proceed with the subsequent actions.
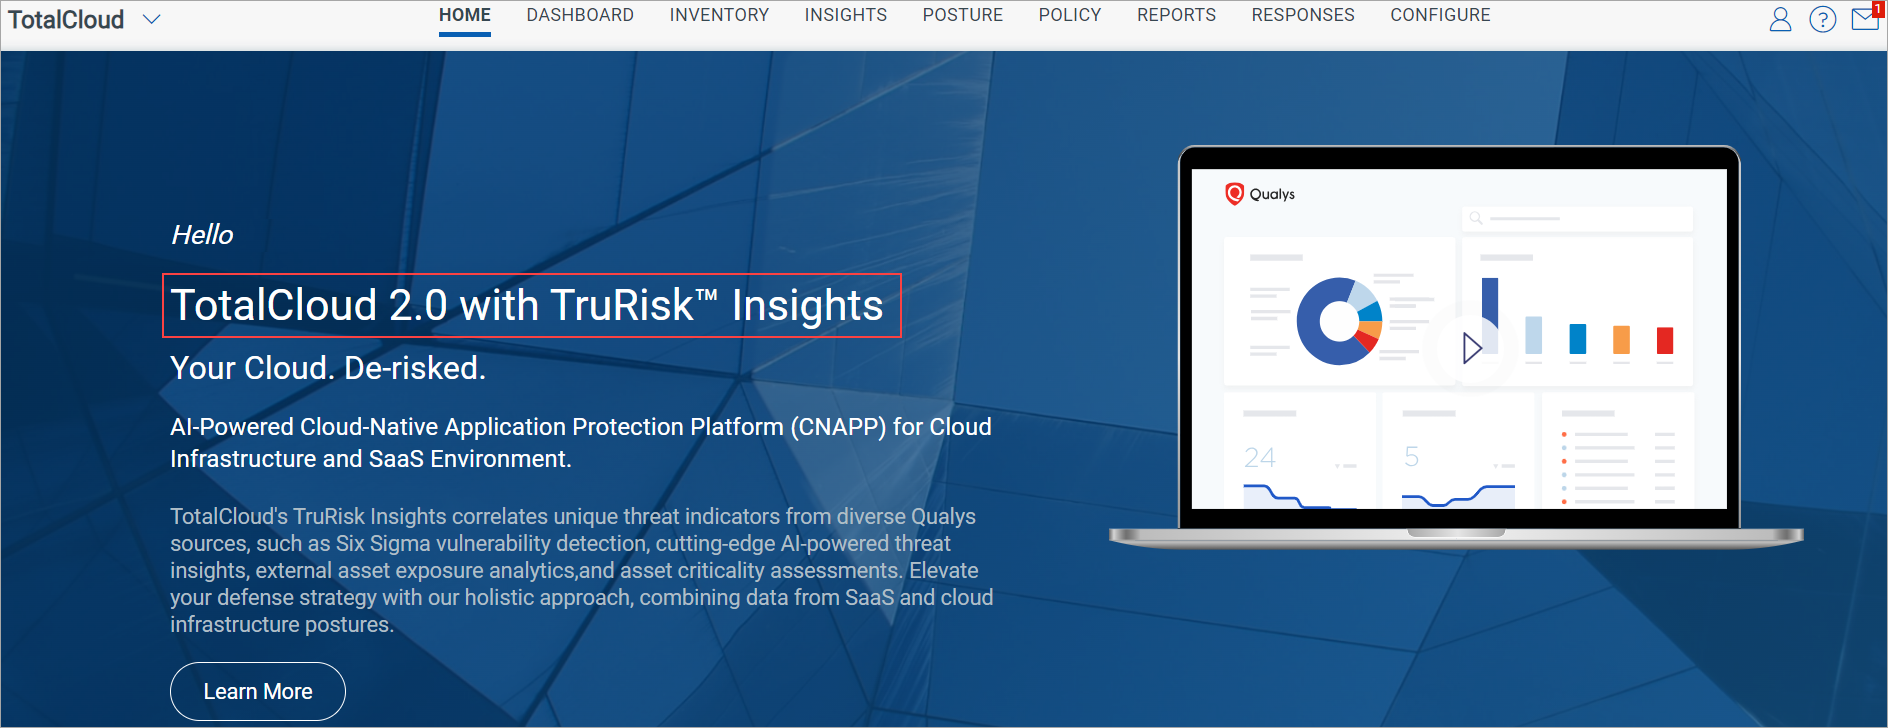
Home Page Enhancement for TotalCloud Users
To enhance the user experience, existing and new users of TotalCloud with trial account subscriptions created from API (website or salesforce) are redirected to TotalCloud instead of VMDR after logging in from the login page. The users of TotalCloud complete their trial account creation process, changing their password and creating a new password. When they log in with their new password, they are redirected to the TotalCloud home page. This helps users navigate to the TotalCloud home page directly.
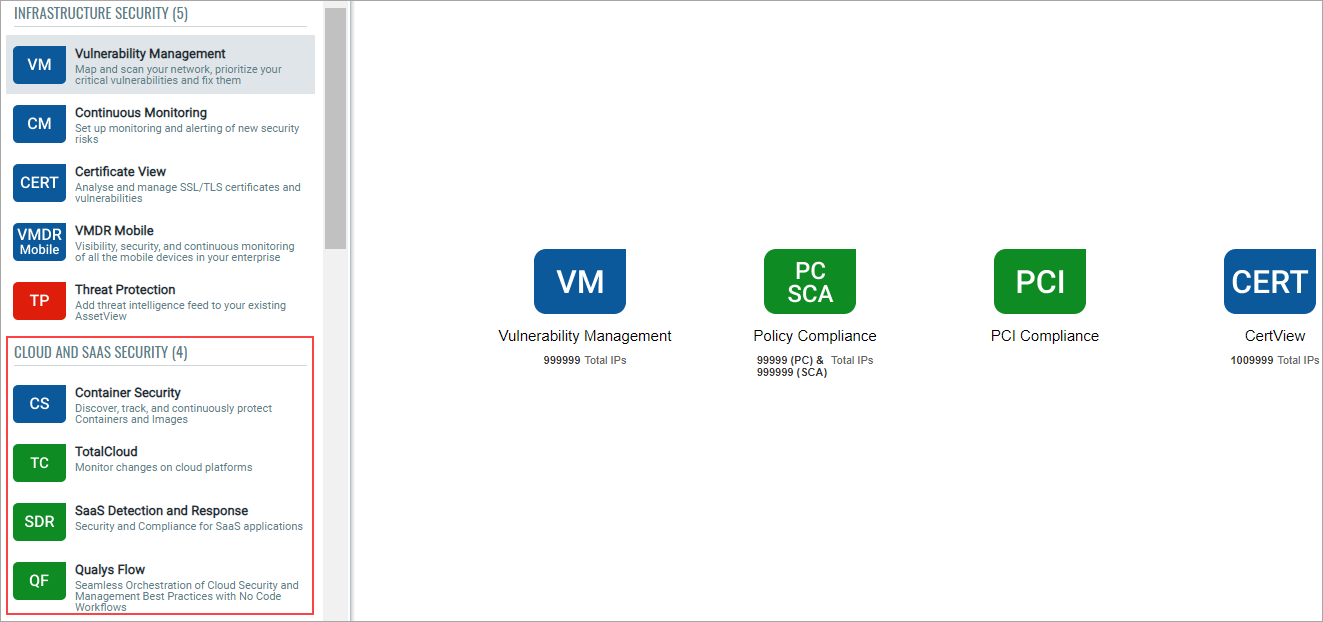
Introducing a new Group for Security Management
With this release, we have introduced Cloud and SaaS Security as a new group for security management for the following applications.
- TotalCloud
- Container Security
- SaaS Detection and Response
- Qualys Flow
Earlier, TotalCloud was under the Cloud Security group, Container Security, Qualys Flow was under the Infrastructure Security group, and SaaS Detection and Response was under the Compliance group. Now, you can view all the applications under the Cloud and SaaS Security group. All the above applications are visible in your Qualys account, provided you have enabled their individual subscription. With this update, you can leverage the security solutions as a part of the Cloud and SaaS security group to gain total visibility and security over all your resources.
Addition of EPSS QDS Factor
With this release, we have added EPSS as one of the supporting factors for prioritizing vulnerability using the APIs. The UI support is already provided on the VMDR. For more information about EPSS on VMDR User Interface, refer to Cloud Platform 3.17.1 release notes.
EPSS (Exploit Prediction Scoring System) is a scoring system that estimates the probability of a vulnerability being exploited. It helps to analyze the severity of the vulnerability and prioritize its remediation efforts.
Qualys API Support
EPSS is added to the Host List Detection API and KnowledgeBase (CVE-centric API) API as a QDS factor. Due to this addition, we have made changes to the following APIs. For more information, refer to Cloud Platform 10.27 API release notes.
- Host List Detection /api/2.0/fo/asset/host/vm/detection
- KnowledgeBase QVS Download in JSON Format /api/2.0/fo/knowledge_base/qvs
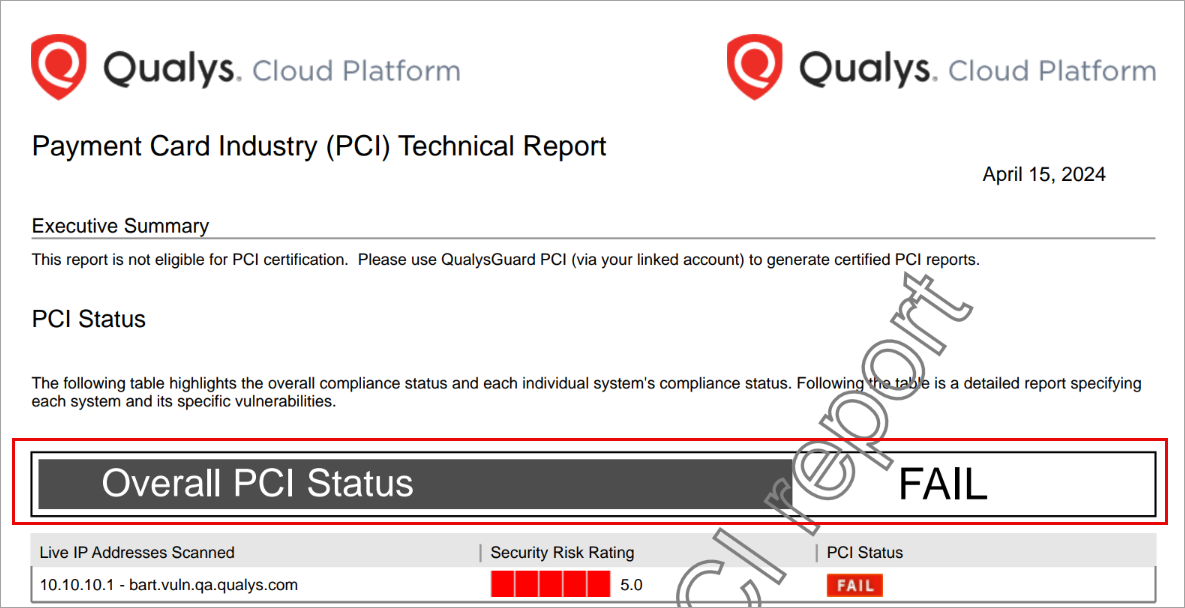
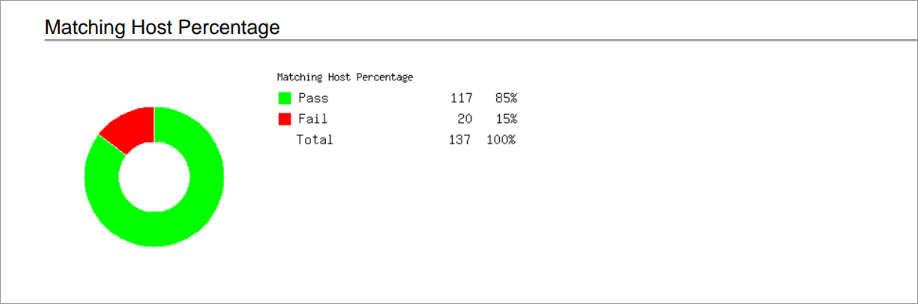
Validate Payment Card Industry (PCI) Technical Report Status
Previously users on downloading the Payment Card Industry (PCI) Technical reports observed that the status (Pass or Fail) given on the summary page of the report did not match the donut chart results given in the Matching Host Percentage section of the report. The conditions for displaying the results as Pass or Fail were, if the PCI status of a IP address scanned were all pass, the overall status is Pass, else if the PCI status of a even a single IP address scanned is false, the overall status is Fail. With this release, we have addressed this issue, thereby enabling users to view the correct PCI status.
To download a PCI report:
- Navigate to VM > Reports > Reports > New.
- In the displayed list, click Compliance Report.
- In Report Type, select Payment Card Industry (PCI) Executive Report.

- Click Next.
- Select from the scan results and click Run. The report is generated.
Manage Containerized Scanner Appliance
A containerized scanner appliance enables users to scan containerized environments effectively for vulnerabilities and malware. This ensures security of the containerized applications and infrastructure. By integrating containerized scanner appliances into your containerized environment, you can identify and prevent security vulnerabilities before they impact you systems.
With this release, you can create, list, update, and delete containerized scanner appliances on the Qualys platform. This feature is available only if you subscribe to it. The subscription can be acquired by connecting with the Qualys Support team. Once the support team approves your request, all Managers can perform the create, list, update, and delete operations for the containerized scanner appliance. However, Unit Managers and Scanners must be provided with the necessary permissions to perform these operations.
Create a new Containerized Scanner Appliance
- Under Vulnerability Management, goto Scans > Appliances > New > Containerized Scanner Appliances.
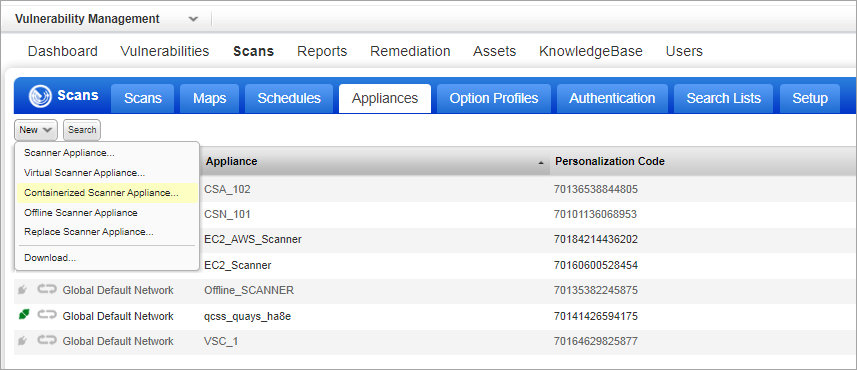
- In Add New Containerized Scanner, you can create an appliance using any one of the following options:
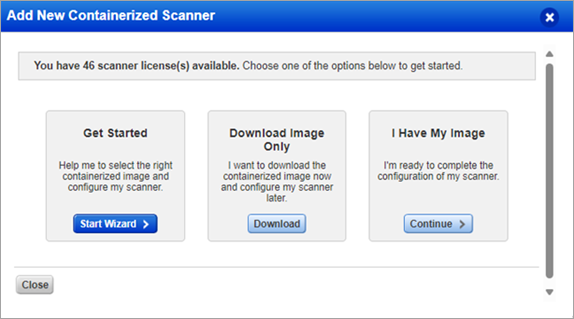
- Get Started - Enables you to create a containerized scanner appliance using a virtualization platform.
- Click Start Wizard.
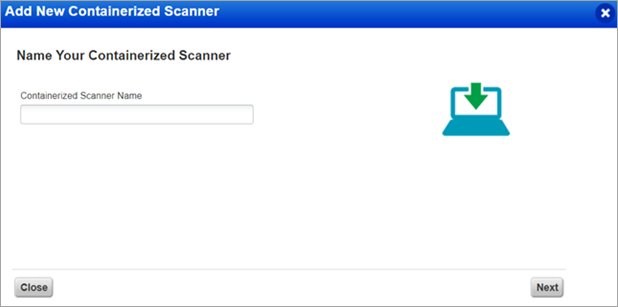
- In Containerized Scanner Name, enter a name for the scanner appliance.
- In Choose a Virtualization Platform, select a platform for the scanner appliance.
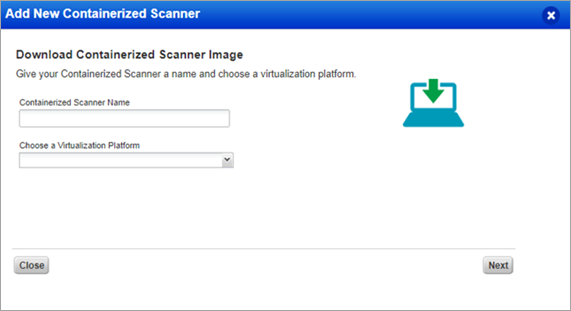
- Click Next.
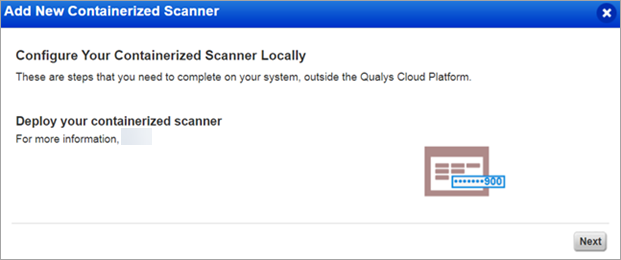
- Follow the steps given under Configure Your Containerized Scanner Locally and Locate the downloaded containerized scanner image.
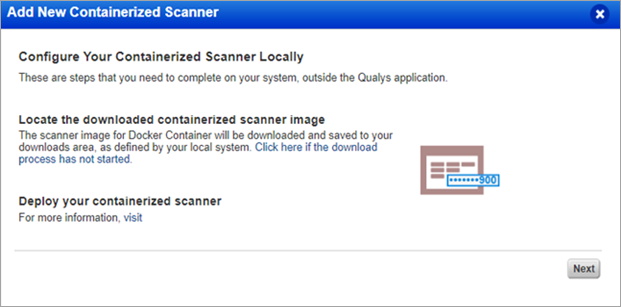
- Click Next.
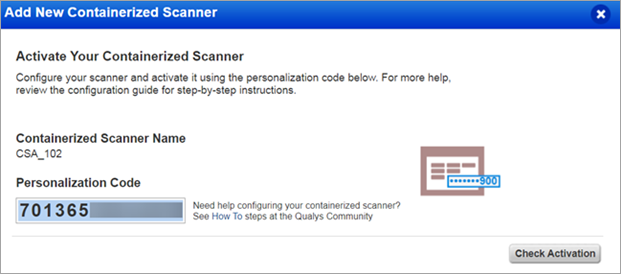
- Copy the Personalization Code and close the window.
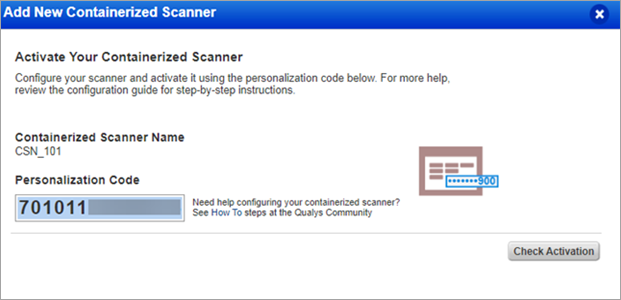
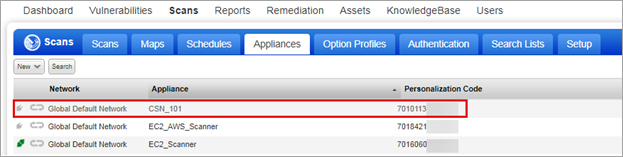
- Refresh the list of appliances. The newly created appliance is added to the list of Scanner Appliances.
- Download Image Only – Enables you to download the image only. Once you download the image, you can later proceed with configuring the scanner appliance.
- Click Download.
- In the Available Distributions window, click Download for a distribution package from which you want to download the image.
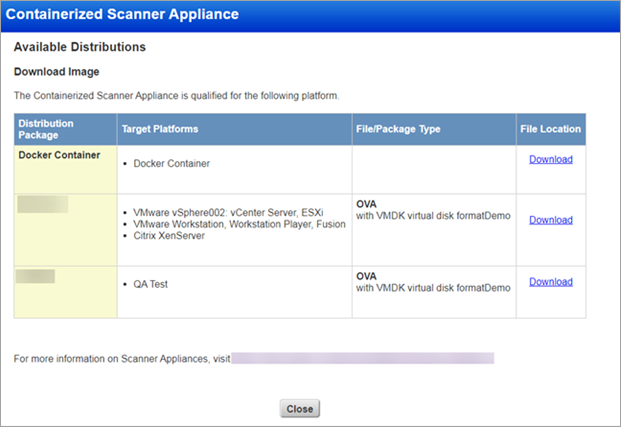
- In the Review and Agree to Virtual Scanner License, click I Agree.
Your image is downloaded.

- Once your image is downloaded, you can proceed to point c.
- Click Download.
- I have my Image – Enables you to proceed with creating a containerized scanner appliance with an existing containerized image.
- Click Continue.
- In Containerized Scanner Name, enter a name for the scanner appliance and click Next.
- If the containerized scanner is to be deployed, click Next.
- Copy the Personalization Code and close the window.
- Refresh the list of appliances. The newly created appliance is added to the list of Scanner Appliances.
- Click Continue.
- Get Started - Enables you to create a containerized scanner appliance using a virtualization platform.
Update a Containerized Scanner Appliance
You can update only those Containerized Scanner Appliances that are marked as ready. The appliances that are ready will be marked with a green icon (![]() ).
).
- Navigate to Scans > Appliances.
- For a containerized scanner appliance you want to update, point your cursor on the appliance and select the more options arrow > Edit.

OR
Select the Containerized Scanner Appliance you want to update. Its details are displayed in the Preview section. In Preview, click Actions > Edit.

- In the Edit Scanner Appliance, edit the required details.
- Click Save. The changes are updated, and a success message is displayed.
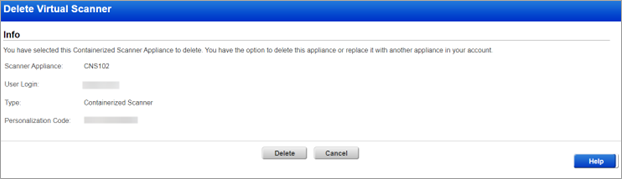
Delete a Containerized Scanner Appliance
- Navigate to Scans > Appliances.
- For a containerized scanner appliance you want to update, point your cursor on the appliance and select the more options arrow > Delete.
OR
Select the Containerized Scanner Appliance you want to update. Its details are displayed in the Preview section. In Preview, click Actions > Delete.
- In the Delete Containerized Scanner window, click Delete.
- In the Warning window, click Delete.
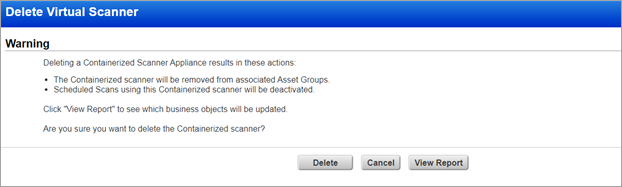
The scanner appliance is deleted.
Search for a Containerized Scanner Appliance
- To search for a containerized scanner appliance, under Vulnerability Scan, navigate to Scans > Appliances.
- Click Search.
- In the Search window, in the field Scanner Type, select Containerized > Search.
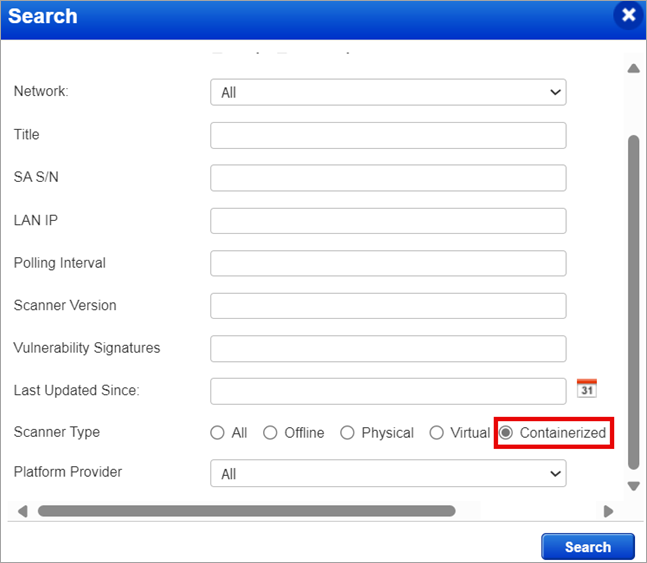
The Search results for containerized scanner appliances are displayed.
Qualys API Support
Due to this enhancement, we made a few changes to the following APIs. For more information, refer to Cloud Platform 10.27 API release notes.
- Create Containerized Scanner Appliance – /api/2.0/fo/appliance/qcss/?action=create
- List Containerized Scanner Appliance – /api/2.0/fo/appliance/qcss/?action=list
- Update Containerized Scanner Appliance – /api/2.0/fo/appliance/qcss/?action=update
- Delete Containerized Scanner Appliance – /api/2.0/fo/appliance/qcss/?action=delete
Qualys Policy Compliance (PC)
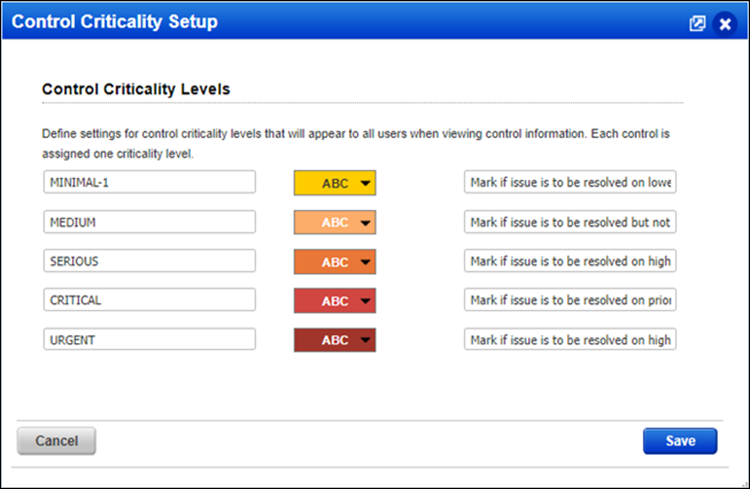
Add Definitions for Control Criticality Levels
With this enhancement, we have added text boxes where you can add definitions for the different Control Criticality Levels based on your requirements. The text limit for each definition is set to 256 characters.
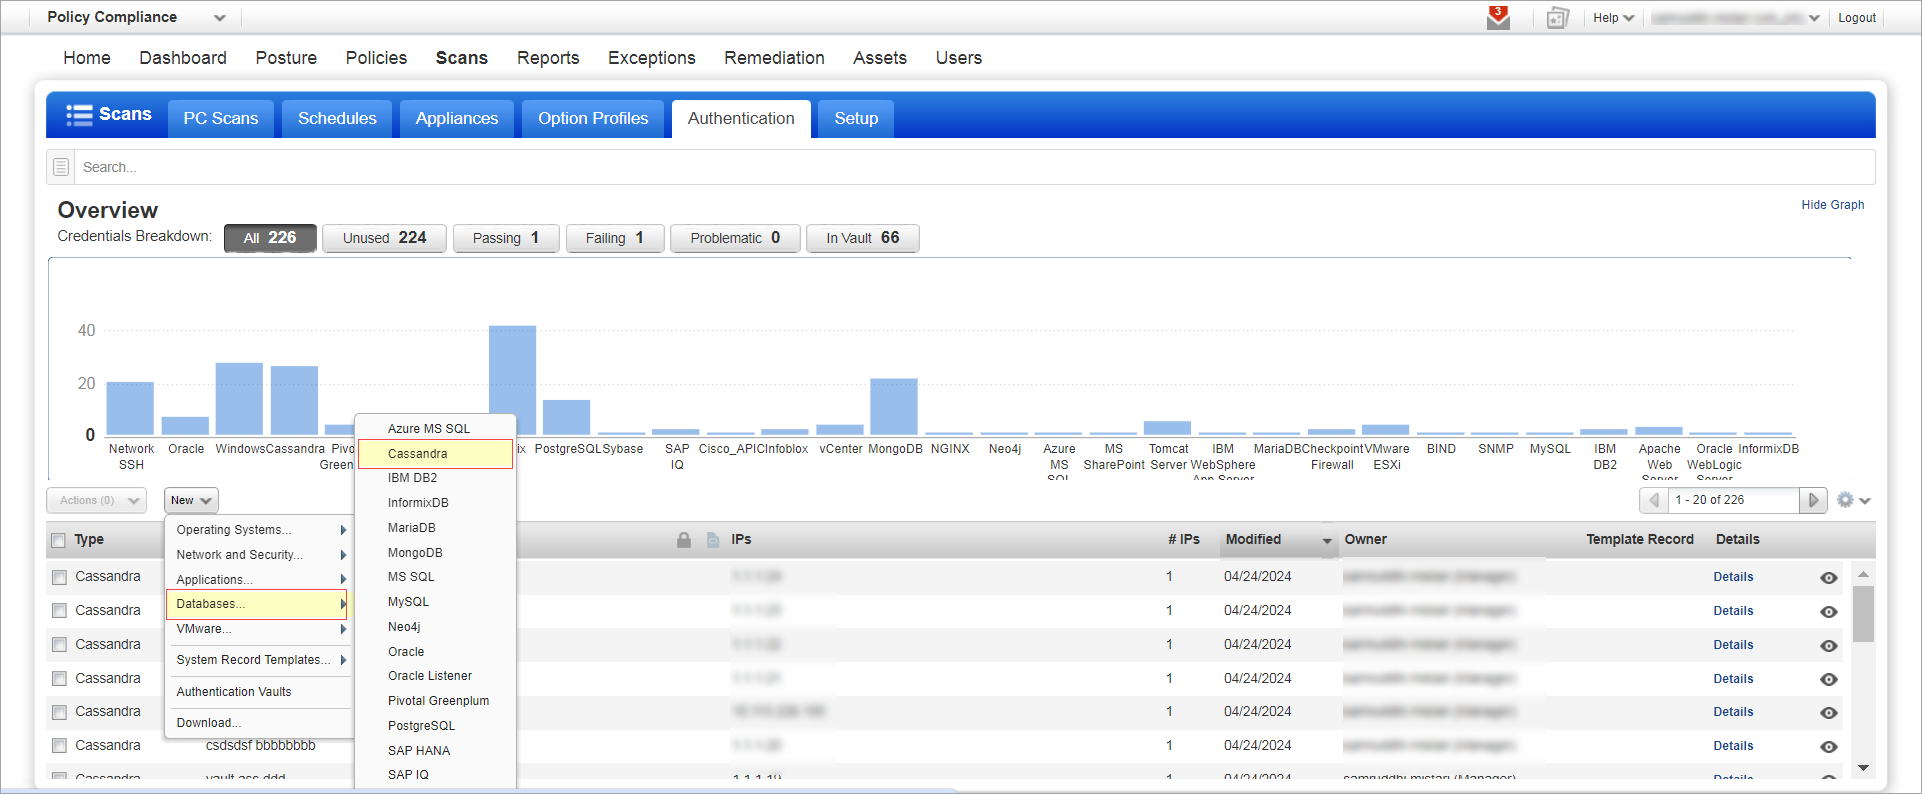
Apache Cassandra (3.x/4.x) Authentication
Qualys supports Apache Cassandra authentication for compliance scans using Qualys apps PC, SCA. Simply create an Apache Cassandra authentication record with details about your credentials to authenticate to an Apache Cassandra database instance running on a host, and scan it for compliance.
How Do I Get Started?
Go to Scans > Authentication, and choose New > Databases > Cassandra:
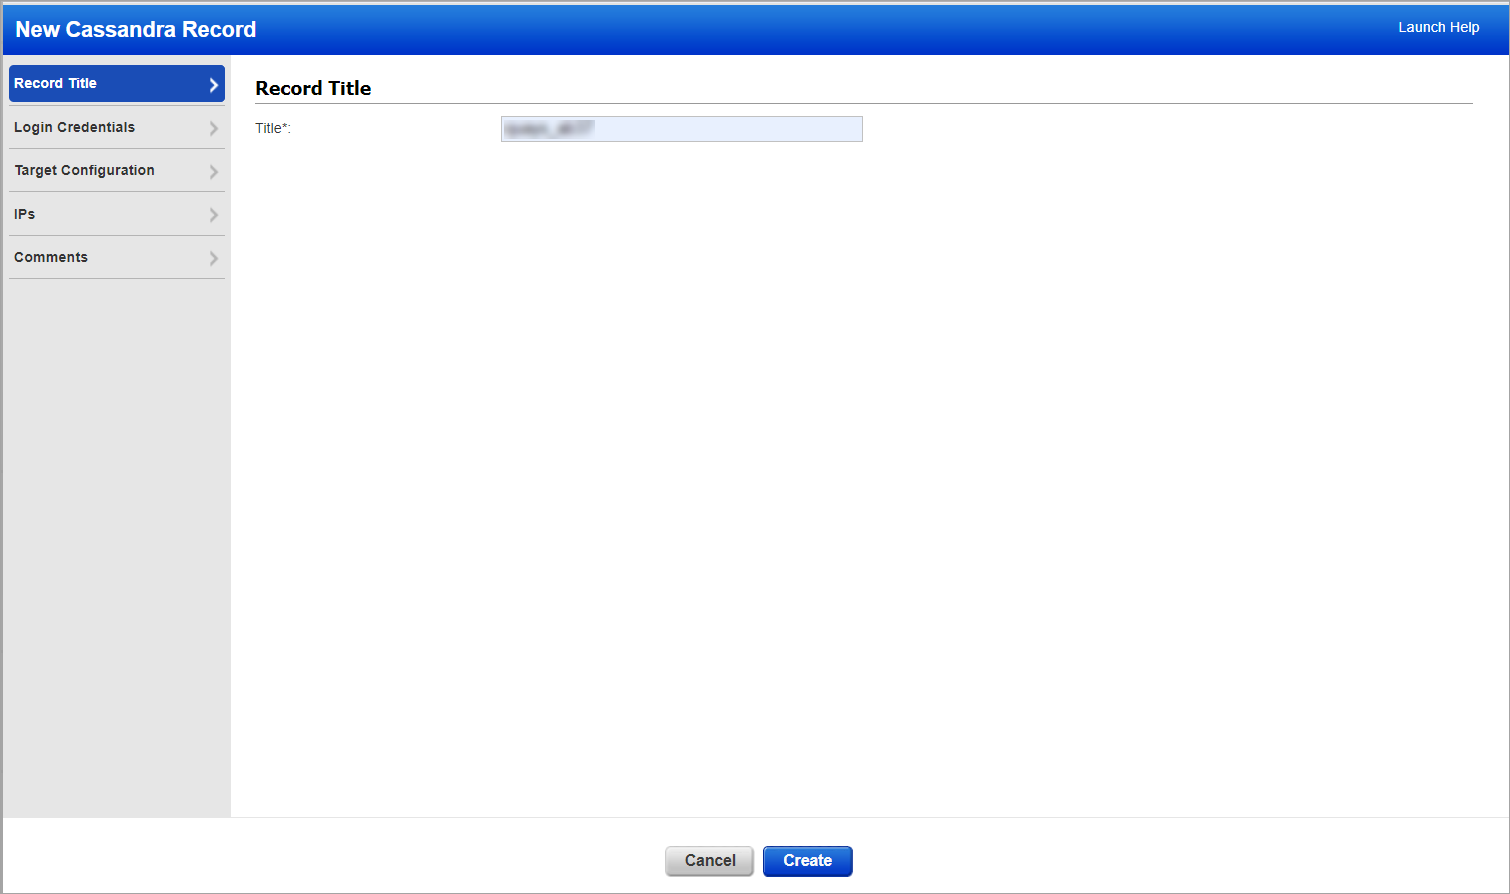
Apache Cassandra Authentication Record
The Scans > Authentication section is where you find authentication records saved in your account, including Cassandra records.
Each Apache Cassandra record identifies account login credentials, database information, and target hosts (IPs). Both basic and vault-based authentication are supported. Vault-based authentication is supported for the following vaults:
• CyberArk AIM
• Thycotic Secret Server
• HashiCorp
• Azure Key
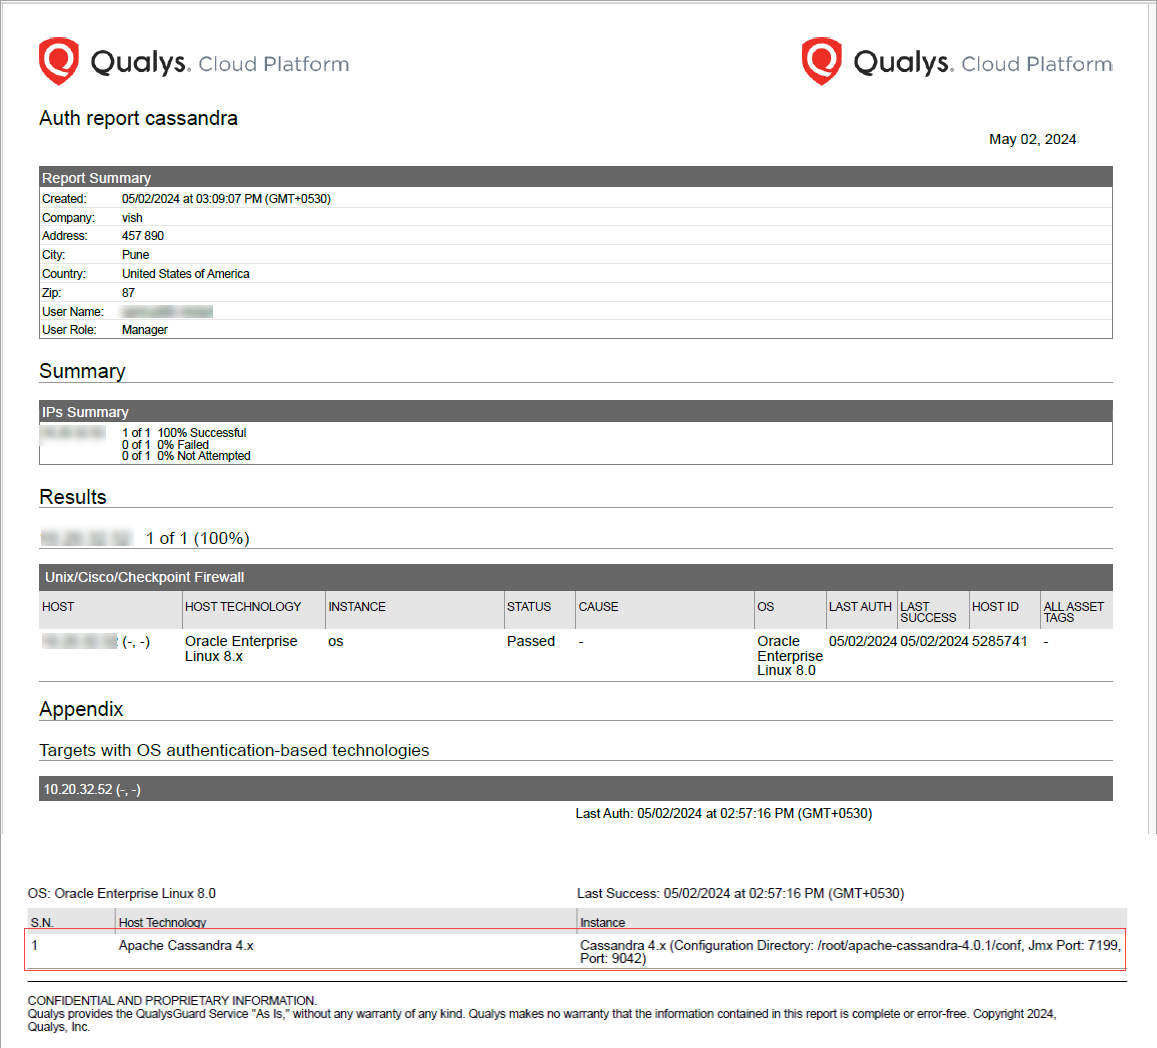
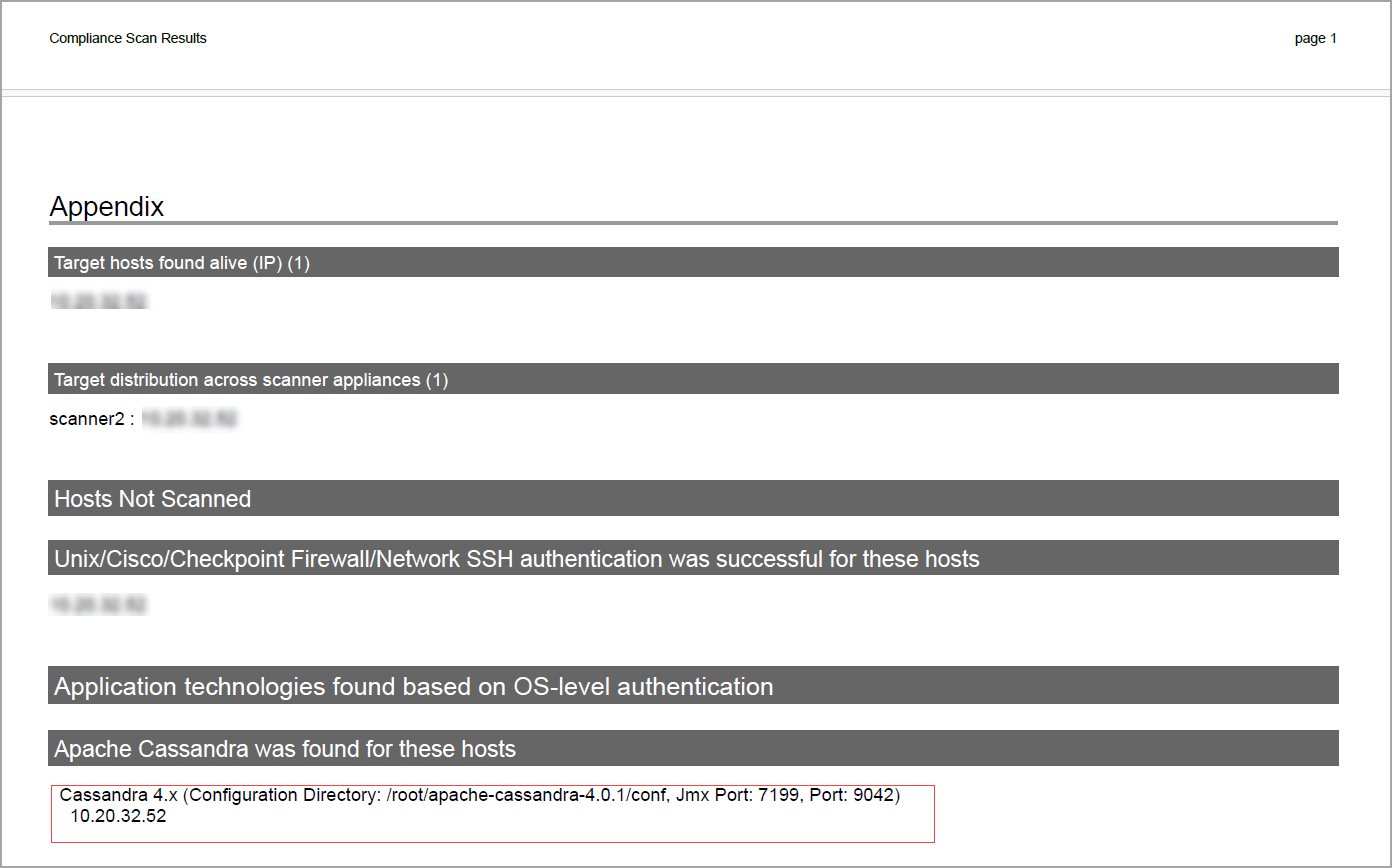
Sample Report/Scan Result
Apache Cassandra instances in compliance scan results and reports:
Sample report
Sample scan results
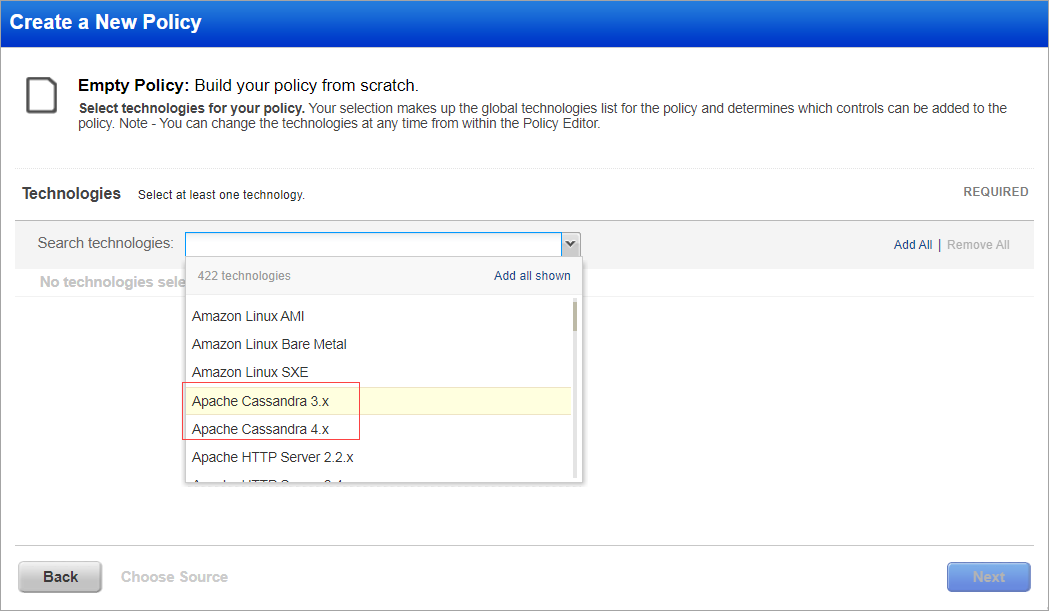
Policy and Controls
When creating new policies or searching for controls, you have the option to select Apache Cassandra.
Qualys API Support
Due to this enhancement, we added a new api /api/2.0/fo/auth/cassandra. For more information, refer to Cloud Platform 10.27 API release notes.
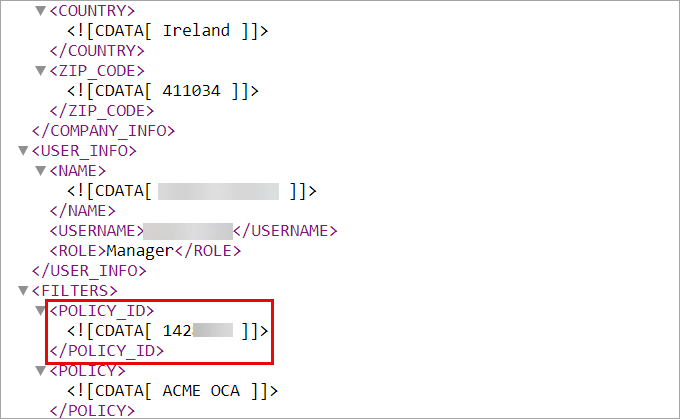
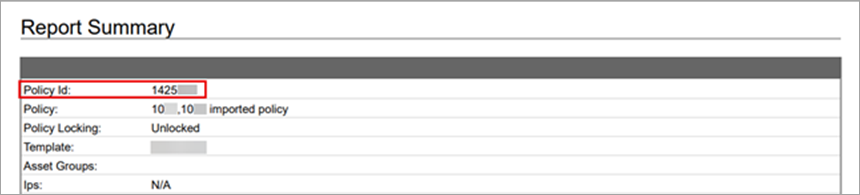
View Policy ID
With this enhancement, you can now view the field - Policy ID for Policy Reports that are generated in the formats Extensible Markup Language (XML), HTML, Portable Document Format (PDF), and in the Web Archive (MHT).
- Extensible Markup Language (XML) format
- HTML format
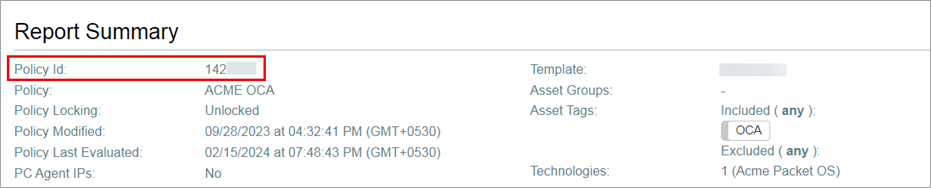
- Portable Document Format (PDF)
Issues Addressed
The following issues are fixed with this release.
| Component/Category | Application |
Description |
| VM - Login issues | Vulnerability Management | When the users were trying to log in to the account after the renewal of their subscription, they were able to log in without two-factor authentication. Relevant code changes have been made to fix this issue. |
| VM - Reports General | Vulnerability Management | When the users were launching a scheduled Scan report with target asset groups and tagset, they were facing an error and were not able to view the last launch scheduled report as the Tag used was empty. Relevant code changes have been made to fix this issue and now if Tag is empty report can be executed on AG only. |
| VM - API General | Vulnerability Management | When the Reader users tried to make authenticated requests through API, they were able to view the user list in API for users outside of the business unit, even when the restrict view option was enabled.Relevant code changes have been made to fix this issue. |
| VM - API General | Vulnerability Management | When the users were trying to launch the Report through API using a template having "All" in asset groups, they were experiencing a 999 error. This error was seen when their subscription did not have any asset groups. Relevant code changes have been made to fix this issue. |
| VM - Authentication Records | Vulnerability Management | When the users with the unit manager role tried to edit the unix auth record, they were able to view the assets which were not in their scope. Relevant code changes have been made to fix this issue. |
| VM - Feature Request | Vulnerability Management | When the users logged in to their account and navigated to Scan > Setup > Scanner Trusted CA, they observed that their names were missing from a few certificates. Relevant code changes have been made to fix this issue. |
| VM-Login Issues | Vulnerability Management | When the users logged into their accounts/subscriptions in the grace period (a limited period after the account subscription date has ended), they were able to access their accounts without using two-factor authentication checks. Relevant code changes have been made to resolve this issue. Users will now have to perform the two-factor authentication checks even when their account is in the grace period and is expected to be renewed. |
| VM - Feature Request | Vulnerability Management | When the users were generating PCI reports, the reports cover page indicated a different result from the one given on the summary page. Relevant code changes have been made to resolve this issue. |
| QWEB | Vulnerability Management | When the users were creating support tickets using the customer support portal, they had to specify the QIDs alligning to their tickets. This resulted to many support tickets being false positives. Relevant code changes have been made to resolve this issue. Users can now view the threat detection logic which allows them to mark the correct QIDs to the support tickets. |
| Documentation | Vulnerability Management | While executing API endpoint /api/2.0/fo/schedule/scan/schedule_scan_list_output, the users found that the XML response indicated the values (2 and 3) for active schedule, whose meanings were not defined. This is now updated in the Qualys API (VM/PC): User Guide, under the section Scheduled Scan List Output. |
| VM - Authentication Records | Vulnerability Management | When sub-users were accessing the Windows Authentication Records without IPs (NetBIOS, Service-Selected IPs or Active Directory), they were able to see only those records that they have created. Whereas, the records that were created by other users were not be visible to them. The users were unaware that this was the existing functionality of the product. This has now been added to the Online Help document. |
| QWEB | Vulnerability Management | When users were trying to pass the Host List Detection API, they were getting two different set of responses. The QIDs given in one response were missing from the other response. This happened because of the QID status was marked as half red half yellow, which is Confirmed or Potential. This condition is now added in the Qualys VM/PC API User Guide, under the section Host List Detection. |
| PC - Reports | Policy Compliance | When the users tried to generate a policy compliance report from the AGMS enabled account, they observed that the control compliance over time graph was not generated for DNS/NetBios tracked assets. Relevant code changes have been made to fix this issue. |
| PC - Reports | Policy Compliance | When the users generated a policy compliance report, they were not able to view the information on the Unexpected Values field under the Cause of Failure section in the policy report summary. Relevant code changes have been made to fix this issue. |
| QWEB | Policy Compliance | When the users were creating support tickets using the customer support portal, they had to specify the QIDs alligning to their tickets. This resulted to many support tickets being false positives. Relevant code changes have been made to resolve this issue. Users can now view the threat detection logic which allows them to mark the correct QIDs to the support tickets. For more information refer to the Information Segment-Threat (detection logic). |