Enterprise TruRisk™ Platform Release 10.37
January 5, 2026
Qualys Vulnerability Management (VM)
New Authentication Support for VMware NSX
With this release, we have introduced authentication support for VMware NSX environments. This capability allows you to securely authenticate to NSX managed components using VMware NSX credentials, enabling authenticated vulnerability and compliance assessments of supported NSX services and appliances.
You can create, update, delete, and list VMware NSX authentication records directly within Qualys. Both basic authentication and vault-based authentication are supported. Vault based authentication is currently supported with HashiCorp Vault.
This enhancement simplifies secure access to NSX environments, improves assessment accuracy through authenticated scanning, and reduces operational overhead when managing credentials at scale.
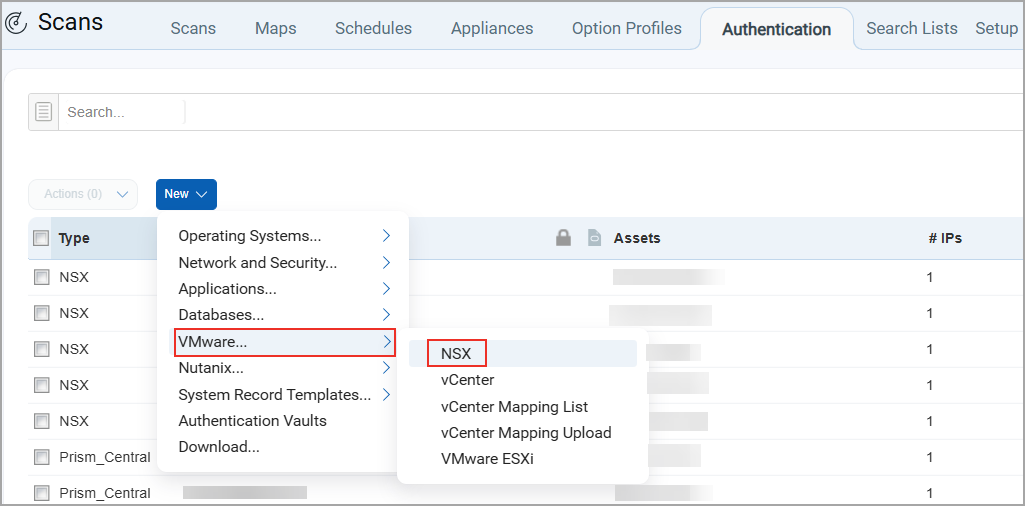
We have also added VMware NSX checkbox under the Authentication field (Scans > Option Profiles > New > Option Profile > Scan). You must create an option profile in the VM/VMDR to select the authentication type for scanning. This authentication enables the scanner to log in to hosts during scanning, thereby extending its detection capabilities.
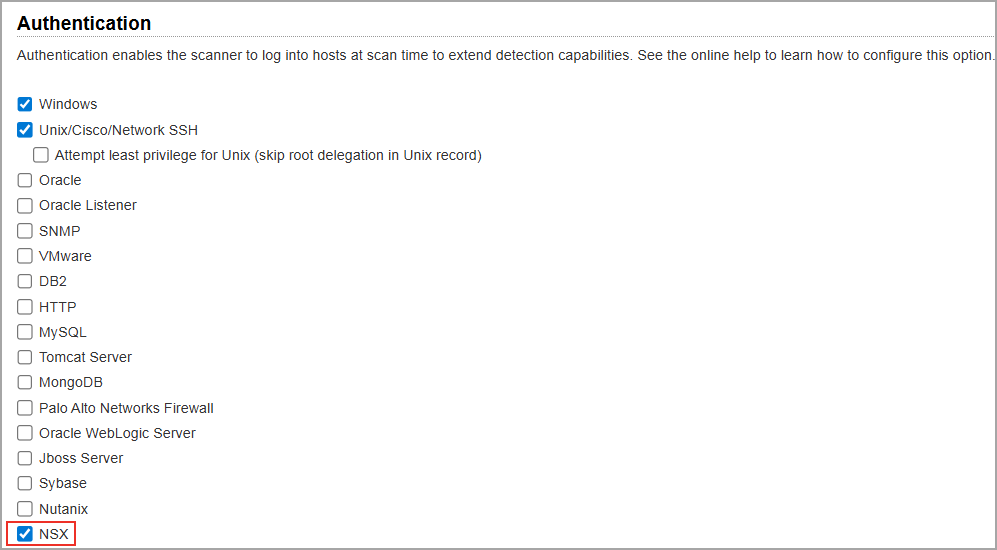
Once you launch the scan by enabling the NSX checkbox in the option profile, you can view all the details in the authentication report when the scan is completed successfully.
- This feature is applicable only if you have VMSP (Vulnerability management Scan processing) enabled account subscribed.
- This authentication support is applicable to both Vulnerability Management (VM) and Policy Audit (PA).
Qualys API Support for VMware NSX
For this enhancement, a new and updated version of the following API's is available:
Authentication API: /api/2.0/fo/auth/nsx
Option Profile API: /api/2.0/fo/subscription/option_profile/vm/
For more information, refer to Enterprise TruRisk Platform Release 10.37 API.
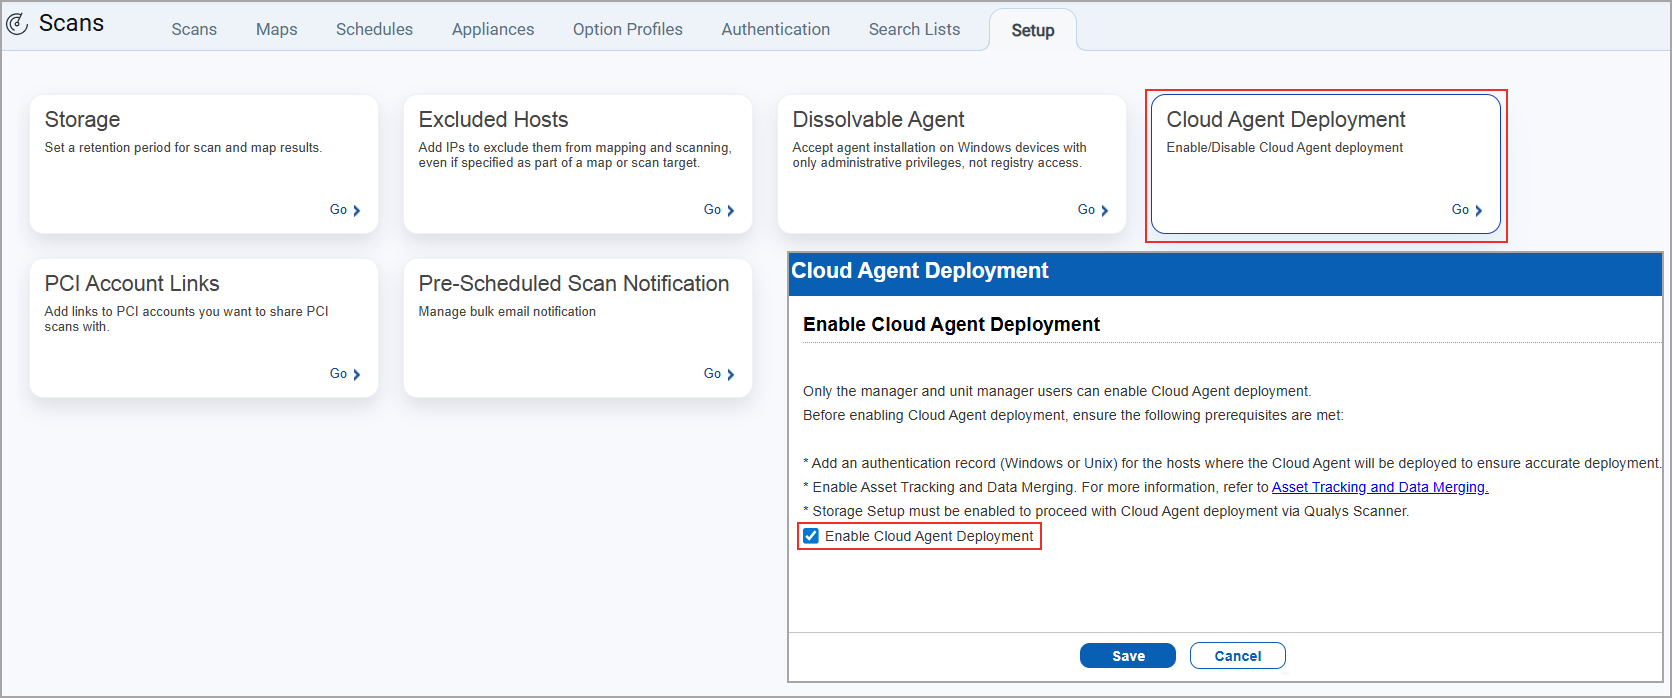
Enhanced Access to Launch Cloud Agent Deployment Scans
Previously, only users with the Manager role (those with primary contact and those without primary contact) were able to enable Cloud Agent Deployment and launch scans.
With this enhancement, Unit Managers can now enable cloud agent deployment scans within their Business Unit.
To enable Cloud Agent Deployment, go to Scans > Setup > Cloud Agent Deployment. Cloud Agent Deployment can be enabled by either a Manager or Unit Managers. Once enabled by one, all Manager, Unit Manager users of that subscription can launch the deployment scans.
Once enabled, the Cloud Agent Deployment option is displayed in the New list on the scan listing page (Scans > New > Cloud Agent Deployment). When you select this option, the Launch Agent Deployment window displays to launch the deployment scan.
When any Manager or Unit Manager enables this option, it is automatically activated for all the other three users (Primary Contact Manager, Managers (Non-primary contacts), and Unit managers) within the same subscription.
When the Manager or the Unit Manager launches a scan, Cloud Agent Deployment is visible in the New and Filters list. Similarly, once the scan is completed, Cloud Agent Deployment is visible in the New and Filters list under the Report tab to generate the report.
Enhanced Forgot Password Workflow with OTP Verification
With this release, we have improved the Forgot Password workflow by introducing OTP-based verification. This enhancement strengthens user identity verification and ensures a secure password reset process.
Workflow
- On the Login page, click Forgot Password.
The Forgot Password page displays. - Enter Username, registered Email Address, and Captcha, and select Send Email.
You will receive an email with a link to reset your password:
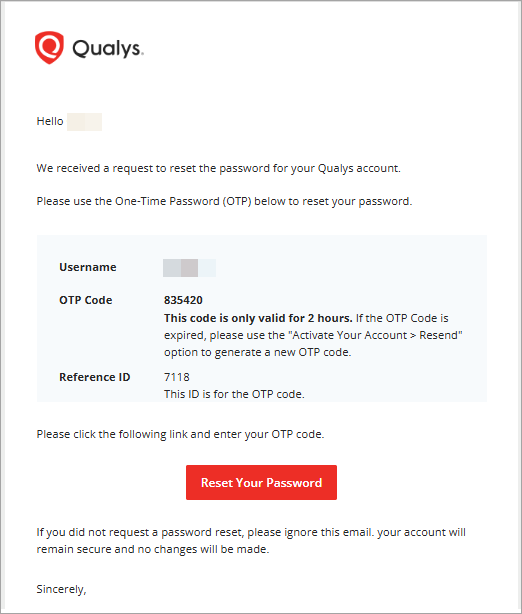
- Select Reset Your Password
You will be redirected to the OTP Verification page. - On the OTP Verification page, enter the OTP and click Submit.
- On successful OTP verification, you will be redirected to the Change Password page.
- Update your password.
After successfully updating the password, a confirmation message will display, and a confirmation email will be sent.
OTP Validation Rules
- A maximum of three attempts is allowed to enter the correct OTP.
- The OTP is valid for two hours.
- An error message displays for expired or invalid OTP.
- Password change is not allowed for NCSM, VIP-enabled, and accounts with security questions set.
You can request to resend OTP on the OTP verification page. If the OTP request is re-triggered within an hour, a new OTP with a unique Reference ID is generated. The old OTP expires automatically.
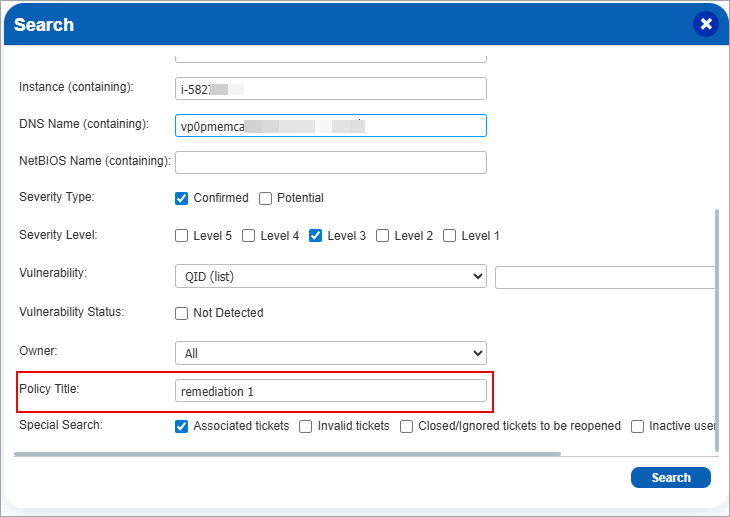
Enhanced UI for Remediation Policy Title Search
With this release, we have enhanced the Remediation tab allowing users to search tickets using the remediation Policy Title and view the policy title in the ticket listing page. This improvement simplifies ticket management and helps users quickly identify and delete tickets associated with specific remediation policies, significantly reducing manual effort.
Benefits
This enhancement addresses the challenge of handling large ticket volumes by providing a quick and effective way to delete tickets linked to a specific remediation policy.
Key Enhancements
Introduced a new Policy Title search field in the ticket Search popup:
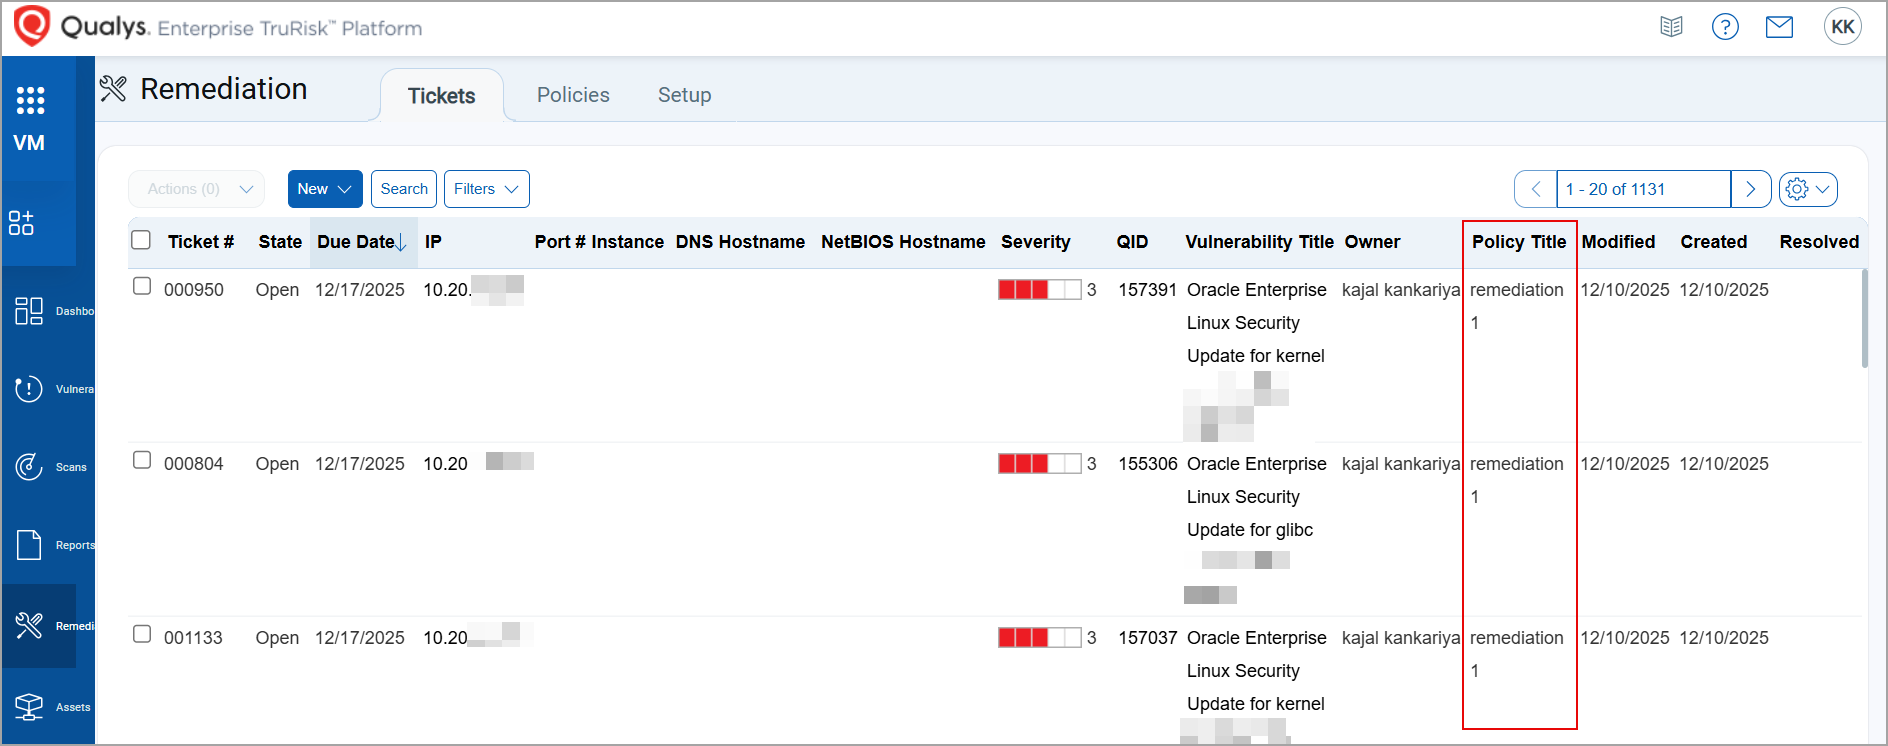
Added a new Policy Title column to the Tickets listing page:
You can now:
- Efficiently search and manage tickets by policy title and perform bulk actions such as delete and edit.
- Download filtered tickets in all supported formats.
- Apply policy title filters when setting up remediation data lists.
- The existing search functionality continues to work as intended.
- Remediation tickets created manually will have a blank value under the Policy Title column. These tickets cannot be searched using a blank value for Policy Title.
Improved Validation for Advanced Debug Scans
Previously, when you performed an advanced debug scan by navigating to Scans > New > Debug Scan > Scanner Debug Modes > Advanced, you were expected to select Custom QIDs (limited to 20 QIDs) in the option profile (Option Profiles > New > Option Profile > Scan > Vulnerability Detection > Custom).
If you selected more than 20 QIDs or selected Complete QIDs in the option profile (Option Profiles > New > Option Profile > Scan > Vulnerability Detection > Complete), the advanced debug scan automatically downgraded from advanced debug level to normal debug level. This caused incomplete data collection and required you to rerun the scan multiple times, which was both challenging and time-consuming.
With this release, when you perform an advanced debug scan and select Custom QIDs with more than 20 QIDs in the option profile, we now display an error message. This message informs you to limit your selection to 20 or fewer QIDs to ensure the scan runs at the advanced debug level, saving you time and effort. This helps to maintain the integrity of advanced debug scans for better troubleshooting.
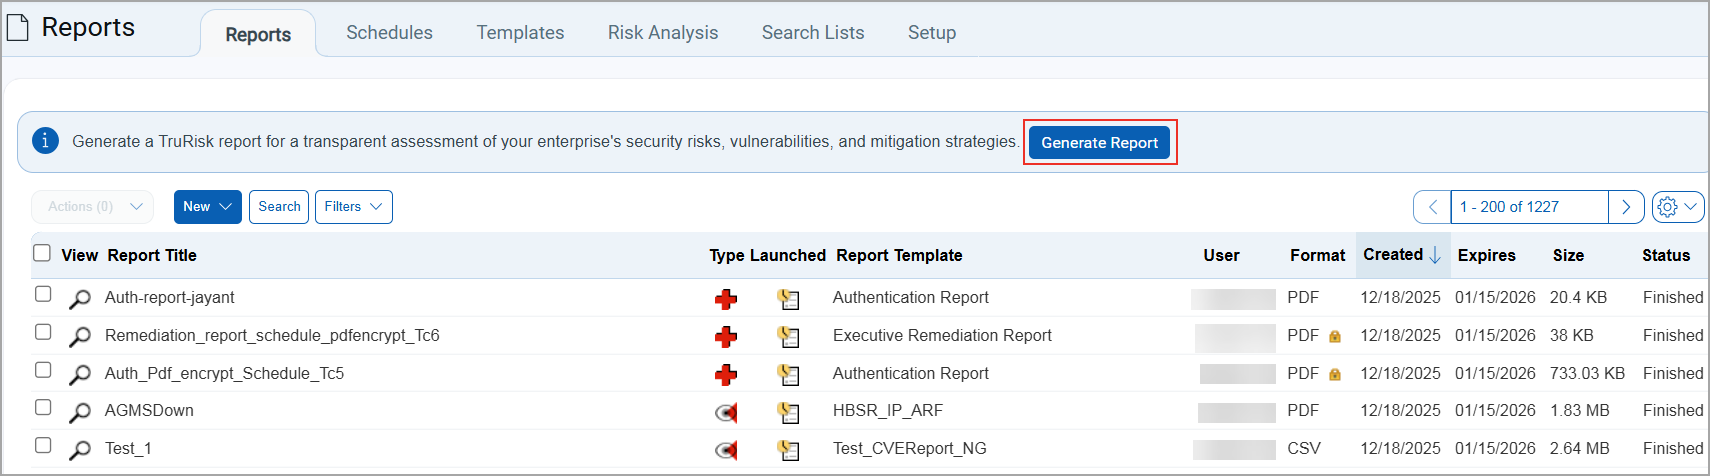
Enhancement in Permissions to generate the TruRisk Report
Previously, only the users with the Manager role were able to generate TruRisk reports. With this enhancement, sub-users can now generate, download, or delete TruRisk reports based on the permissions assigned by their Manager.
To generate a report, click Generate Report button. Once the report is generated, the sub-users can view it on the Report Listing page after refreshing the page.
 If users have access to TruRisk, the following actions are available:
- Find the TruRisk Reports option in the New and Filters menu.
- View report details in the Info and can download the report by selecting the Download options in the Quick Actions menu.
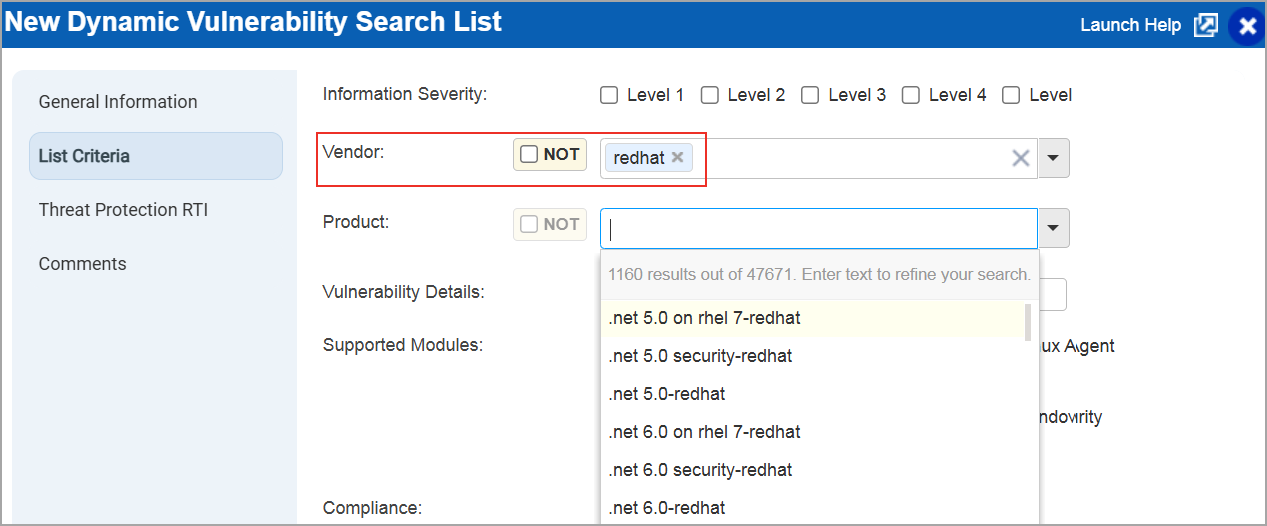
Enhanced Search Experience in KnowledgeBase
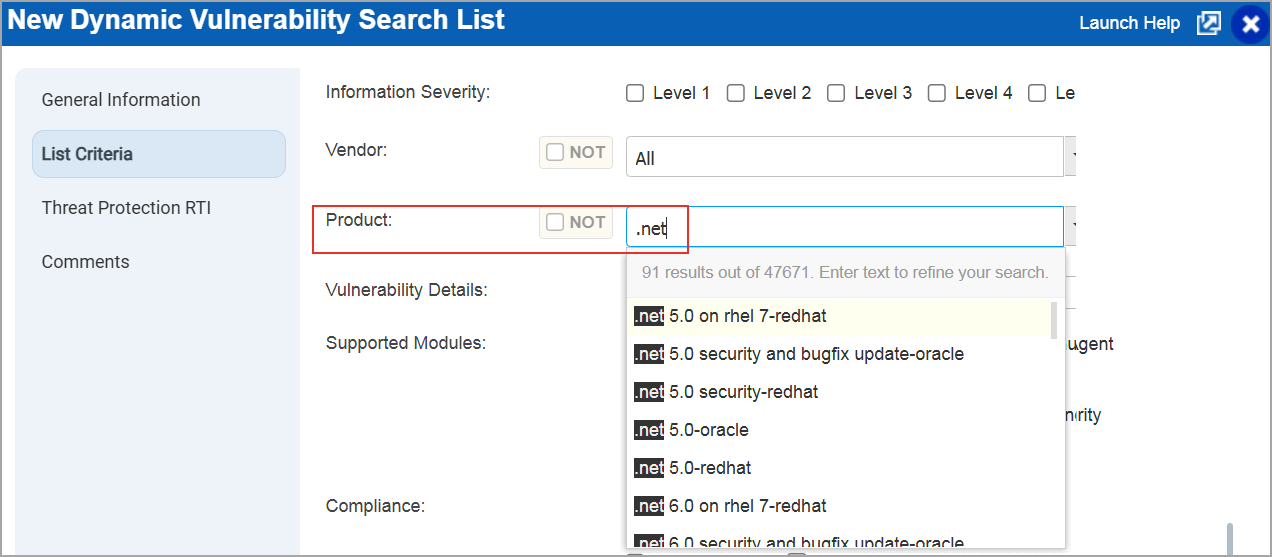
Previously, when you searched for a specific vendor or product (KnowledgeBase > Search Lists > New > Dynamic List > List Criteria > Vendor/Product), the results often displayed the same product multiple times due to the one-to-many association between products and vendors. While this was by design, it appeared as duplication. This was not a very good experience.
With this enhancement, vendor names are now concatenated with product names in the search results.
For example, if you select Red Hat as the product name, you can see a list of entries where each vendor name is combined with the product name, making it clear that these entries are distinct and not duplicates.
Now, when you perform a search:
- By vendor: The results display all products associated with that vendor.
- By product: The results display the product across all vendors.
Qualys Policy Compliance (PC)
For the list of features and improvements we have made in Policy Compliance/Policy Audit, refer to the Policy Audit UI Release Notes for Release 1.7.
Issues Addressed
The following reported and notable customer issues are fixed in this release:
| Component/Category | Application |
Description |
| VM - Option Profile | Vulnerability Management | When users selected the Skip Pre-scanning checkbox in Scans > Option Profile > Create/Edit > Scan > Performance section > Configure > Configure Scan Performance Settings, the feature did not work. Relevant code changes have been made to fix the issue ensuring that Skip Pre-scanning functions as expected when selected. |
| VM - Authentication | Vulnerability Management | When the user tried to edit a scan authentication record to add asset groups, the system displayed the following error message, An error has occurred and the Qualys service cannot process your request. If this continues, please contact Qualys support. This happened due to a validation failure in cases where records had no IP addresses. The code has been updated to handle these scenarios correctly, so users can now upload asset groups to scan authentication without encountering errors. |
| VM - Host List API | Vulnerability Management | When users performed the host list API purge action (/api/fo/asset/host/?action=purge), only versions v2.0 and v3.0 worked as expected. Versions v4.0 and v5.0 did not function properly. Relevant changes have been made to fix the issue. |
| VM - Host List API | Vulnerability Management | When users created encrypted PDF reports with passwords containing certain characters, such as “$”, the system displayed an error, and the report could not be generated. The code has now been updated to handle these characters correctly. The fix has been verified across all report types using password combinations that include A–Z, a–z, 0–9, special characters (! @ # $ % ^ & * ( ) - _ = + [ ] { } ; : , . < > ? / ~ ' "), and shell-sensitive characters (" ' \ $ & |. Users can now successfully generate encrypted PDF reports with these password patterns. Examples of acceptable patterns include 12345$/ABCde and 12345$%ABCde. |
| VM - Scan UI | Vulnerability Management | When users launched/relaunched a scan and encountered an issue with the asset tag retrieval, the UI displayed a generic error message. This was not helpful for troubleshooting. To improve user experience, we have enhanced the error message. The updated message now reads: TagSet service is currently unavailable – We are unable to retrieve asset data right now. Try again later. If the issue continues, contact TAM or Qualys Support. |
| VM - Scan UI | Vulnerability Management | When users navigated to the VMDR module and clicked the Scan and Map tab for a few accounts with Scan Retention Period enabled, no scans were displayed. This issue occurred regardless of the selected filter options, such as Running or Finished. An error message was displayed. The issue occurred across all browsers, including Chrome, Firefox, and Safari. Relevant changes have been made to fix the issue |