Onboarding CDR for GCP
This guide provides a step-by-step process for deploying the Cloud Detection and Response Appliance in the Google Cloud Platform (GCP) environment.
Pre-requisites:
Things you need to get started.
- A TotalCloud GCP Connector must be configured for your account. Refer to Configure GCP Connectors.
- Install Terraform to create and manage the Qualys environment on the GCP infrastructure.
Pre-requisites in GCP
- Ensure that VPC and private subnets exist in the Service GCP account. To know how to set up a VPC, refer to Create a VPC.
- The CDR appliance must be deployed in private subnets (Create a Subnet). Private subnets must have outbound internet access. Verify outbound internet access before deploying the CDR appliance.
- The open ports of the security group attached to the CDR Appliance and the firewall active for outgoing internet connection must allow the following connections.
Allow these URLs for outbound internet access
|
URLs |
Direction |
Port |
|---|---|---|
| nac-le-service.qg3.apps.qualys.com | Outbound | tcp/443 |
| qualysguard.qg3.apps.qualys.com | Outbound | tcp/443 |
| distribution.qg3.apps.qualys.com | Outbound | tcp/443 |
| gateway.qg3.apps.qualys.com | Outbound | tcp/443 |
The above URLs are as per Qualys platforms. For example, we have used US POD3. For the complete list of URLs for all Qualys Production PODs: URLs required for CDR, recommended to open for all URLs mentioned here.
Allow these IPs for inbound internal access
|
IPs |
Direction |
Port |
|---|---|---|
|
any (GCP mirror traffic) |
BOTH |
any |
Get Started with CDR on GCP
Connect Qualys to your GCP account(s) to by creating a TotalCloud GCP Connector. After connecting your GCP account with your Qualys account, you can see instructions to follow on the CDR page before CDR can provide you accurate deep visibility into your workloads.
After configuring a TotalCloud connector for GCP, your TotalCloud account is ready to onboard CDR to your network.
The CDR onboarding can be broken down to three primary steps.
Create Deployments on TotalCloud
1. Navigate to the Configure > Threat Scanners in TotalCloud, select the GCP tab under it.
![]()
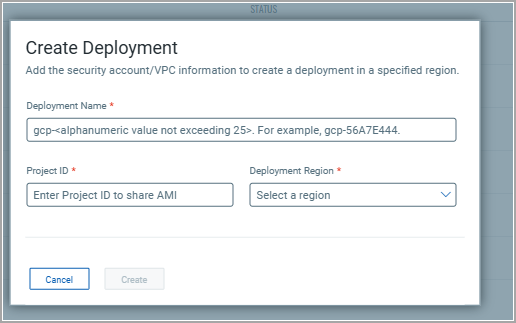
2. Click Create Deployment to begin your scanner deployment. You can find three input fields in the Create Deployment screen.
- Provide a unique Deployment Name. Ensure the name starts with 'gcp-', followed by alphanumeric characters. The character limit is 25 (including 'gcp-').
- Provide the Project ID of the cloud provider account on which you want to deploy Threat Scanners.
- Select the Deployment Region where the threat scanner must be deployed on.
Qualys supports CDR deployment in all GCP regions.
After creating a deployment, the CDR key is visible from the list of deployments. Store it for later use.
You will also need the CDR Image name for the next steps.
The latest Image Name for GCP CDR is
projects/qualys-gcp-security/global/images/qualys-cdr-370-5-gcp
Once you have created your first deployment, the option to download scripts appears. This downloads the templates to set up CDR on your network.
Click Download Scripts. Once the scripts are downloaded, follow the steps below to proceed with the rest of the CDR configurations.
Deploy Qualys CDR in GCP
Deploy the scripts using GCP CloudShell and get started with CDR easily.
Qualys CDR for GCP supports Network Load Balancer(NLB) based High-availability auto-scaling mode.
Here, the NLB receives all mirrored traffic and forward it to CDR Appliances in backend. It also performs High-availability and autoscaling function.
CDR monitors your network via VPC Packet Mirroring.
Following GCP instance type is supported for CDR Appliance VM instance.
n1-standard-8
NLB Autoscaling - CDR deployment
For Qualys HA high-availability deployment, Qualys virtual appliances should be deployed within VPCs with private subnets across several AZs.
Following diagram depicts how deployment will look like after deploying scripts.

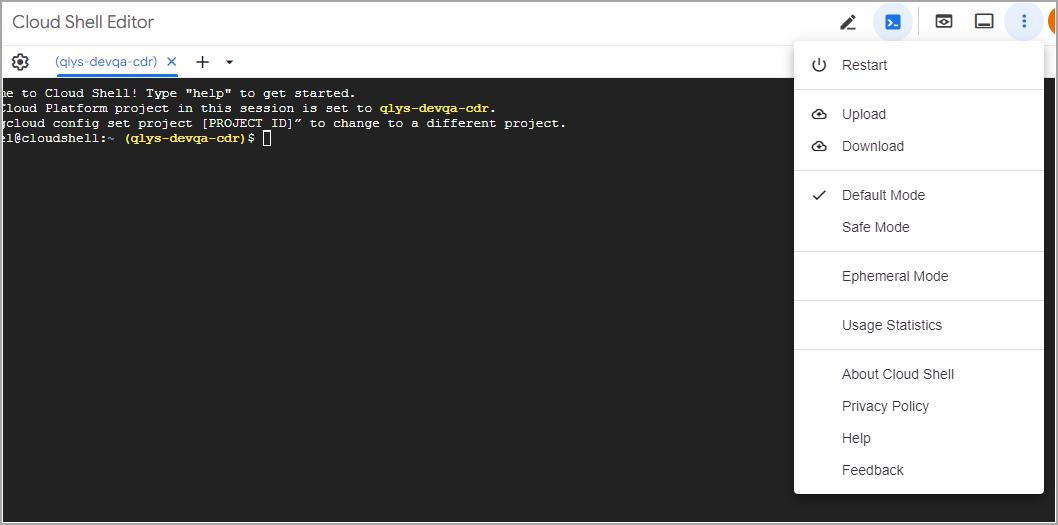
1. Go to your GCP Console > Navigate to CloudShell.
2. Select the downloaded qualys_gcp_cdr_terraform.zip bundle and upload it to CloudShell.
3. Extract qualys_gcp_cdr_terraform.zip.
![]()
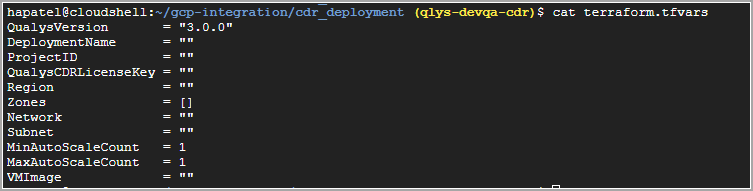
4. Go to cdr_deployment directory of extracted bundle. Modify the terraform.tfvars file here to manage deployment variables. Terraform variables are explained in detail in the README.md & terraform.example file.
Provide the unique deployment name and other parameters.
5. Terraform is ready to deploy CDR in your security account's VPC once terraform.tfvars file is configured.
6. Run the following commands to deploy the module to each GCP subscription as needed.
terraform init
terraform apply --auto-approve
![]()
7. After terraform apply runs successfully, a CDR stack should be created including Appliance, NLB and dependent components in the GCP account. You should be able to see same in respective instance group behind Load balancer deployed.
![]()
8. Refer Deploy Packet Mirroring on Workloads section shown below to setup packet/traffic mirroring for this.
Deploy Packet Mirroring on Workloads
Packet mirroring copies network traffic from specified sources to a collector destination. An internal passthrough Network Load Balancer (NLB) forwards mirrored packets to CDR instances within an instance group.
Implement the packet mirror stack across all VPCs hosting application workloads to ensure comprehensive threat detection. The solution supports traffic mirroring between VPCs in the same or different projects with VPC peering.
Define mirroring sources by specifying a subnet or network tag, enabling precise traffic monitoring across network segments.
Terraform's packet mirroring module simplifies deployment using GCP's native features, streamlining network traffic monitoring configuration.
Packet Mirroring
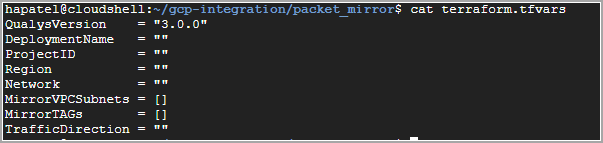
1. Deploy the traffic mirroring stack in the traffic source account hosting your application workloads. Access the deployment through CloudShell by navigating to the packet_mirror directory in the extracted bundle.
2. Open the terraform.tfvars file to manage deployment variables. Refer to README.md and terraform.example for detailed variable explanations.
Deployment Variable
- Deployment Name: Use the same name from your CDR deployment stack
- Network: Specify the VPC name for packet mirroring deployment
- MirrorVPCSubnets: List subnet names (comma-separated) for packet mirroring
- Mirror Tags: List network tags (comma-separated) for packet mirroring
- GCP Region: Define deployment region
- Project ID: Specify the project for packet mirroring stack
3. Once all tfvars are set, run the following commands to deploy the module to each GCP project-id & VPC as needed.
terraform initterraform apply --auto-approve
4. After a successful terraform apply, the stack automatically creates the packet mirror policy, configuring traffic forwarding to the respective load balancer front-end.

5. Navigate to the packet mirroring module to confirm policy creation. Verify the policy successfully taps and forwards network traffic as configured.
