Onboard CDR for AWS
With TotalCloud 2.10.0, Qualys CDR integrates with Network Passive Sensor to deliver enhanced features and performance.
As part of this integration, we have updated the AWS CDR setup. Legacy CDR users can manage their previous deployments from the AWS (Legacy) tab, which is not visible to new CDR users.
CDR also supports IPv6 addresses for AWS Appliances, Flow Logs, and GuardDuty. For more information, check the CDR IPv6 support page.
If you are running TotalCloud 2.9 or prior, you can create new deployments by referring to Onboard CDR for AWS (Legacy).
The new onboarding instructions are detailed below.
Pre-requisites
Things you need to get started.
-
A TotalCloud AWS Connector must be configured for your account. Refer to Configure AWS Connectors.
-
Install Terraform or ensure you have AWS CloudFormation to create and manage the Qualys environment on the AWS infrastructure.
Pre-requisites in AWS
- Ensure that VPC and private subnets exist in the Service AWS account. To know how to set up a VPC, refer to Create a VPC.
- The CDR appliance must be deployed in private subnets (Create a Subnet). Private subnets must have outbound internet access. Verify outbound internet access before deploying the CDR appliance.
- The open ports of the security group attached to the CDR Appliance and the firewall active for outgoing internet connection must allow the following connections.
Allow these URLs for outbound internet access
| URL | Direction | Port |
|---|---|---|
| nac-le-service.qg3.apps.qualys.com | Outbound | tcp/443 |
| qualysguard.qg3.apps.qualys.com | Outbound | tcp/443 |
| distribution.qg3.apps.qualys.com | Outbound | tcp/443 |
The above URLs are as per Qualys platforms. For example, we have used US POD3. For the complete list of URLs for all Qualys Production PODs: URLs required for CDR, recommended to open for all URLs mentioned here.
Allow these IPs for inbound internal access
| IPs | Direction | Port | Supported Deployment |
|---|---|---|---|
| Any AWS mirroring traffic (VxLAN) | Inbound | udp/4789 | Standalone or NLB Deployment |
| GWLB/NLB IP | Inbound | tcp/8080 | GWLB or NLB Deployment |
| GWLB IP(GENEVE) | Inbound | udp/6081 | GWLB Deployment |
Get Started with CDR on AWS
Connect Qualys to your AWS account(s) to by creating a TotalCloud AWS Connector. After connecting your AWS account with your Qualys account, you can see instructions to follow on the CDR page before CDR can provide you accurate deep visibility into your workloads.
After configuring a TotalCloud connector for AWS, your TotalCloud account is ready to onboard CDR to your network.
.png)
The CDR onboarding can be broken down to three primary steps.
Create Deployments on TotalCloud
Navigate to the Configure > Threat Scanners in TotalCloud.

Click Create Deployment to begin your scanner deployment. You can find three input fields in the Create Deployment screen.
- Provide a unique Deployment Name. Ensure the name starts with 'aws-', followed by alphanumeric characters. The character limit is 25 (including 'aws-').
- Provide the Account ID of the cloud provider account on which you want to deploy Threat Scanners.
- Select the Deployment Region where the threat scanner must be deployed on.
AWS allows traffic mirroring on 33 regions currently, you can find the list of allowed regions here. CDR for AWS does not support AWS GovCloud and China region yet.
After creating a deployment, the CDR key is visible from the list of deployments. Store it for later use.

Once you have created your first deployment, the option to download scripts appears. This downloads the templates to set up CDR on your network.
Click Download Scripts. Once the scripts are downloaded, follow the steps below to proceed with the rest of the CDR configurations.
Deploy Qualys CDR in AWS
You can deploy Qualys CDR either using Terraform or a Cloud Formation Template (CFT).
To Deploy Qualys CDR in AWS using Terraform,
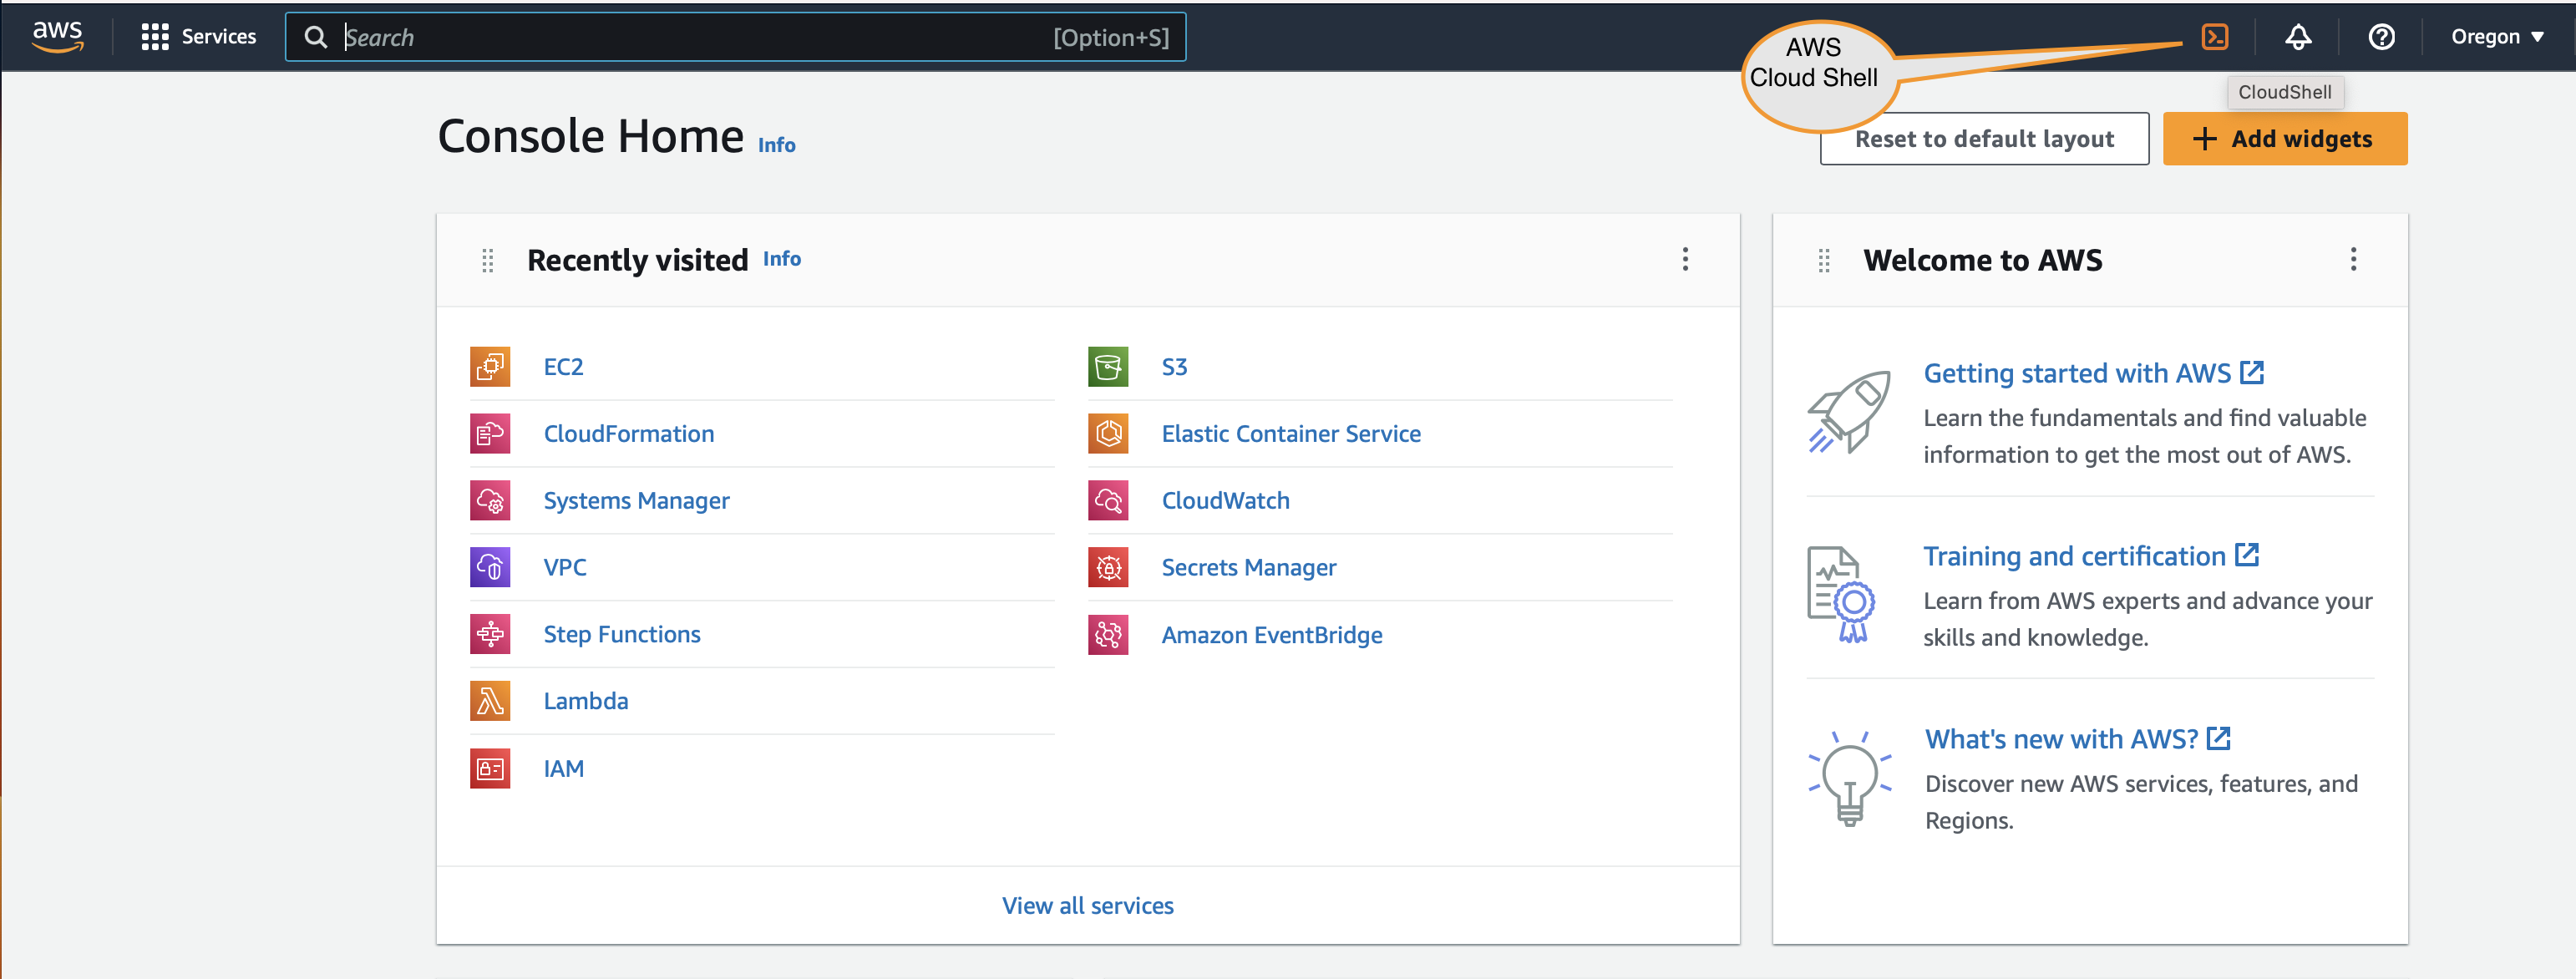
- Login to your AWS account and access CloudShell.
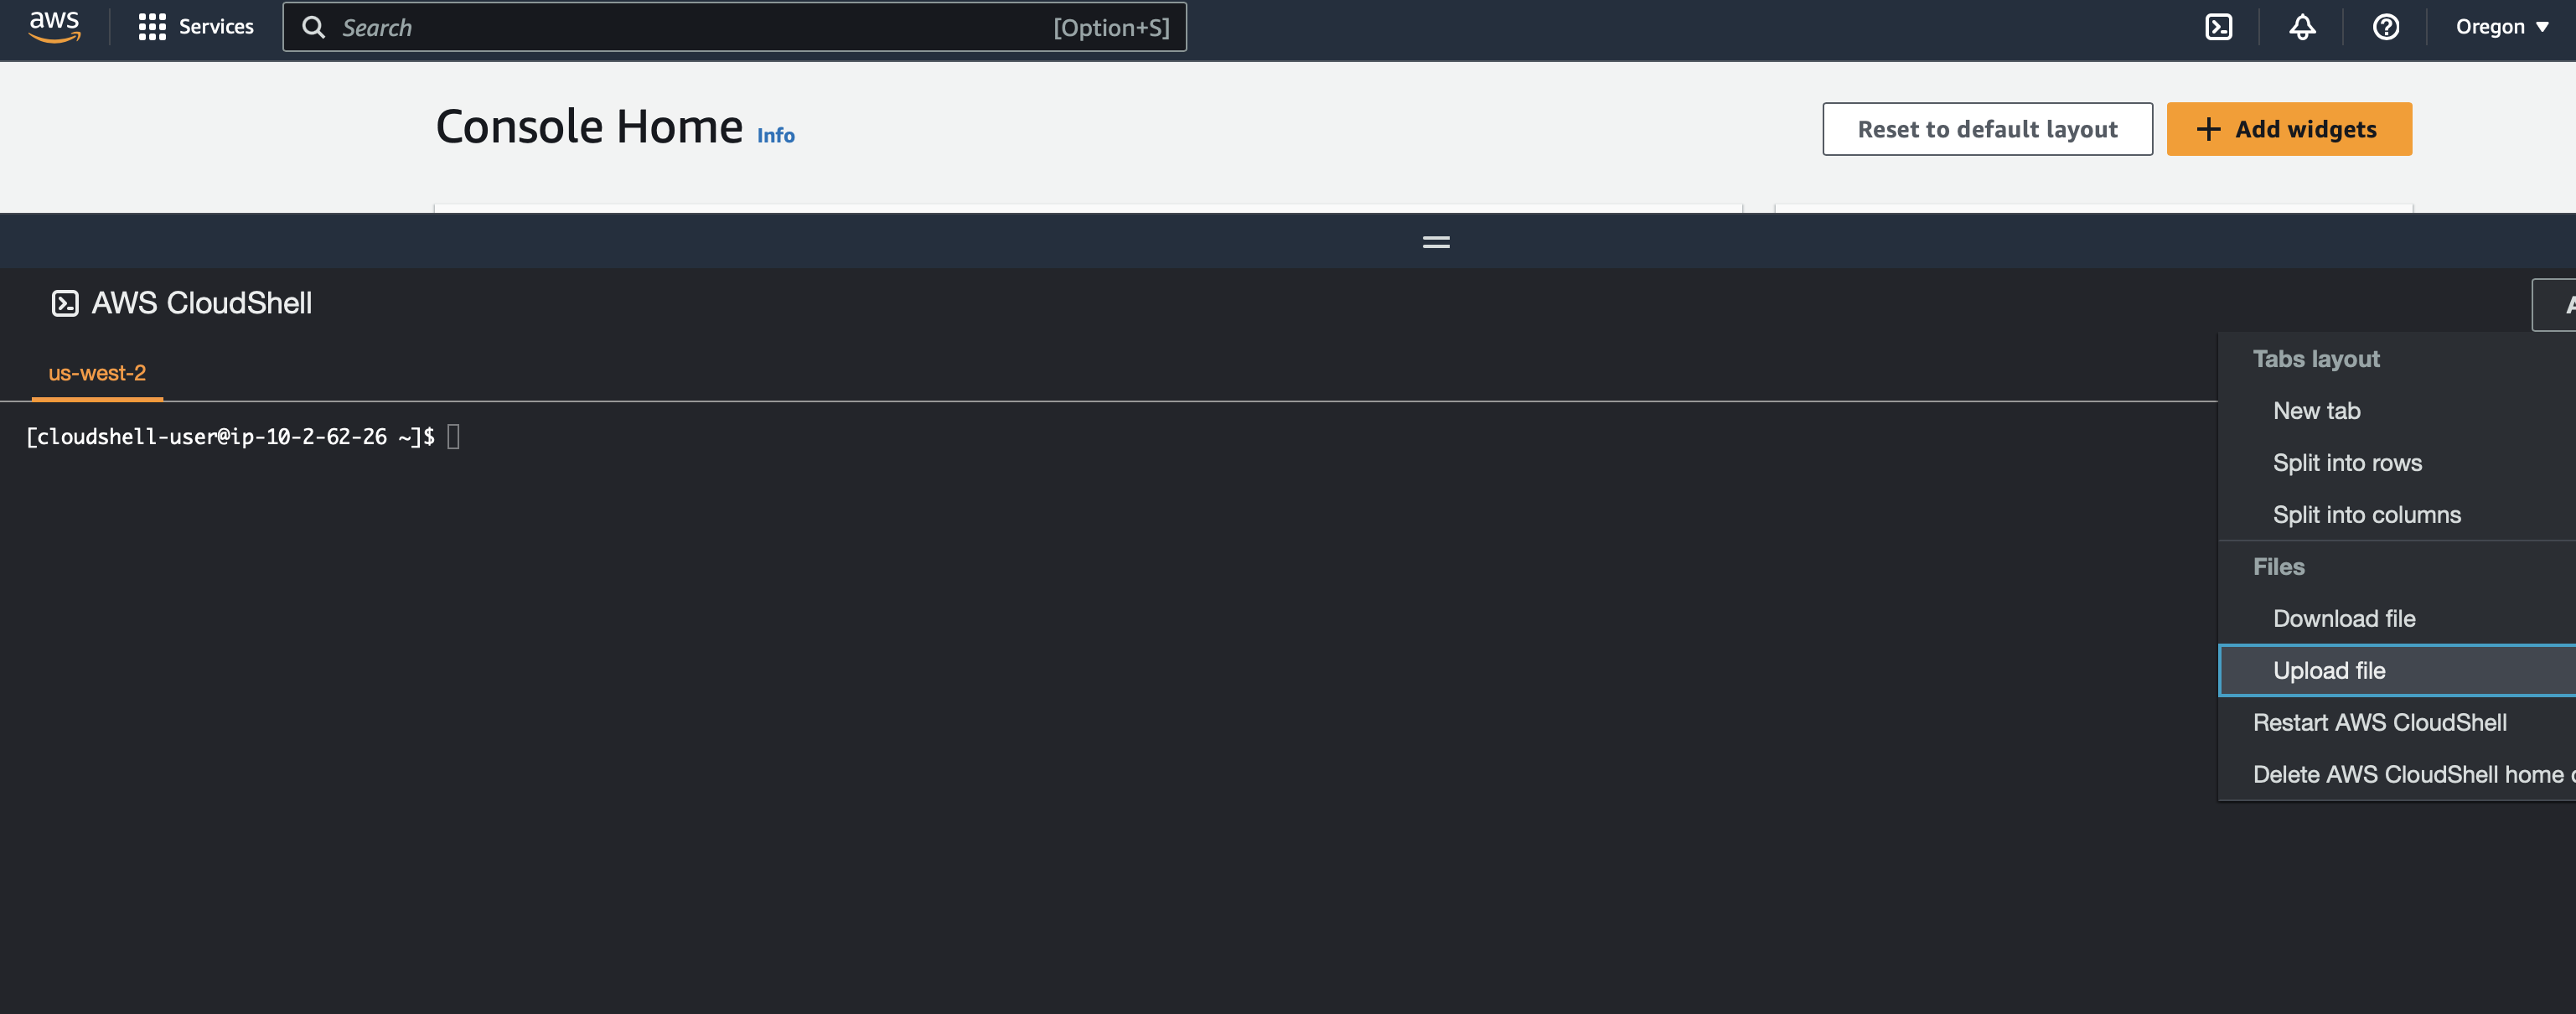
- Upload the downloaded Zip file (qualys_aws_cdr_terraform.zip).
- Install Terraform.
- Deploy CDR.
OR
To deploy Qualys CDR using CFT,
- Login to your AWS account and go to Services > CloudFormation.
- Click Create stack.
- Upload your cloud formation template.
Deploy CDR using Terraform
Deploy the scripts using AWS CloudShell and get started with CDR easily.
Do not change the user data of the downloaded templates. Making changes to this file fails the CDR deployment.
Qualys CDR supports three modes of deployment.
2. High-availability auto-scaling mode with AWS Network Load Balancer
3. High-availability auto-scaling mode with AWS Gateway Load Balancer
The following AWS instance types are supported for CDR Appliance EC2.
- m5a.2xlarge
- r5a.2xlarge (default)
- r5.2xlarge
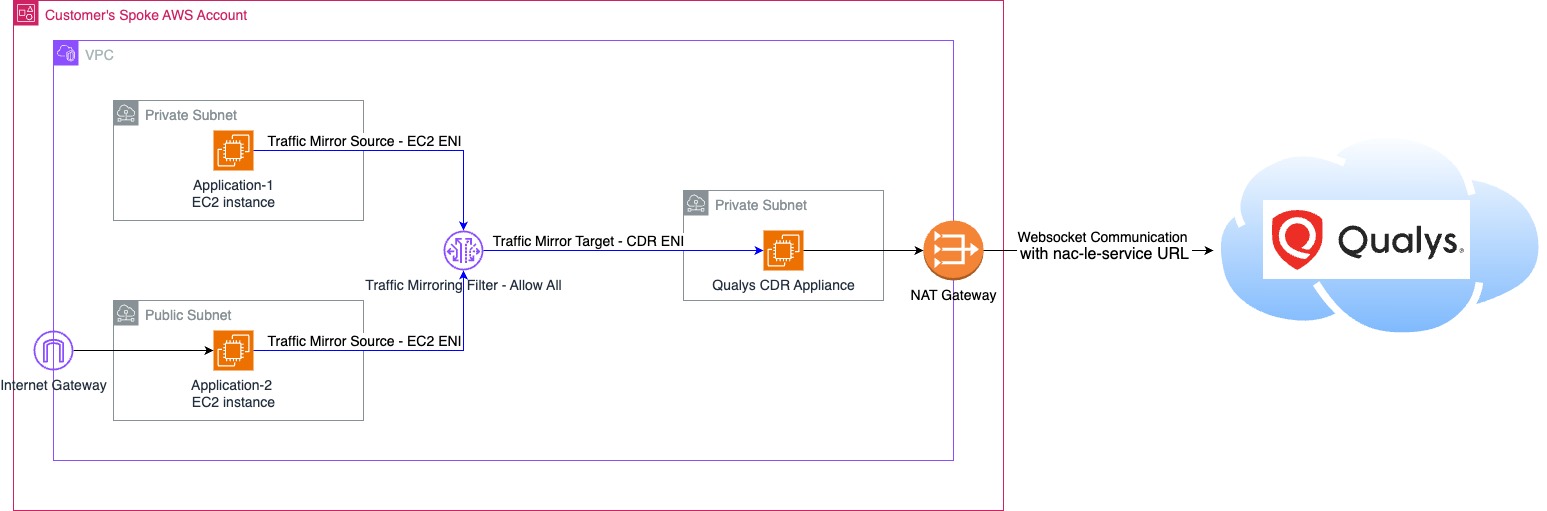
Standalone CDR Deployment
You can deploy Qualys CDR as a standalone Amazon EC2 virtual machine.
- The Qualys CDR stack includes one EC2 instance and the necessary Security Group and IAM role.
- AWS VPC Traffic Mirroring supports up to ten mirror sources per EC2 instance configured as a mirroring target.
The following diagram depicts how the deployment works after deploying scripts.
1. Navigate to your AWS Console -> Navigate to CloudShell.
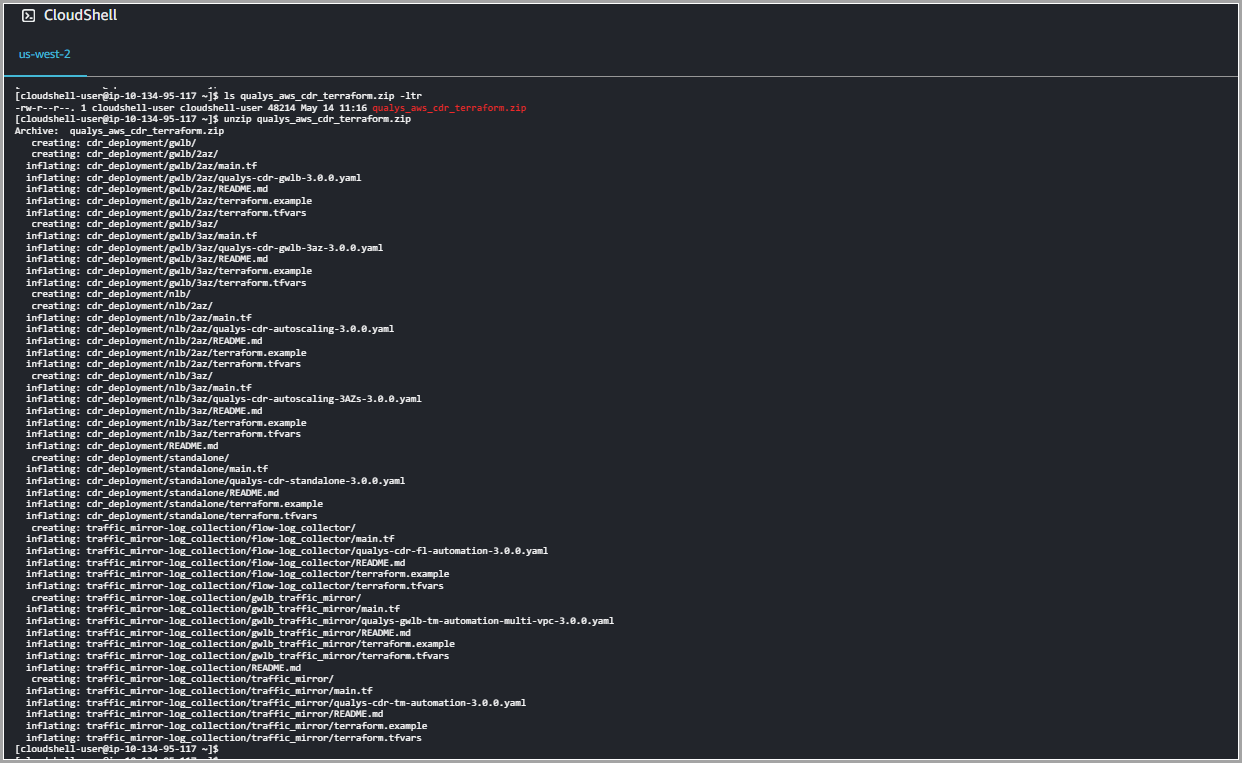
2. Download the qualys_aws_cdr_terraform.zip. Upload it to CloudShell.
3. Extract qualys_aws_cdr_terraform.zip.
4. Navigate to cdr_deployment/standalone. Modify the terraform.tfvars file to manage deployment variables. Terraform variables are explained in detail in the README.md file.
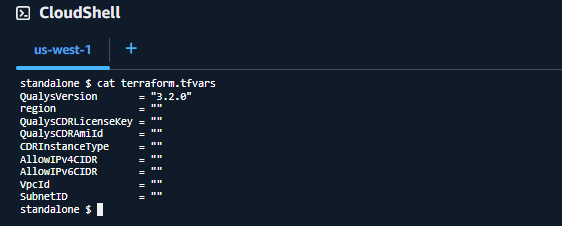
5. In the deployment wizard, specify the correct AMI ID for the region. Qualys has shared the latest AMI for your deployment region with your registered AWS account. You can find the latest Qualys CDR AMI here as well.
Terraform is ready to deploy CDR in your security account's VPC once terraform.tfvars files are set.
6. Run the following commands to deploy the module to each AWS subscription as needed.
-
terraform init -
terraform apply --auto-approve
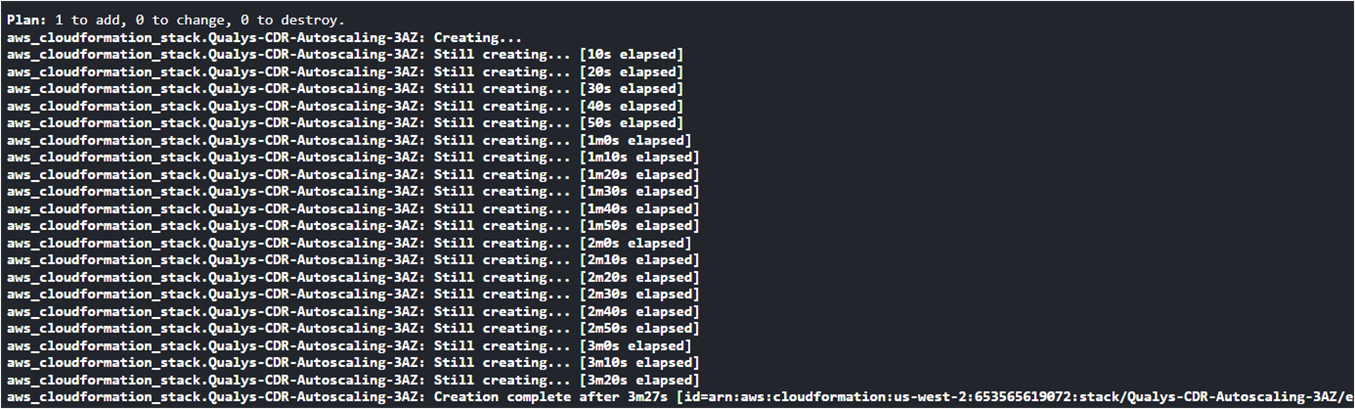
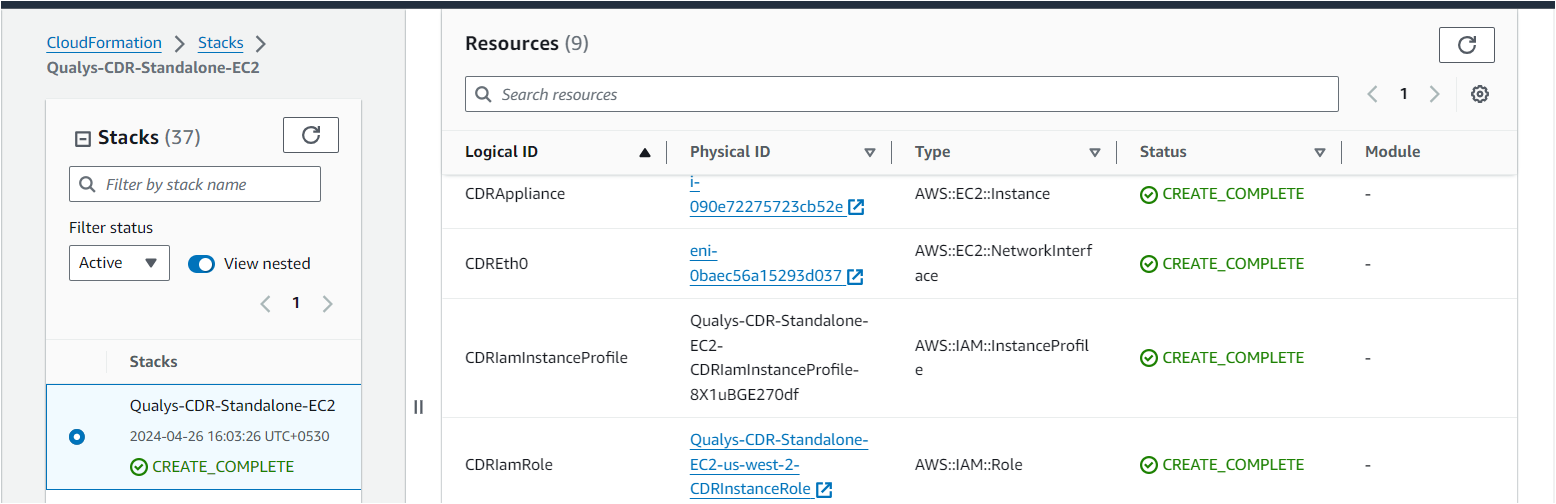
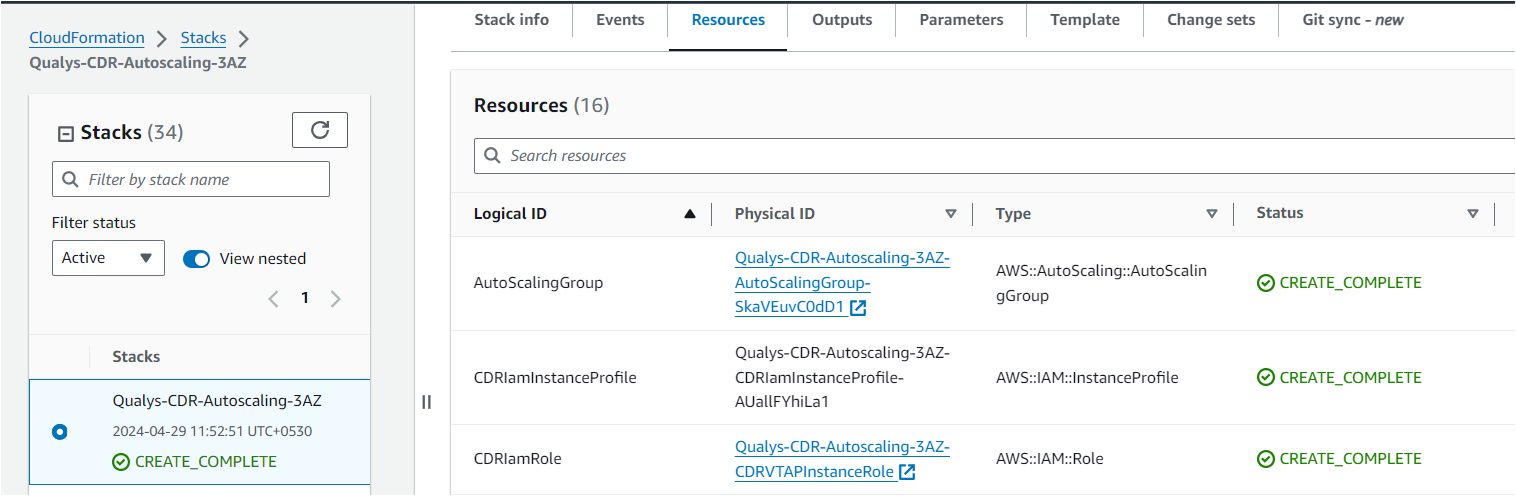
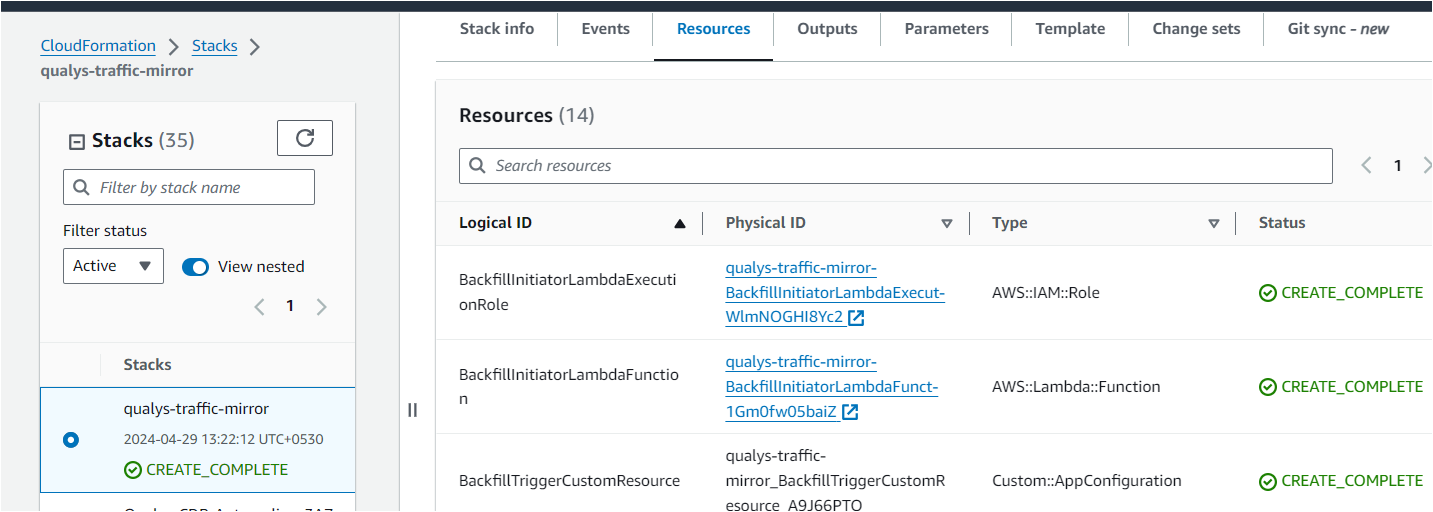
7. After terraform apply runs successfully and the application registers with Qualys, a CloudFormation stack should be created in the AWS account. This stack shows the resources and outputs needed to set up a traffic mirror session.
Resources
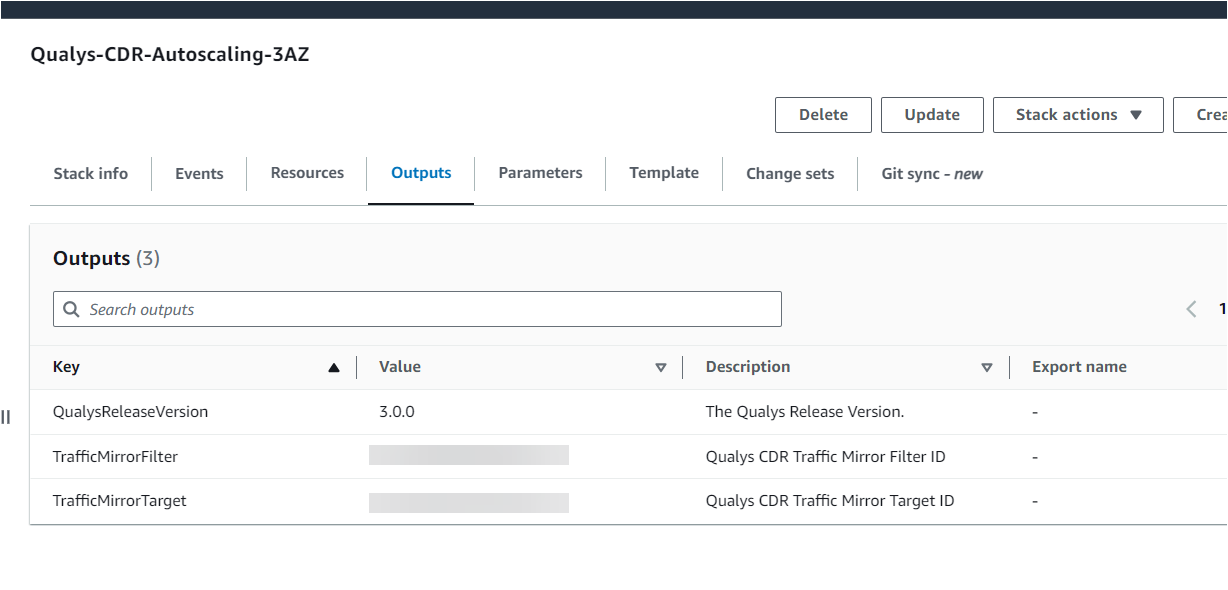
Output
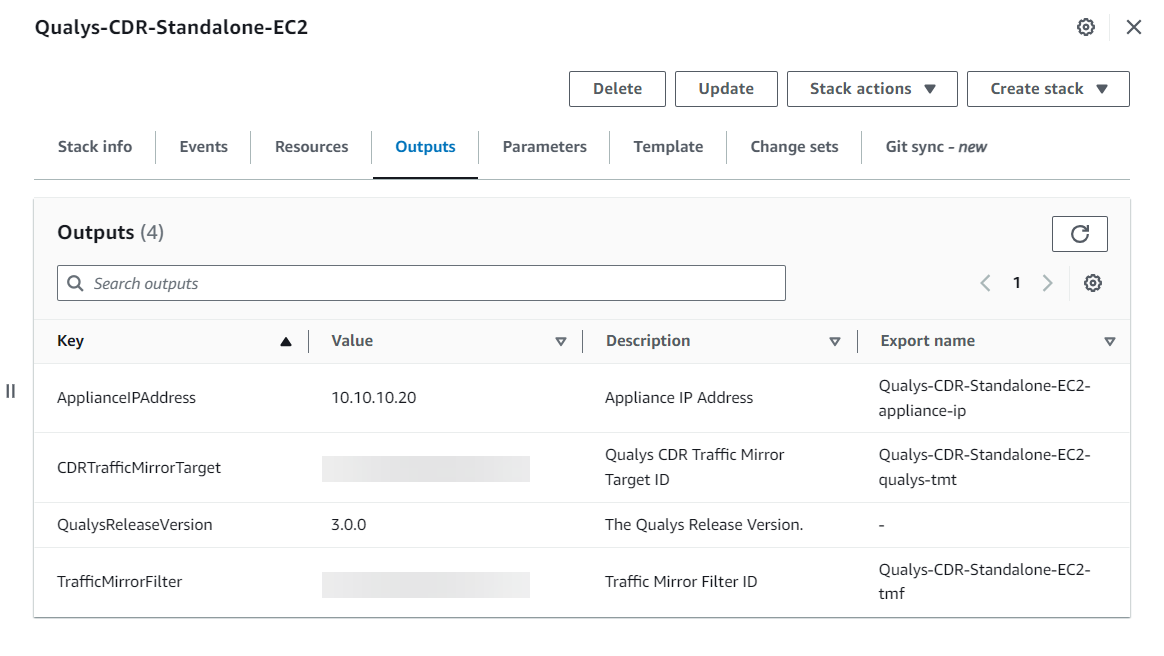
Refer to Traffic Mirroring - Standalone & NLB deployment section to setup traffic mirroring for this.
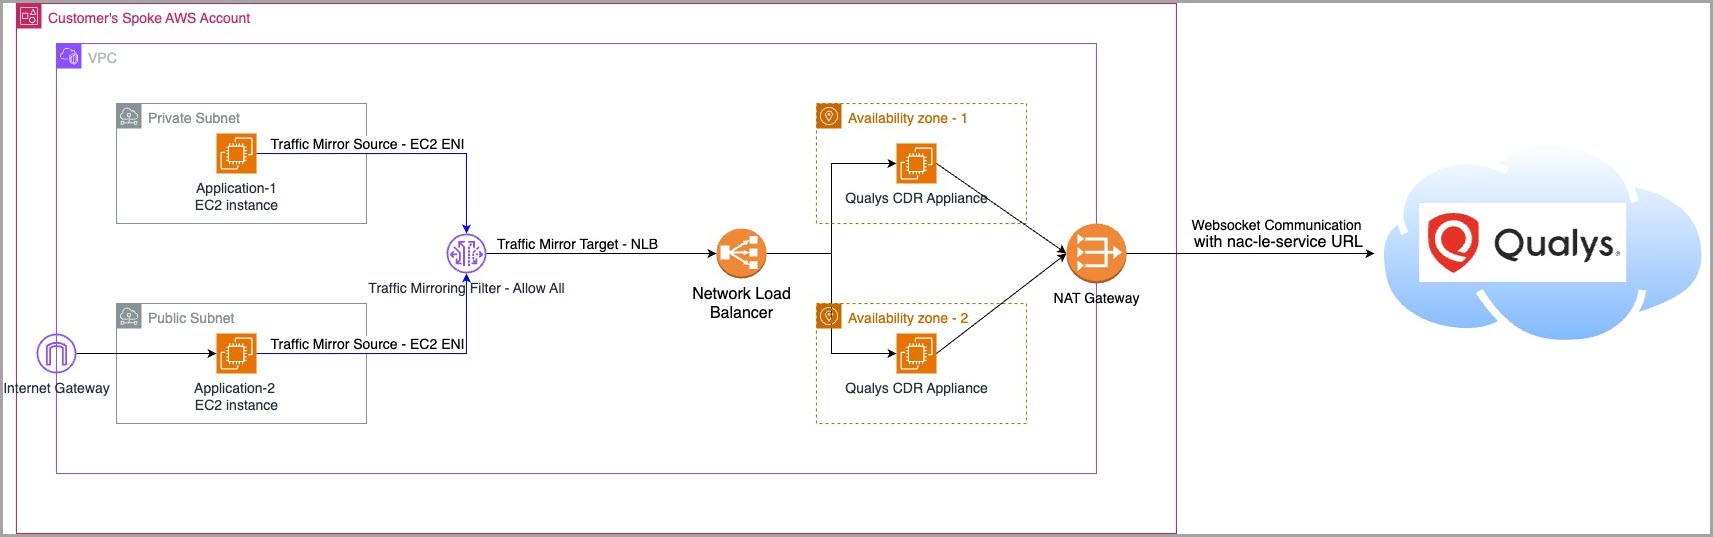
Network Load Balancer - High Availability Autoscaling Mode Deployment
Qualys virtual appliances should be deployed within VPCs with private subnets across several AZs for Qualys high-availability deployment.
The following diagram depicts how the deployment will look after deploying scripts.
- Follow steps 1-3 from Standalone section. Next, navigate to the cdr_deployment/nlb directory of the extracted bundle.
- Depending on the number of availability zones to opt for high availability, navigate either to the 2az or 3az folder.
- Modify the terraform.tfvars file here to manage deployment variables. Terraform variables are explained in detail in the README.md file.

- In the deployment wizard, specify the correct AMI ID for the region. Terraform is ready to deploy the CDR in your security account's VPC once terraform.tfvars file is set. Qualys has publicly released the latest AMI. You can find the latest Qualys CDR AMI here as well.
- Run the following commands to deploy the module to each AWS subscription as needed.
-
terraform init -
terraform apply --auto-approve
-
- After terraform apply runs successfully, a CloudFormation stack should be created in the AWS account. This stack should show the resources and output needed to set up a traffic mirror session.
Resources
Outputs
Refer to Traffic Mirroring - Standalone/NLB deployment section to setup traffic mirroring for this.
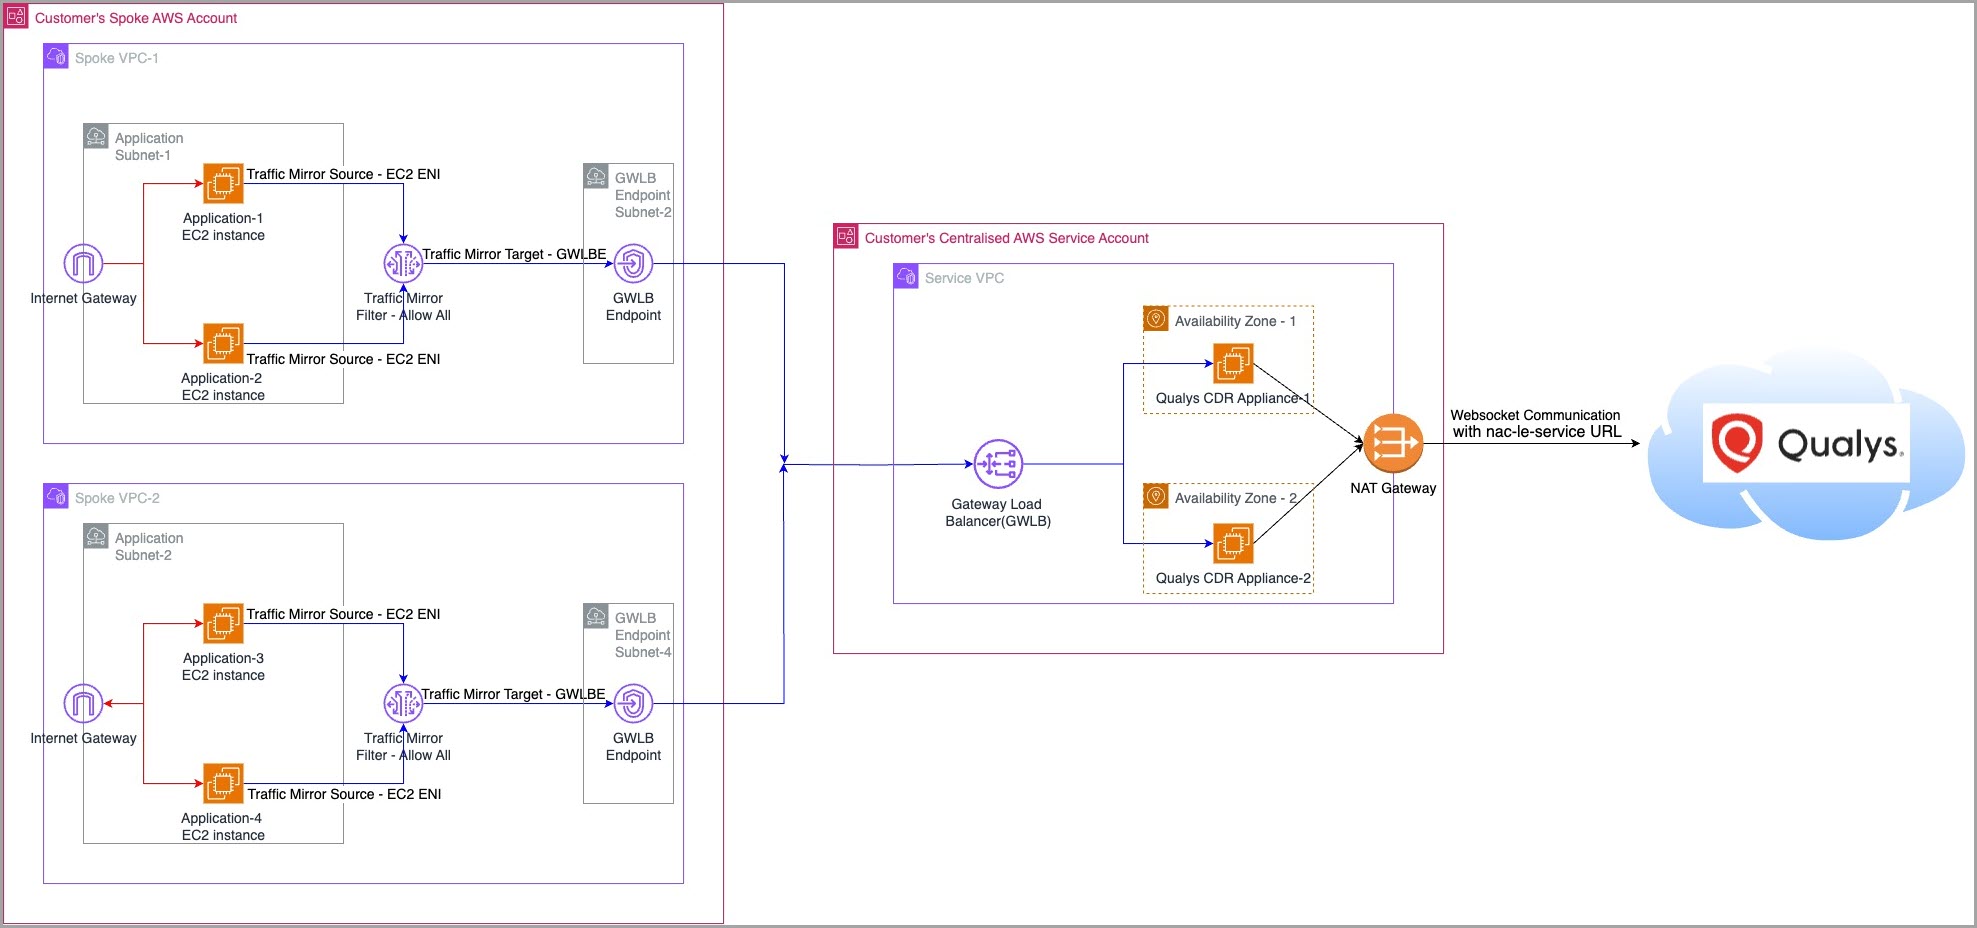
Gateway Load Balancer - High Availability Autoscaling Mode Deployment
Qualys CDR also supports deployment with Gateway Load Balancer (GWLB). With a GWLB CDR deployment, you can obtain the high availability, network load balancing, auto-scaling of Network Load Balancer (NLB), and ensure a single traffic mirror session for the VPCs of all your accounts. You can save significant time from setting up traffic mirroring on all your networks by setting up a GWLB.
The following diagram illustrates deployment once scripts are deployed.
- Follow steps 1-3 from the Standalone section to deploy in autoscaling mode, then navigate to the cdr_deployment/gwlb directory of the extracted bundle.
- Depending on the number of required availability zones for high availability, go inside either the 2az or 3az folder.
- Modify the terraform.tfvars file here to manage deployment variables. Terraform variables are explained in detail in the README.md file.
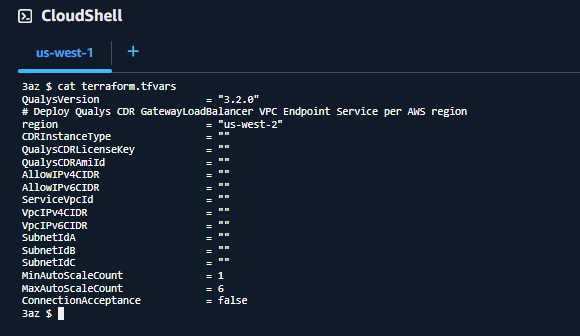
- In the deployment wizard, specify the correct AMI ID for the region. Qualys has publicly released latest AMI. You can find the latest Qualys CDR AMI here as well.
Terraform is ready to deploy the CDR in your security account's VPC once terraform.tfvars file is set. - Run the following commands to deploy the module to each AWS subscription as needed.
-
terraform init -
terraform apply --auto-approve
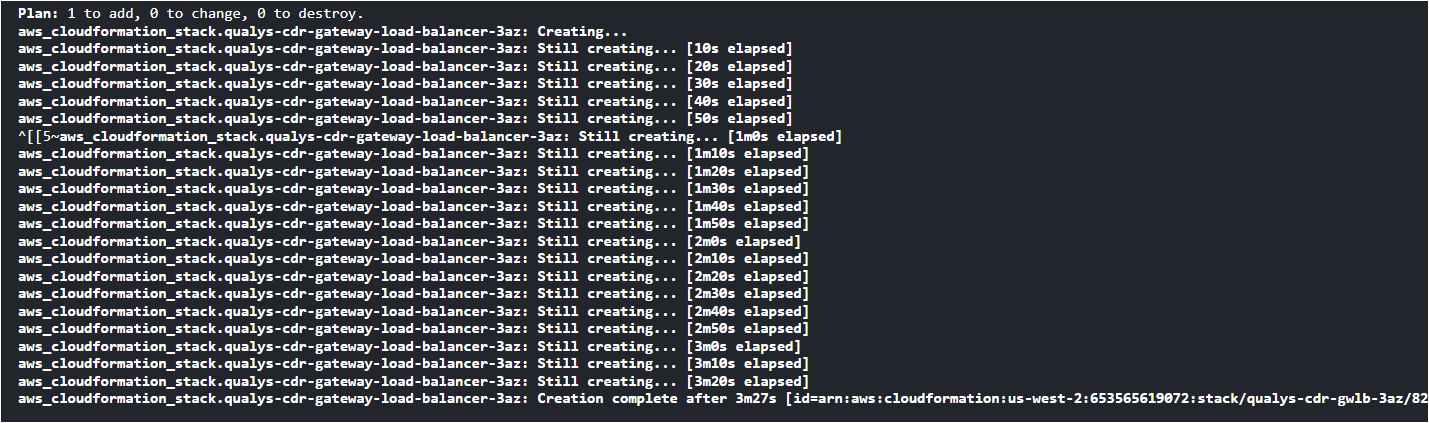
-
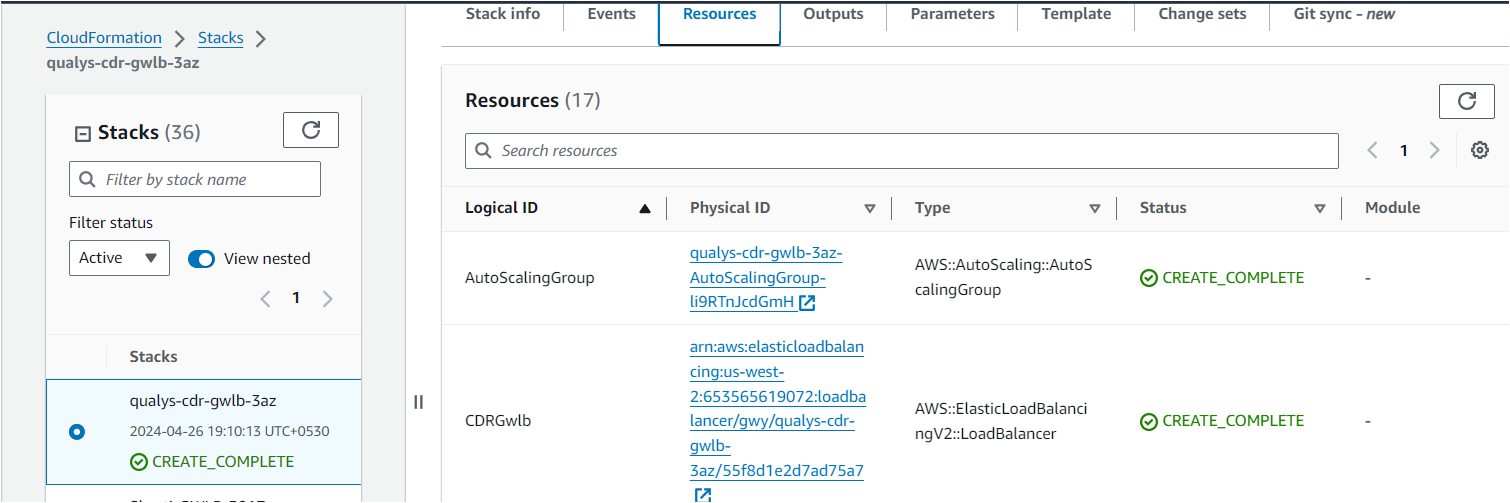
After terraform apply runs successfully, a CloudFormation stack should be created in the AWS account. This stack should show the resources & outputs needed to set up a traffic mirror session.
Resources
Outputs
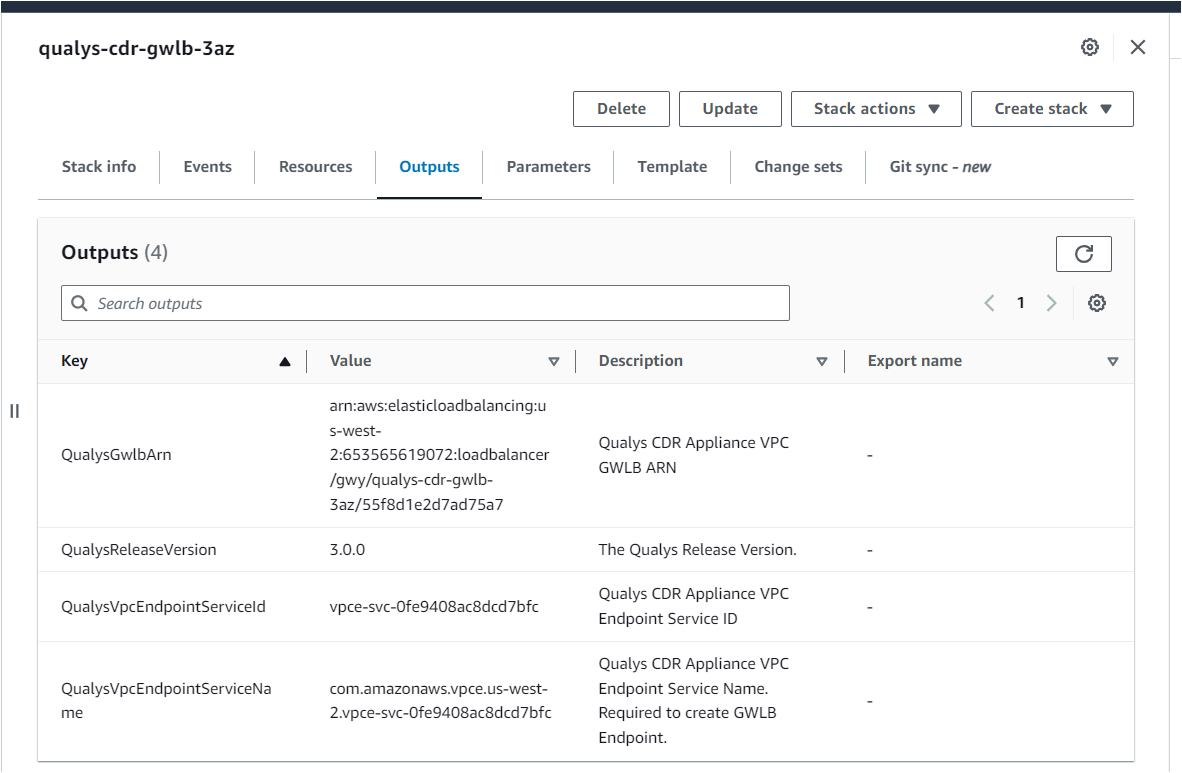
Refer to Traffic Mirroring - GWLB deployment section to set up traffic mirroring for this.
Deploy Traffic Mirroring on Workloads
VPC Traffic Mirroring is supported on Elastic Network Interfaces (ENI) attached to EC2 and EKS instances. For a full list of instance types that support VPC Traffic Mirroring and additional considerations, click here.
VPC Traffic Mirroring supports the following target types as destinations:
- Elastic Network Interfaces
- Network Load Balancer
- Gateway Load Balancer
AWS offers a serverless application for automating traffic mirroring based on VPCs, subnets, or tags. You can launch the application using the Terraform module for traffic mirroring, available as an easy-to-use CloudFormation Template from the qualys_aws_cdr_terraform.zip file downloaded for Standalone/NLB/GWLB deployments.
By specifying the VPCs or subnets to monitor, the serverless application sets up traffic mirroring sessions on existing instances or future instances in the selected VPCs or subnets. You can also specify instance tags to mirror traffic across instances with matching tags (existing or future).
Terraform's traffic mirroring module simplifies deployment using AWS's built-in features.
Traffic Mirroring - Standalone/NLB Deployment
For traffic mirroring to Standalone deployment, traffic mirroring target will be CDR Appliance ENI, whereas for NLB deployment case it will be Network Load Balancer.
1. For launching the traffic mirroring stack, go to CloudShell and browse the traffic_mirror-log_collection/traffic_mirror directory of the extracted bundle.
The traffic mirroring stack should be deployed in the traffic source account.
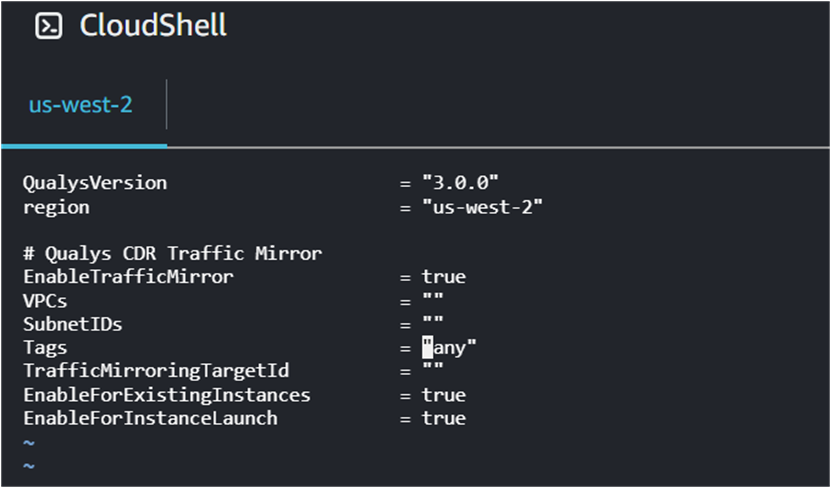
2. Modify the terraform.tfvars file here to manage deployment variables. Terraform variables are explained in detail in the README.md file.
- (Optional) Specify list of VPCs to enable traffic mirroring in comma separated if more than one.
- (Optional) Specify list of subnets to enable traffic mirroring in comma separated if more than one.
- Specify AWS region where you want to deploy traffic mirroring stack.
- Obtain TrafficMirroringTargetId from output section of CDR deployment stack.
Run the following commands to deploy the module to each AWS subscription as needed.
-
terraform init -
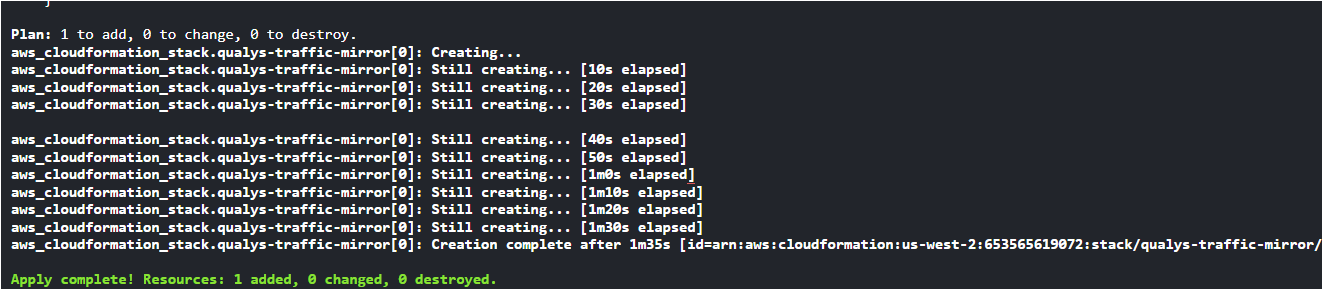
terraform apply --auto-approve
4. After terraform apply runs successfully and creates the stack, it will add resources to listen to events for workload activation. It will also add functions to update the traffic mirror session.
Traffic Mirroring - GWLB Deployment
The traffic_mirror stack provided by Qualys creates a traffic mirror session for each workload, a common traffic mirror filter & traffic mirror target alongside.
For traffic mirroring to GWLB deployment, the traffic mirroring target will be the VPC endpoint.
We recommend you provide all AZs in the form of subnets in each where your application workload is running.
This creates a VPC endpoint in all those subnets, so VPCE will be available in each AZs and mirrored traffic won't cross AZ boundary.
1. For launching traffic mirroring stack go to CloudShell and browse traffic_mirror-log_collection/gwlb_traffic_mirror directory of the extracted bundle.
The traffic mirroring stack should be deployed in traffic source account.
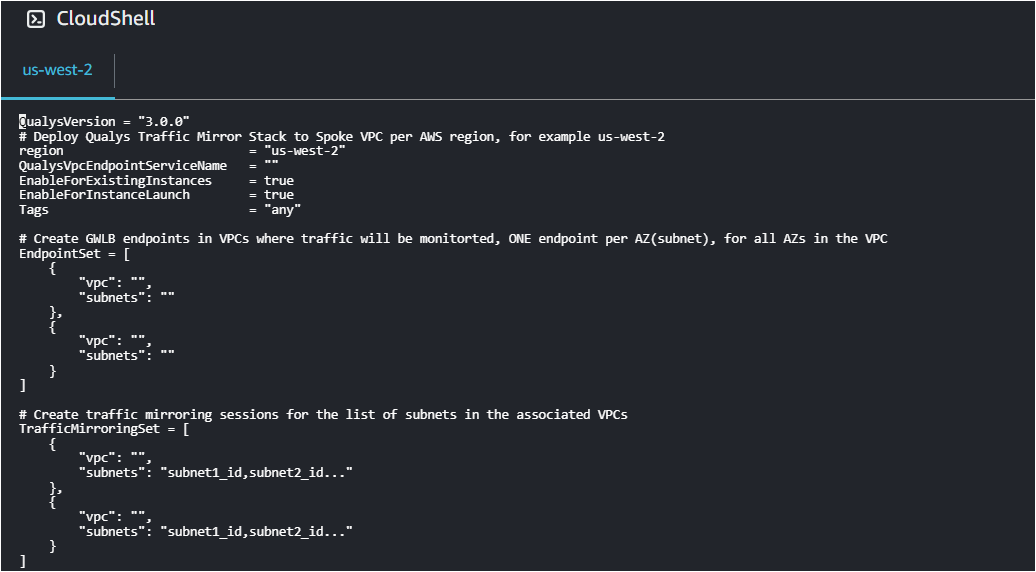
2. Modify the terraform.tfvars file here to manage deployment variables. Terraform variables are explained in detail in the README.md file.
- QualysVpcEndpointServiceName: Specify Qualys VPC Endpoint Service Name - Obtain this from GWLB CDR stack output section.
- EndpointSet: Specify VPC and subnets duo where traffic will be monitored, stack will create VPC endpoints in VPCs where traffic will be monitored. One endpoint will be created per VPC per subnet(AZ), effectively for all AZs in the VPC.
- TrafficMirroringSet: Specify VPC and subnets duo where application workloads are running and for which traffic mirror sessions will be created.
Refer terraform.example.tfvars for more details.
3. Run the following commands to deploy the module to each AWS subscription as needed.
-
terraform init -
terraform apply --auto-approve
4. After terraform apply runs successfully and creates the stack, it will add resources to listen to events for workload activation. It will also add functions to update the traffic mirror session.


Deploy CDR in AWS using Cloud Formation Template
To deploy CDR using Cloud Formation Template,
- Go to your AWS account > Services > CloudFormation.
- Click Create stack.

- Under Specify template, select Upload a template file.
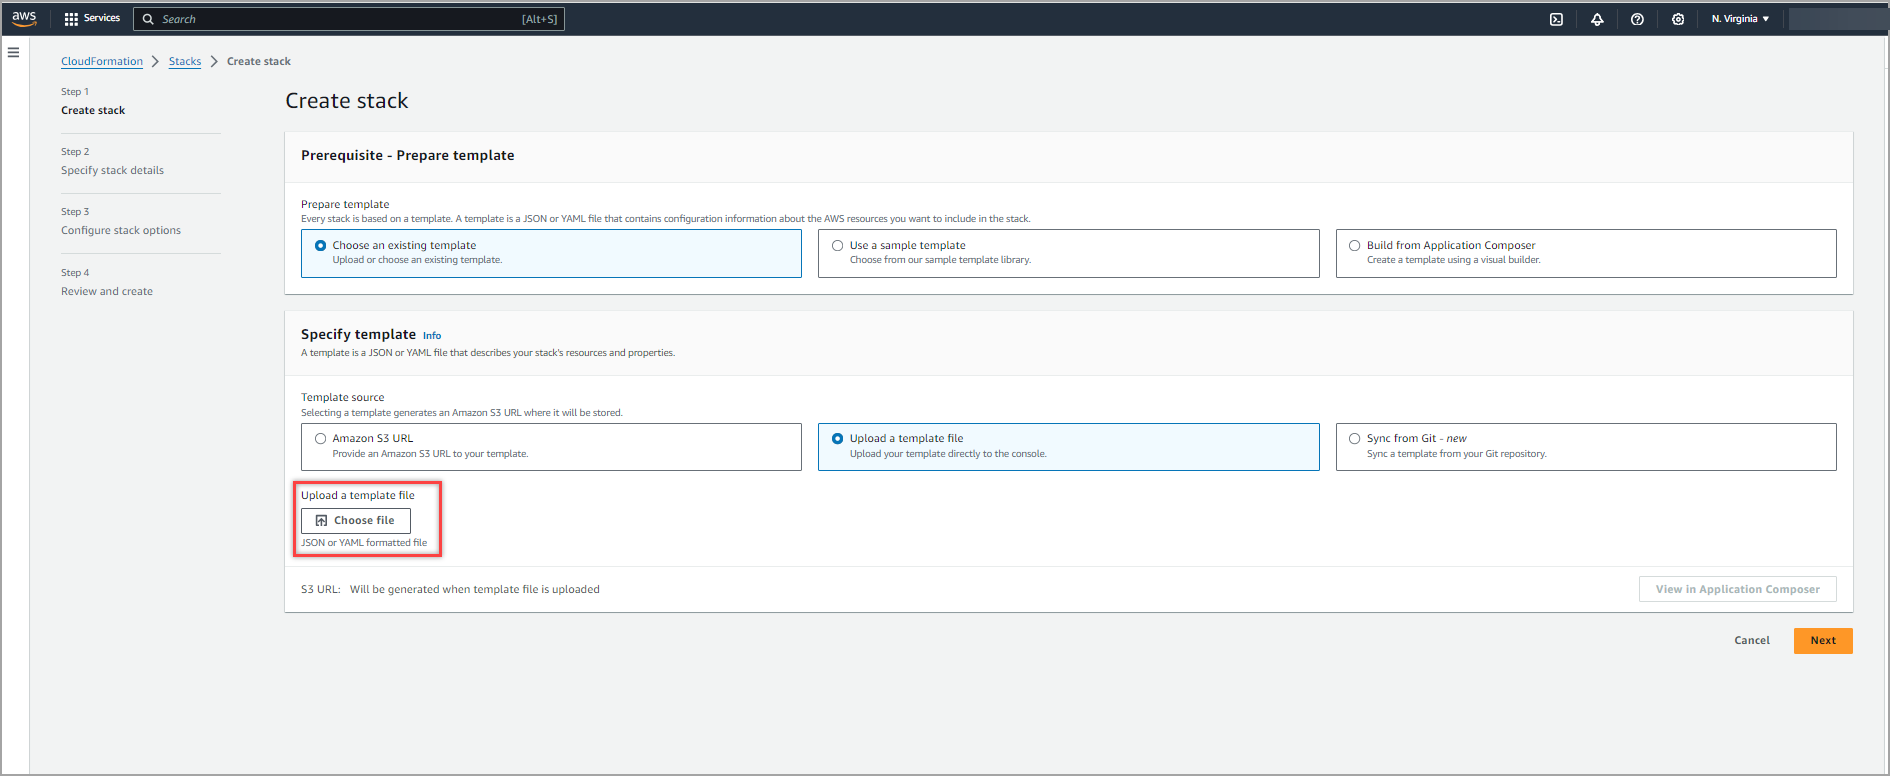
- Choose the Yaml file (qualys.yaml) present in the downloaded zip file and click Next.
- Provide Stack name, along with the details of its associated parameters and click Next.

-
Configure your stack, and click Next. To learn more about configuring a CFT stack, refer to Modifying a Stack template.
- Review your stack settings and click Submit.