Configure Appliances
The Appliance tab in the Qualys Connectors application is introduced to run virtual appliances for your AD Connector and VMWare ESXi Connector. A CAMS appliance is necessary to query the Active Directory data in Qualys environment. The connector fetches data collected by AD Collector and VMWare ESXi running on the CAMS appliance.
The following section describes how to create and manage the appliance.
Minimum Virtual Machine configuration requirements for AD Connector and VMWare ESXi Connector:
- CPU: 4 vCPUs
- RAM: 16 GB Minimum
- Primary Disk: 100 GB Disk minimum (For Primary Disk only)
The remaining configuration requirements are same as the Virtual Machine Configuration mentioned in Qualys Gateway Service (QGS) User Guide - Overview
How to Create an Appliance?
To create an Appliance for Active Directory connector, you must begin by navigating to the Connectors application.
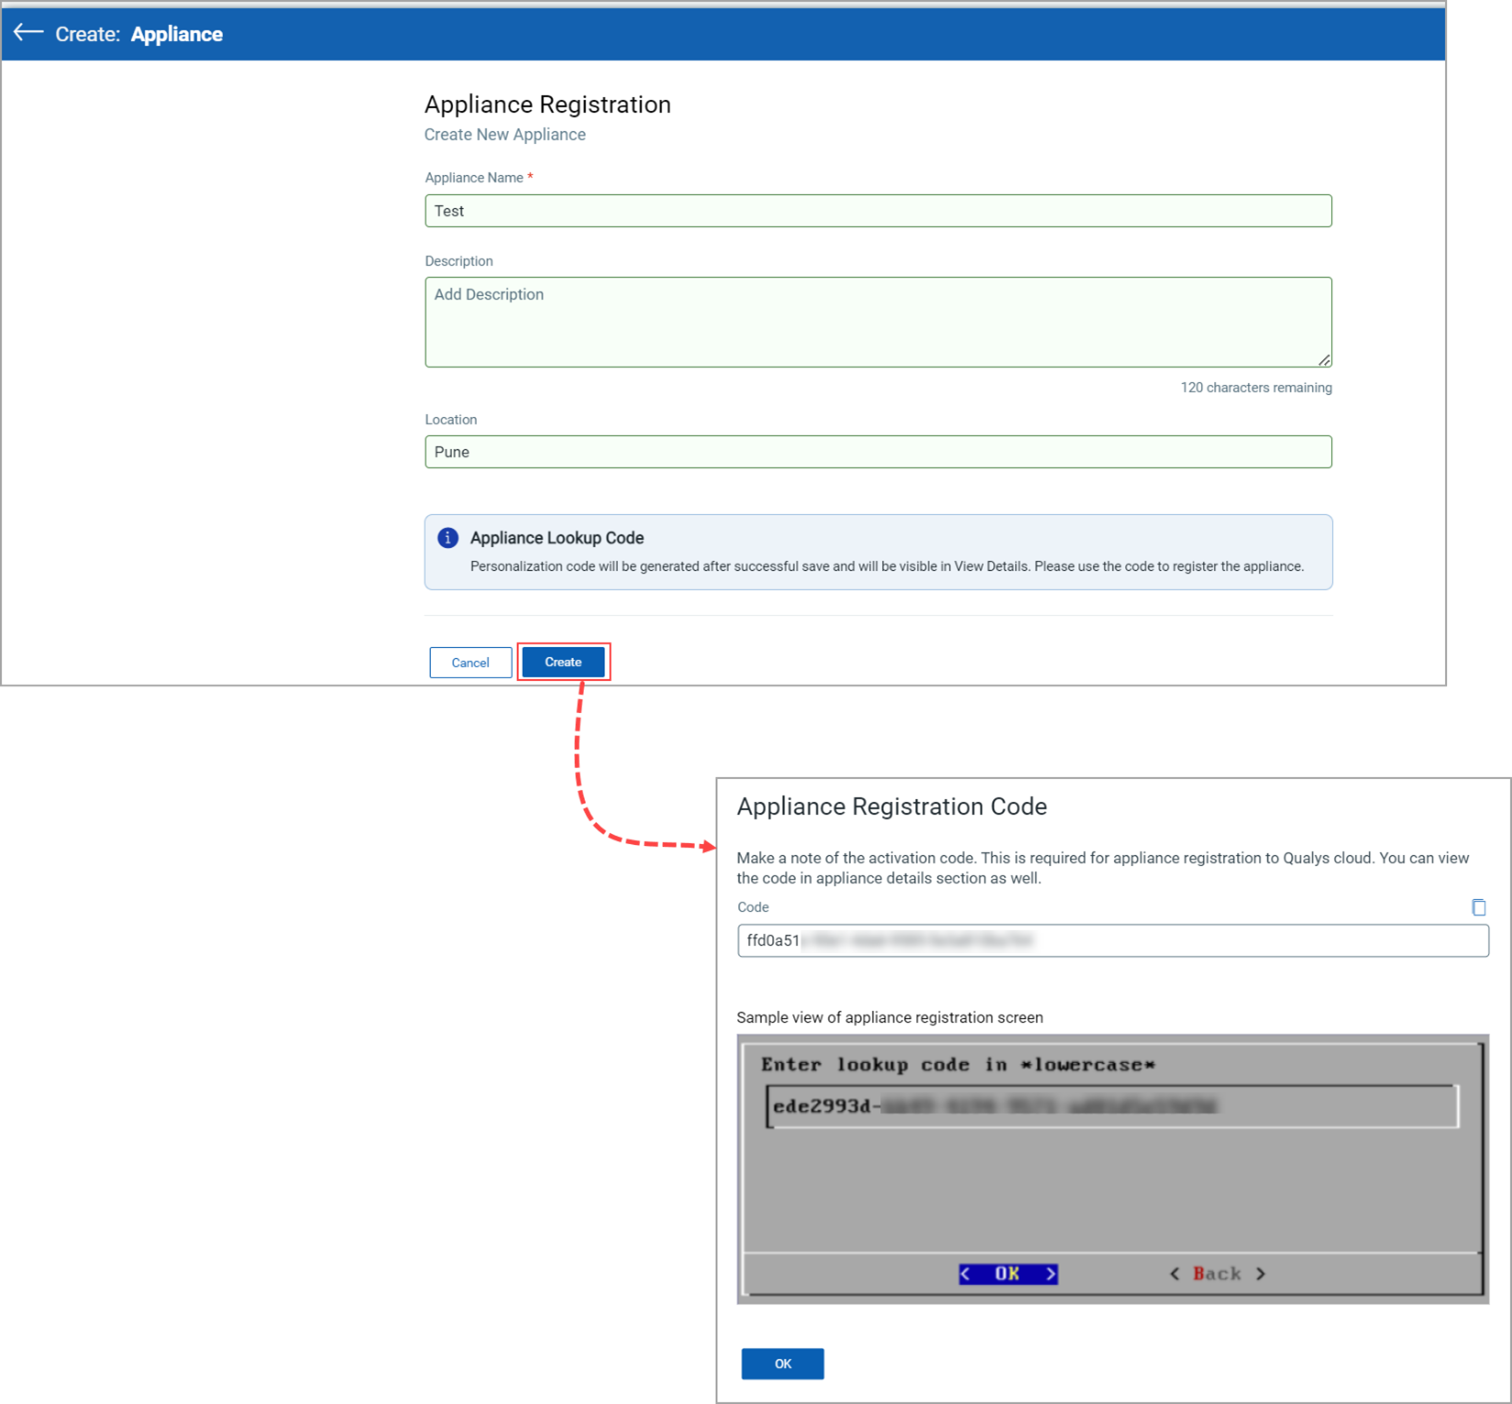
1. To create an appliance, navigate to the Connectors > Appliance tab > Click Create Appliance.

2. Add appliance name, description, and location, and click Create. A new Appliance Registration Code pop-up opens.
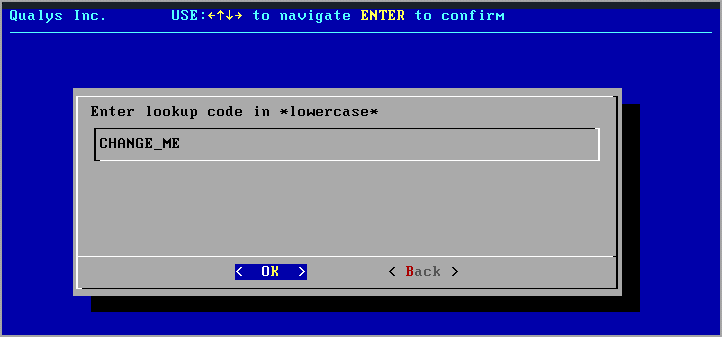
3. The Lookup code is required for appliance registration to Qualys Cloud Platform. You can view the code in the appliance details section as well.
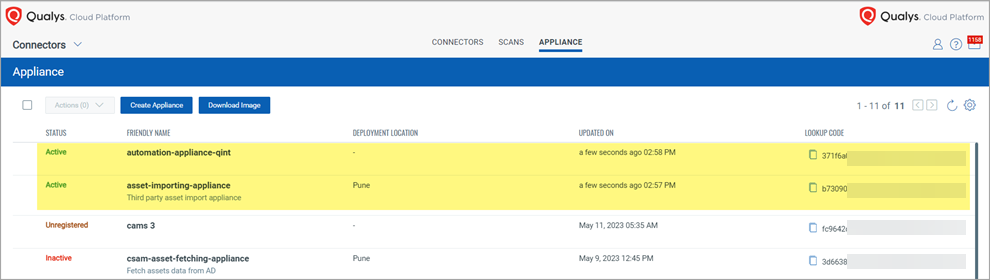
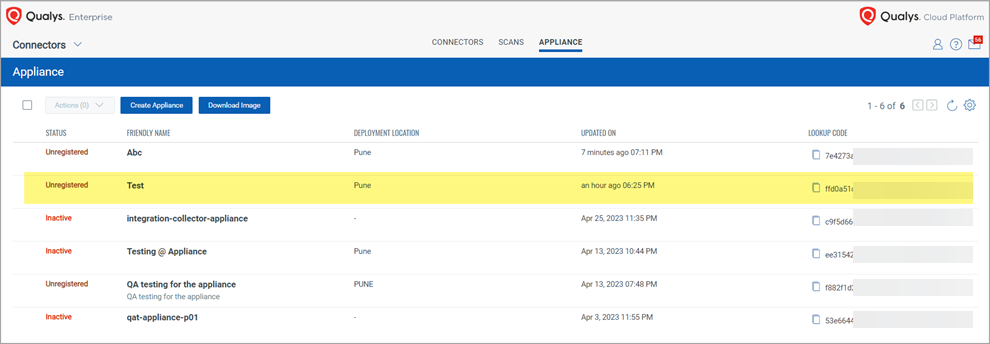
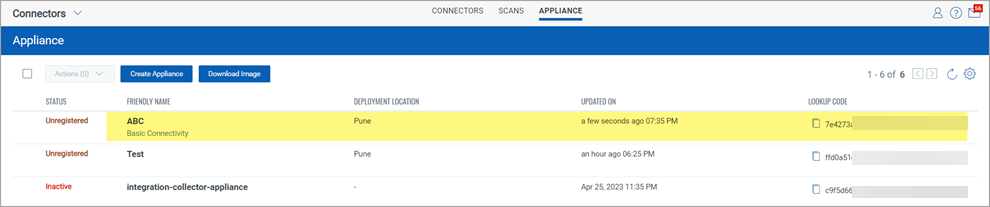
After creating an appliance, you can see your newly created appliance listed under the appliance tab.
How to Download the Image?
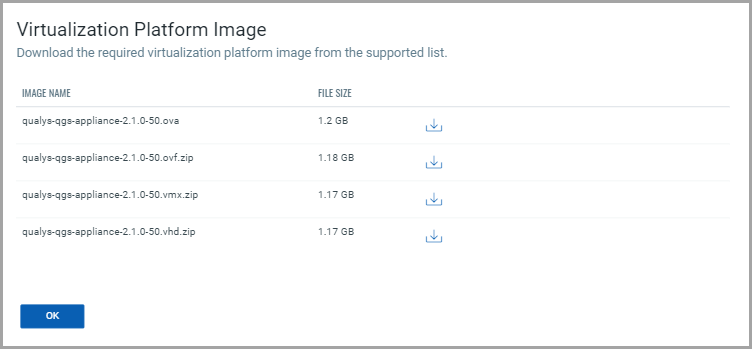
To download an image, navigate to the Connectors> Appliance tab > Click Download Image.

A new virtualization platform image pop-up opens; you can download the required virtualization platform image from the supported list.
How to Delete and Edit the Appliance?
To delete and edit the created appliance, navigate to the Connectors > Appliance tab. You can see all your created appliances.
To edit the appliance, select and hover over the appliance, and from the Quick Actions menu, click Edit, a new Update: Appliance window opens. Add the required details and click Update.
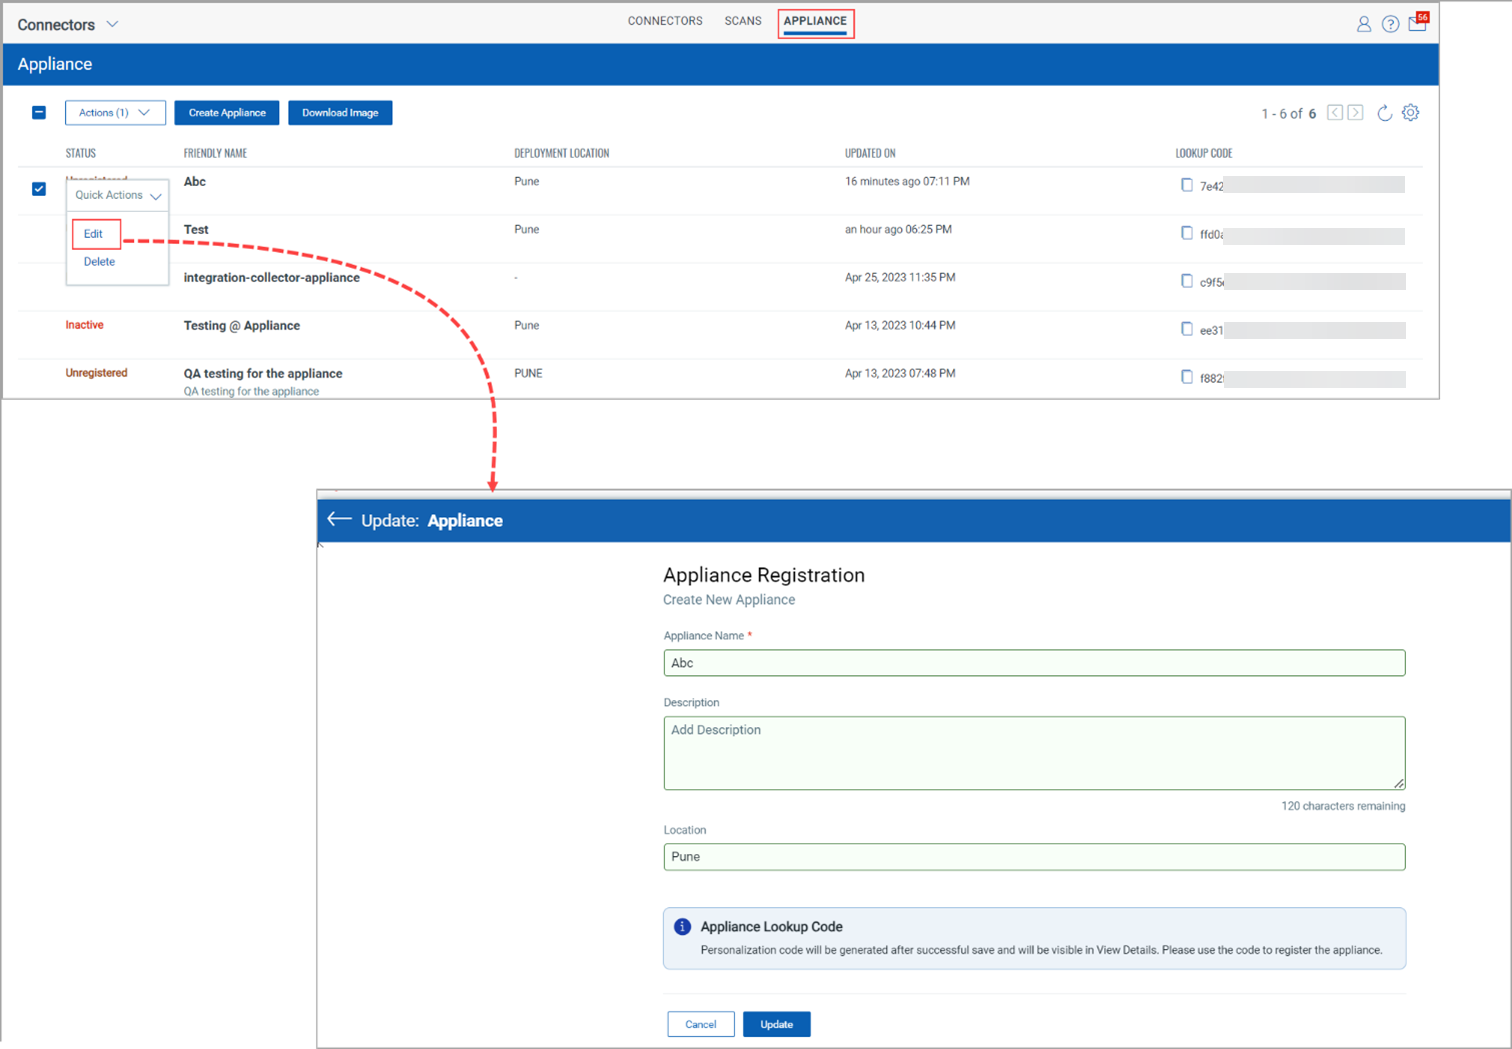
Your recently updated appliance details are under the Appliance tab.
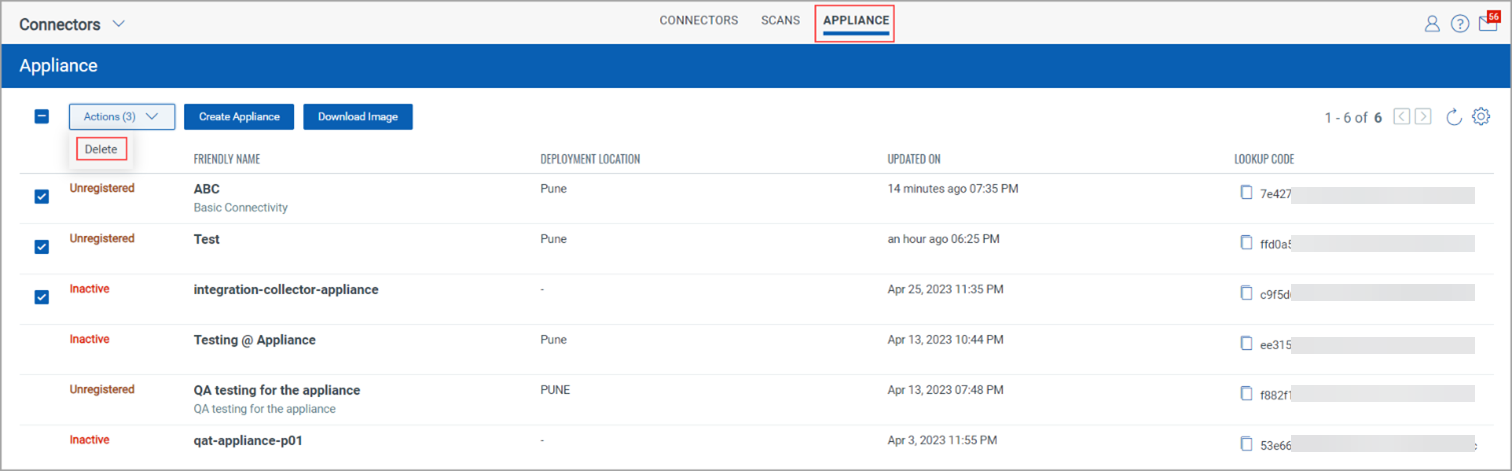
To delete the appliance, select and hover over the appliance, and from the Quick Actions menu, click Delete; a new delete confirmation pop-up opens. Click Yes to delete the appliance.

If you want to delete one or more appliances, select the appliances and, go to the Actions menu, click Delete.
Connector Virtual Appliance Local Configuration
The Qualys Connector virtual appliance utilizes a text-based user interface from the appliance console to configure the network, view the status, perform diagnostics, and reset the appliance.
The menu structure of the local configuration will be as shown below
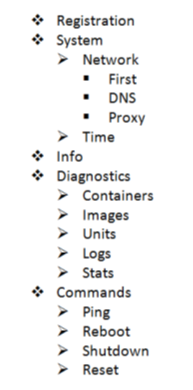
Configuration Screens
Next, let’s look at the screens used to configure & manage the Qualys Connector Virtual Appliance.
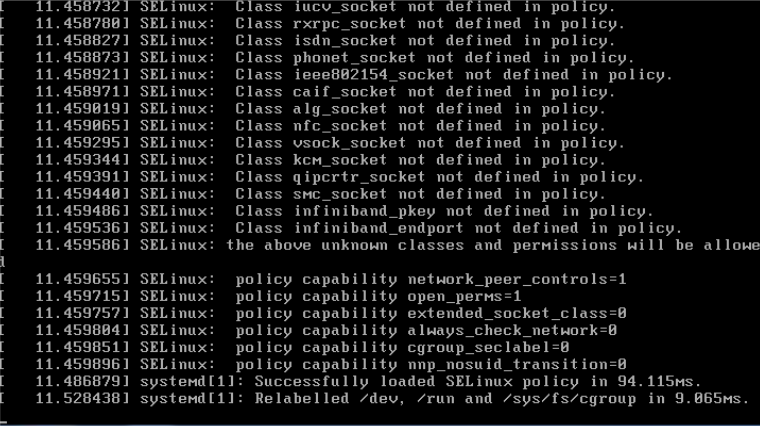
QGS virtual appliance startup screen.
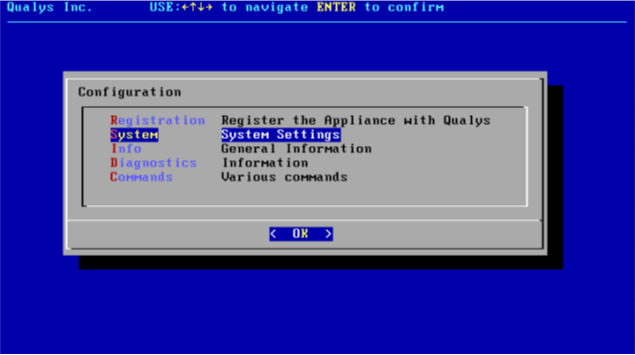
Main Configuration Menu
Follow the Text UI configuration steps to create your CAMS appliance.
Under Configuration, configure System Settings.
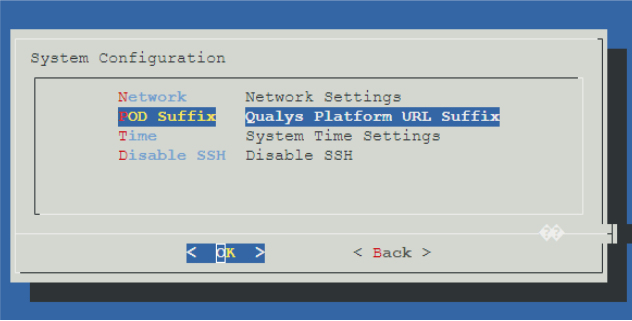
Under System Configuration, select POD Suffix
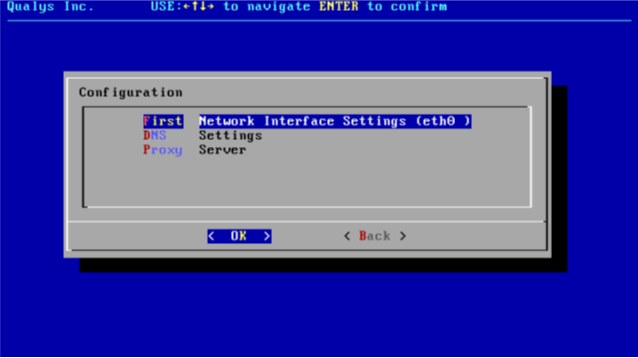
Select First as Ethernet interface
Static
Configure the virtual appliance network interface to use Static IP Address if using Static IP.
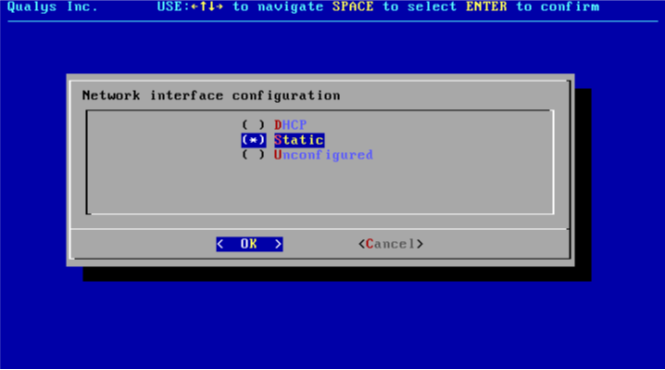
Cloud Agents connect to the Static IP Address on port 1080.
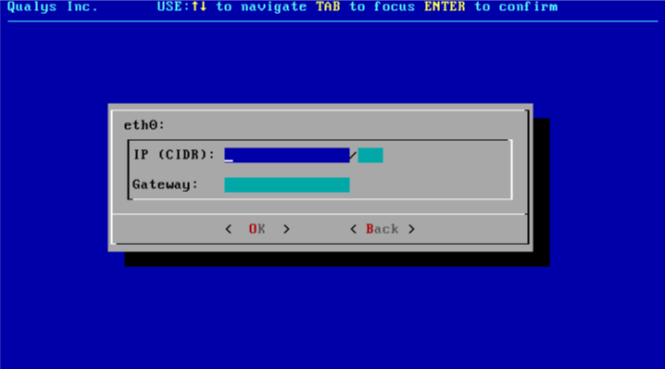
Set static IP address, if used.
IP address uses a 32-bit netmask, e.g. “/24” for 255.255.255.0
Specify the Default Gateway IP address.
DNS Servers
Set DNS servers for the virtual appliance to resolve the Qualys URLs.

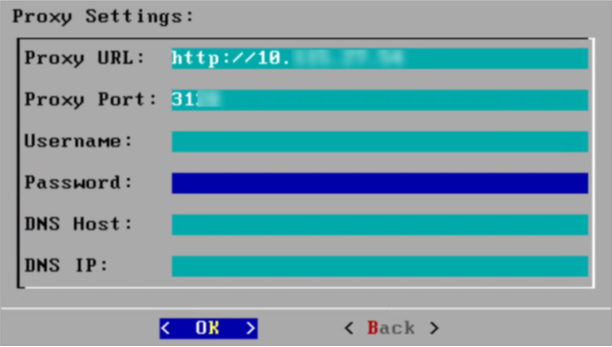
Proxy Servers
Configure the upstream Proxy Server if using proxy chaining.
How to Register the Appliance with Qualys
You must follow the following steps to register your newly created appliance with Qualys.
1. Select the appliance to register with Qualys and go to the appliance CLI (command-line interface).
2. Navigate to Configuration > Select the Registration > Click OK.

3. Enter the Personalization Code that was copied during the appliance creation process. Click OK.
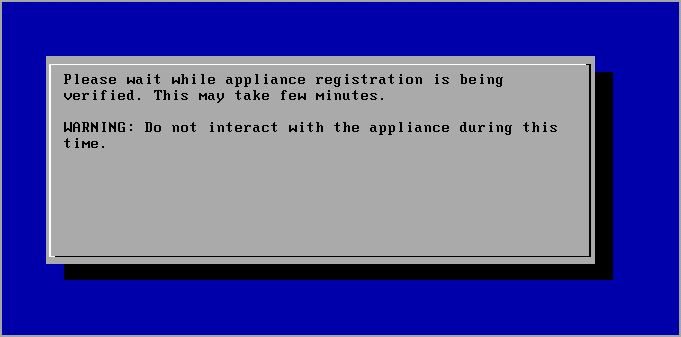
4. You can get a warning prompt about the appliance registration process.
5. Once the appliance registration is completed, You can get a confirmation prompt.
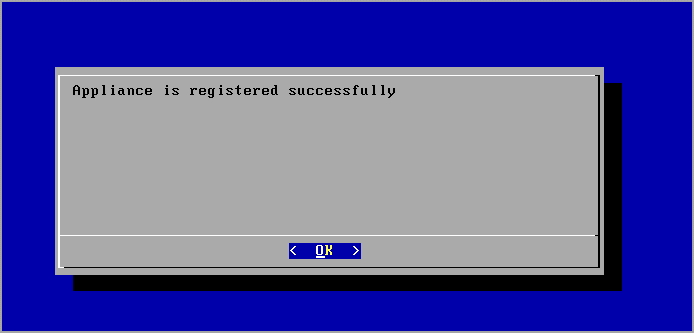
6. Now you can see the details of the successfully registered appliance under the Appliance tab of the Connectors app with the Active form.