CSV Import
The CSV Connector addresses a fundamental integration challenge by enabling security teams to consolidate vulnerability and asset data from multiple vendor platforms into a centralized system. Rather than manually transferring findings between tools, organizations can automate the import and export of vulnerability assessments from sources like Tenable, CrowdStrike, and Wiz into Qualys ETM.
The connector's flexible field mapping and data transformation capabilities ensure that disparate vendor scoring systems align with Qualys' detection framework, while features like status retention help teams maintain finding context across consecutive scan cycles. This automation reduces operational overhead and enables security teams to focus on remediation rather than data management tasks.
To know more about how the CSV Connector leverages the findings, refer to the Qualys ETM Documentation.
CSV Connector Supported Data Model
The CSV Connector supports two data models:
- Standard CSV Connector
- UAI-activated CSV Connector
Supported Data Ingestion for each mode:
| Standard | UAI-activated |
|---|---|
|
|
How do I activate UAI Support for CSV Connectors?
- Navigate to the CSAM application
- Click on ? help icon
- Click on Go to Unified Asset Inventory -> This activates UAI config for the subscription
Create a New CSV Connector
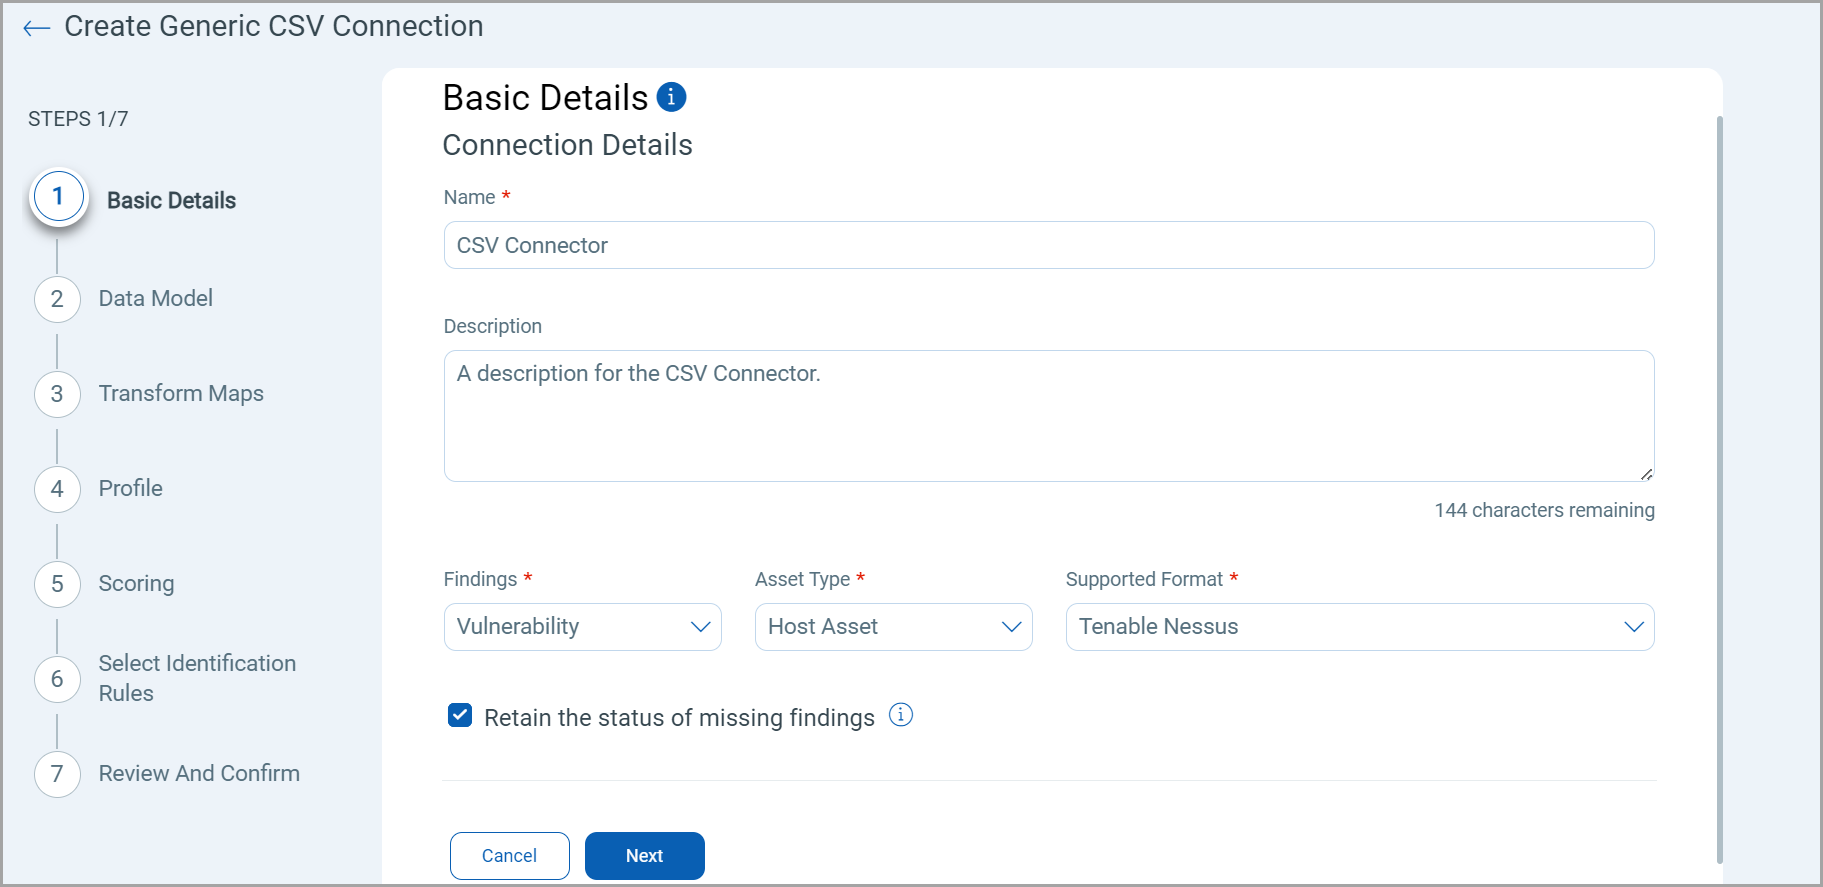
Basic Details
- Provide the Connector's Name and Description.
- Select the type of findings you want to import or export — currently, we support Vulnerability.
- Select the Asset Type - currently, we support Host Asset.
CSV connectors now support Vulnerability/Application (WAS Findings) and Assets-only data. You can now select their target data model while configuring connections and upload Generic CSV format to the connector.
-
Select the Supported Format. The field shows the list of supported vendors from where the connector can fetch the data
Currently, CSV connector supports the following vendor formats.- Tenable
-
CrowdStrike SpotLight
-
Wiz
-
Onapsis
- (Optional) The Retain the status of missing findings checkbox retains the status of a finding discovered in prior connector runs. When selected, findings absent in new runs keep their previous status. When deselected, absent findings are automatically marked as "Fixed".
The following screenshot displays the Basic Details fields.
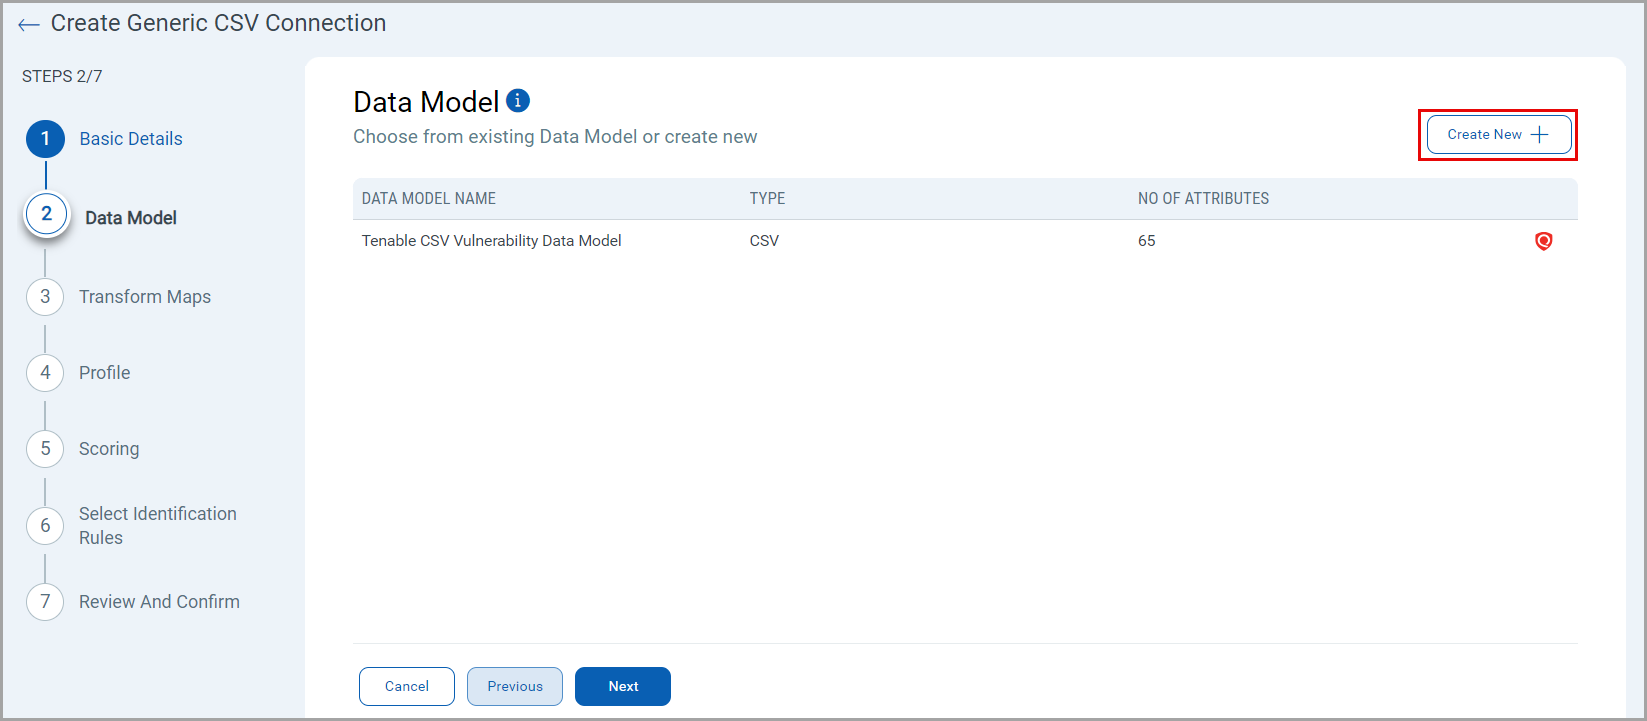
Data Model
Define the structure of the data you want to import. Specify the fields and their data types to ensure the CSV data aligns correctly with your system's schema.
- If you have selected any format other than Generic CSV, the Data Model screen has an out-of-the-box data model mapping available for your use.
- This connector allows a maximum file upload size of 100 MB and a maximum source data model creation size of 10 MB.
If the size of the file is larger than the allowed limits, then you can use either of the following connectors to upload files:- CSV Automation - This connector will split the file before uploading it.
- AWS S3 connector - This connector retrieves files from the backend, and whenever an upload is made to the configured S3 bucket, the connection is notified to fetch the file data and send it to ETM.
Perform the following steps to create a new data model:
- Enter a unique name for your data model. This helps identify and manage different data models.
- Upload a CSV file containing your data. This is a quick way to import data without manual entry.
However, if you prefer to input data manually, use the following fields:-
Header: Specify if the CSV file contains a header row. This row typically includes column names.
- Column Delimiter: Define the character that separates columns in your CSV file, such as comma (,) semicolon (;) or tab.
- Qualifier: Indicate the character used to enclose each field in the CSV file, commonly a double quote (").
- Row Delimiter: Specify the character that separates rows in your CSV file, usually a newline (\n).
- Escape Character: Identify the character used to escape special characters in the CSV file, typically a backslash (\).
- Header Row: Enter the row number where your data begins. This is especially useful if your file contains metadata or comments in the top row.
Each input field allows precise control over how your data is structured and imported, ensuring accuracy and consistency in your data model.
The following screenshot displays the Data Model fields for the Upload option:

-
Transform Maps
Map the fields from the CSV file to the corresponding fields in your target system. Transform Maps ensure the data is transformed correctly during the import or export process.
If you have selected any format other than Generic CSV, the Transform Map screen has an out-of-the-box data transform mapping available for your use.
Perform the following steps to configure a Transform Model:
- Transform Map Name: Enter a unique name for the Transform Map. This name helps identify the specific transformation configuration within this connector.
- Source Data Model: Select the data model that serves as the input for the transformation. This is the model from which data will be extracted.
- Target Data Model: Choose the data model that receives the transformed data. This model defines how the data will be structured after the transformation.
Refer the following Transform Map screenshot:
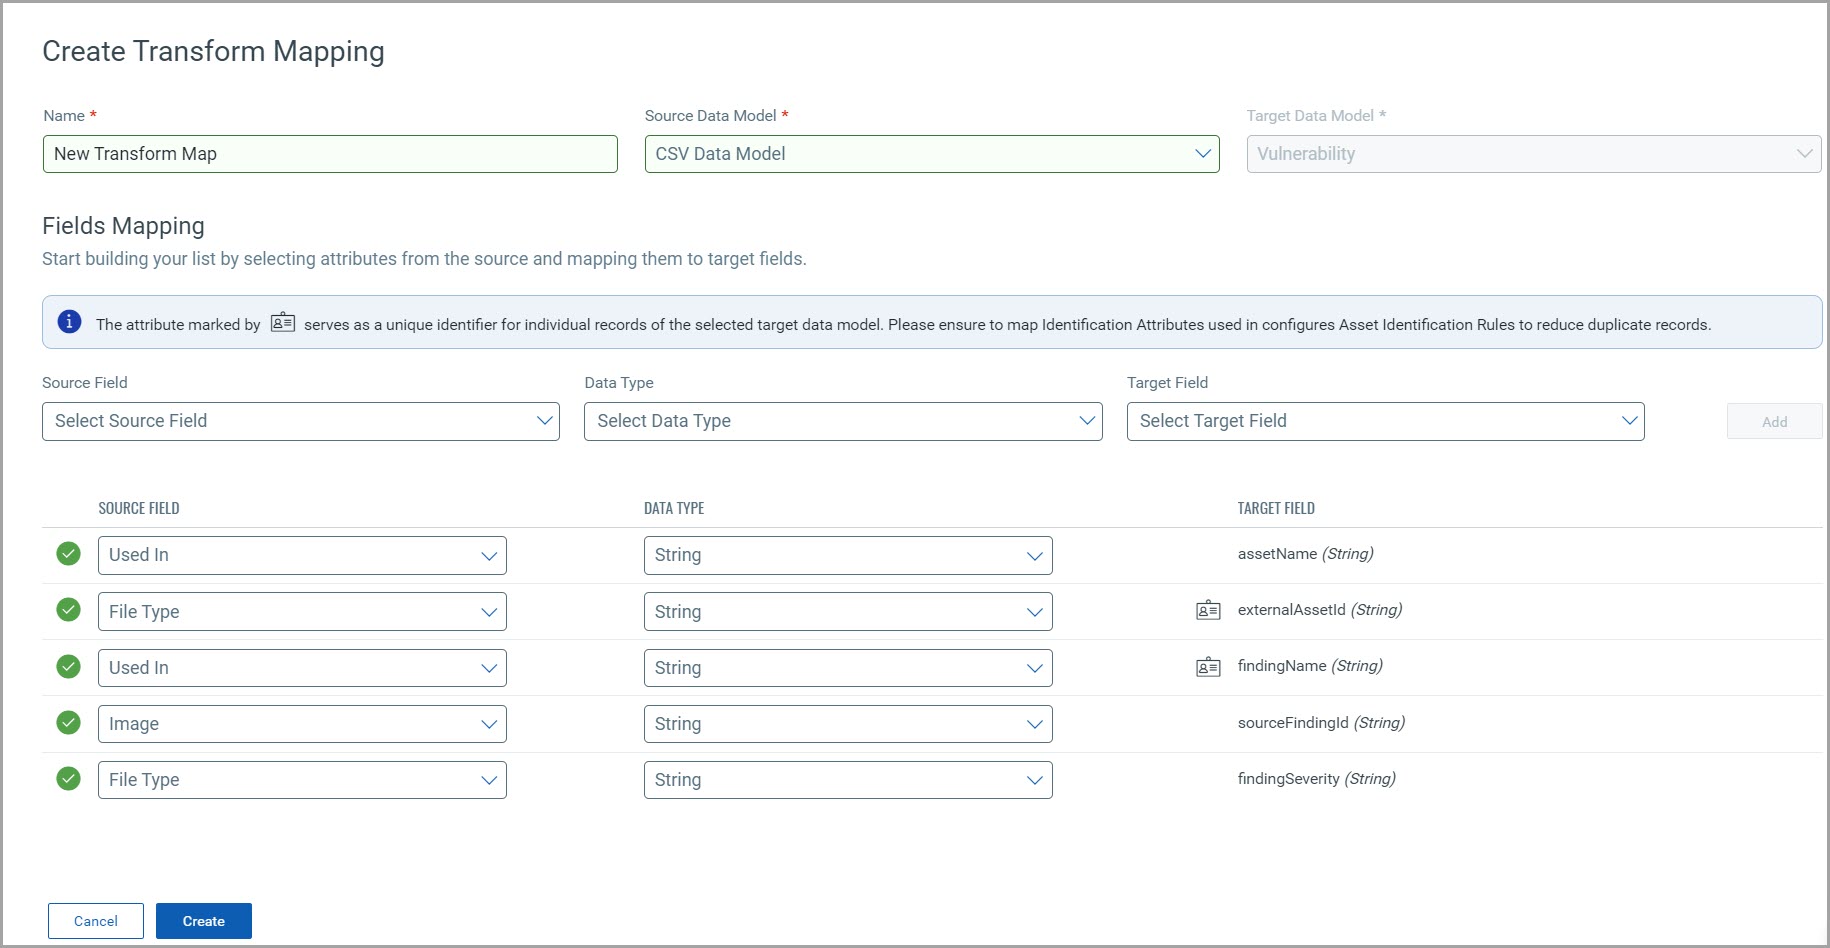
Fields Mapping
The Fields Mapping section maps fields from the Source Data Model to the Target Data Model.
- Source Field: Specify the field in the Source Data Model containing the transformed data.
- Data Type: Indicate the data type of the Source Field (e.g., string, integer, date).
- Target Field: Designate the corresponding field where the transformed data will be placed in the Target Data Model.
Click Add to create and display the mapping for the Source Field, Data Type, and Target Field below the section. This visual helps ensure that all necessary fields are mapped correctly and allows easy verification and adjustments.
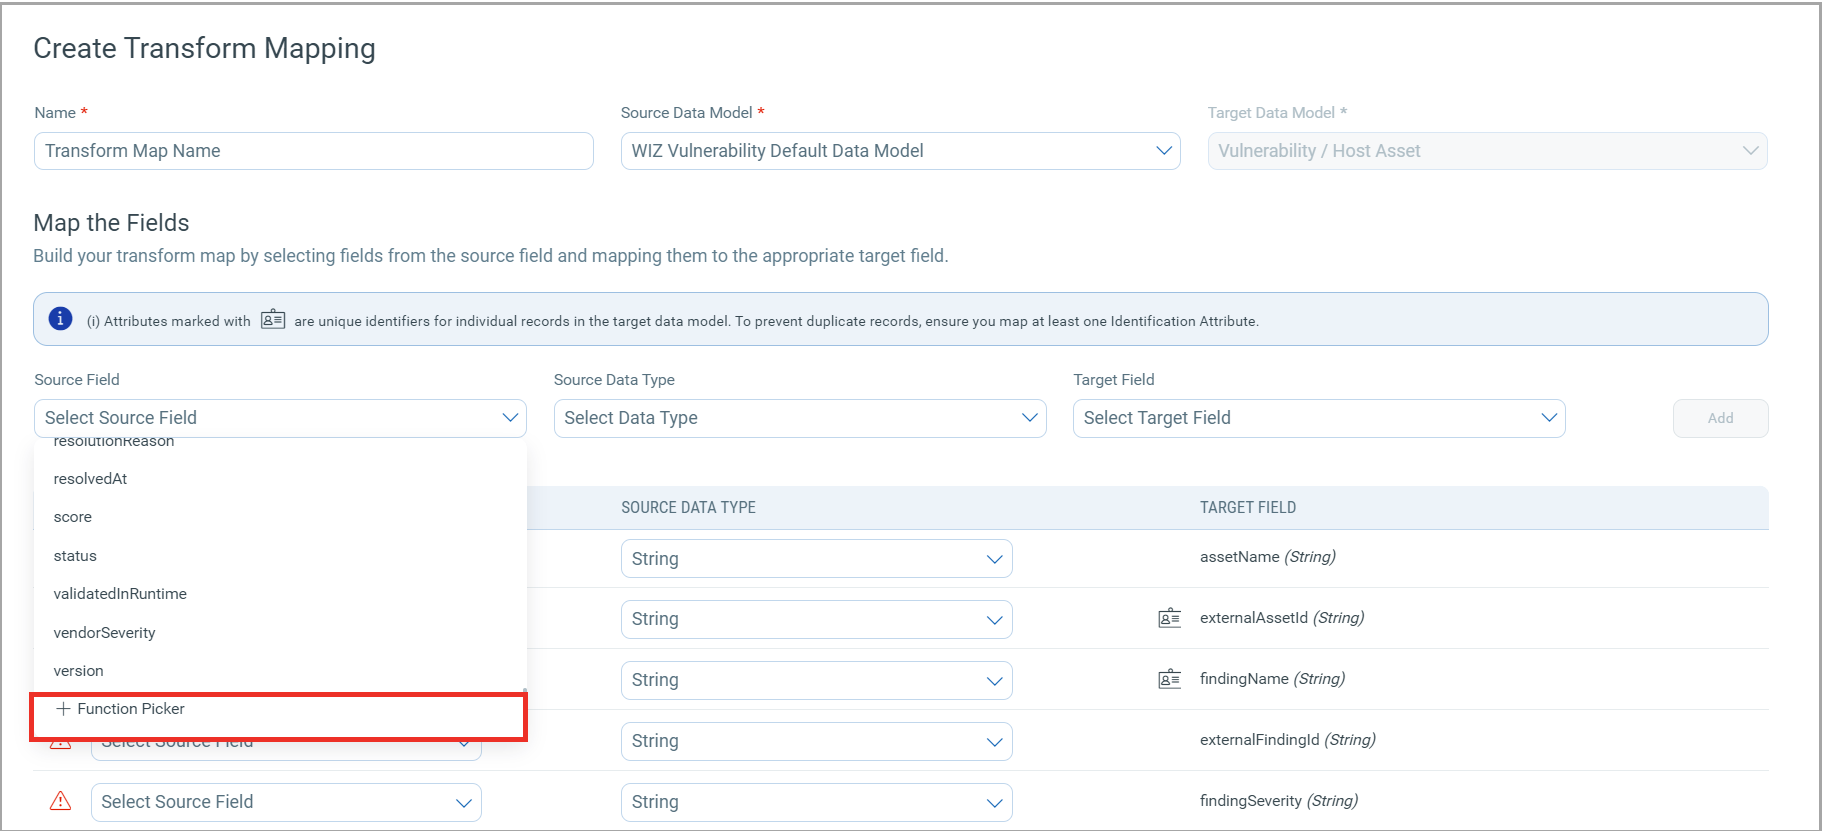
Function Picker
When creating a transform map, you can either directly map attributes or use functions to modify and format the data as needed. From the list of supported source fields in the transform map, you can see an option called the Function Picker. This tool lets you modify the data during the transformation step.
The Function Picker is a collection of powerful operations for your data model transformation. Select and apply these data transformation operations while mapping data from your vulnerability assessment vendors to the Qualys ETM. For example, you can combine multiple text strings using Concat, convert date formats using formatDateTime, or manipulate text case using toUpperCase/toLowerCase functions.
Click the source field dropdown to view the list of source fields, scroll down to see the Function Picker option.
To learn more about all the various Function Picker operations, refer to Transform Map Functions.
Profile
Create a profile for your connector. A profile decides the connector status, execution schedule and transform map to choose. The connector follows the configurations of this profile for all future executions.
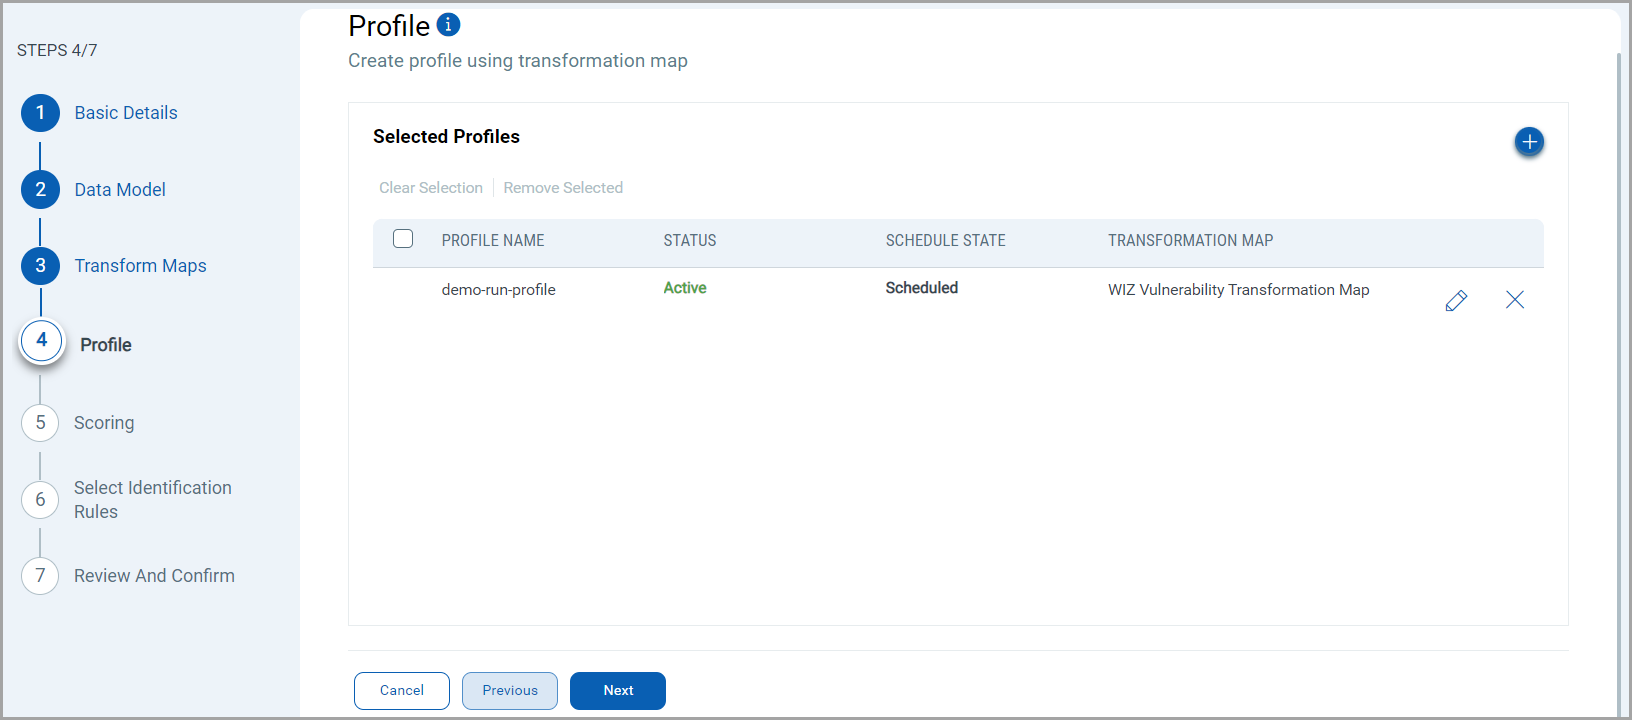
Click the "+" to create a new profile.
In the Add Profile screen, provide the necessary inputs for your new profile.
Provide a Name and Description.
Select the required Transform Map for the data mapping.
The Status field determines whether the connector should be in Active or Inactive state after creation.
Scoring
The Scoring screen lets you map non-CVE vulnerability scores from your vendors to Qualys Detection Score (QDS) system.
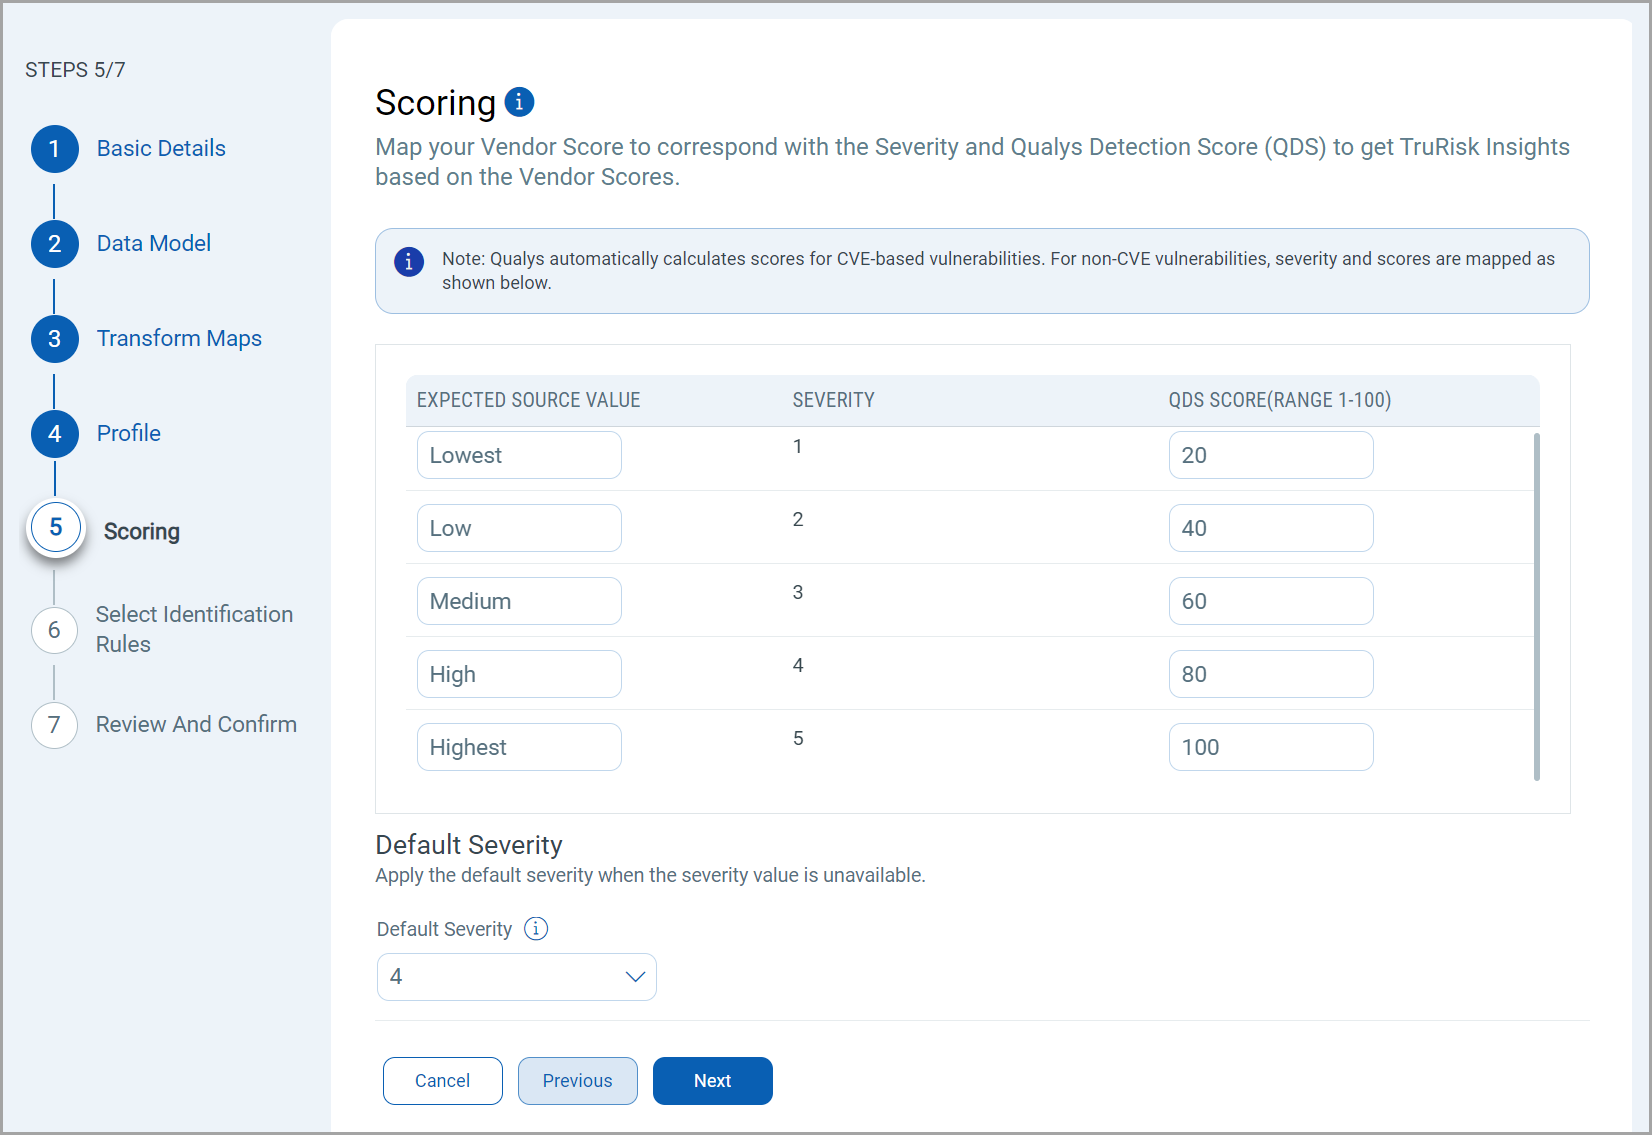
You have two columns with 5 input fields in each of them. These fields correspond to a specific severity starting from the least severe (1), to the most severe (5).
Fill out all 5 rows to create a comprehensive score mapping. This allows for translation between various vendor scoring systems and Qualys' Detection Score.
The specifics of the mapping is explained below.
Expected Source Values - Enter the vendor's original score or rating for non-CVE vulnerabilities.
This can be alphanumeric values. (e.g., "High", "Critical", "A", "3", etc.).
Severity - This column is pre-populated with severity levels from 1-5. These represent the severity levels in Qualys. The Source Value must be mapped such that it utilizes these 5 severity levels.
QDS - Enter the corresponding Qualys Detection Score. Use values from 0-100, where higher numbers indicate higher severity.
Default Severity
Below the scoring map, find the 'Default Severity' dropdown menu.
Select a default severity level from 1-5, this is applied when a vendor's score for a non-CVE vulnerability doesn't match any 'Expected Source Value' in your mapping table.
Select Identification Rules
The Identification Rules are a set of out-of-the-box precedence rules set by Qualys CSAM. The connector discovers findings based on the order set by the selected Identification Rules.
You can proceed to the next step without making any changes to this screen.
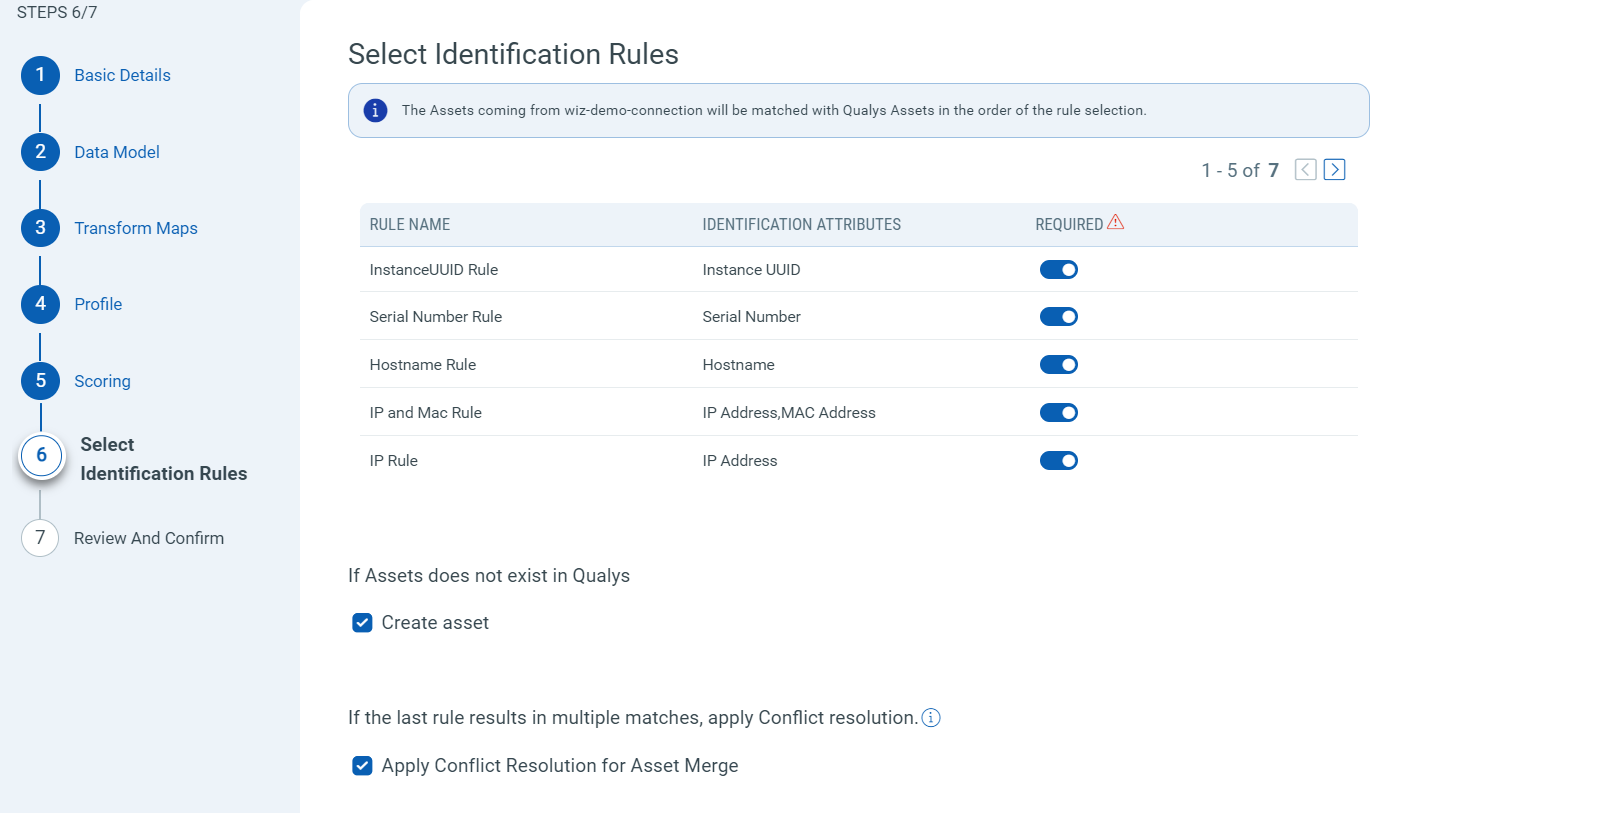
If you don't want to choose a specific rule, turn off the toggle next to it. But, ensure that at least one rule is selected.
To learn more about the different rules and options present in this screen, refer to the CSAM Online Help.
Review and Confirm
Review the configurations provided in the previous steps. Ensure all details are correct and complete. Confirm the setup to finalize the configuration of the CSV connector.
This streamlined process allows for efficient data integration, ensuring accuracy and consistency across systems.
Saving and Running the Connector
When saving and running the connector, a popup appears with the following input fields:
Select Transform Maps: Choose the appropriate Transform Map from the dropdown list. This map defines how the data from the uploaded CSV file be transformed and structured according to the specified data models.
Upload CSV File: Upload the CSV file containing the data to be processed. This file should match the structure defined in the selected data model and will undergo the transformations specified in the chosen Transform Map.
After selecting the Transform Map and uploading the CSV file, the connector will process the data accordingly, transforming and importing it as per the configurations set.
Related Topic