Prioritization Workflow
The prioritization workflow helps you move from a broad set of findings to a clear, actionable list of the most important items to address.
Step-by-Step Instructions
To prioritie your workflow, follow these steps:
- Navigate to Risk Management > Risk Workbench.
- Click Start Prioritizing.
-
Define Scope
Set the business context and drive prioritization:
-
Click the desired business entity/entities.
OR
Click Choose Tags Instead to use asset tags for the prioritization scope. - Show me the steps to add asset tagsShow me the steps to add asset tags
- Click Choose Tags Instead. The Select Tags dialogue box appears.
- Select the desired tags and then click Add Tag.
-
-
Filter Findings
Decide the prioritization approach to discern and filter the findings requiring immediate attention. To do this effectively, structure the approach based on certain filters :- Select the system-defined template(Highest Risk Reduction) with default filters.
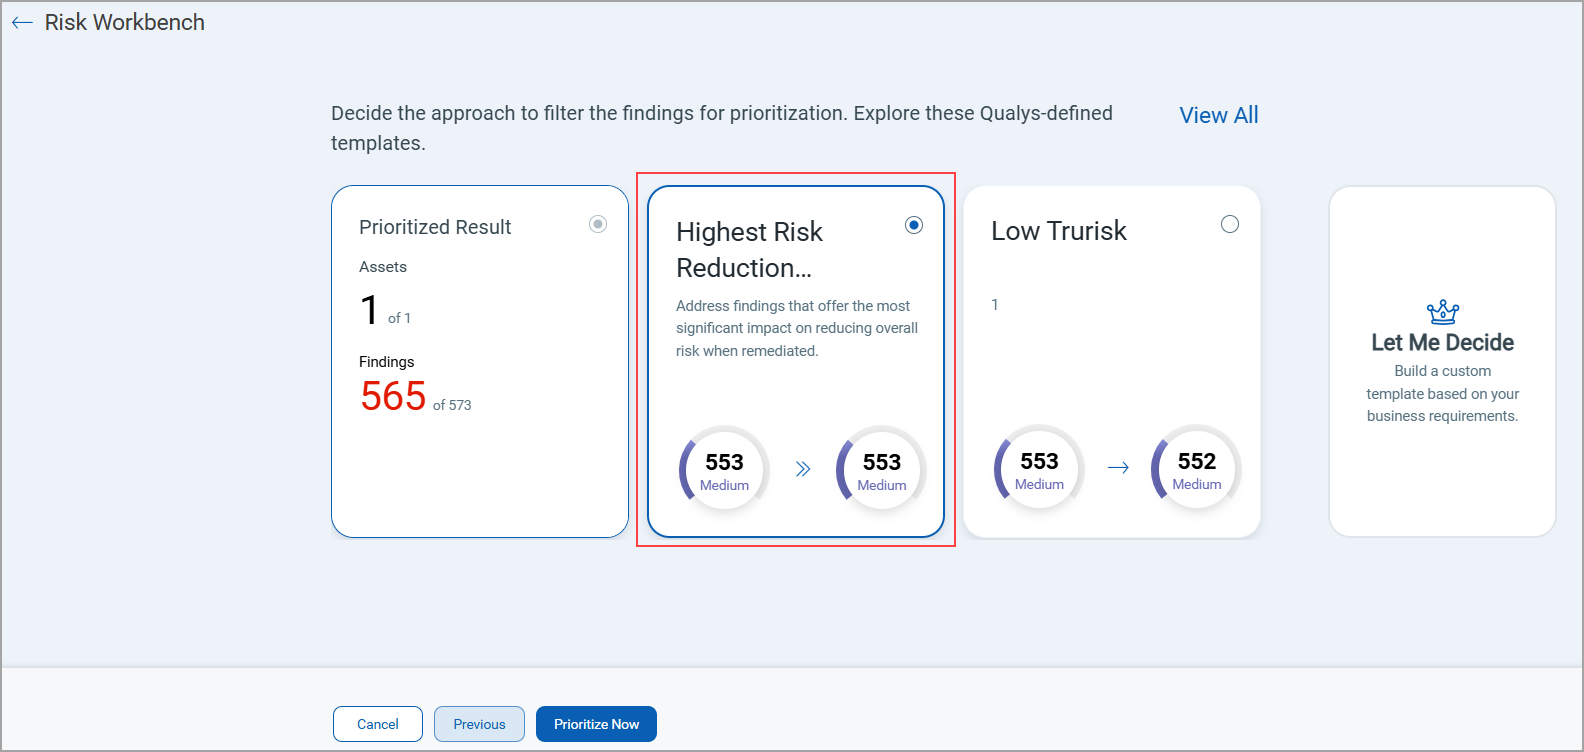
OR - Create a custom template.
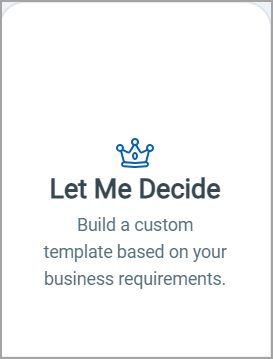
You can prioritize active vulnerabilities and misconfigurations on-demand across tagged assets or selected Business Entities.Show me the steps to create a custom templateShow me the steps to create a custom template- Click Let Me Decide.
- The Filters page appears with three different types of filters:
- Common Attributes: These filters are common across both the finding types (vulnerabilities and misconfigurations)
- Vulnerabilities: These filters are only applicable to vulnerabilities.
- Misconfigurations: These filters are only applicable to misconfigurations.
- Expand each filter type and then drag and drop the desired filters to build your custom template.
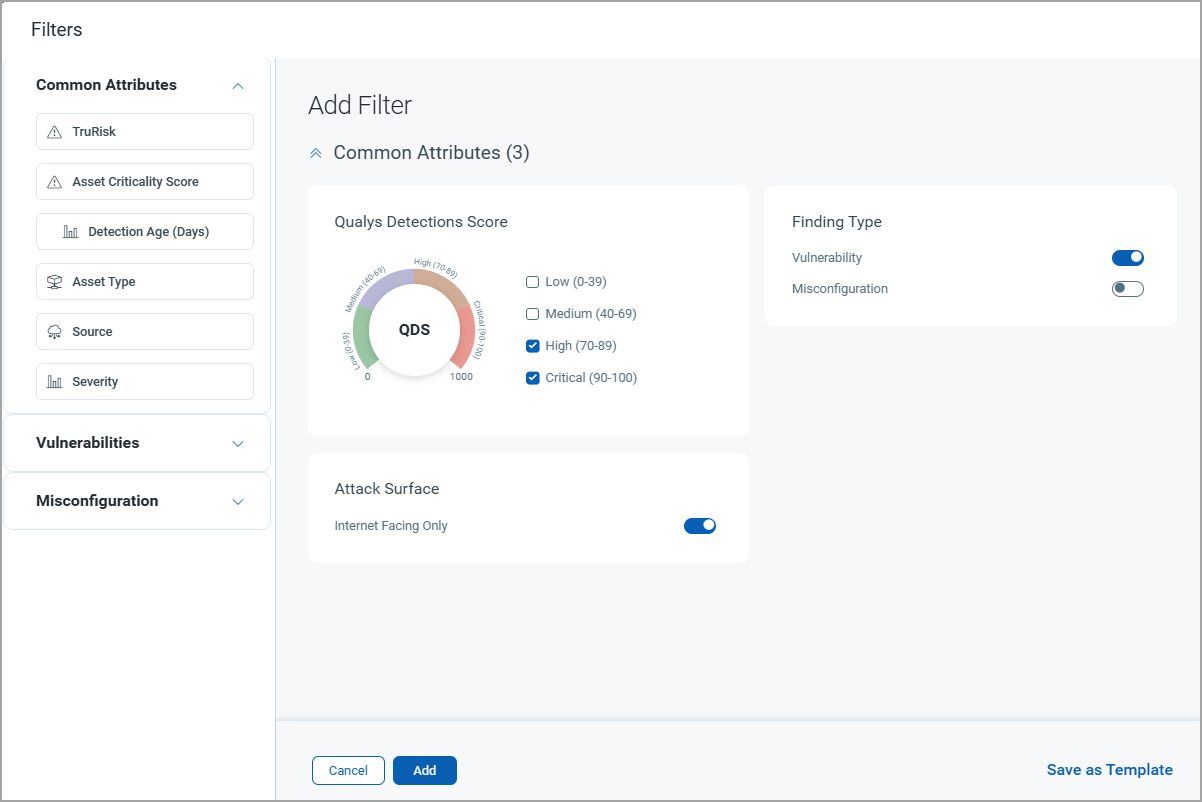
- Click Add.
- Click Save as Template if you desire to save this custom template for future use.
- In the Save Filter As A Template dialog box, enter the Name and Description of the template and click Save.
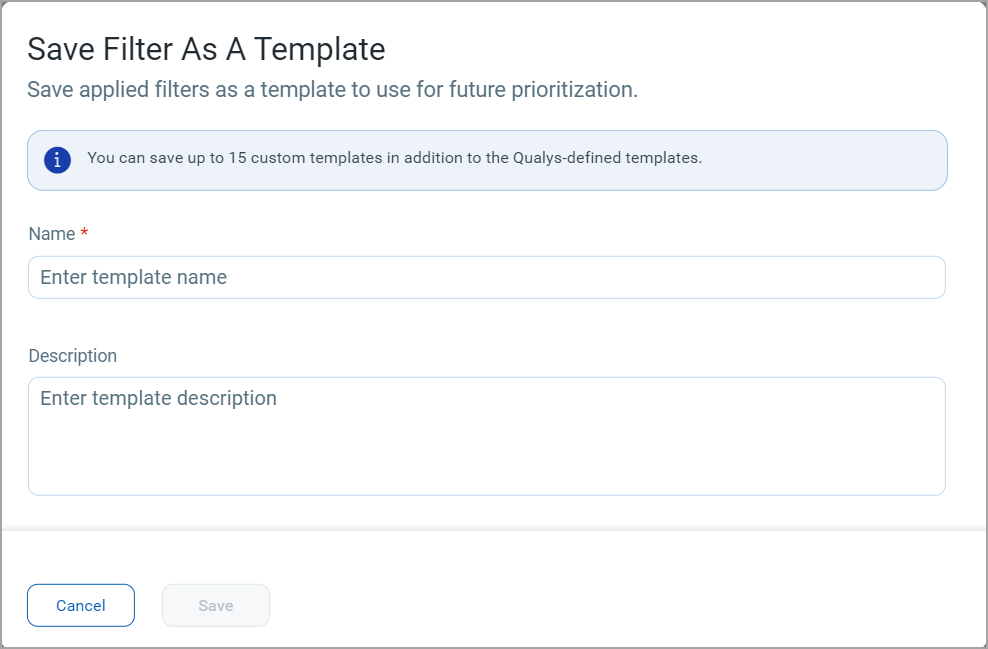
- The saved template appears on the Select Prioritization Approach page.
- Click Let Me Decide.
- Select the system-defined template(Highest Risk Reduction) with default filters.
-
Start Prioritization
Click Prioritize Now.
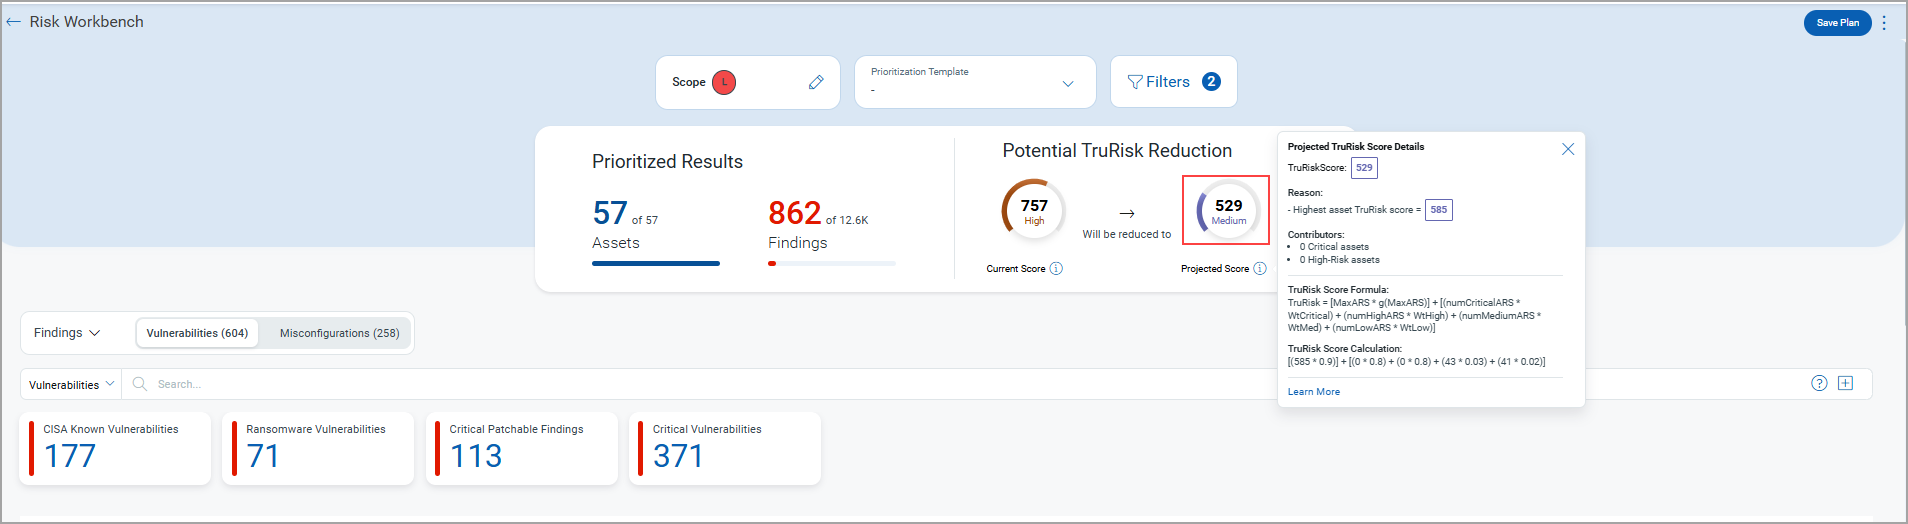
View calculation stages and TruRisk™ score updates. - You can view the various stages of the calculation.
Potential TruRisk™Risk Reduction Score is calculated for on-demand plans. You get informative status messages during plan recalculations.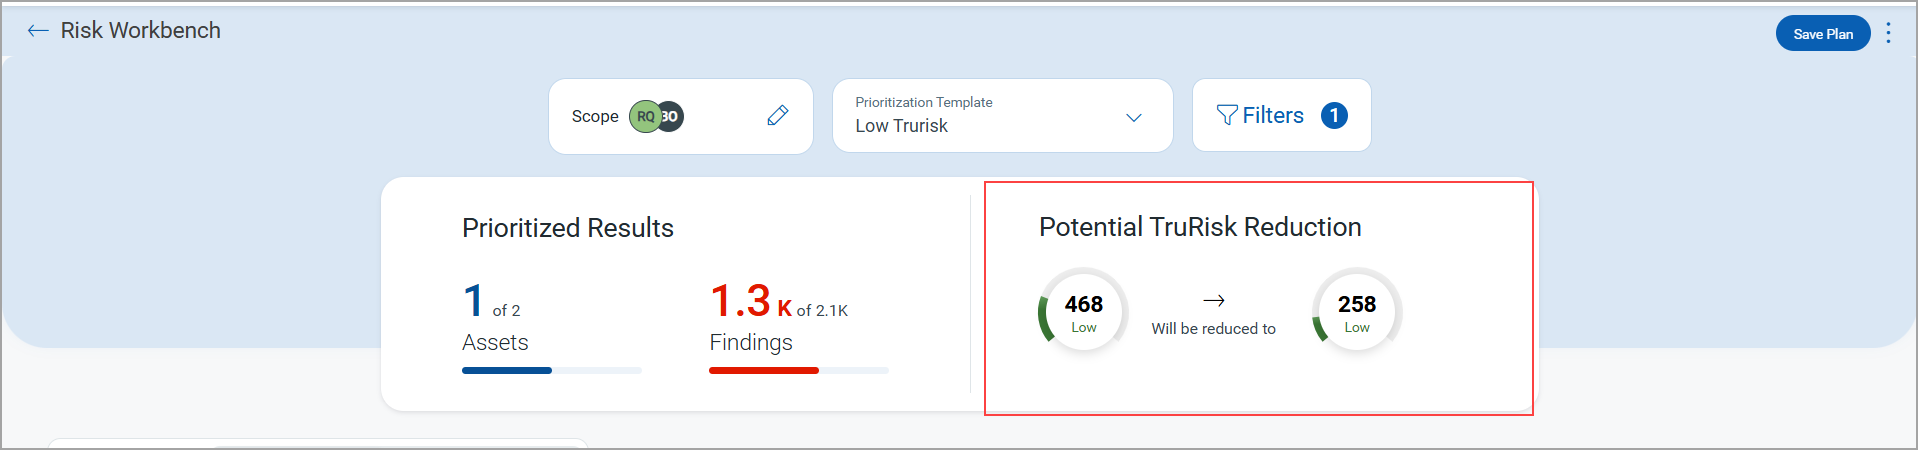
Status Messages During On-Demand Plan Workflow
The following messages assist you during various stages of the on-demand plan workflow:- While creating an On-Demand Plan:
'Save the updated plan and you will be able to see potential risk reduction once recalculations are complete.' - After Saving the On-Demand Plan:
'Your plan has been saved. Recalculation is in progress, and your updated TruRisk™Risk score will appear shortly.' - In the Risk Workbench listing page (during recalculation):
An informational message is displayed for plans where the projected score calculation is still in progress. - While opening a saved plan (pending score calculation):
'Your saved plan is being recalculated. The updated TruRisk™Risk score will be available soon.' - After projected score calculation is complete: Projected score calculation is done (Approx 2-3Min), you can view the score on the Risk workbench along with the Formula is TruRisk™Risk V2 is enabled.
-
Actions and Quick Actions Available
You can now perform the following actions from the Actions menu and the Quick Actions menu of selected Findings from the Prioritization tab:- Add Supporting Artifacts
You can attach files or links as evidence to findings. This makes it easier to review or close findings while maintaining a clear record of supporting evidence. - Accept Risk
You can acknowledge risk, accept the potential impact, and assume accountability for it. - Mark False Positive
You can mark the finding that is incorrectly flagged as a risk or security issue. - Launch TruConfirm Assessment
Used to validate whether a finding is exploitable or not.To view these settings, navigate to Risk Management > Risk Workbench > Start Prioritization. Proceed with Prioritization. You find this option under the Findings tab.
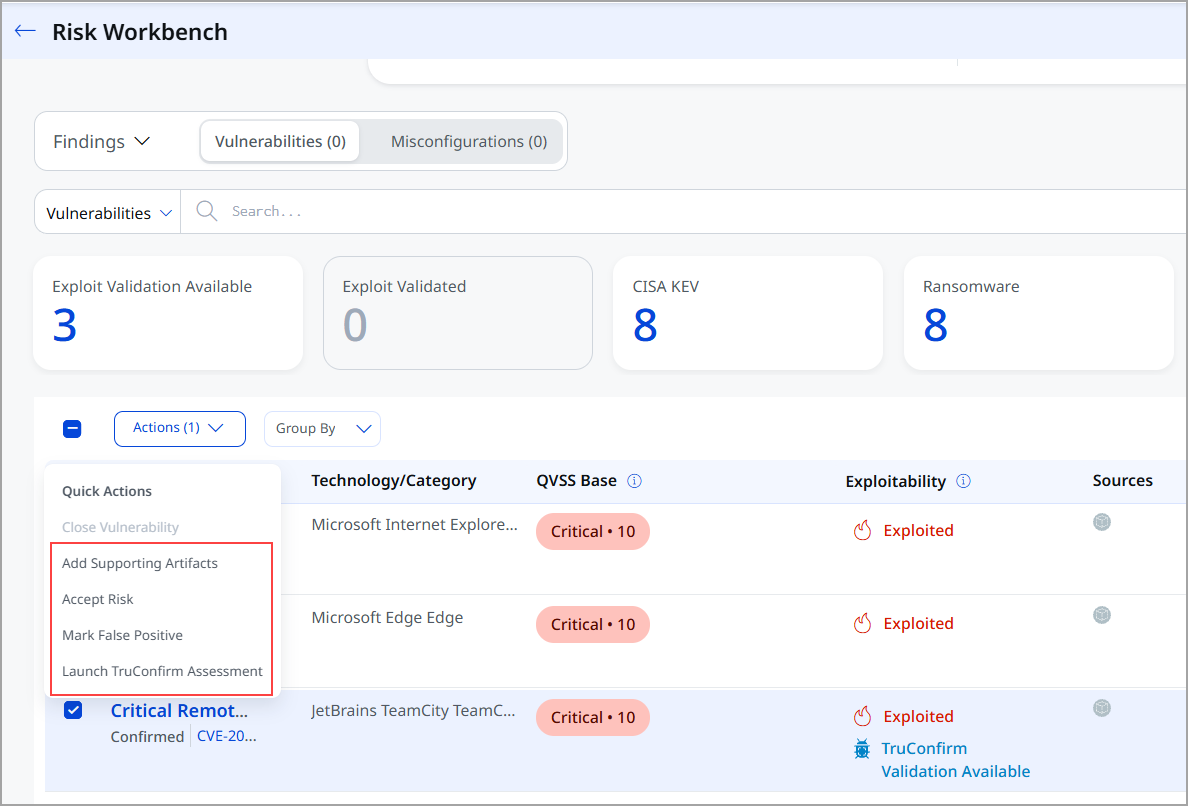
- Add Supporting Artifacts
- While creating an On-Demand Plan:
-
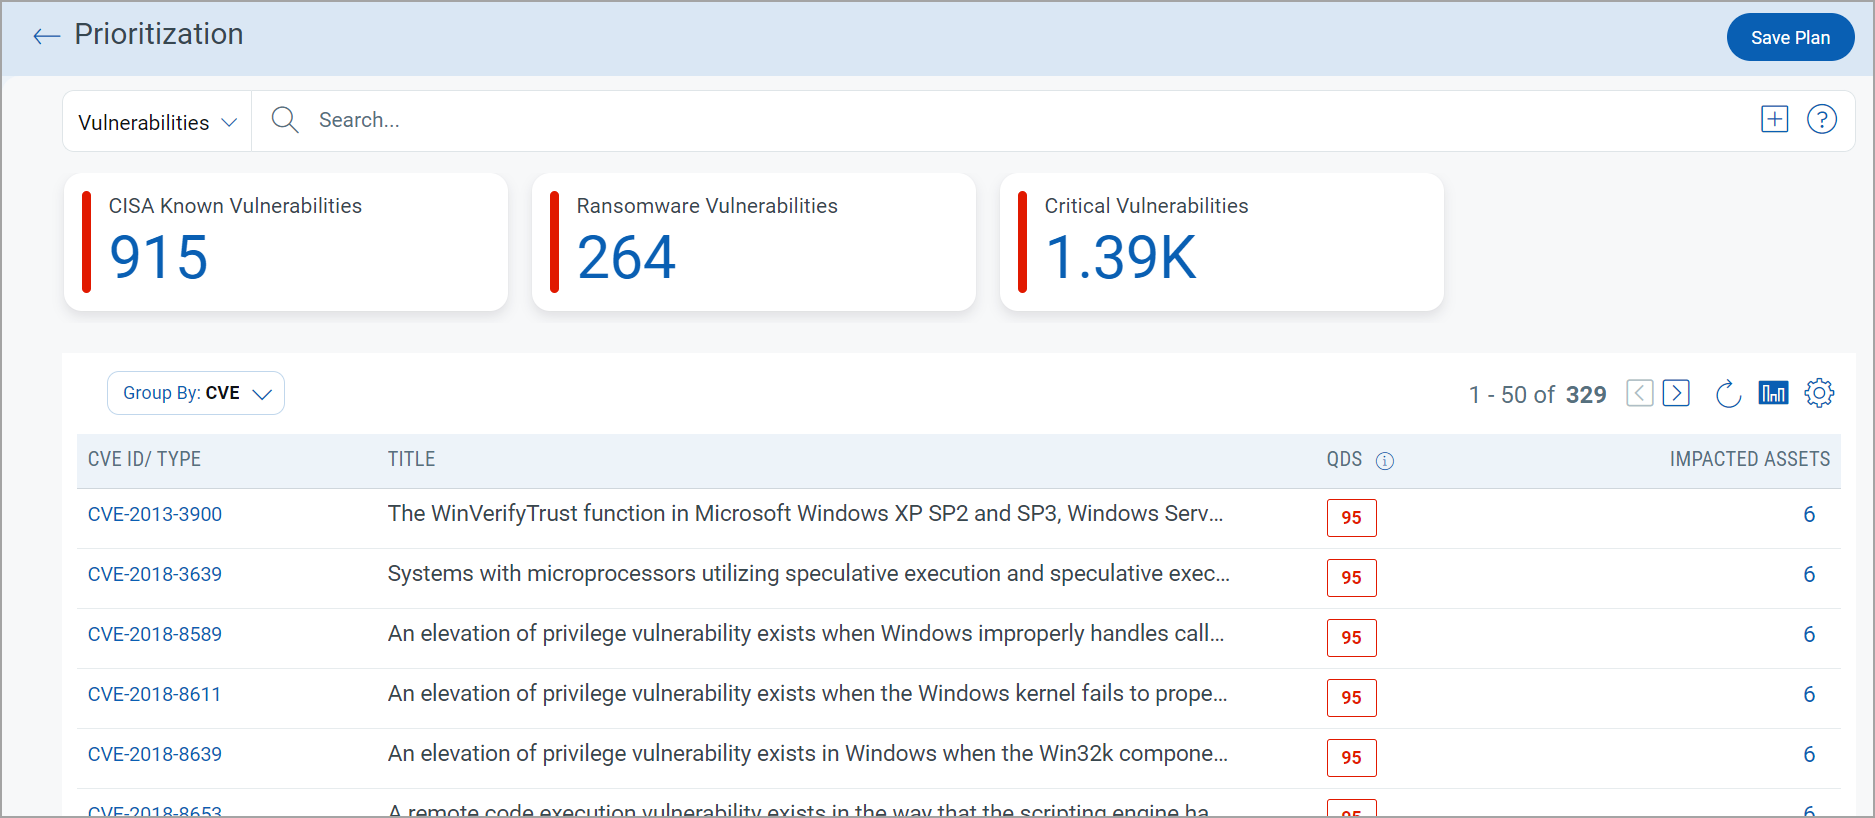
View Findings in the Risk Workbench tab.
The prioritized findings data is displayed.
-
Take Actions on Prioritized Findings
-
Filter Using Group By:
If desired, you can further filter these findings using various Group By options. To do so, click Group By, and use any one of the specified options to group and filter the findings further. - Download Findings in CSV Format:
If desired, you can download these findings in CSV format. To do so, click the ellipsis near Save Plan at the top right corner and then click Download Report as CSV. - Save Prioritization Plan:
i) Click Save Plan if you want to save the prioritization scope, findings, and filters for future use.
ii) In the Save Prioritization Plan dialog box, enter the name and description of the plan and then click Save.
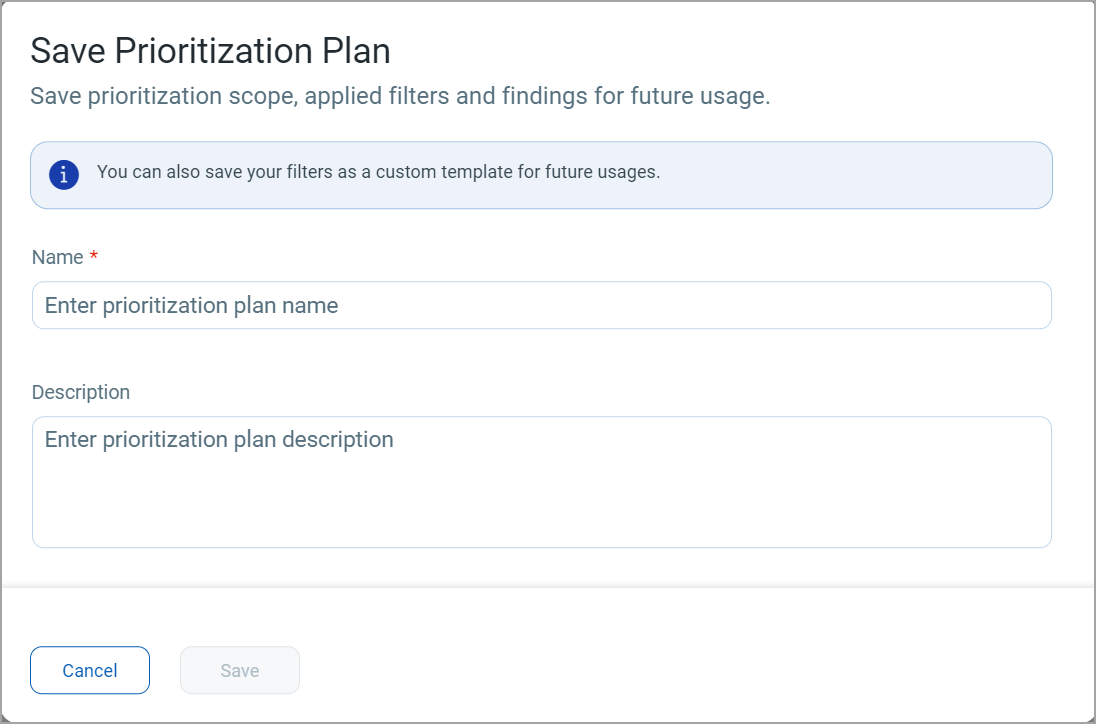
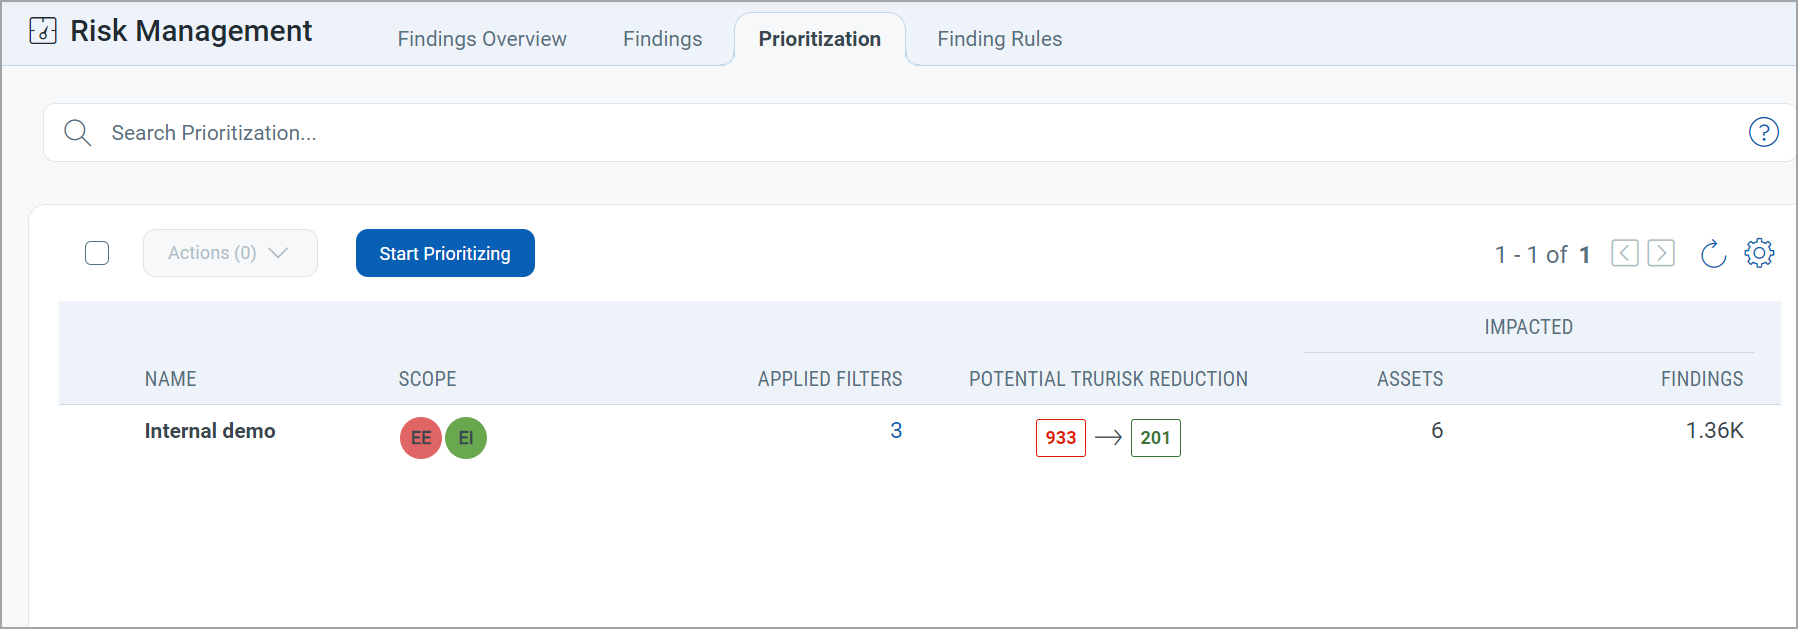
iii) The saved plan appears on the prioritization listing page on the Risk Workbench tab:
-
Download Report
You can download the Prioritization report from hamburger menu. The generated report now includes enhanced, plan‑level contextual details, such as:
- Plan title and description
- Scope and applied filters
- CVSS metadata
- Vulnerability count
- Impacted findings
- Asset details and asset IDs
- Additional relevant metadata

-
To start prioritization using this plan in the future, simply select the plan and then click Run Now (click
 > Quick Actions > Run Now)
-