Creating a FIM Profile
FIM configuration profiles help you ease the efforts required to monitor the change events that continuously take place in your file system. With the help of the configuration profiles, it is ensured that you not only stay vigilant about changes in critical files, but at the same time, comply to some of the most important IT GRC regulations as well.
FIM allows you to create separate profiles for Windows and Linux assets based on the organization's requirements. For Windows assets, you can also add profile exclusion filters to approve change events that are generated for trusted users and processes. Such events are not included in the change events list in FIM; thus, enabling you to control event generation to a great extent.
For Linux, you get an added option of Symlinks. You can monitor symbolic links, or symlinks, within the specified directory.
Create a Monitoring Profile
Navigate to Configuration > Profiles and click Create New Profile.

To create a profile, follow these steps:
Step 1: Provide Profile Details
Step 2: Add Profile Exclusion Filters
Step 3: Add Section and/or Rules
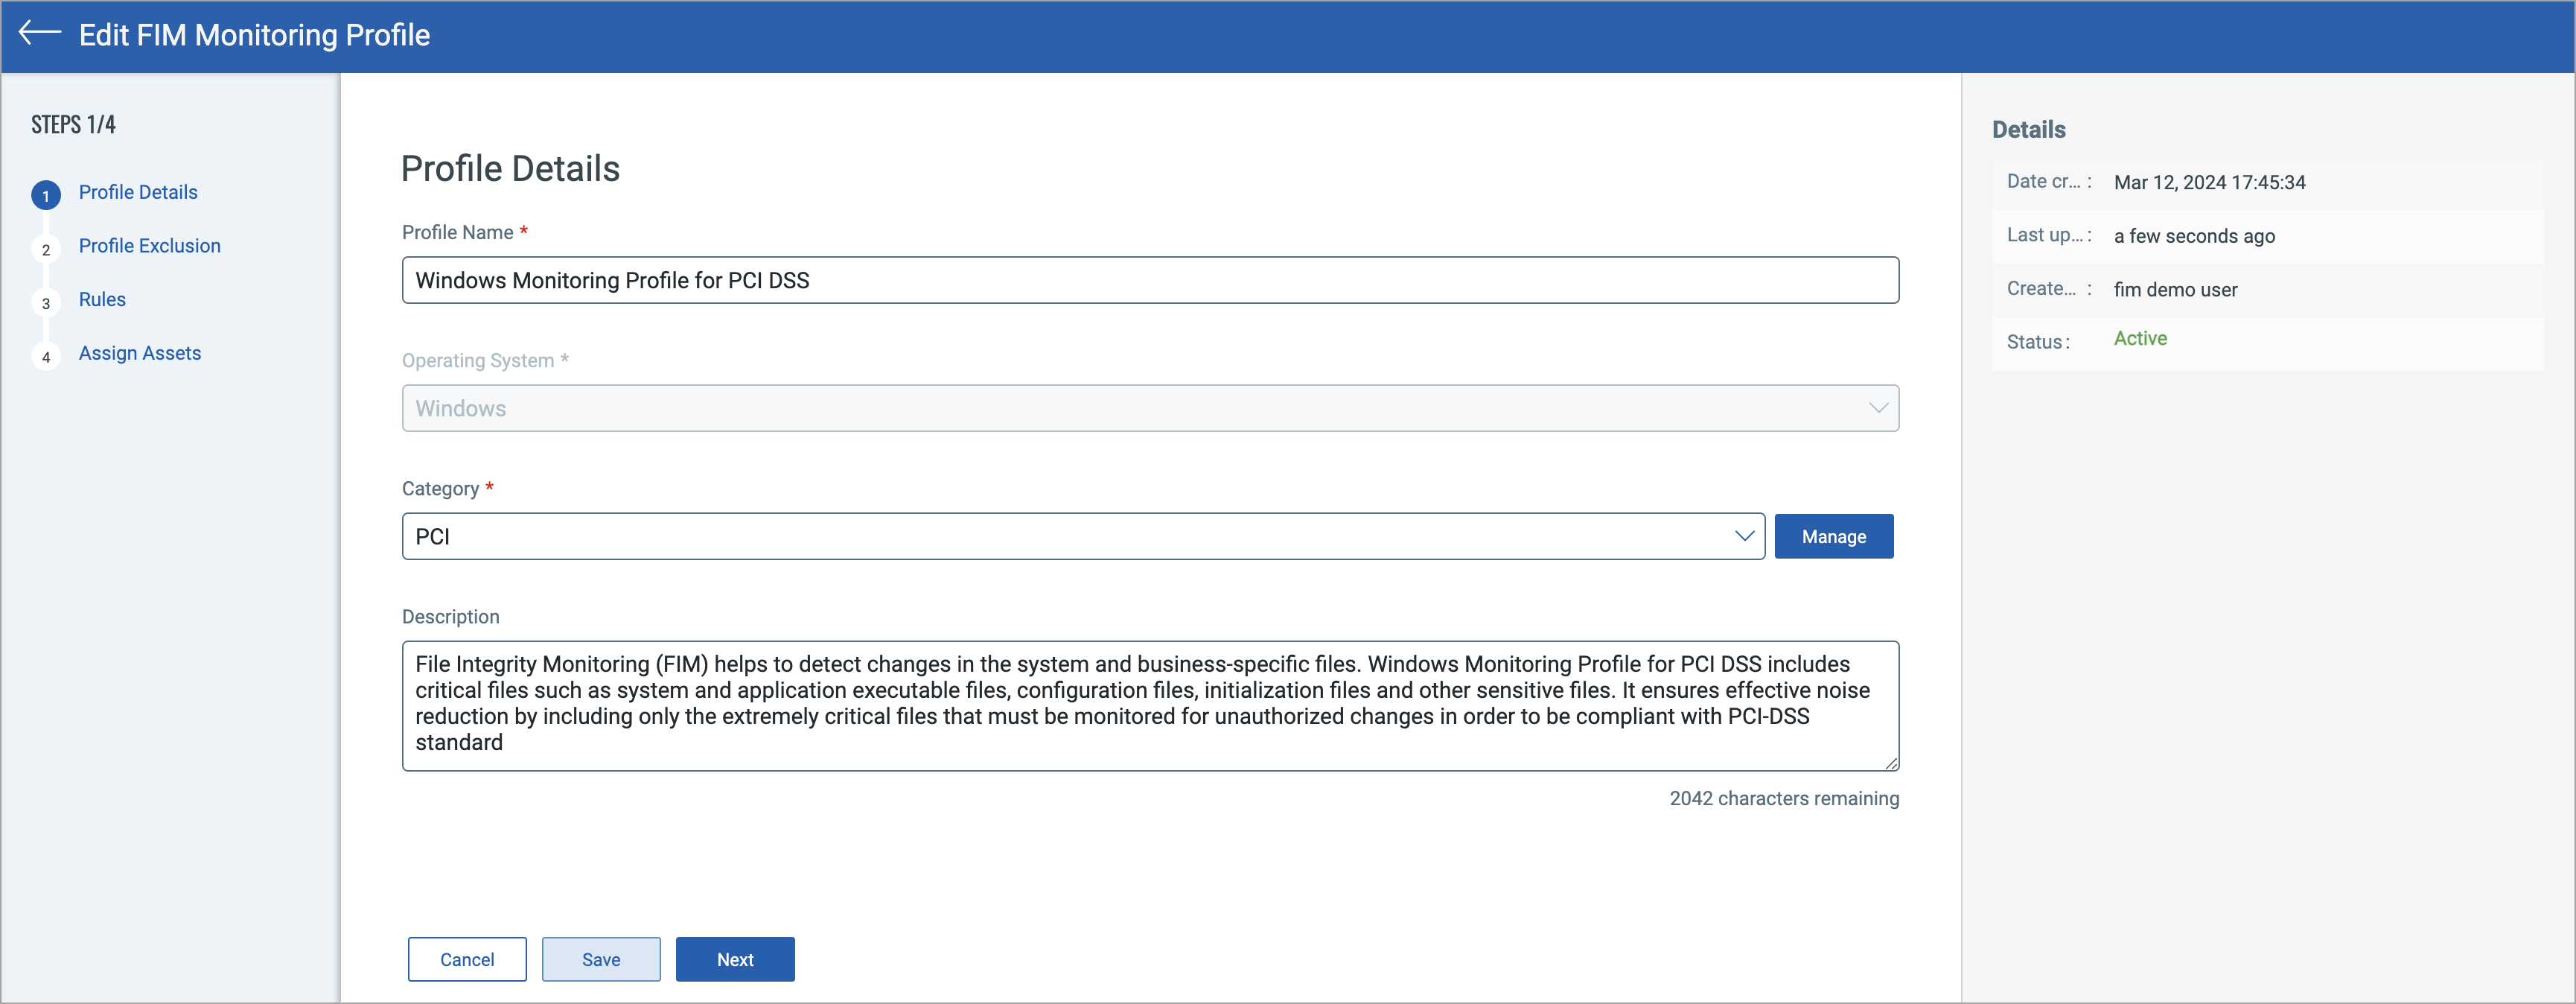
Step 1: Provide Profile Details
On the Profile Details page, add the following information and click Next.
- Profile Name: The name of the profile.
- Operating System: Select the required operating system from the drop-down list. You'll need to create separate profiles for Windows and Linux.
- Note: Registry monitoring and profile exclusion filters are enabled only for Windows assets. Hence, select Operating System as Windows if you want to add the Registry Key and Registry Value rule types, and include exclusion filters in your profile.
- Category: Select the required compliance category from the drop-down list. Click Manage to add a new category, if required.
- Description: Add a description about the profile you are creating.
Step 2: Add Profile Exclusion Filters
On the Add Profile Exclusion Filters page, add the following information and click Next.
This page is displayed only if you have selected Operating System as Windows in the Profile Details page.
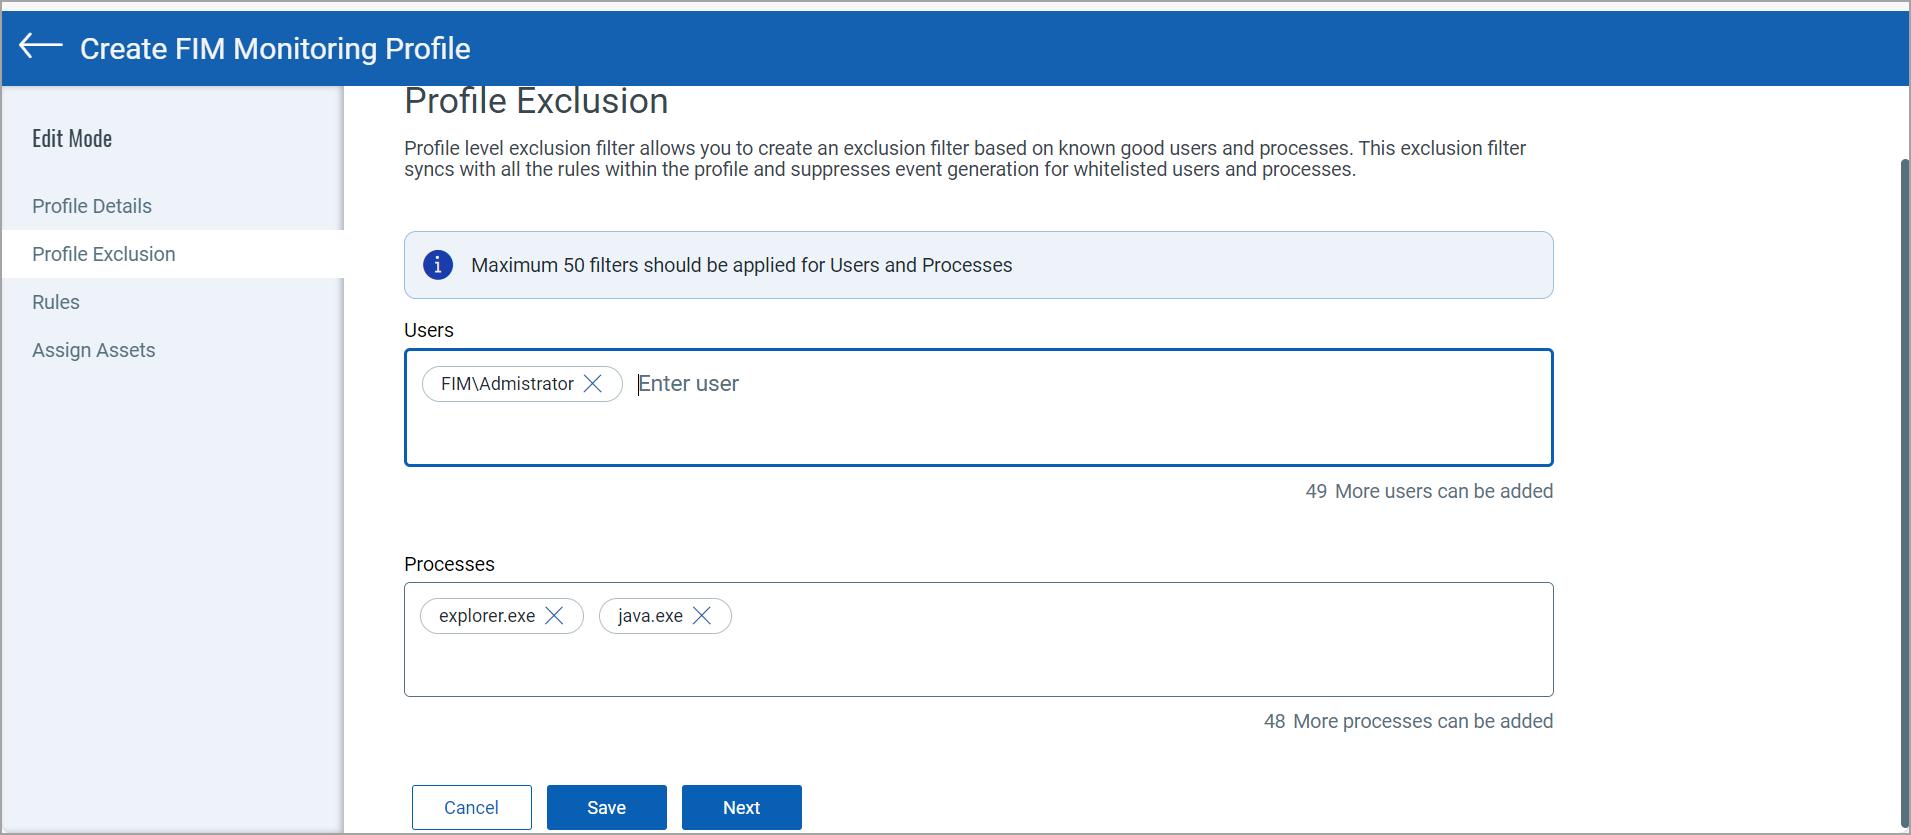
- Users: Enter user names in the domain\user format. You can add up to 50 users.
- Processes: Enter the process names or the exact paths of the processes that you want to approve. You can add up to 50 processes.
Events generated for the combination of specified user accounts and processes are not be recorded in the Events tab.
Step 3: Add Section and/or Rules
On the Rules page, you can create sections and rules.
Sections
Sections are created to group rules in distinct categories.
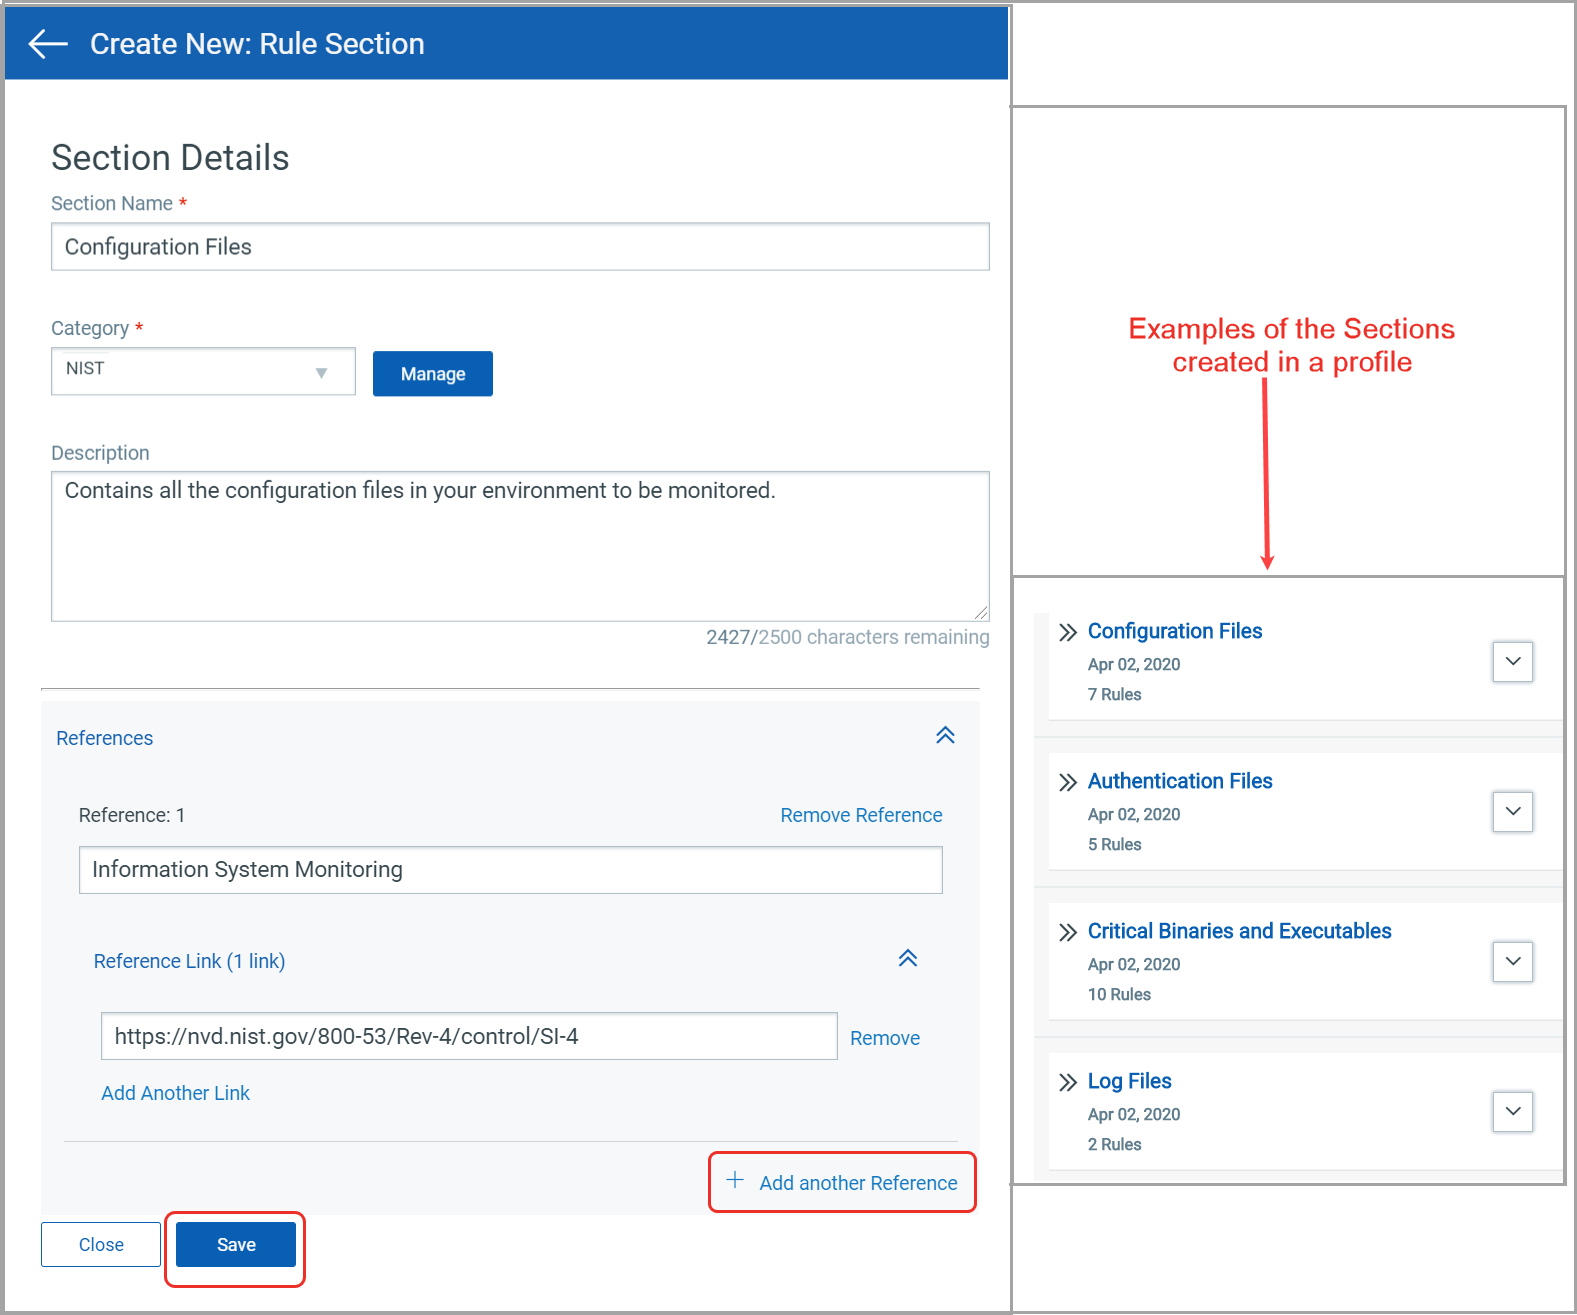
To create a section, click New Section and provide the following details:
- Section name: Name of the section. Example: Configuration Files, Authentication Files, Critical Binaries and Executable, Log Files etc.
- Description: A brief description about the section.
- Category: Select the required compliance category from the drop-down list. Click Manage to add a new Category, if required.
- References: Map the section to the relevant compliance standards it adheres. You can click +Add another reference option.
You can add and edit up to 10 References.
Example: Information System Monitoring ( Link: https://nvd.nist.gov/800-53/Rev4/control/SI-4).
After you add all the above details, click Save to create the section. Similarly, you can create all the sections required for the profile at once.
If you delete a section, all the rules under the section are also deleted.
Rules
Rules list the absolute paths for files and directories that you want to monitor for any changes.
To create a rule, click New Rule and provide the following details:
- Rule Name: Name of the rule.
- Description: Purpose of the rule.
- Section: Select the required section from the drop-down list. You can also click Create Section option to create a new section.
- Rule Type: Currently, Qualys FIM supports types of rules:
- Directory Type - Select this rule type and provide the directory name (absolute path) on which real-time monitoring needs to be enabled.
- File Type - Select this rule type when you want to monitor a specific file for any kind of activity on it.
- Registry Key Type - Select this rule type when you want to monitor a specific registry Key for any kind of activity on it.
- Registry Value Type - Select this rule type when you want to monitor a specific registry value for any kind of activity on it.
For more information on Registry Integrity Monitoring, refer to Windows Registry Integrity Monitoring.
- Severity: Using this parameter, you can define the criticality of that file path to be monitored. The severity levels range from 1 to 5, where 5 is the highest.
- File Path: The file path to be monitored, ensure you do not put spaces in the beginning or end of the file path. You can add up to 20 file paths.
The File Path option is displayed if you select the Rule Type as 'File'.
- Monitor the files for: Select the actions that should trigger events for the selected file path. This option is displayed if you select the 'Rule Type' as File.
- Monitor the Directory structure for: Select the actions that should trigger events for the selected directory. This option is displayed if you select the Rule Type as Directory.
- Monitor the files within the directory structure for: Select the actions that should trigger events for the files within the selected Directory. This option is displayed if you select the Rule Type as Directory.
- Directory Path: The directory base path to be monitored. This option is displayed only if you select the Rule Type as Directory.
- Key Path: The registry base path to be monitored. This option is displayed only if you select the Rule Type as Registry Key.
FIM supports monitoring shared network drives or paths only for Windows hosts that have Cloud Agent installed.
- If Rule Type is selected as 'Registry Value', then Key Path and Value Path fields are displayed. In Key Path, enter the registry base path to be monitored and in Value Path, enter the value to be monitored.
In the Directory Path if you specify only a Windows root directory without any subdirectory (e.g. only drive names with or without slash (C:, D:, C:\, D:\) then at least one Inclusion or exclusion filter is required. Similarly, if you specify only a Linux root directory without any subdirectory (e.g. /, /root, /var, /opt, /usr) then at least one Inclusion or exclusion filter is required.
- Depth: The depth of directory traversal . The depth you choose indicates till which level monitoring is enabled in the hierarchical directory structure. This feature is introduced to reduce load on the agent and to monitor the paths only till a certain required level instead of monitoring everything and returning false positives.
If the scope of monitoring inside a directory is unknown, then the best practice is to put a depth of 3. This is done to ensure that the scanning does not descend into further subdirectory levels, which not only optimizes the scan time but also reduces CPU load and agent processing.

Events get generated for FIM assets on AIX even if you do not select the File Removal and Directory Removal check boxes.
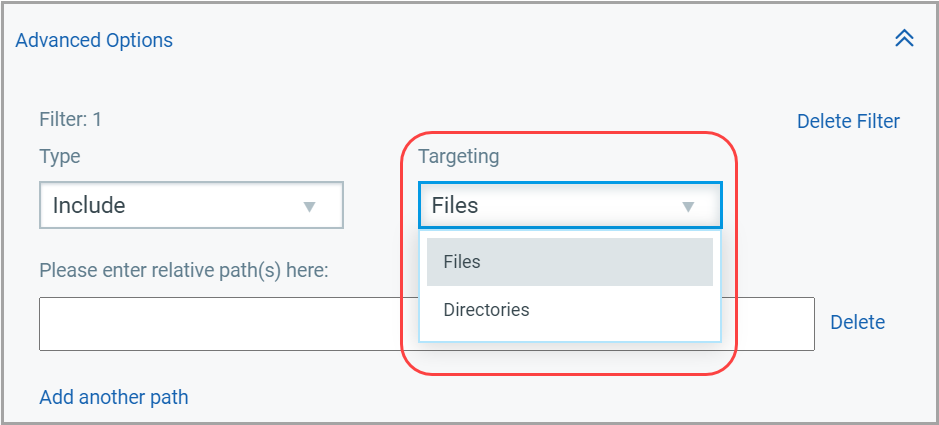
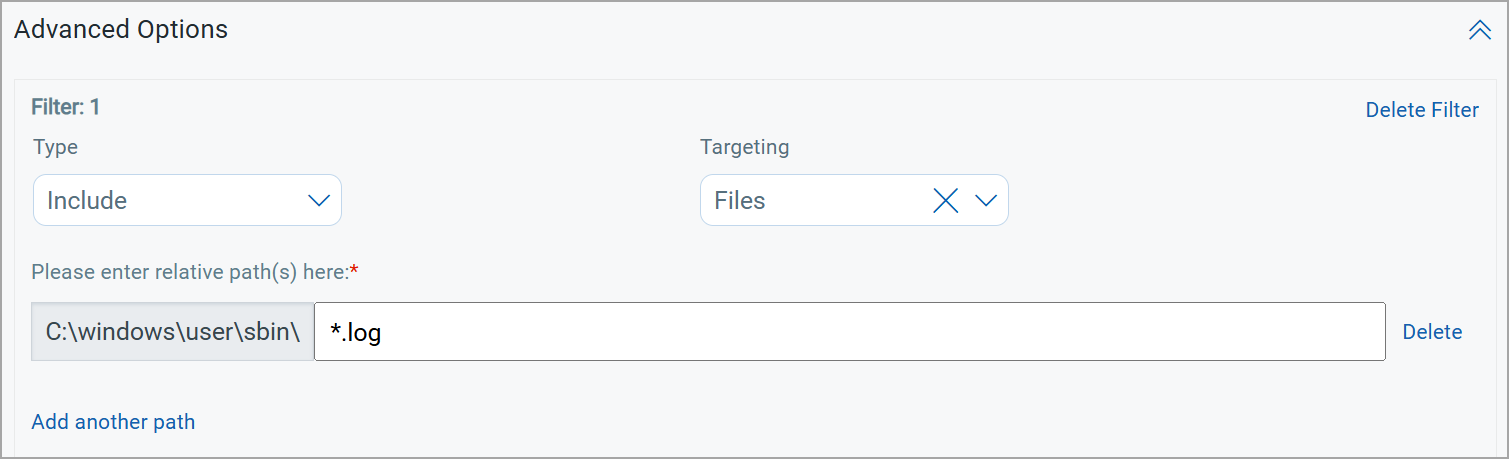
- Advanced Option: If you choose Directory as the Rule Type, you can click Advanced Options to include or exclude specific patterns of files or directories within that directory. Using the Include and Exclude filters you can further fine tune the monitoring rules to reduce the number of false positives.
- Targeting: Inclusion and Exclusion filters can be applied on Directories (to include/exclude the folders) or Files (to include/exclude the files) or Key or Value (to exclude/include the registry keys and values). You can add a maximum of 15 filters.
If you select value in the Targeting drop-down, you have to add the value you cannot provide the path in this case.
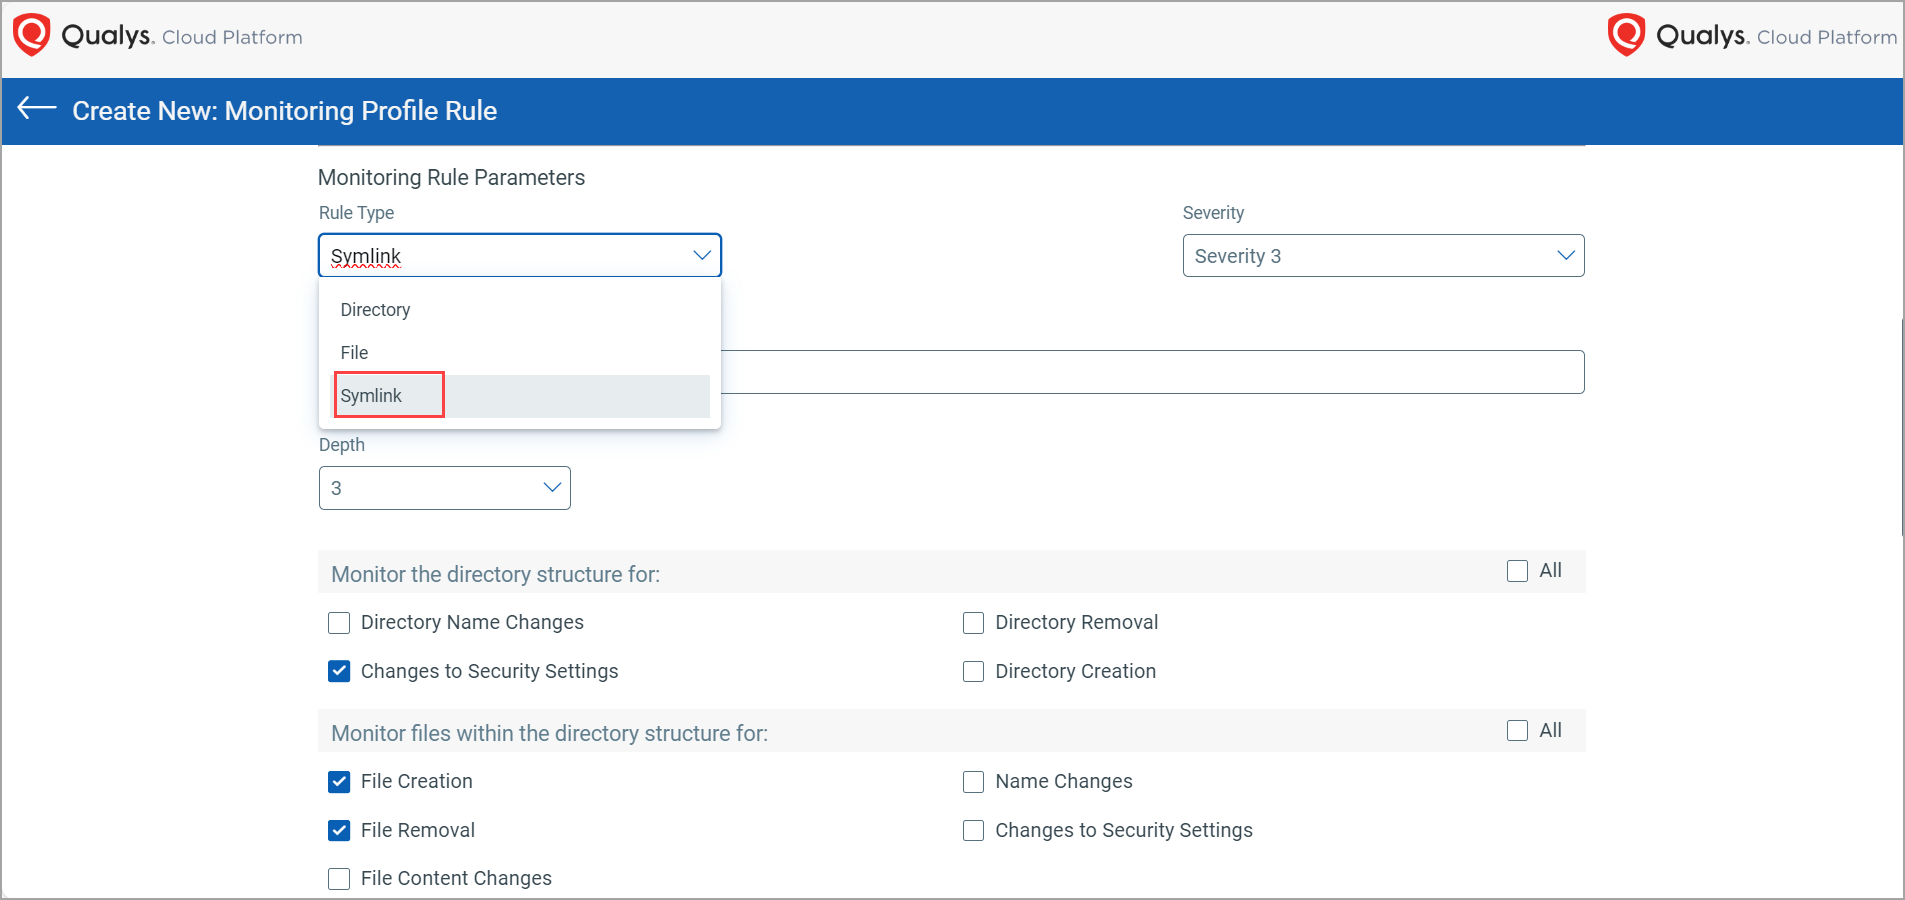
For Linux, you get an added option of Symlink You can monitor symbolic link, or symlink, within the specified directory.
To enable symlink, navigate to,
Configuration> Profiles> Create New Profile.
Provide the Profile Details and choose Linux as the Operating System.
Go to Rules click Create New and select Rule from the drop-down menu.
In Monitoring Rule Parameters, from Rule Type drop-down menu click Symlink.
Inclusion and Exclusion Filters
The Include filter monitors only what is specified to be included and excludes everything else outside of the specification. This property makes the filter effective for noise reduction. For example, you want to monitor any modification done on the log files. Here, Inclusion filter is [*.log], which means if modifications are made on any other files apart from [*.log], events are not generated.
The maximum number of inclusion or exclusion filters is 15. You can add up to 20 relative paths for each filter.
Advanced filter are available for only Directory and Registry Key Rule Type.
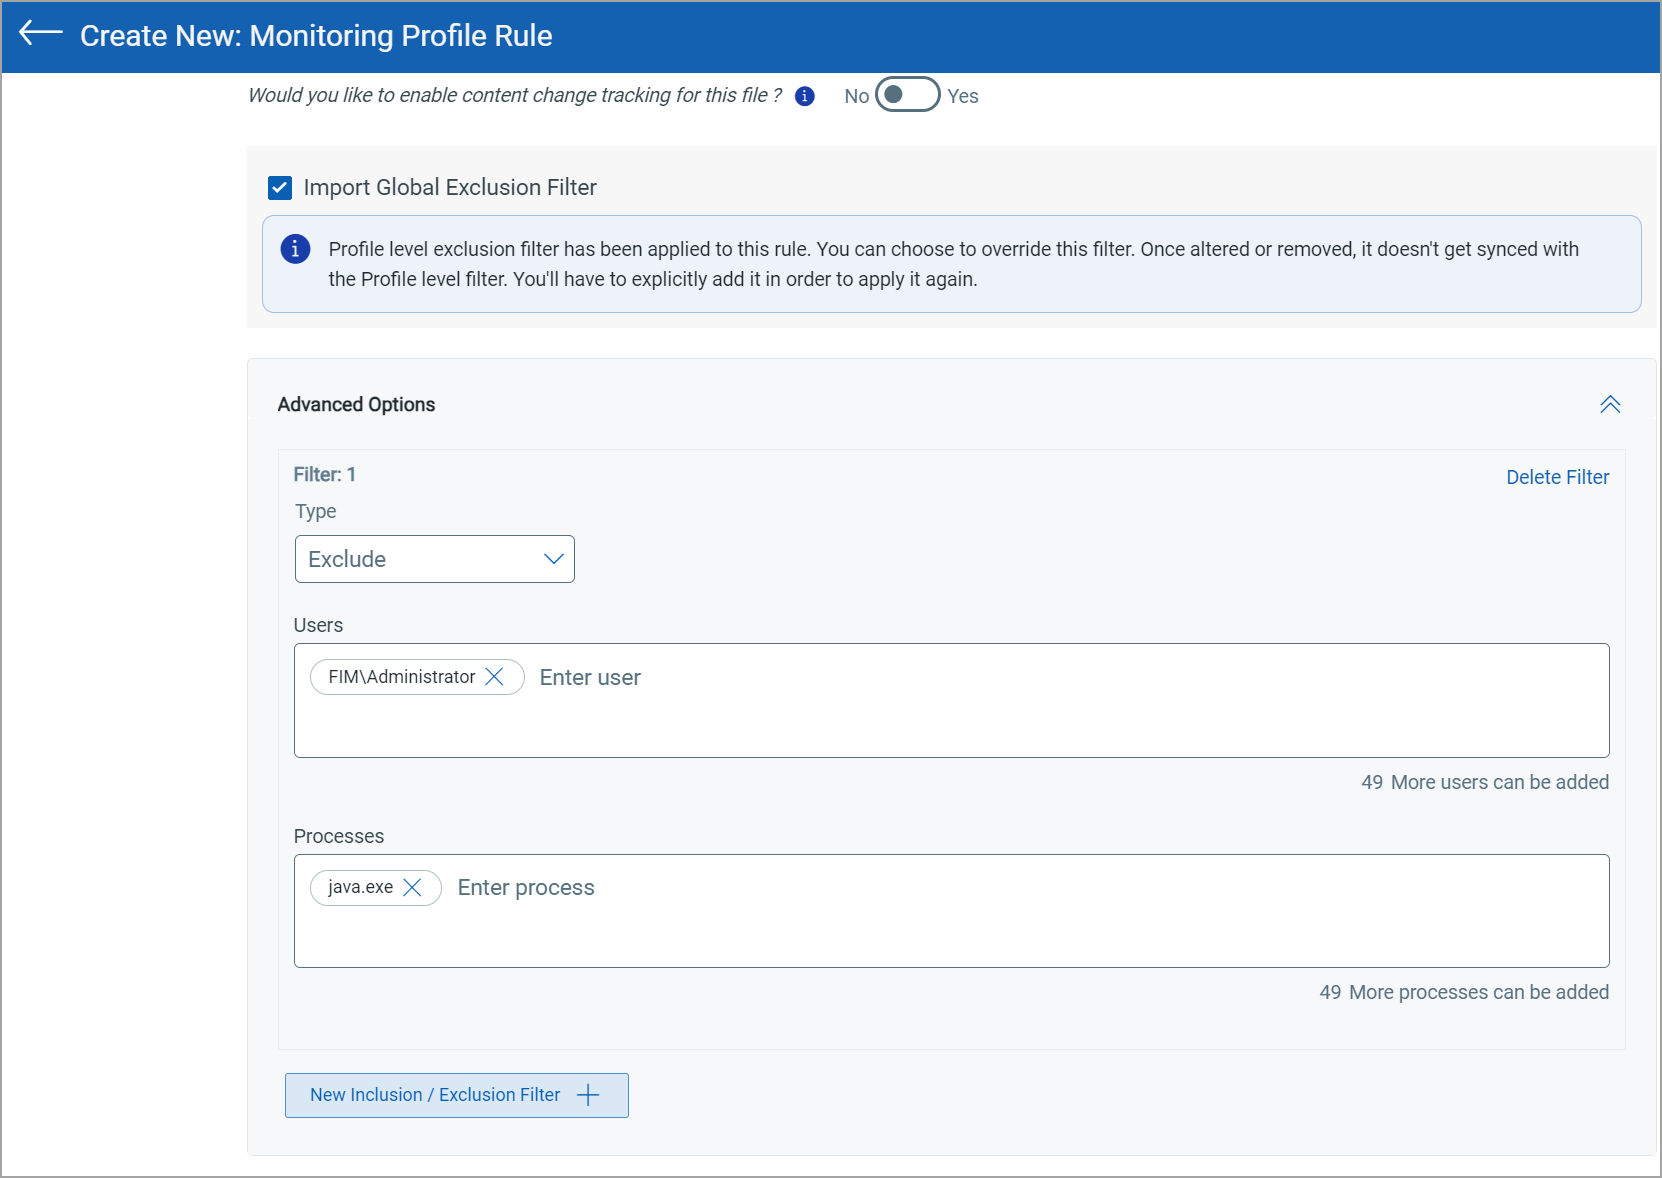
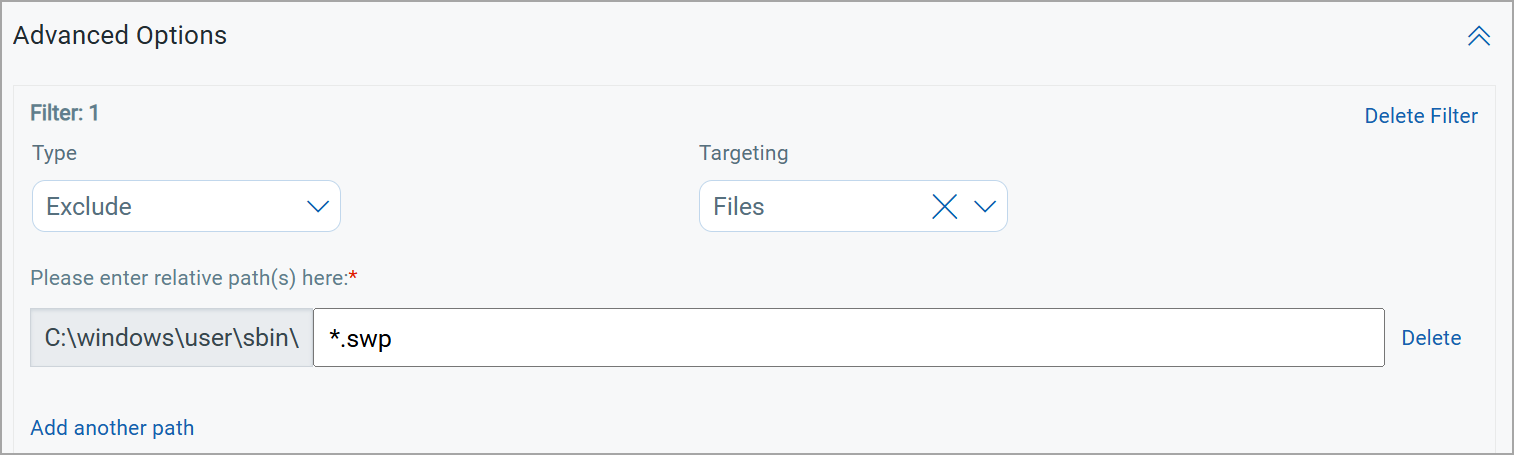
The Exclude filter works exactly opposite to that of Inclusion. Here, specify the type of files or directories you do not want an event for. There could be certain file modification activities that are harmless, and you may not want an event to be generated for them. Such files are mentioned in the Exclusion filters. Events are not generated when an activity on the asset matches the Exclusion filters. This also reduces noise to a good extent.
If you have already specified exclusion filters in the Profile Exclusion page, the Import Global Filter check box is selected by default. The Users and Processes fields in the Advanced Options section are populated by default with the inputs that you provided in the Profile Exclusion page.
You can add up to 50 Users and Processes.
For User and process-based whitelisting features, the supported Lxag agent version is 6.2 and later.
In the case of Registry monitoring, Inclusion and Exclusion filters can be applied to both Registry Key type rules and Registry Value type rules.
We have guidelines for specifying patterns for excluding/including Windows/Linux files or directories. See Guidelines for Creating Patterns in Inclusion/Exclusion Filters.
Step 4: Assign Assets
You can select individual assets in your account or assign asset tags in order to monitor all matching assets automatically.
We recommend you to create asset tags and assign the assets tags to profiles if the number of assets to be monitored in the profile exceeds 50.
To specify the assets to be included in the monitoring profile, use the Any or All option from the drop-down list.
The Any condition ensures that an asset is considered if it is included in any of the specified asset tags. Whereas, the All condition considers an asset only if it is included in the scope of all the specified asset tags.
For example, you have two tags - 'HR_dept_Assets' and 'Finance_dept_Assets', and three assets in your scope - Asset1, Asset2, and Asset3. The 'HR_dept_Assets' tag is assigned to Asset1 and Asset2, and the 'Finance_dept_Assets' tag is assigned to Asset1 and Asset3.
You select the Any condition and then add the 'HR_dept_Assets' and the 'Finance_dept_Assets' tags for the profile you are creating. The profile rules is applied to Asset1, Asset2, and Asset3, because an asset included in any of the specified tags is included in the manifest.
You select the All condition and then add the 'HR_dept_Assets' and the 'Finance_dept_Assets' tags for the profile you are creating. The profile rules will be applied to Asset1 only, because only Asset1 is included in both the tags that you have specified.
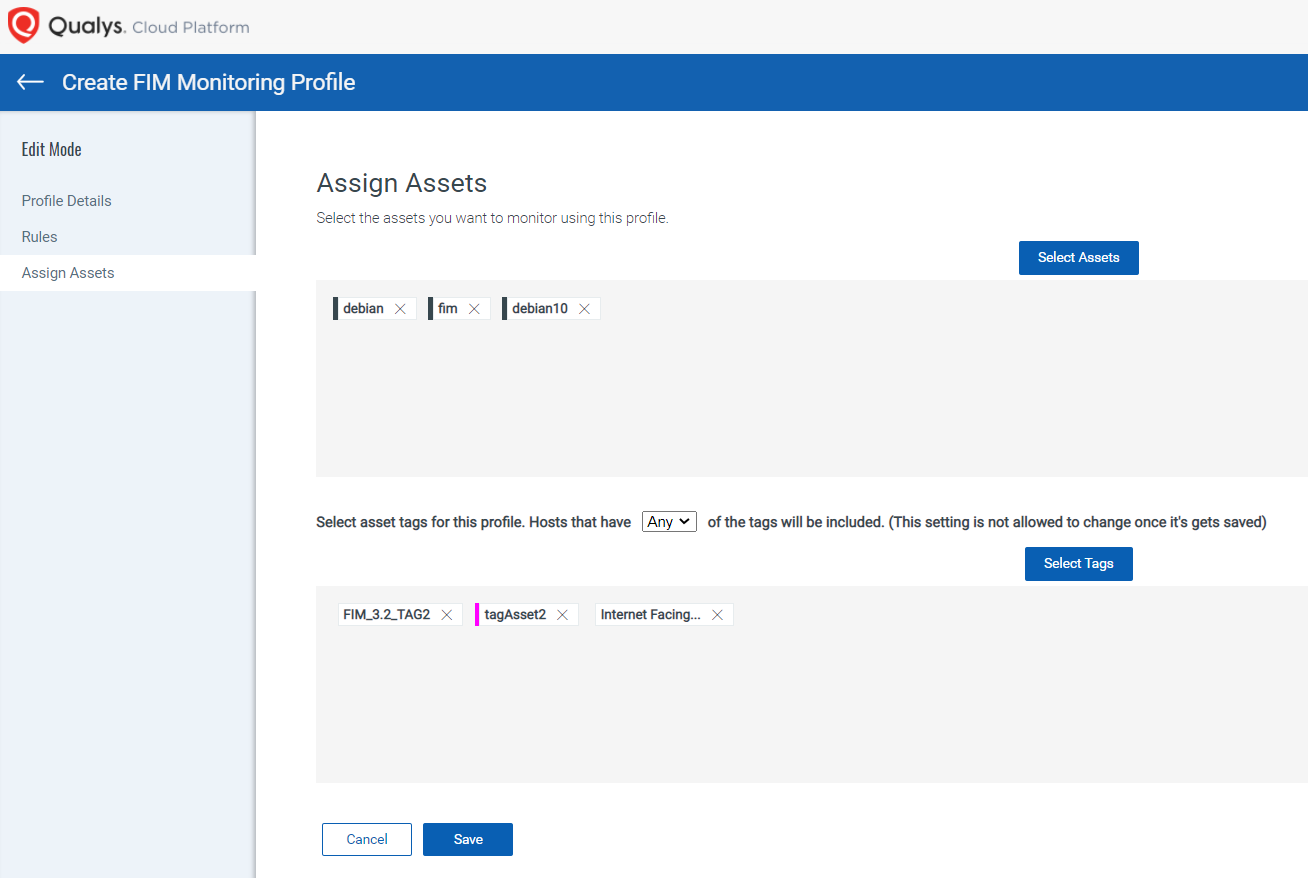
Once you add the assets and tags, click Save. The profile is created and displayed under the Profiles tab. By default, the profile is in an inactive state. You can navigate to the Inactive tab and activate the profile from Quick Actions to associate it with the asset.
Monitoring Mapped Drives
FIM supports monitoring events on mapped drives, enabling you to track changes made to shared drives on network file servers.
Mapped drives are shared directories on file servers that users access from client systems. With agent installed on these client systems, any modifications to the mapped drives, such as file creation, deletion, or updates, can be captured and logged in the FIM UI.
While creating a FIM profile rule, you can add the Universal Naming Convention (UNC) path as the base directory in the Directory Path field available on the Rule Details page. The following are the supported UNC path formats:
| Format | Example |
|---|---|
| Hostname | \\server-name\shared-resource-pathname |
| IP Address | \\IP address\shared-resource-pathname |
| FQDN | \\FQDN\shared-resource-pathname |
| NetBIOS | \\NetBIOS\shared-resource-pathname |
This topic explains how to configure FIM to monitor mapped drives and capture events effectively.
Creating a Monitoring Profile for Mapped Drive
To create, follow these steps:
- Navigate to the Configuration > Profiles tab.
- Click Create New Profile.
- Follow the instructions outlined in the Create a Monitoring Profile topic (Step 1 to Step 4).
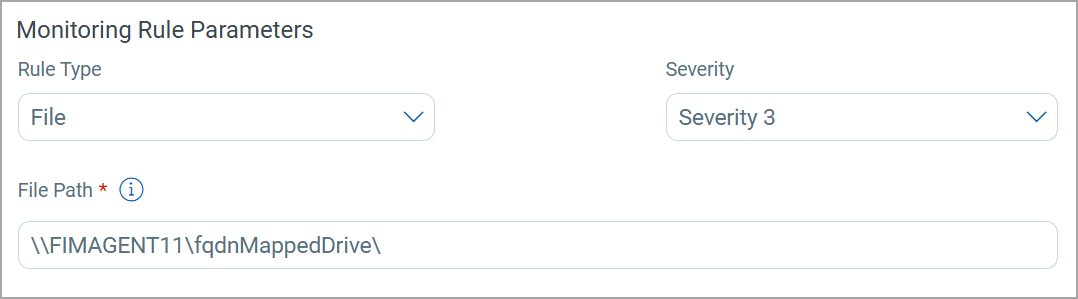
- When you reach Step 3: Add Section and/or Rules, ensure the following settings are selected in the Monitoring Rule Parameters section while creating profile rule:
- Rule Type: Select Directory to monitor changes to mapped directories.
- Severity: Select the desired severity level based on your monitoring requirements.
- Directory Path: Enter the UNC path of the mapped drive to be monitored. Examples:
\\FIMAGENT11\fqdnMappedDrive\\\10.115.136.67\MappedDriveTest\
After completing the steps, the profile is created in Inactive status. You can navigate to the Inactive tab and activate the profile from the Quick Actions menu.
Once activated, the monitoring profile will start capturing events on the specified mapped drive. Events are captured when the mapped drive is accessed, and changes are made from a client system where the FIM agent is installed.
Related Topics
Import a Profile from Qualys Library
Activate and Deactivate a Profile
Saving a Monitoring Profile Rule
Guidelines for Creating Patterns in Inclusion/Exclusion Filters