Managing Incidents
You can review the events detected on your assets and group related changes into incidents to determine if they are valid, mark them approved or unapproved, and classify them by the type of change. This is especially useful for auditing purposes. You can Create an Incident from the Events and Incident tab.
You also have the option to create incidents based on certain criteria defined in a correlation rule. See Configure Correlation Rules to Auto Create Incidents.
If you are creating a manual incident and ignoring the events at the same time, and if the QQL in both have a common event involved, then we recommend you to keep a minimum of fifteen minutes of buffer time. In addition, you can
A Service Level Agreement (SLA) is a formal communication agreement established to keep you informed about incidents requiring your review. Enabling SLA lets you receive reminder emails till you review the incident. You can enable SLA for default incidents and automated incidents. You can define the SLA duration in days(minimum 1 day), weeks, or months (maximum 6 months).
Creating Incidents from the Events Tab
Go to Events > Event Review to see the events that are waiting to be reviewed.
Enter your search query or use filters on the left side to find events that are part of the same incident. For example, find events based on tags, user, process, and profile.
Then click Create Incident. All events matching your query is included in the incident.
The Create Incident option is enabled only after you enter a valid QQL query in the search bar.
We support upto 500k events in an incident. When you create your incident, choose your filters or search query to return less than or equal to 500K events.
Give the incident a name, and provide the reviewer's details.
You can add the email ID of the reviewer. You can add a maximum of 10 reviewers.
If Tag-based User Scoping is enabled for the reviewer, ensure that the reviewer's scope is equal to or greater than yours. This ensure that the incident is reviewed by the reviewer who has access to all events in it.
Only the reviewers for whom you enter an email ID receive notifications. To ensure they receive the notification emails, you must enter their valid email IDs.
You can enable the Service Level Agreement (SLA). Once you enable SLA, provide SLA duration and select the time frame from the respective drop-down list.
You cannot edit the SLA once it is enabled.
Click Create.
Your new incident is saved on the Incidents list where you can view and add details.
Choose View Details from the Quick Actions menu to see the list of events included in an incident and break them down by severity, action, and user.
Choose Edit from the Quick Actions menu for any Open incident to rename it or change the events associated with it by modifying the query or time frame. If an event no longer matches the query it is removed from the incident and appear back on the Events list so it can be reviewed again.
After creating a default or manual incident, Events are marked to the incident within 10 minutes,
For events with 'reputationStatus' as 'MALICIOUS', an Automated Incident is created with following configuration:
Disposition = Malware
Change Type = Compromise
Approval Status = Policy Violation
Start Review option is available for such Incidents Immediately.
Default incident can be edited only when events mapping status is in progress. Event mapping status can be seen on incident detail page.
Creating Incidents from the Incidents Tab
To create a manual incident, click Incidents > All Incidents > Create Incident.

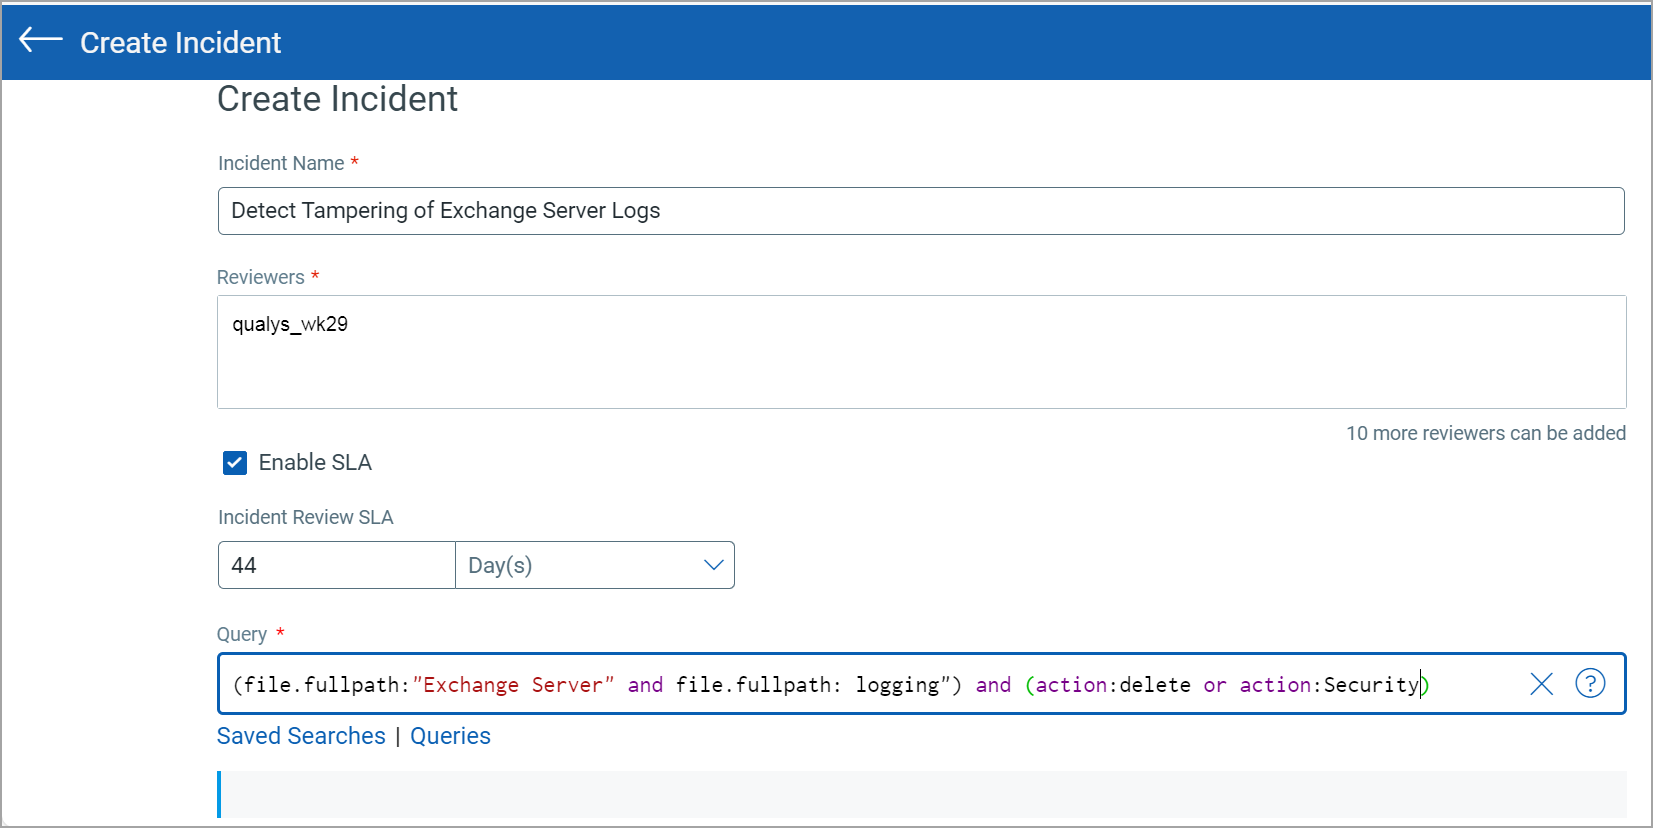
On the Create Incident page, add the following details:
- Incident Name: The name of the Incident.
- Reviewers: Enter names or email IDs of the reviewers. The logged-in user's name is listed by default as the reviewer. Logged-in user . You can enter up to 10 reviewers. When an incident is generated using the query you have entered, it gets assigned to the users that you enter in the Reviewers text box.
The users who you set as reviewers receive a notification every time an incident is generated by the rule.
Only the reviewers for whom you enter an email ID, receives notifications. You must enter valid email IDs of the reviewers to ensure they receive the notification emails.
You can enable the Service Legal Agreement(SLA). Once you enable SLA, provide SLA duration and select the time-frame from the respective drop-down list.
- Query: Enter your QQL search query to find events. You can also select the required QQL query from the Saved Searches or Queries option.
- Start Date and Start Time, End Date, and End Time: The duration for which you want to capture the events based on the QQL query.
- The end date and time should always be before or equal to the date and time you are creating the incident.
- In the Query field, to add a folder path for file.fullPath and actor.imagePath QQL, user should avoid using “ \” at the end of the path as it results in invalid QQL while searching.
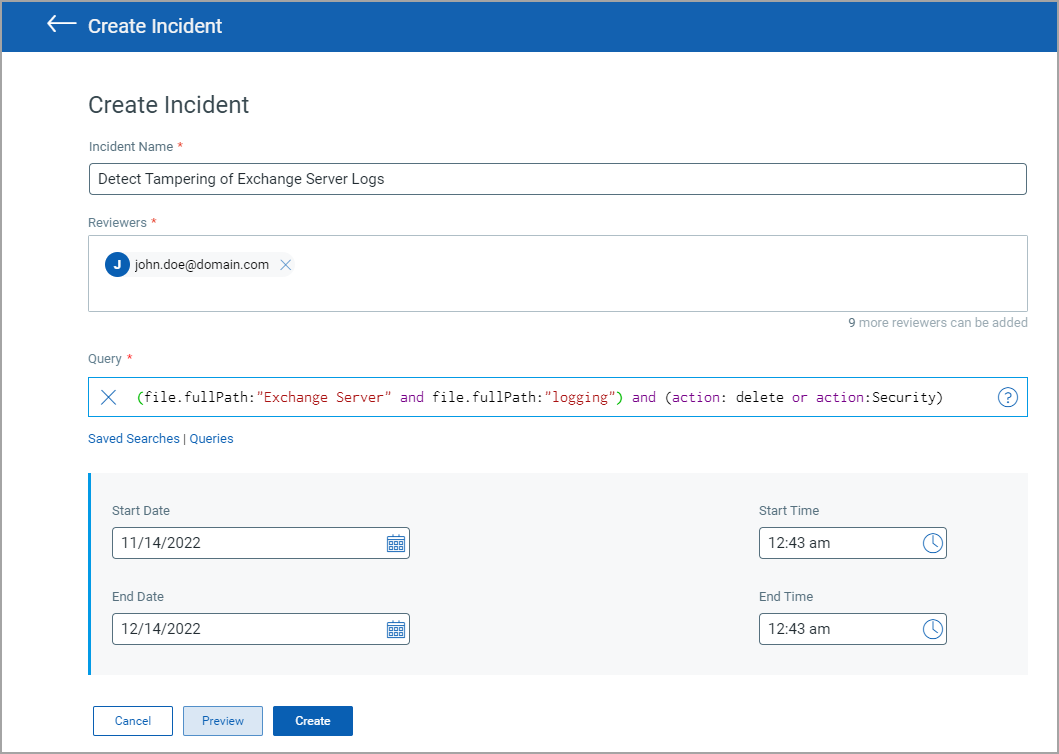
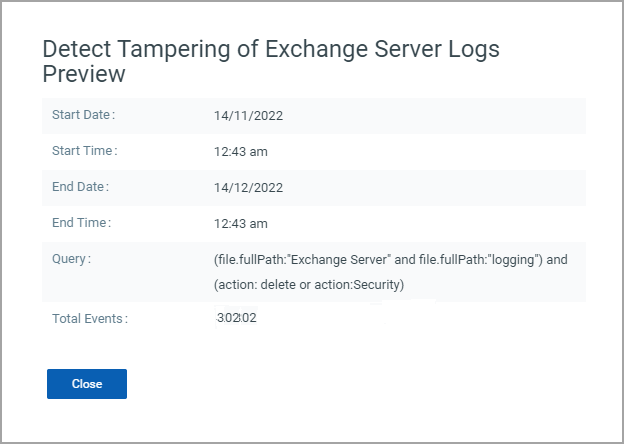
Click Preview to see the total number of events that are generated based on your query, and click Close to close the window.
You can create an incident only if there are events matching to your QQL query.
On the Create Incident page, click Create. The new incident is listed on the Incidents tab for a manual review.
After creating a default or manual incident, Events are marked to the incident within 10 minutes.
For events with 'reputationStatus' as 'MALICIOUS', an Automated Incident is created with below configuration:
Disposition = Malware
Change Type = Compromise
Approval Status = Policy Violation
Start review option is available immediately.
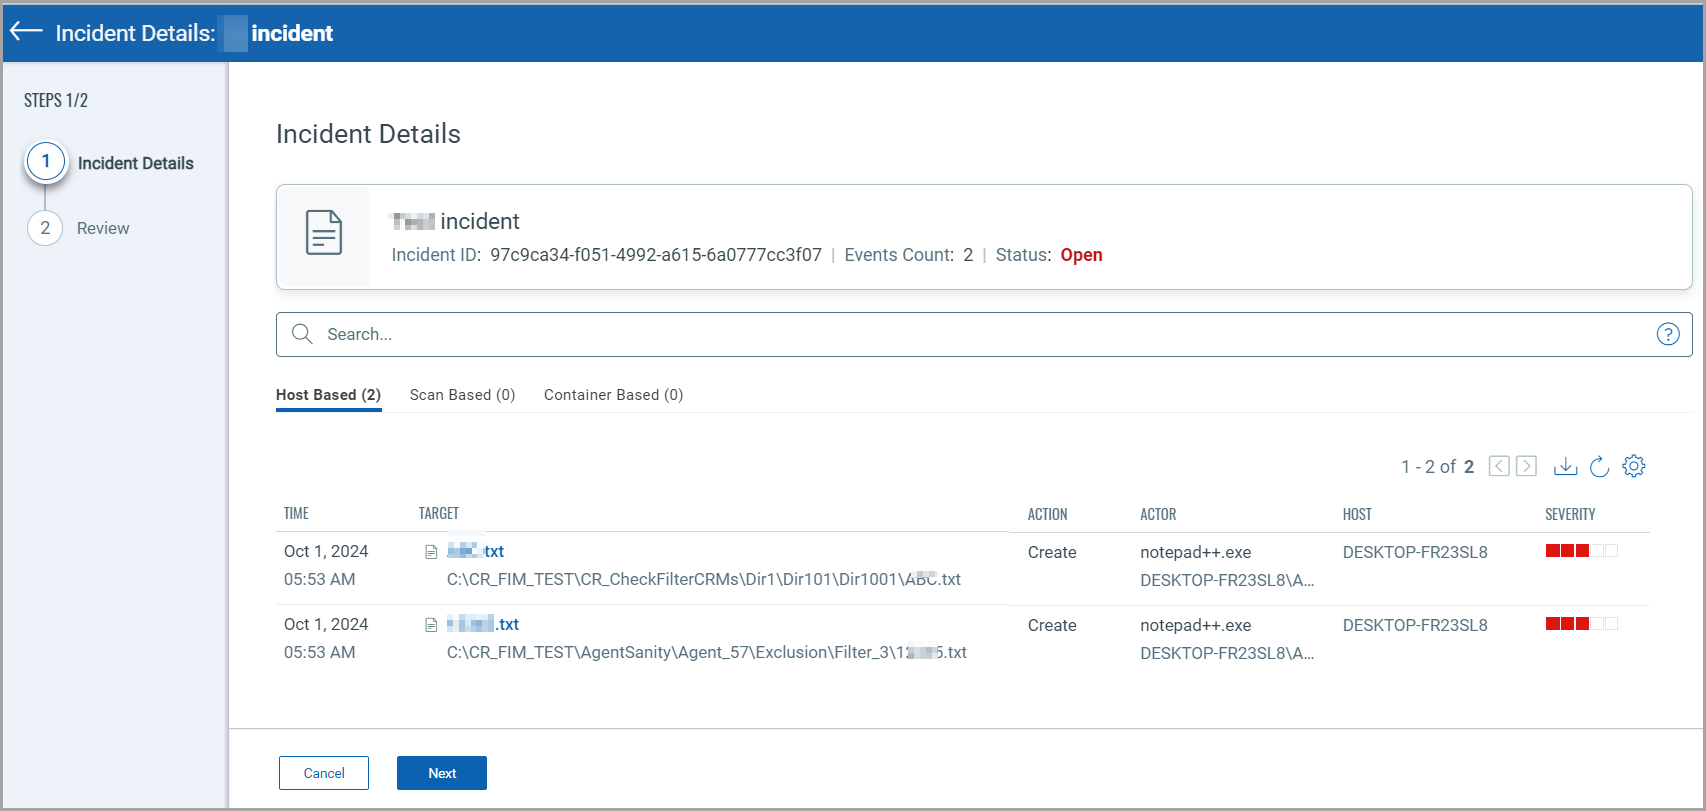
View Incident Details
You can view the details of an Incident by clicking View Event Details from Quick Action menu of the selected Incident.
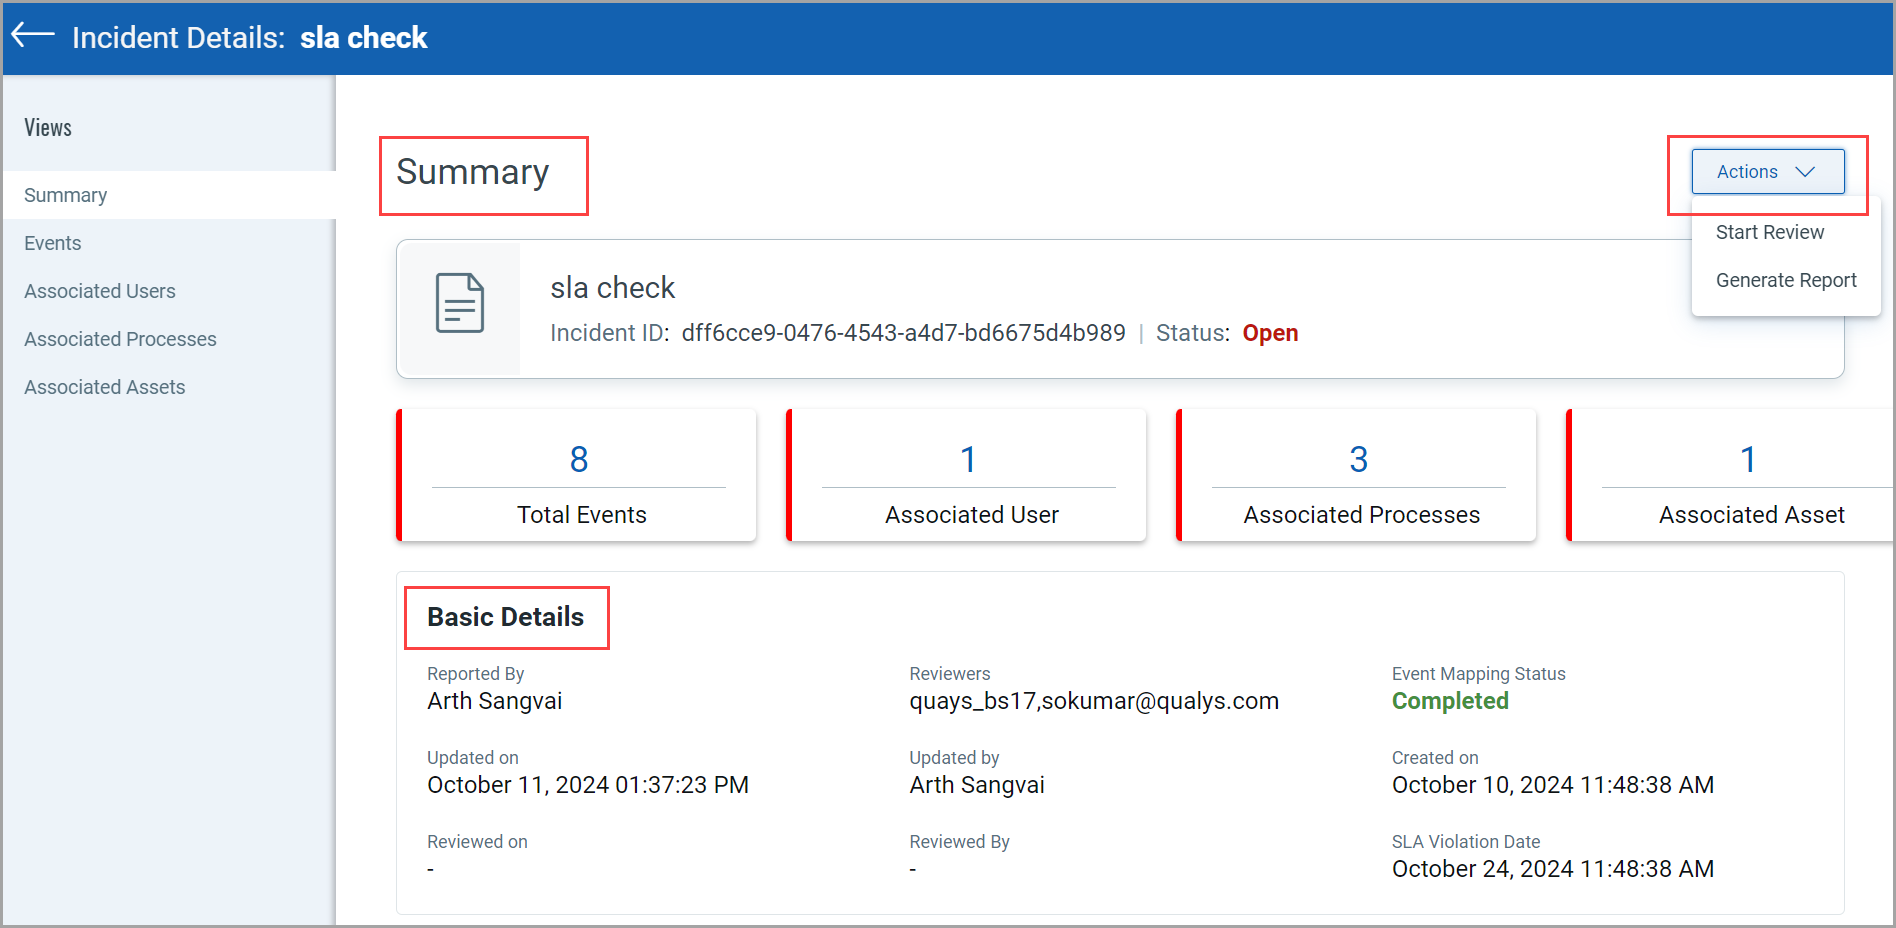
Description of fields
- Summary section displays categorization, making it easier to view basic information like the Incident ID and current status.
- Cards displays informative overview with details like Total Events, Associated Users, Associated Processes, and Associated Assets.
These cards are interactive. You can instantly navigate to the corresponding section by clicking on a card.
- Basic Details area provides comprehensive information about the reporter, reviewers, the current status, and key time stamps for when the incident was created, updated, and reviewed.
- The Actions section has report generation and review initiation option
Editing Incidents
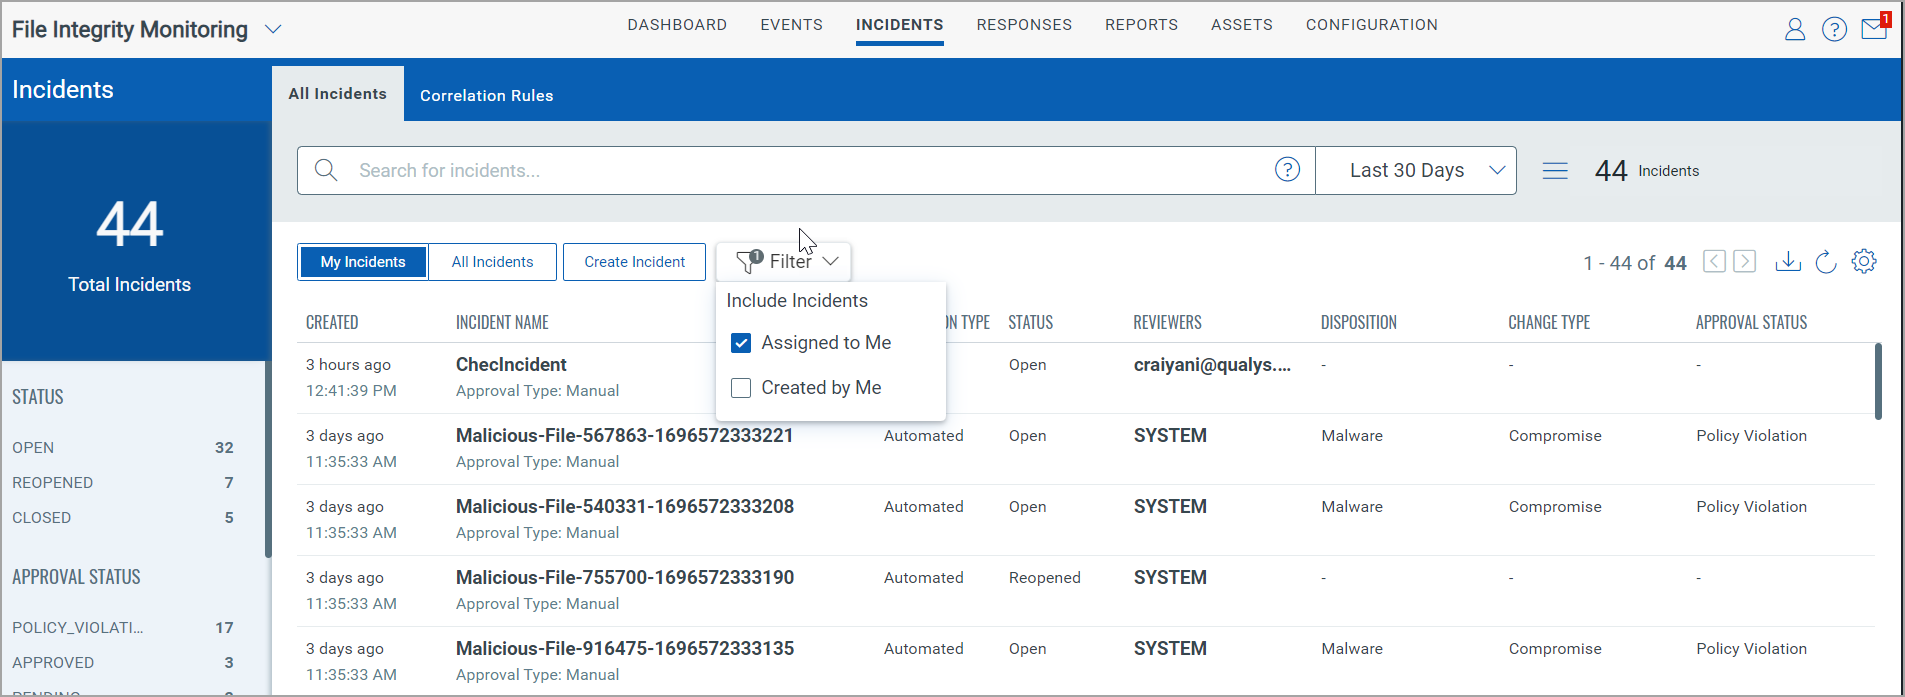
You can view and edit your incidents by clicking My Incidents. With My Incidents, you can apply a filter to view the incidents that created by you.
On selecting Assigned To Me, you see all the incidents created by you and the incidents. FIM has User-Based RBAC, which ensures specific restrictions for editing or reviewing incidents, enhancing security and control.
You can edit an incident until it reaches a closed state. During the editing process, you can make adjustments if the reviewer's name is mistaken or if you need to add additional reviewers.
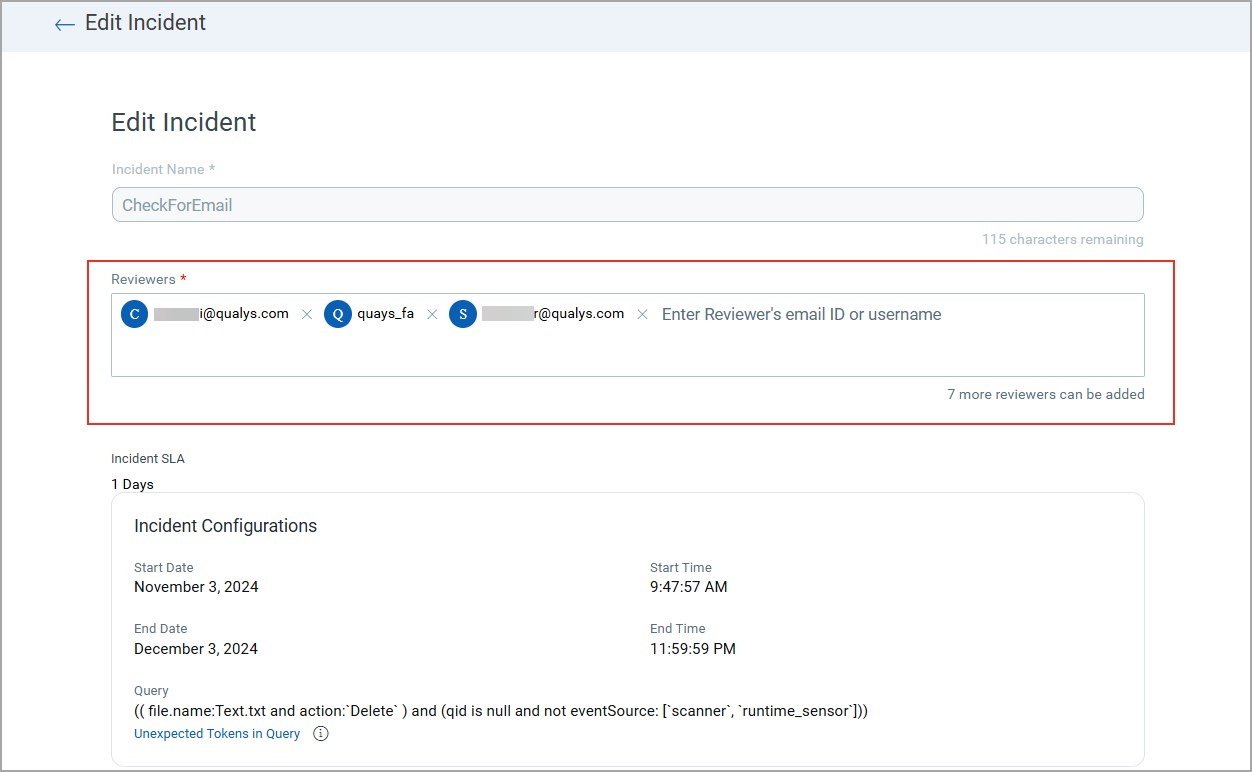
You can modify the current reviewer and include additional reviewers, but you can not change the name of the Incident and any other fields.
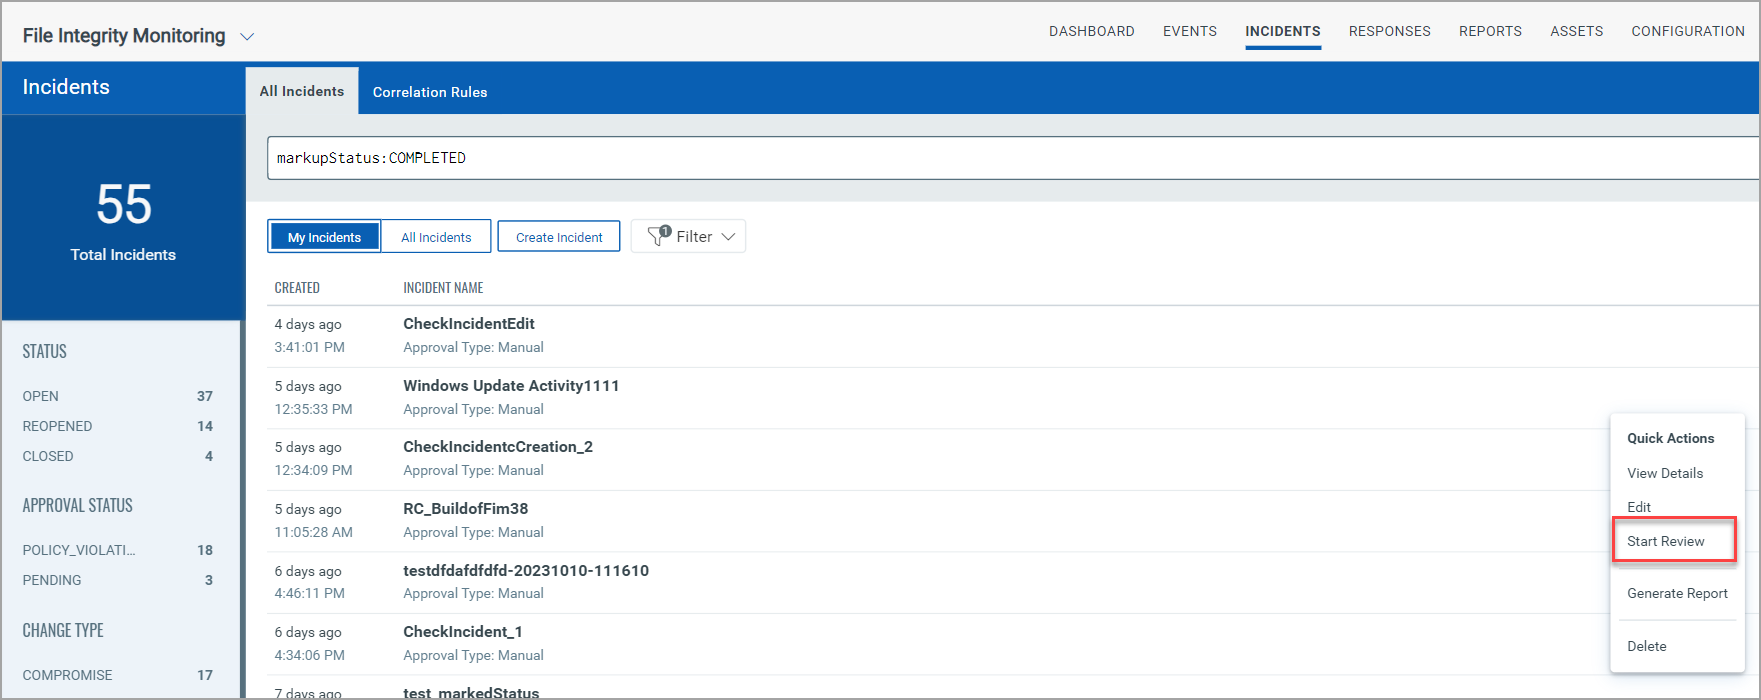
Reviewing Incidents
You can choose to view and review your incidents by clicking 'My Incidents'. With Created By Me Incidents, you can apply a filter to view the incidents that are assigned to you, and created by you.
On selecting Assigned To Me, you see all the incidents assigned to you and the incidents with reviewer SYSTEM.
In addition, with All Incidents, you can view a list of all incidents that are created by you or the sub-users under you.
You can edit the incident only if you are the creator of the incident. Similarly, you can review the incidents only when you are on the list of reviewers for the incident.
Go to All Incidents and then select Start Review from the Quick Actions menu for any incident that is Open.
You can view the list of events associated with the incident, and you can drill into the details for any event.
Click Next below the list to complete your review.
Provide a comment, mark the incident as Approved or Unapproved, pick the appropriate disposition category for reporting and classification, and choose whether the incident resulted from a manual or automated change. Click Finish.

The incident status is updated to Closed.
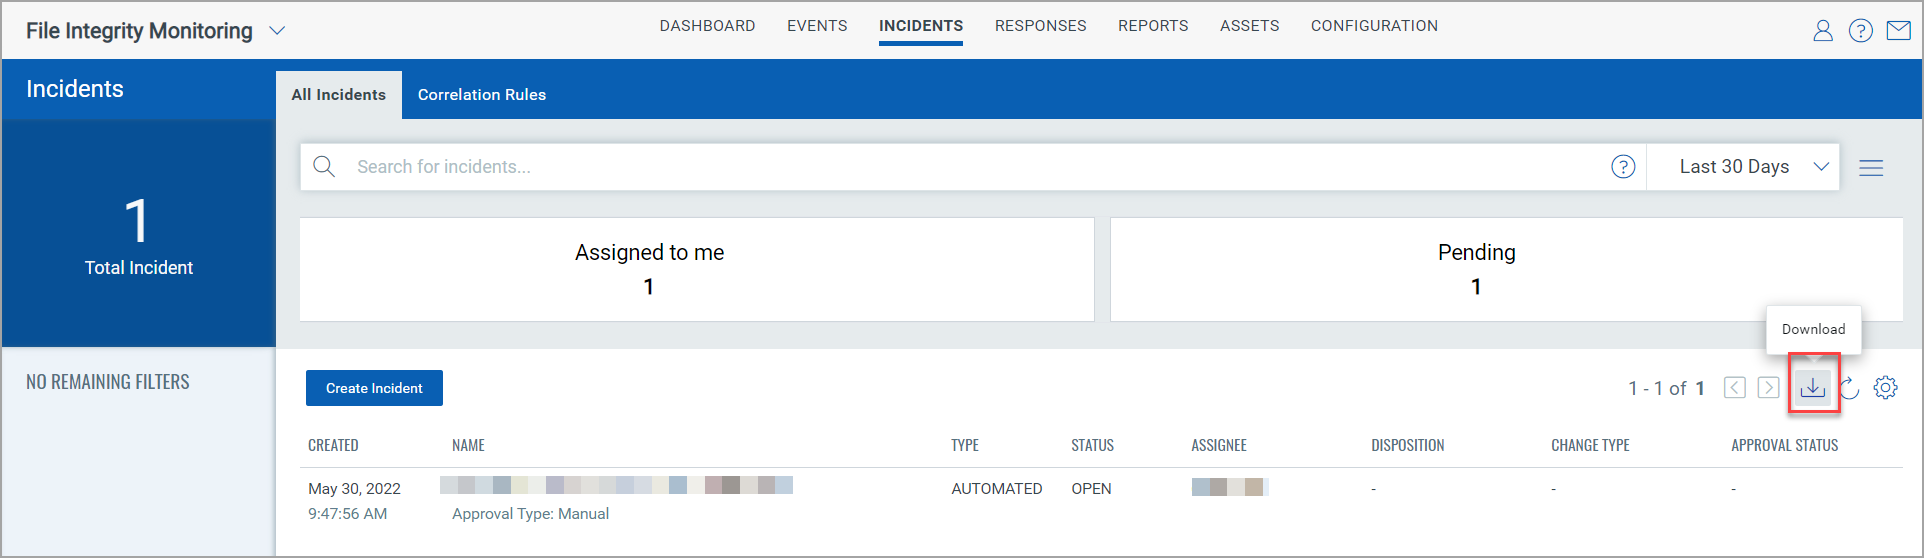
Downloading Incidents
You can download the incidents from UI. Click the Download icon above the list and choose a download format.
Deleting Incidents
To delete an incident, click Delete from Quick Actions of the event.
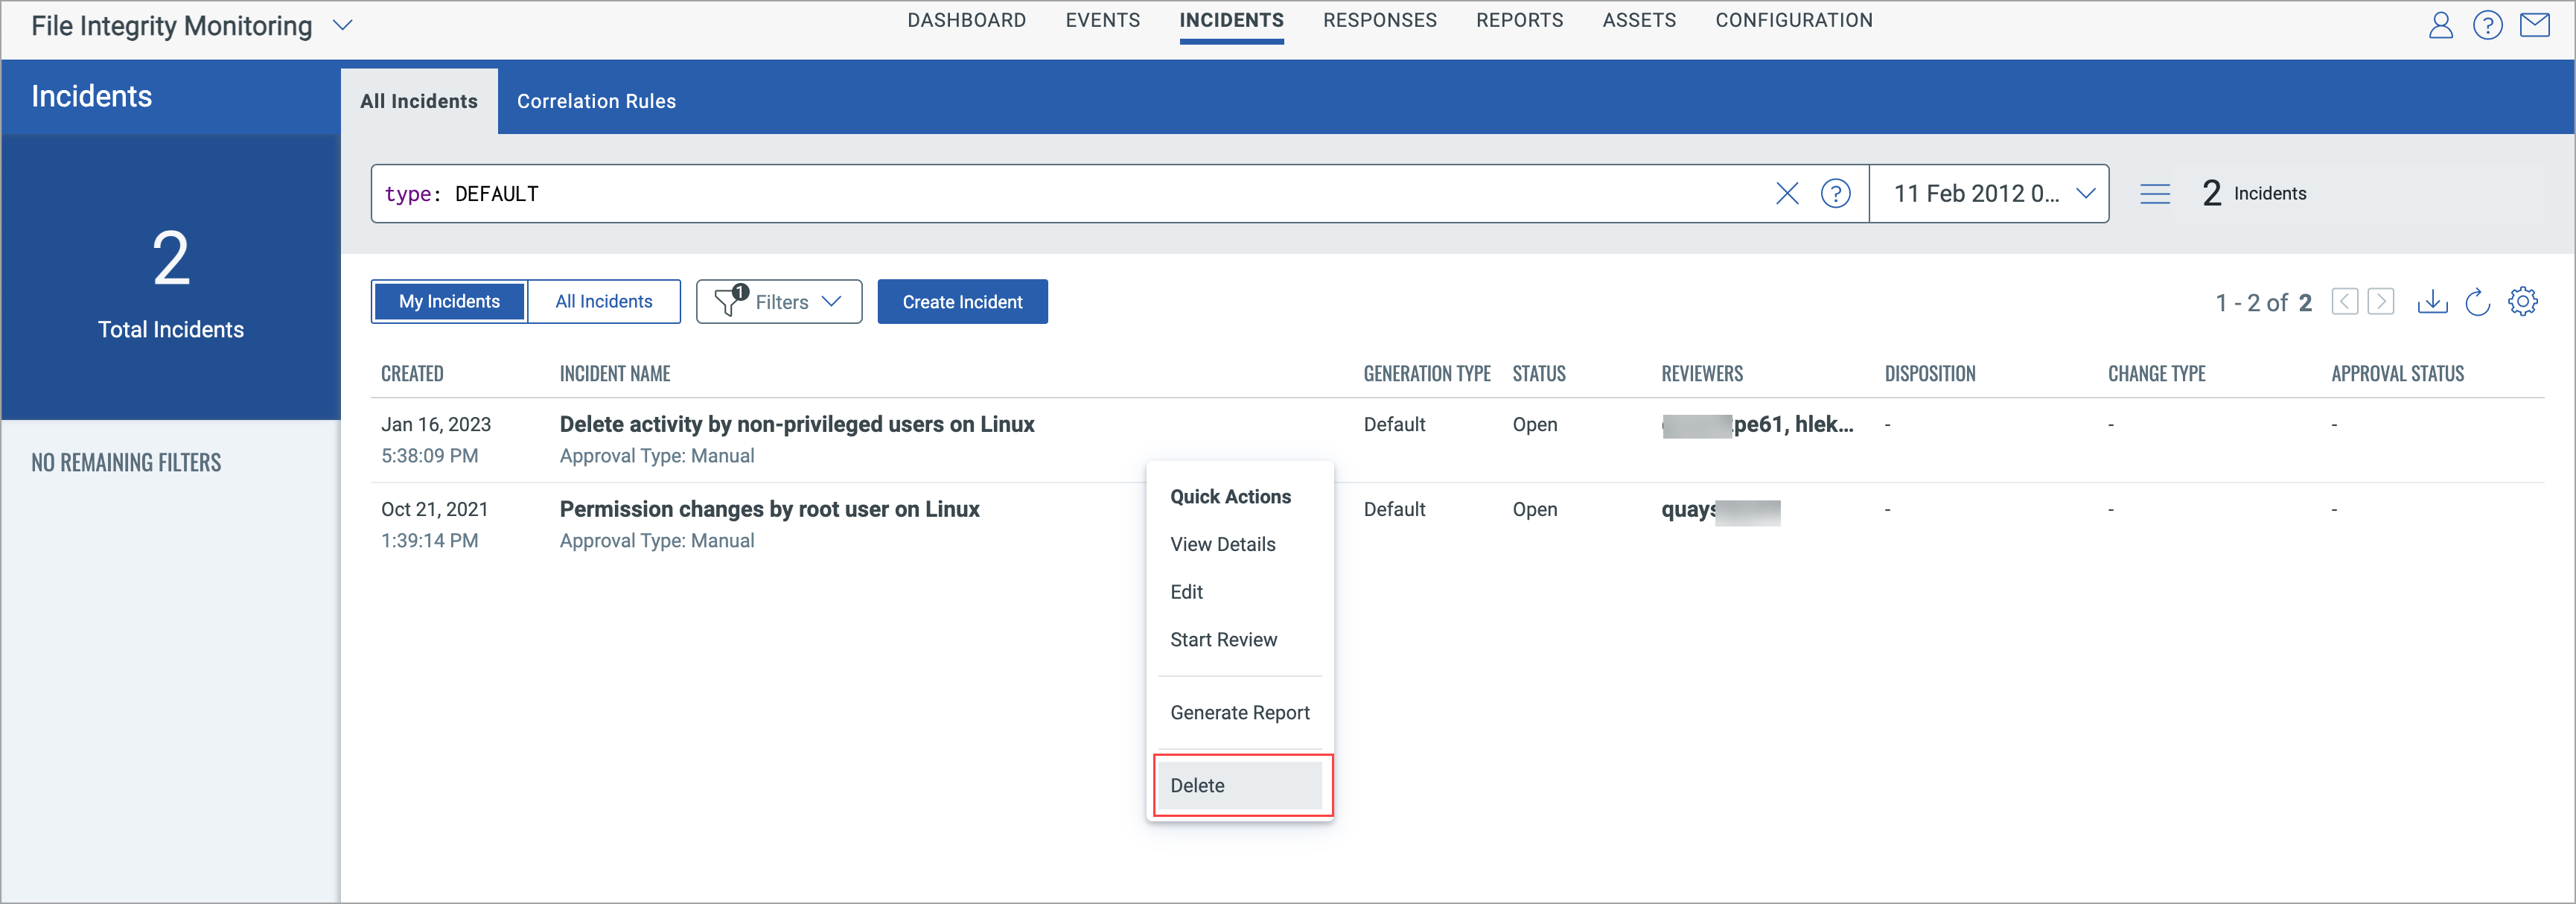
A confirmation tab opens where you can click Delete to delete the event.
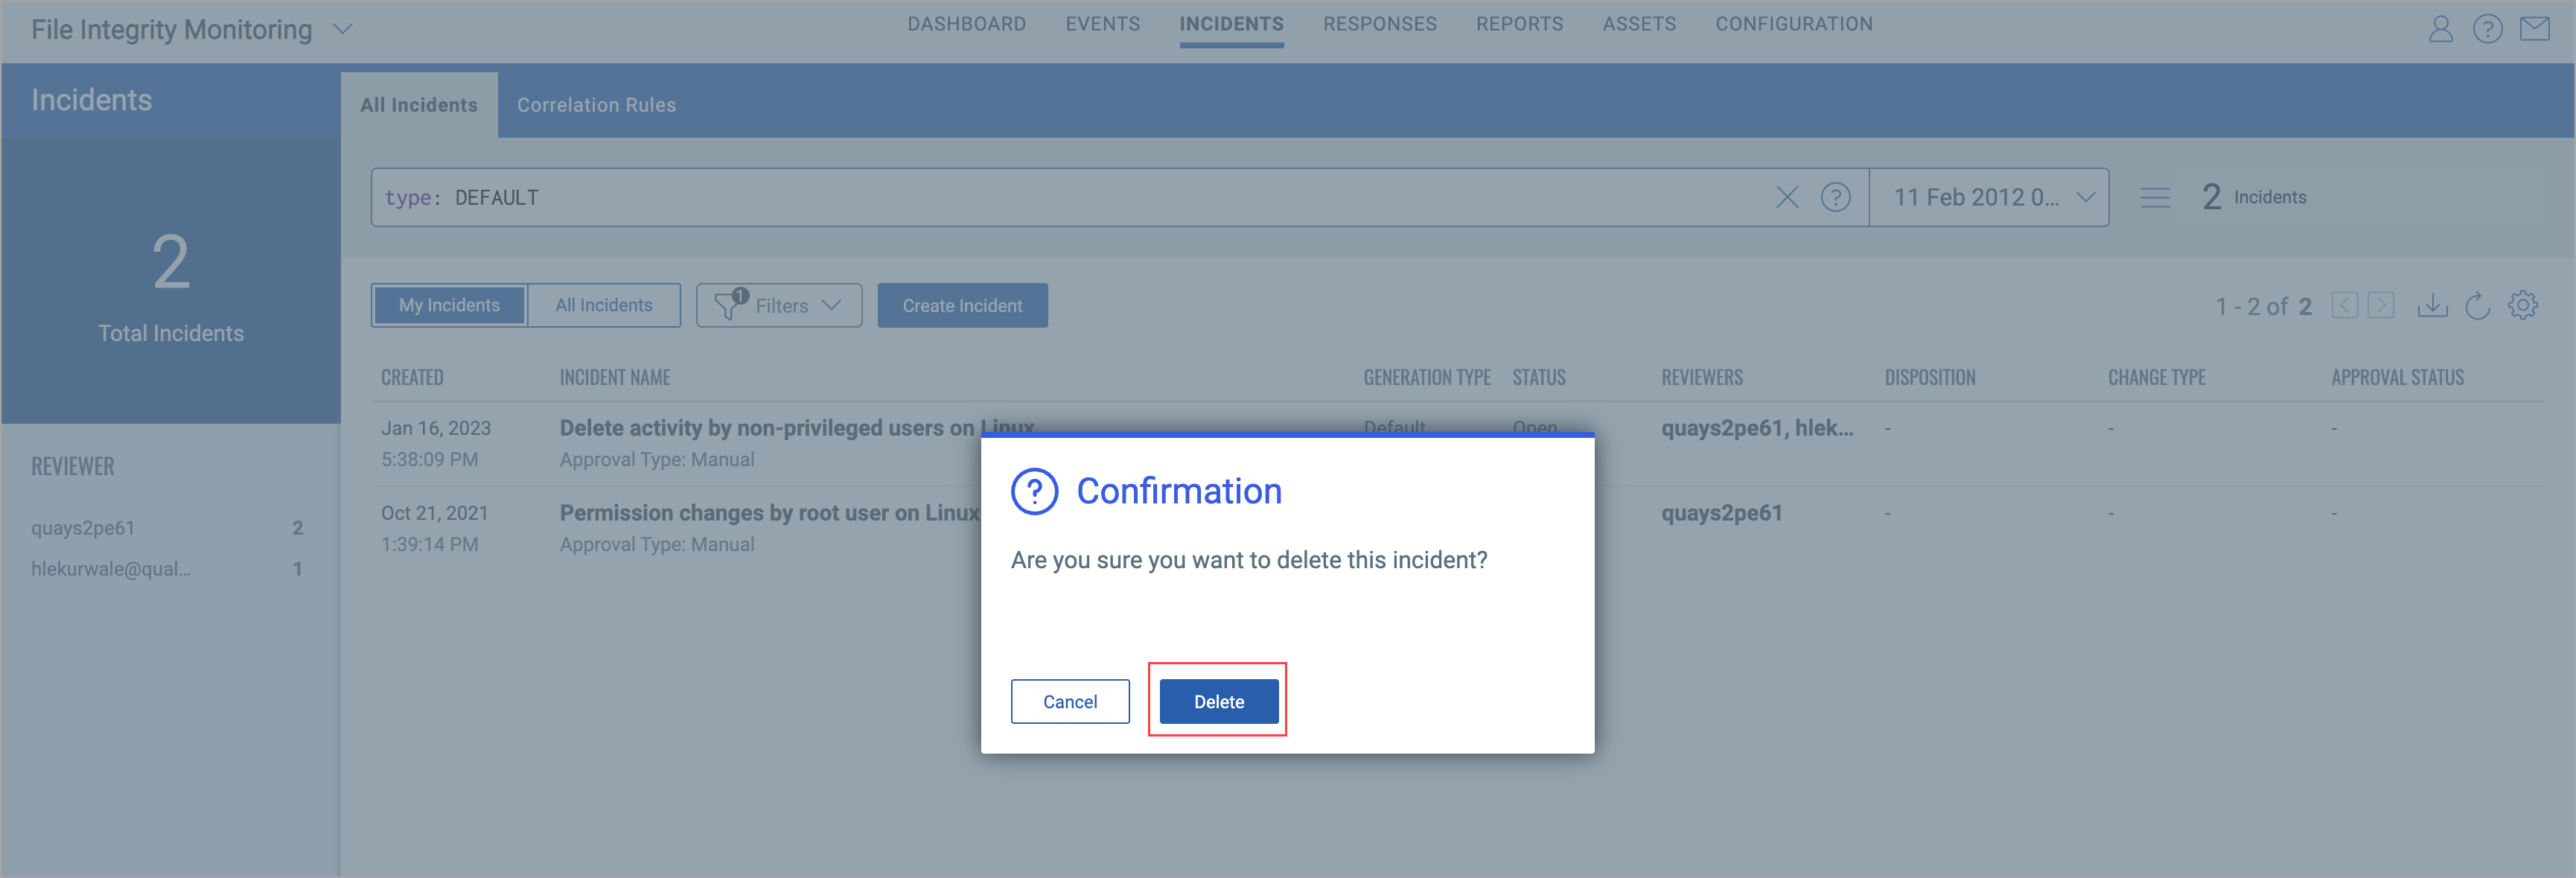
You can delete an incident only when you are a FIM user who is one of the reviewers of the incident and has incident deletion permission.
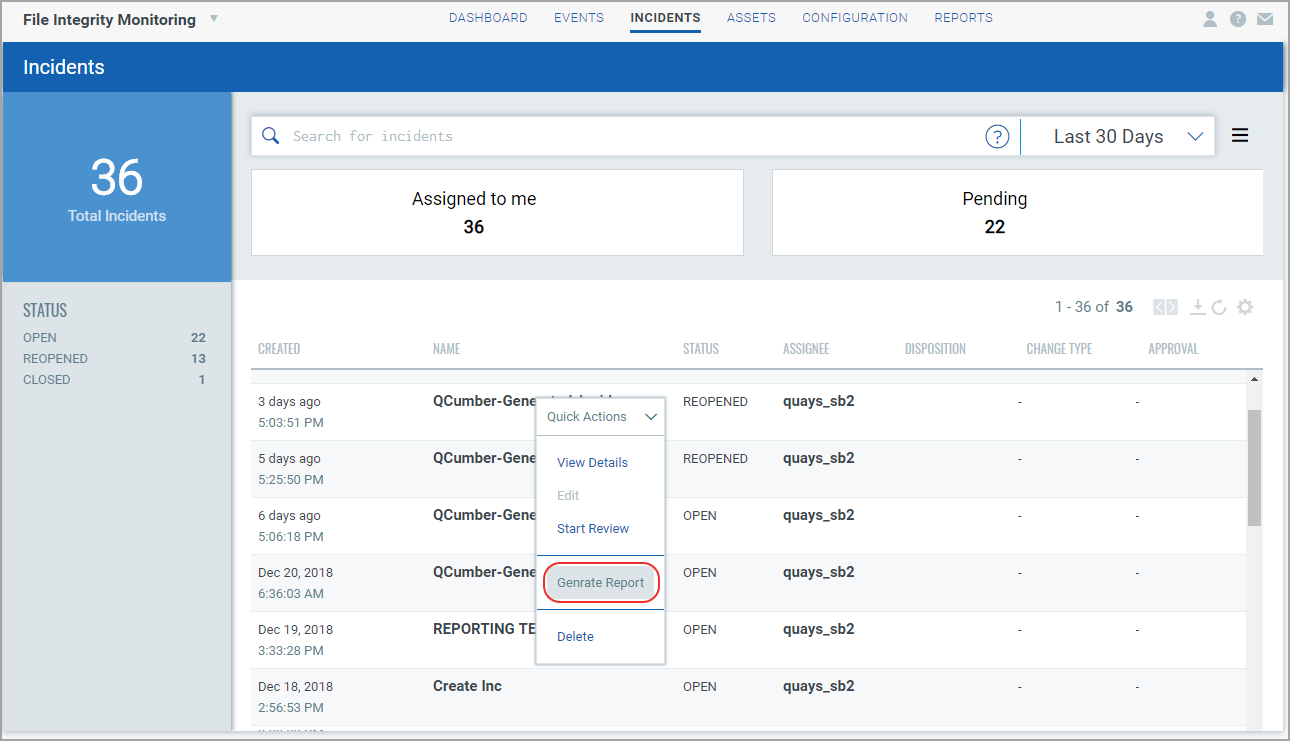
Generating Incident Reports
Select an incident and click Generate Report from the Quick Actions menu. Select PDF/HTML/CSV format and click Download.
Note: Report generates after a job is completed which takes five minutes of time. Therefore once an incident occurs, it is suggested to wait for five minutes before generating a report
The report is created for the incident and listed in the Reports tab. You can download a report only if the status of the report is completed.

Viewing a Report Status
When you submit a request for generating a report, FIM assigns the following status to the report which you can see in the Report tab during different stages of its processing:
- Accepted: The request for generating the report is accepted.
- Processing: The report generation is in progress.
- Completed: The report is generated and is available for download.
- Failed: Report generation process failed due to some reason.
If the report is in "Failed" state or if the report is stuck in a particular state (except Completed state ) for a long time, you can run the report again using the "Run Again" options from the Quick Actions menu.
Re-running a Report
Click the Run Again option under the Quick Actions menu to generate a new report with the same name but updated data, date, and time.
The Run Again option is not available if the incident for which the report is generated is deleted.
You cannot rerun reports that have special characters in their name.

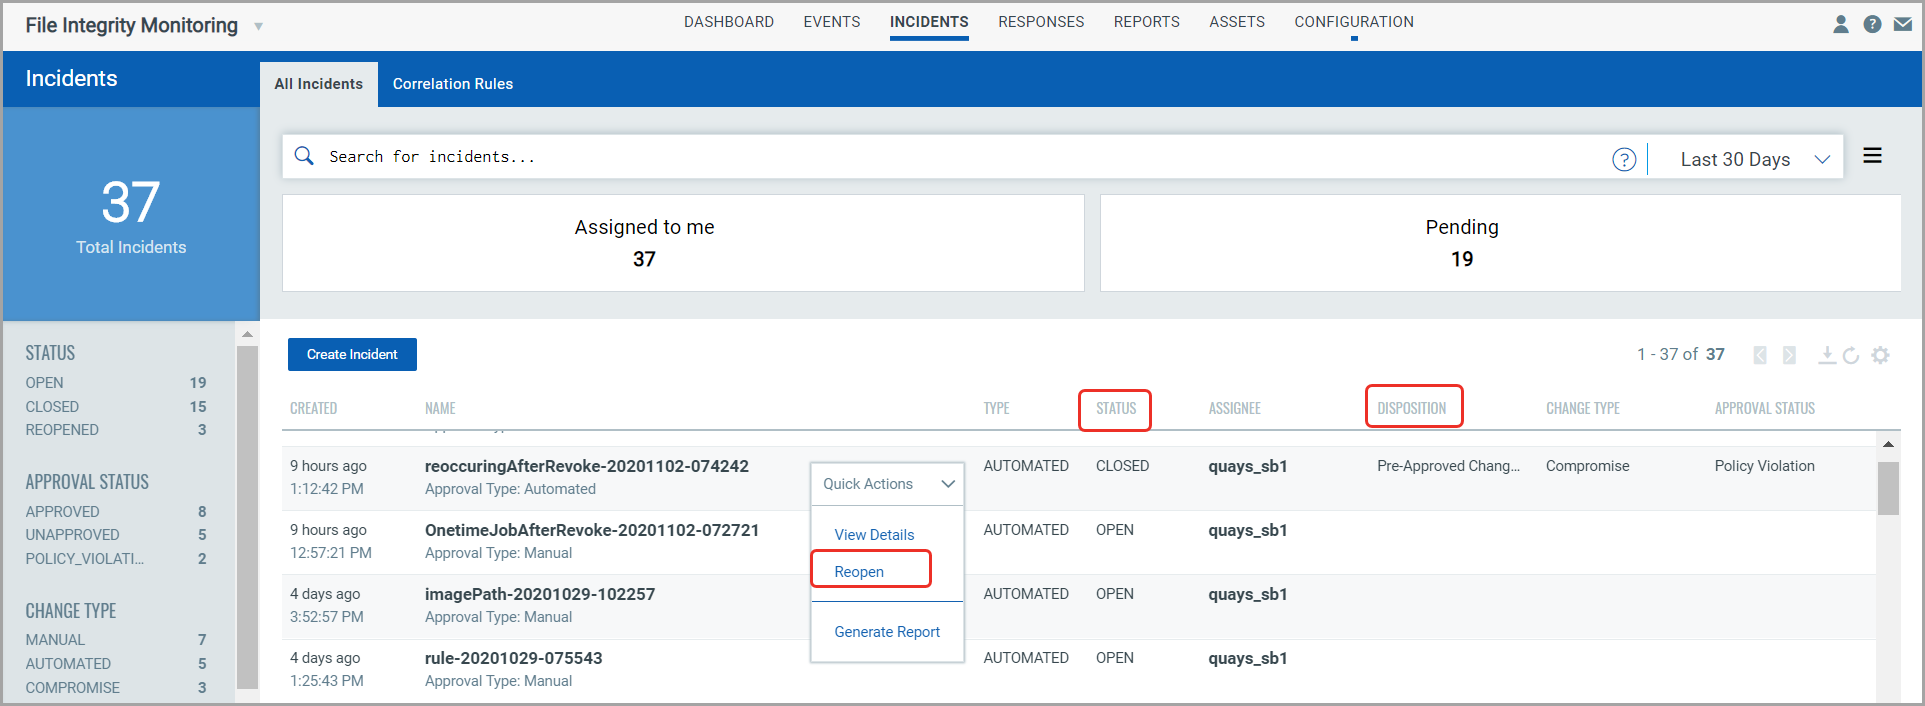
Reopening Closed Incidents
You have an option to reopen a closed incident to modify the incident’s review information. When you reopen an incident, all the review information in the incident such as disposition, change type, approval and other information is set to blank. You can then review the reopened incident, provide review comments and mark it Closed.
To reopen an incident, click Reopen from the Quick Actions menu.
Enter the comments and click Yes.