Steps to Deploy Cloud Agent as AWS EC2 Image Builder Component
The following are the important steps to use Qualys CLoud Agent as AWS EC2 Image Builder Component.
Prepare Cloud Agent Installer | Create Configuration Parameters | Create Image Recipe | Create Pipeline for Image Recipe | Create Image for Cloud Agent | Create an Instance |
Extract Cloud Agent Parameters
Refer to Extract Cloud Agent Parameters to get all the required Cloud Agent parameters.
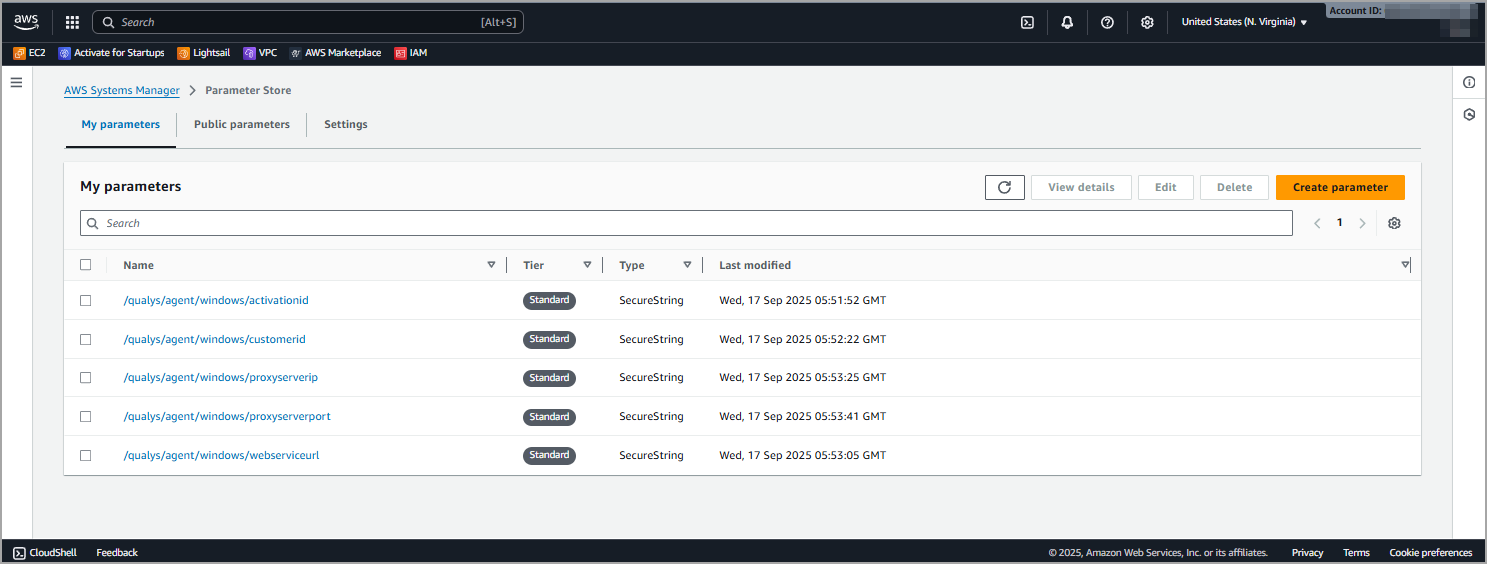
Create Configuration Parameters
Perform the following steps to create configuration parameters for Qualys Cloud Agent Component.
- In the AWS user interface, navigate to System Manager > Parameter Store.
- Click Create Parameter to create parameters for Qualys credentials and installation arguments.
The following table lists all the required parameters you need to create:
Parameter Name Mandatory/Optional Data Type Description Activation-ID Mandatory String Unique activation ID to activate the Cloud Agent. Customer-ID Mandatory String Unique customer ID for your subscription. Web Service URI Mandatory String The platform URL where your account is hosted. Proxy Server IP Optional String The proxy host for Cloud Agent to use while communicating with the Qualys Platform. Proxy Port Optional Integer The Proxy port that Cloud Agent uses while communicating with the Qualys Platform. - You can check all the newly created parameters in the My parameters section of Parameter Store.
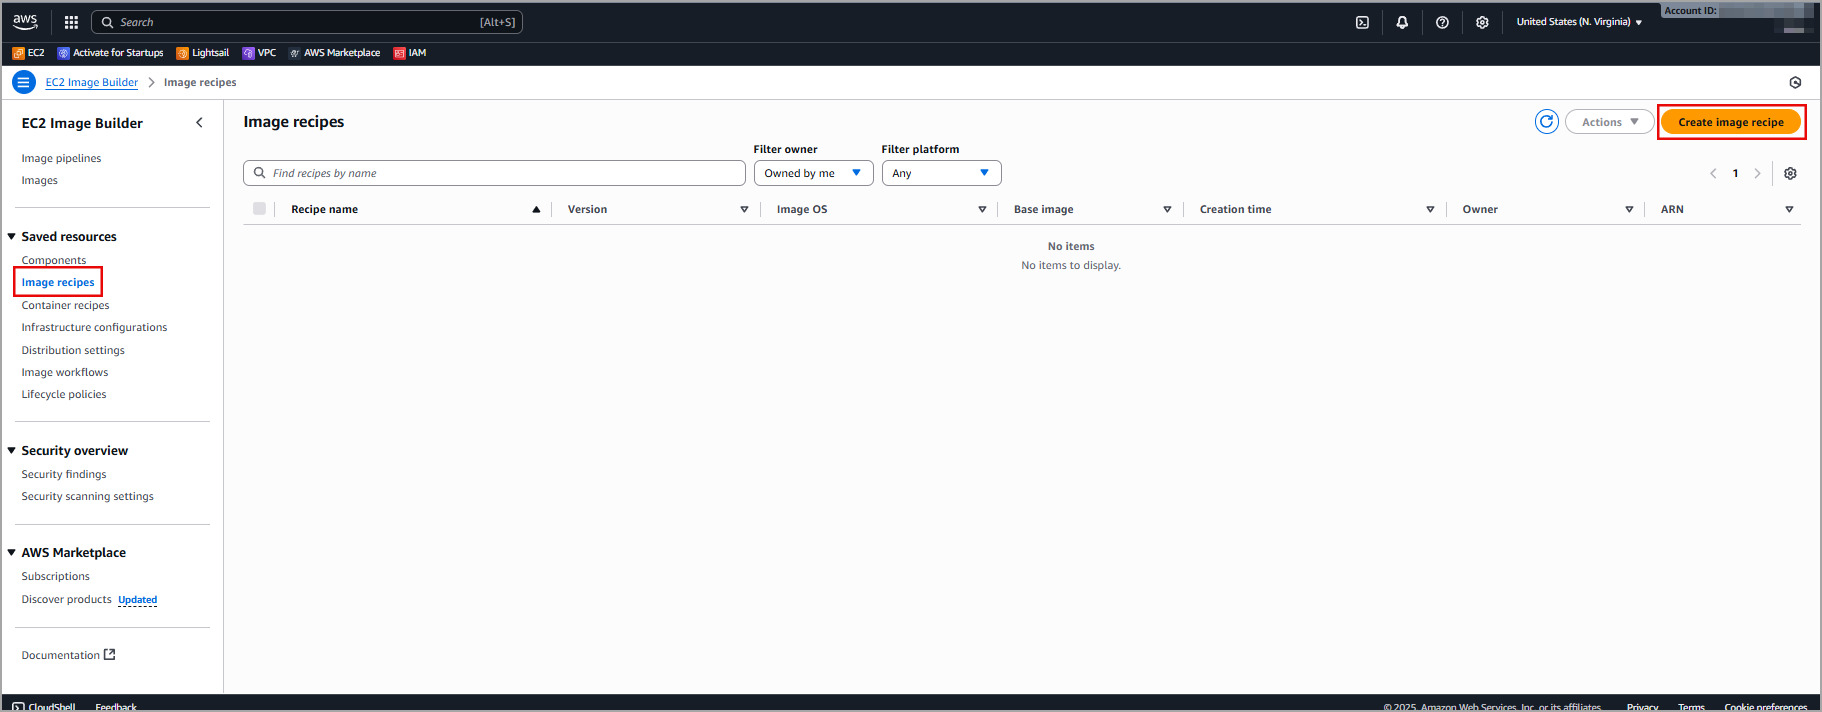
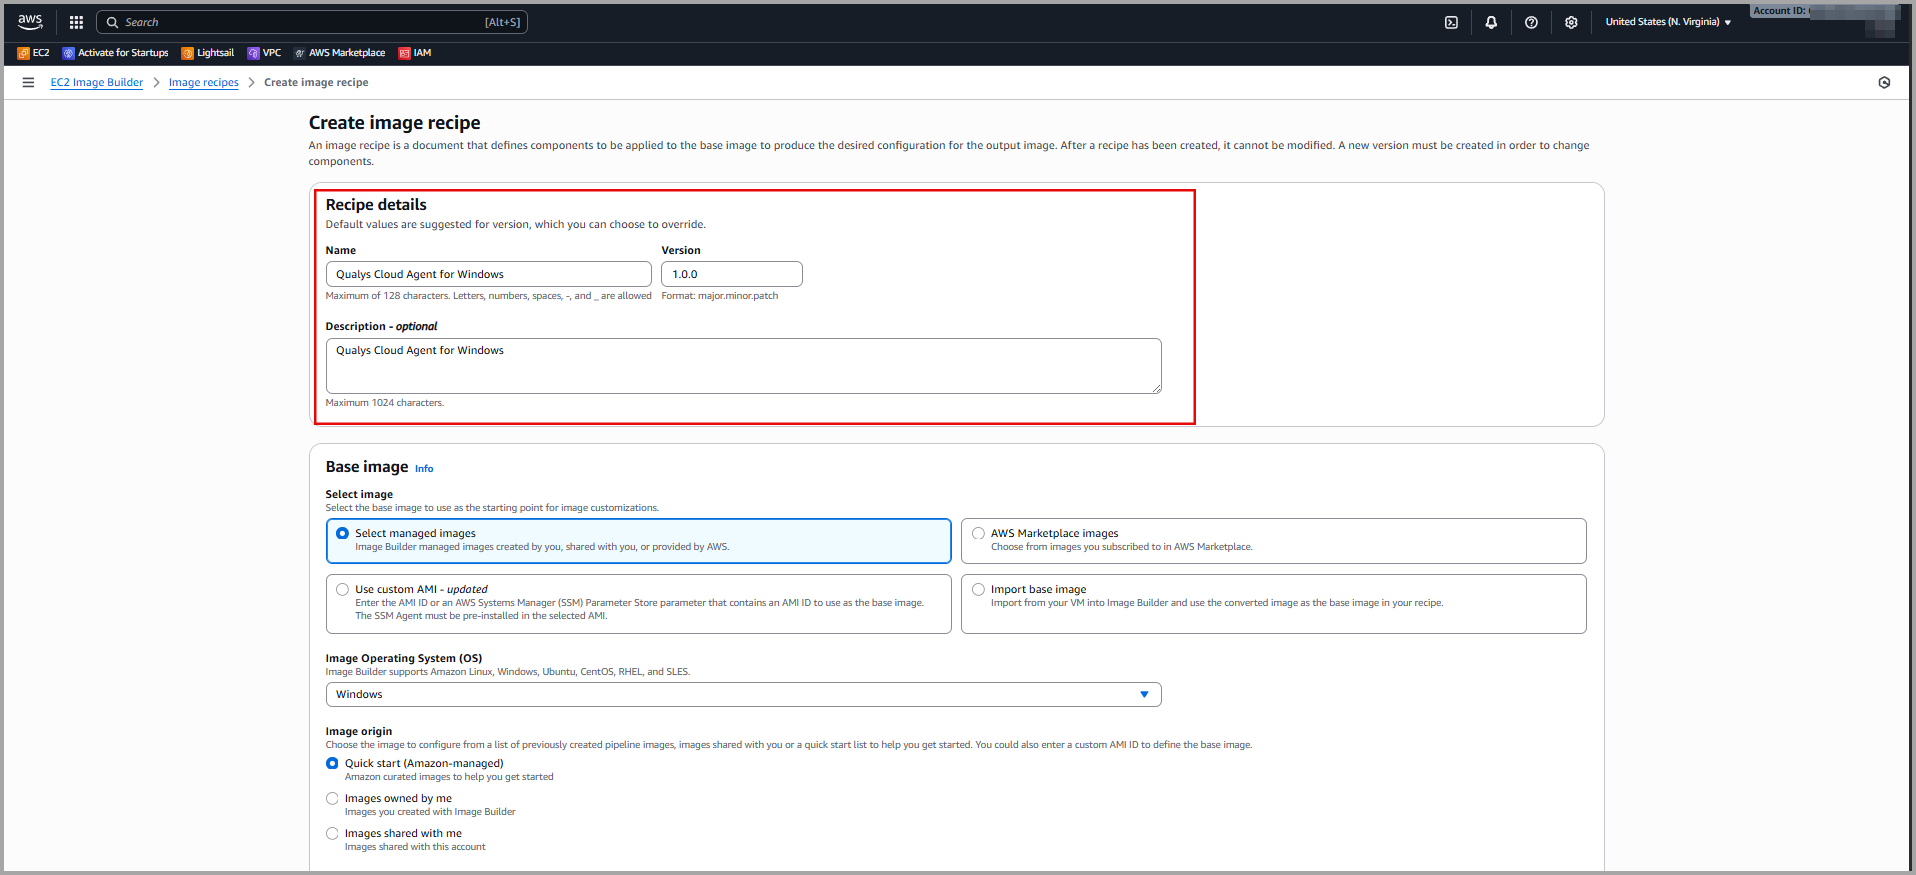
Create Image Recipe
Perform the following steps to add the Qualys Cloud Agent component to Image Recipe.
- Navigate to EC2 Image Builder > Image recipes > Click Create image recipe.
- Select Qualys Cloud Agent Component.
- Click Add to recipe.
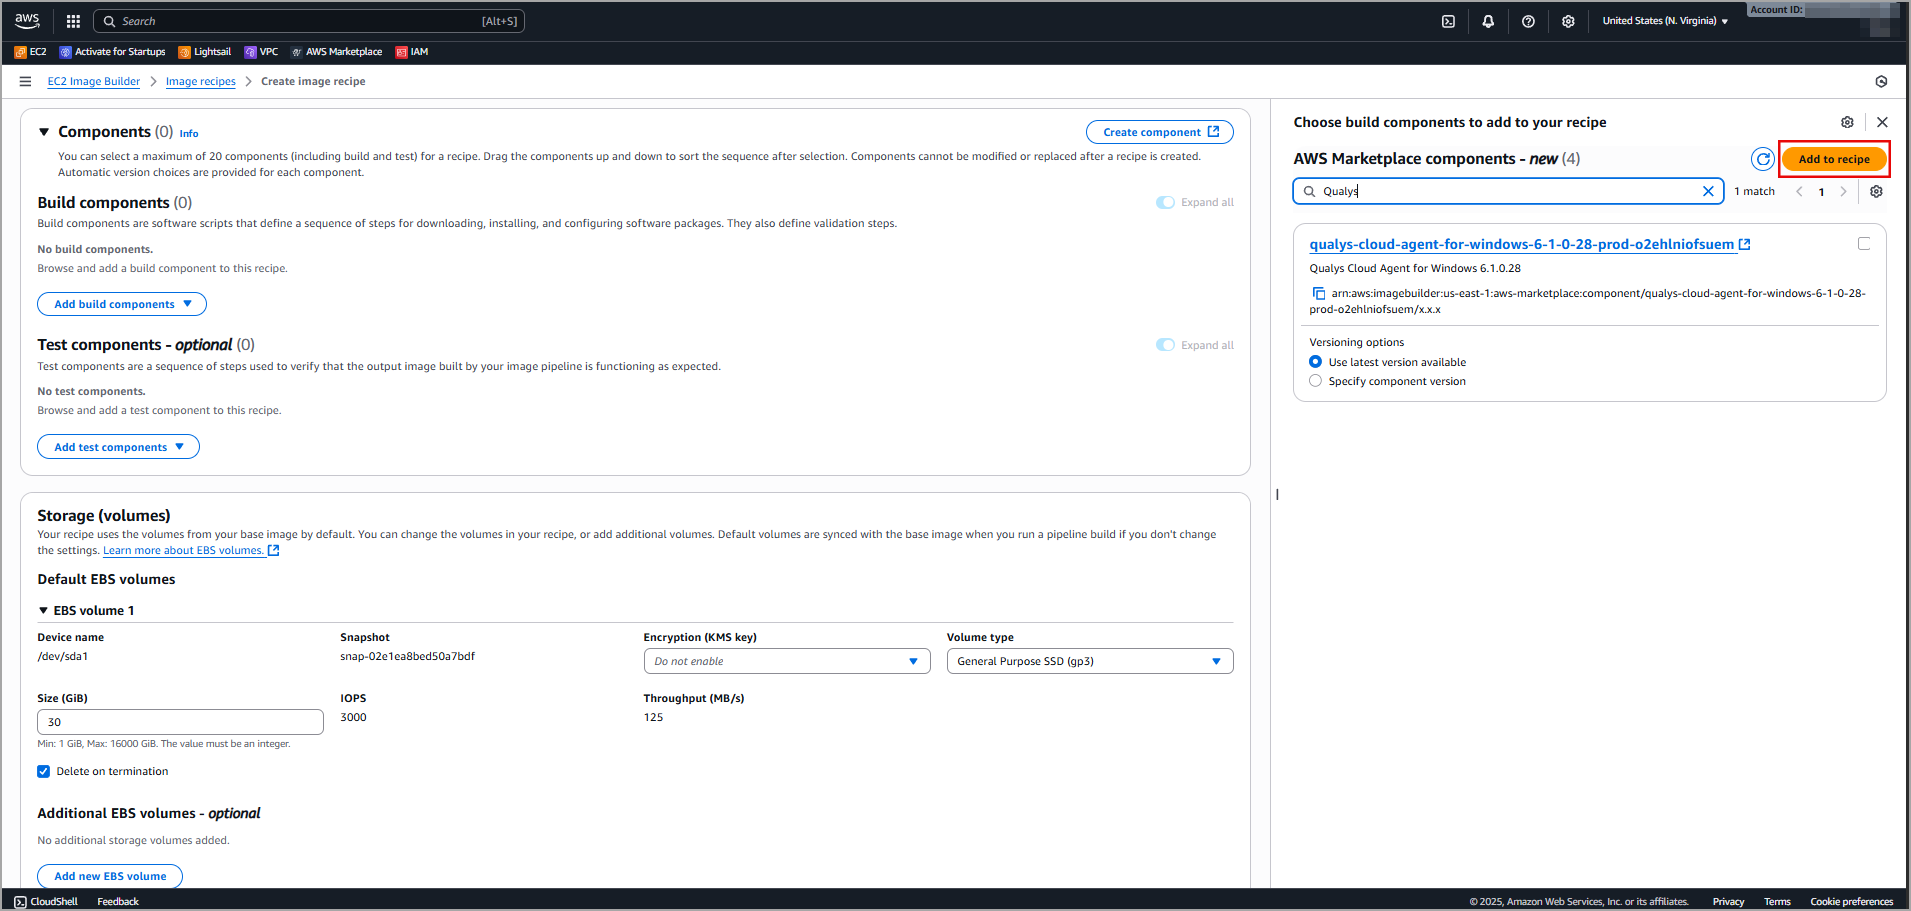
- Add the configuration parameters you created in the Value field.
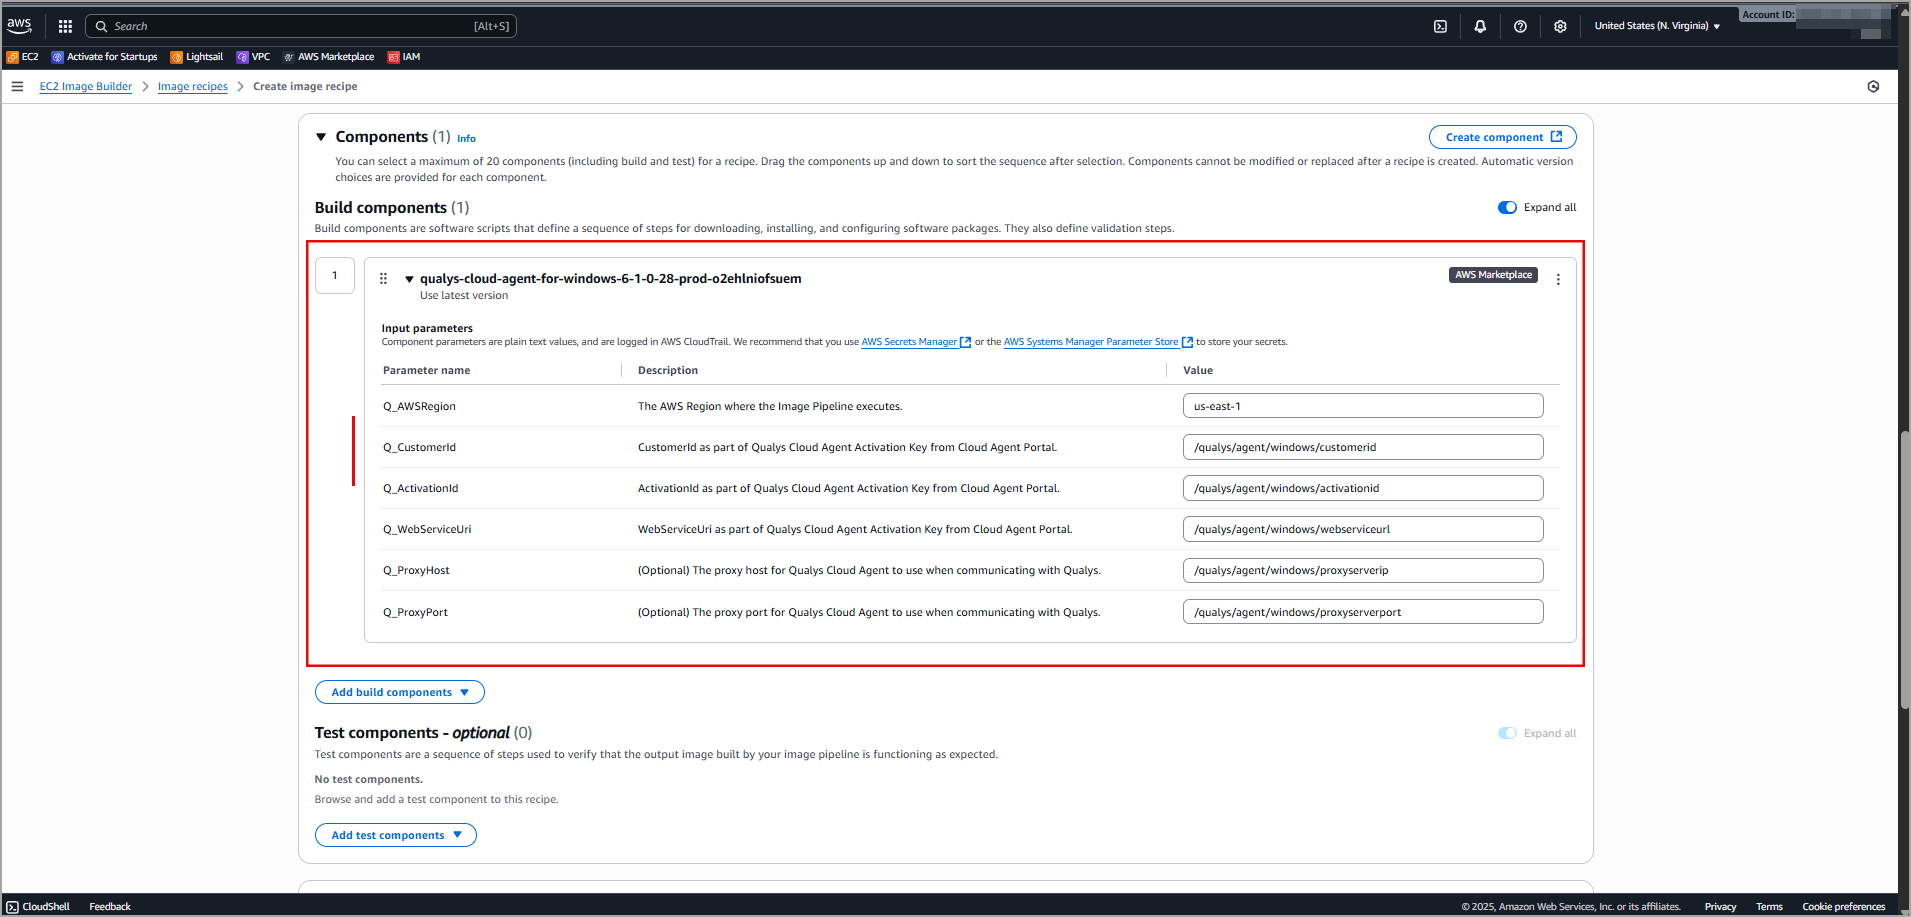
- Click Create. The new image recipe with Qualys Cloud Agent as a component is created.
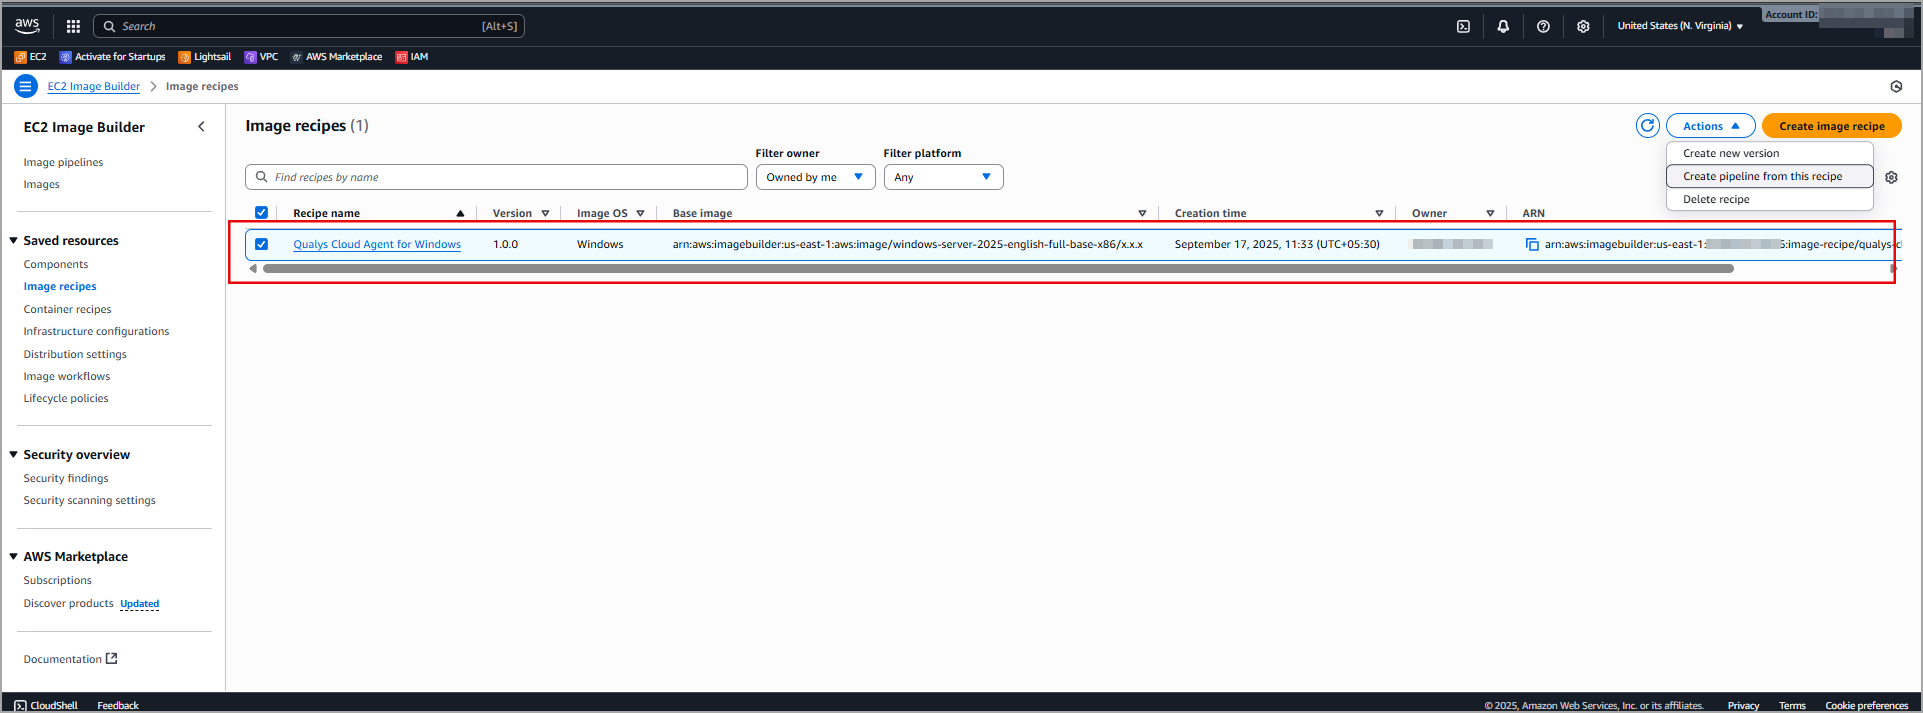
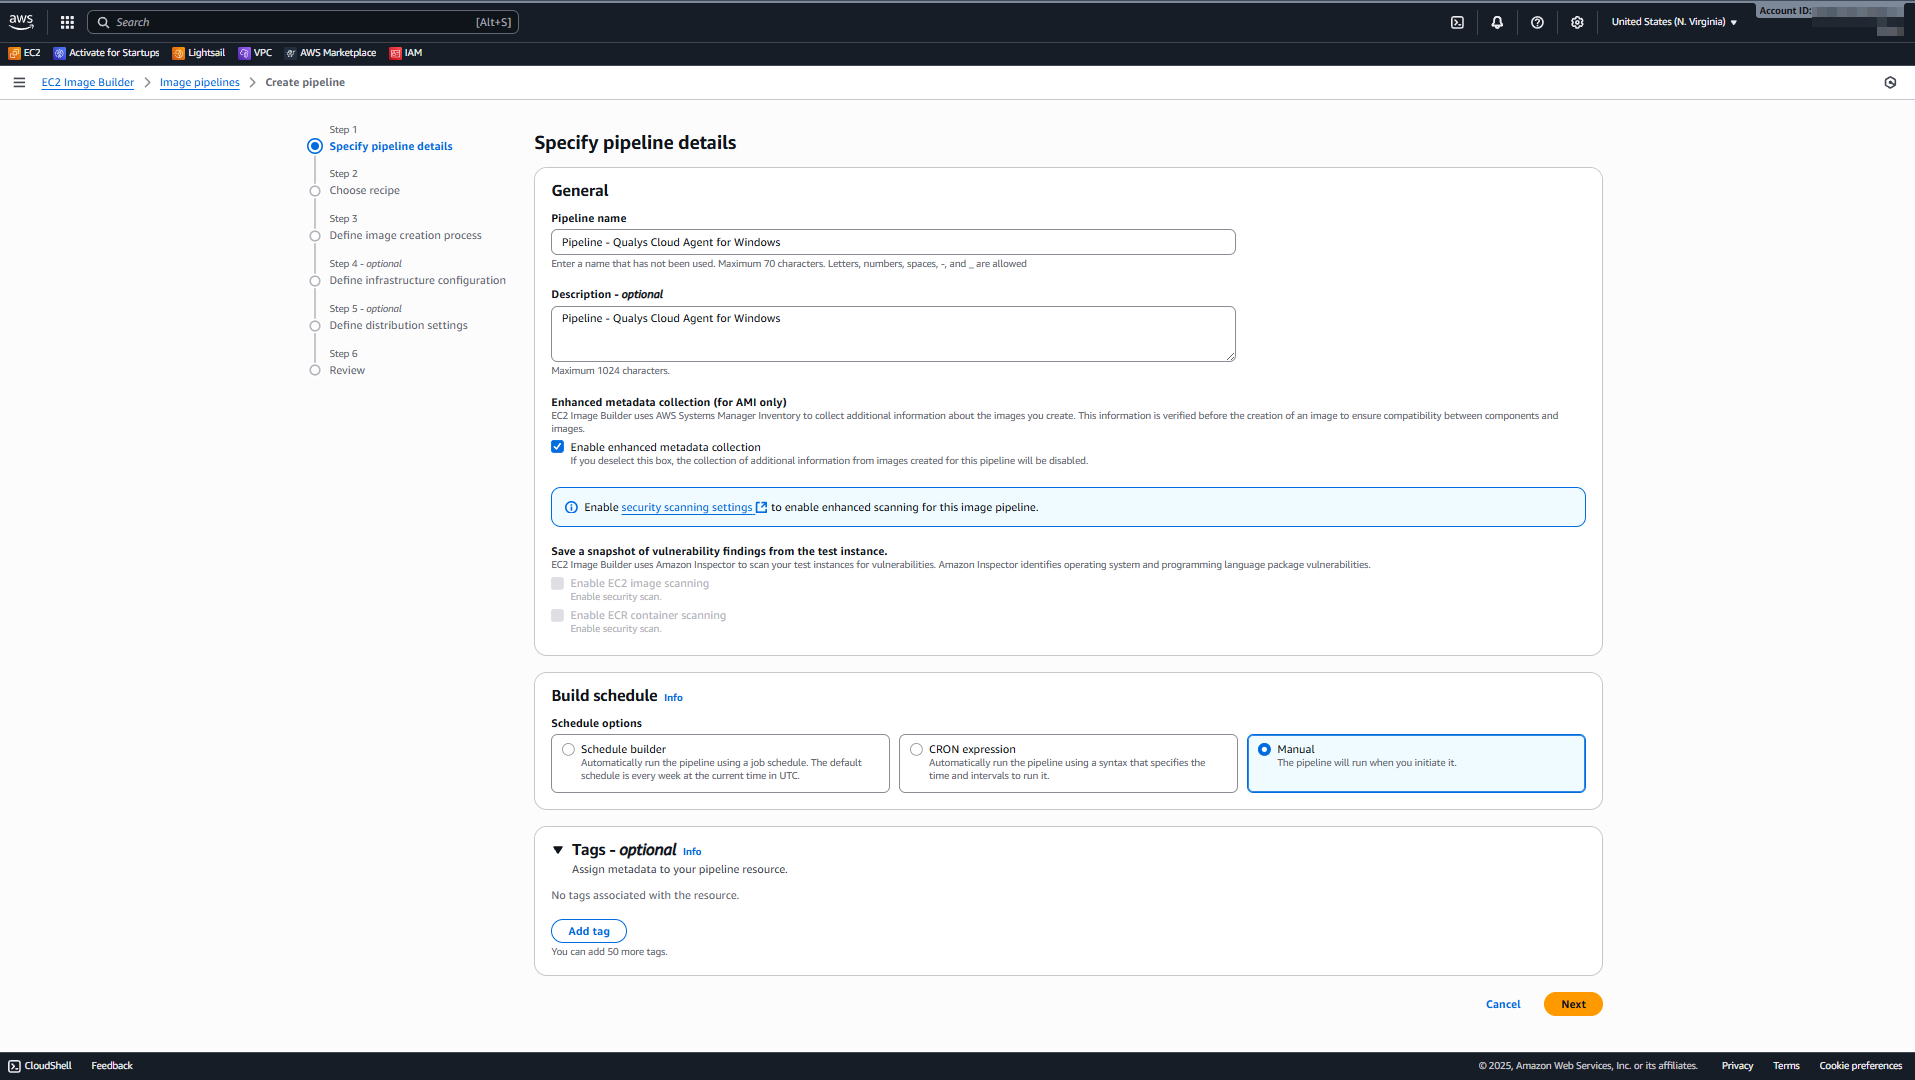
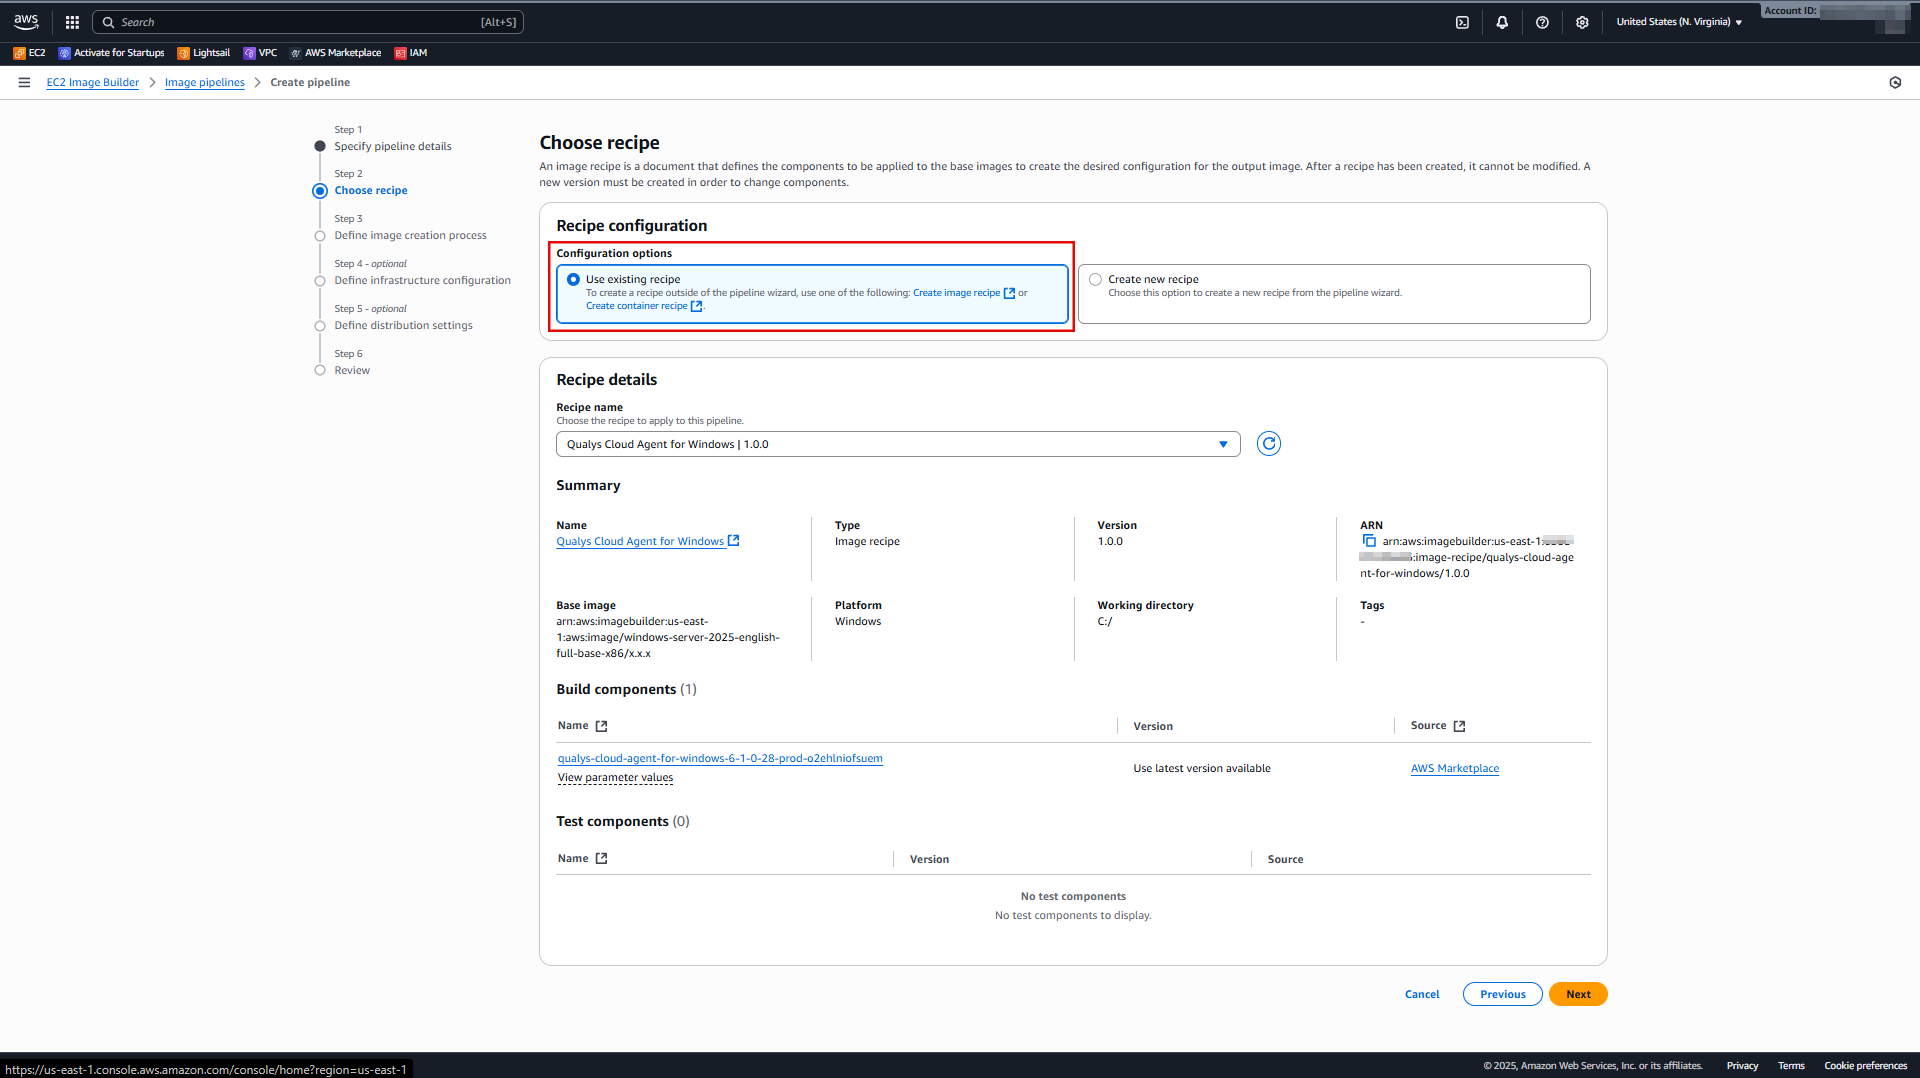
Create Pipeline for Image Recipe
Perform the following steps to create a pipeline for an image recipe.
- Navigate to EC2 Image Builder > Image pipeline.
- Click Create pipeline.
- In the Choose recipe section, select a image recipe that you have created for Qualys Cloud Agent.
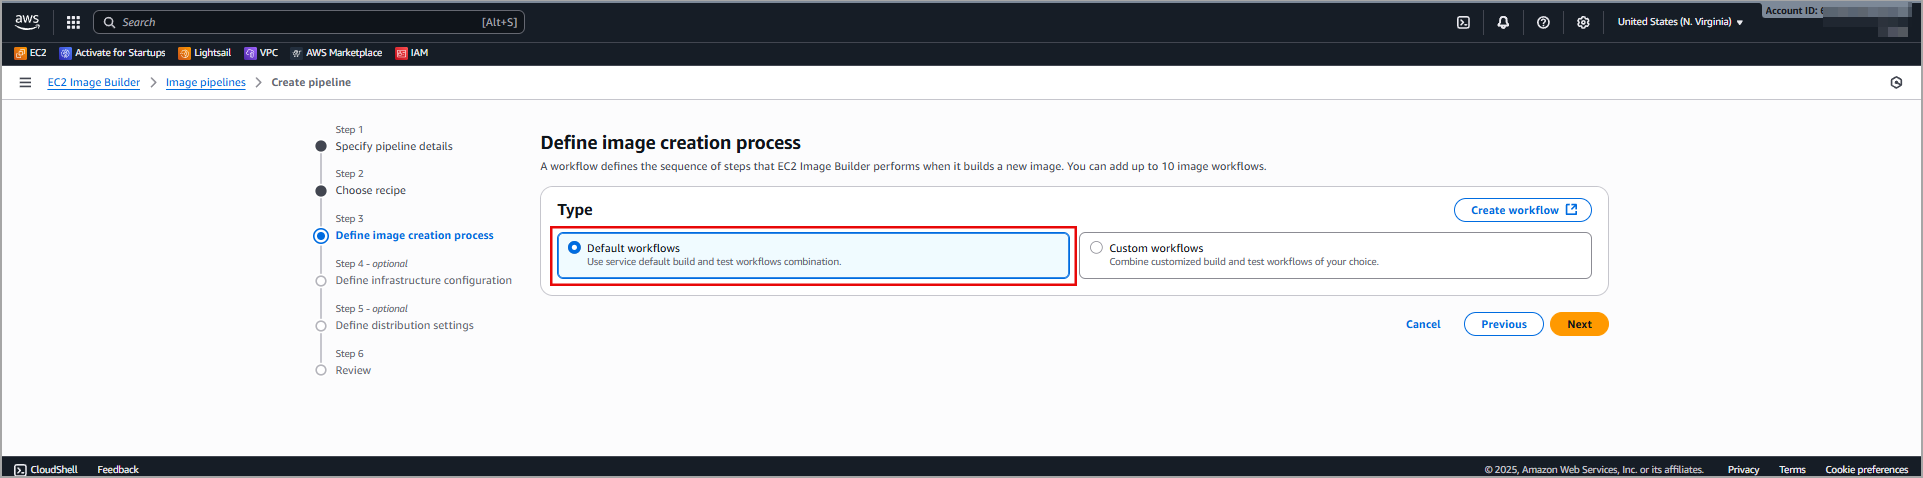
- In the Define image creation process section, select Default workflows.
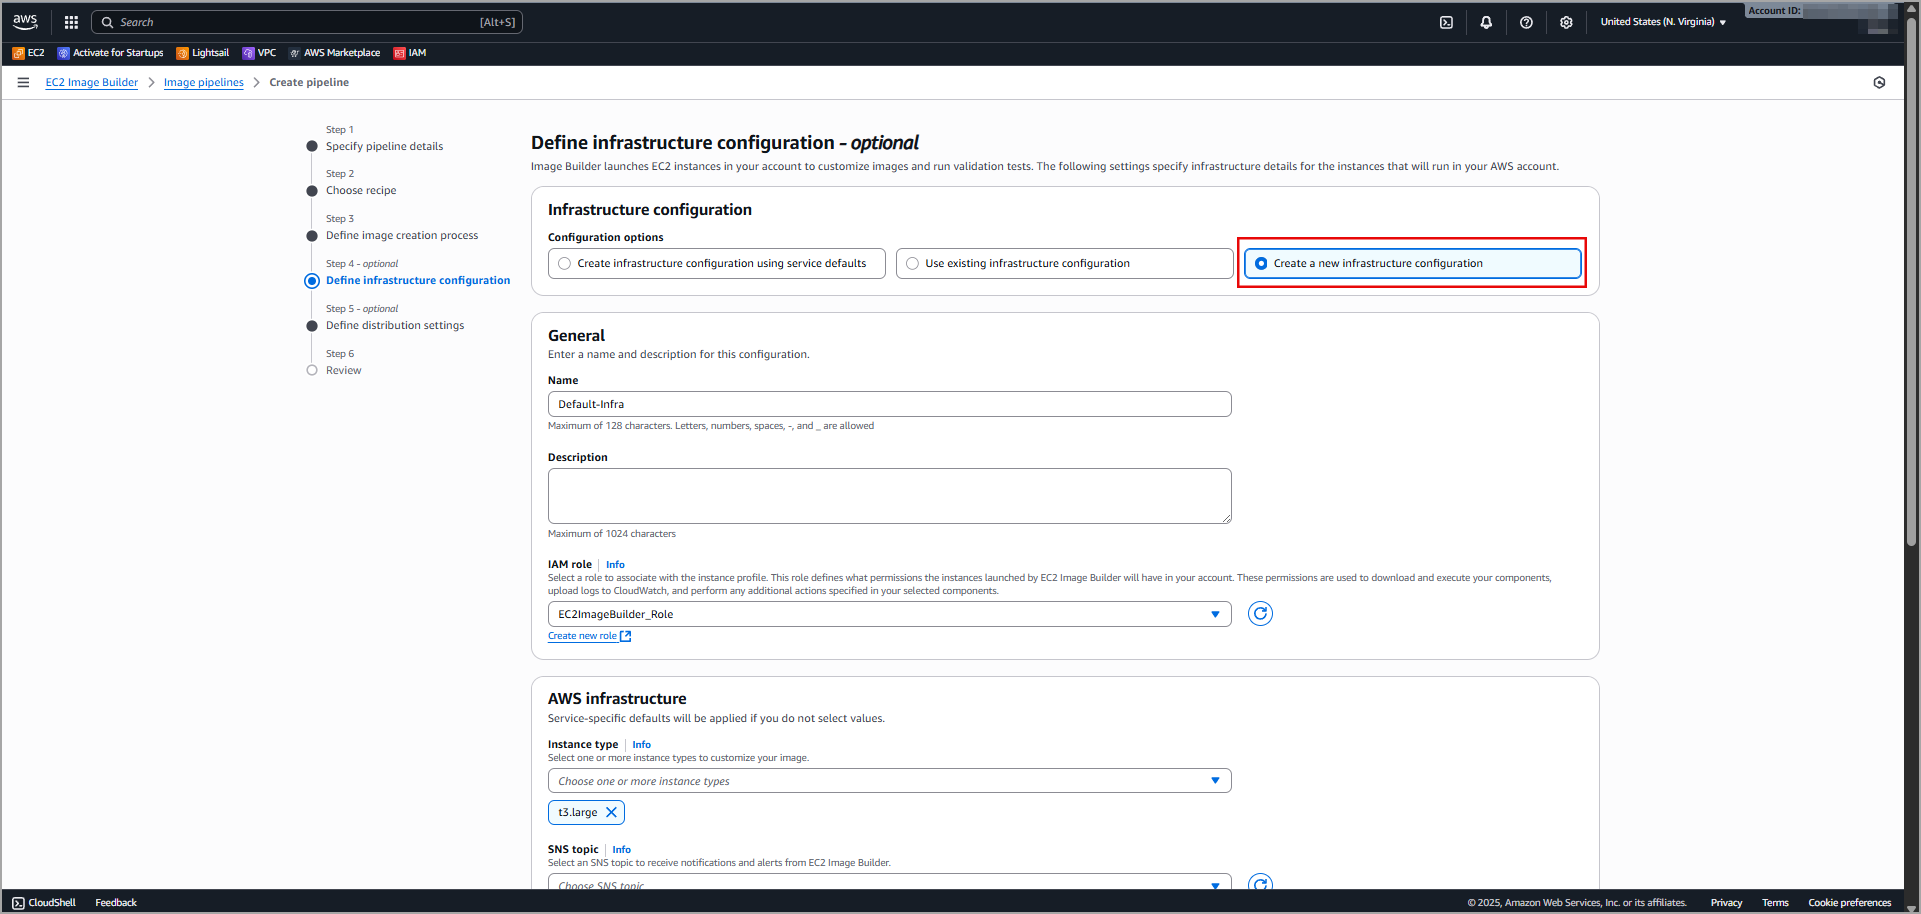
- In the Define infrastructure configuration section, create a new infrastructure configuration or select an existing configuration.
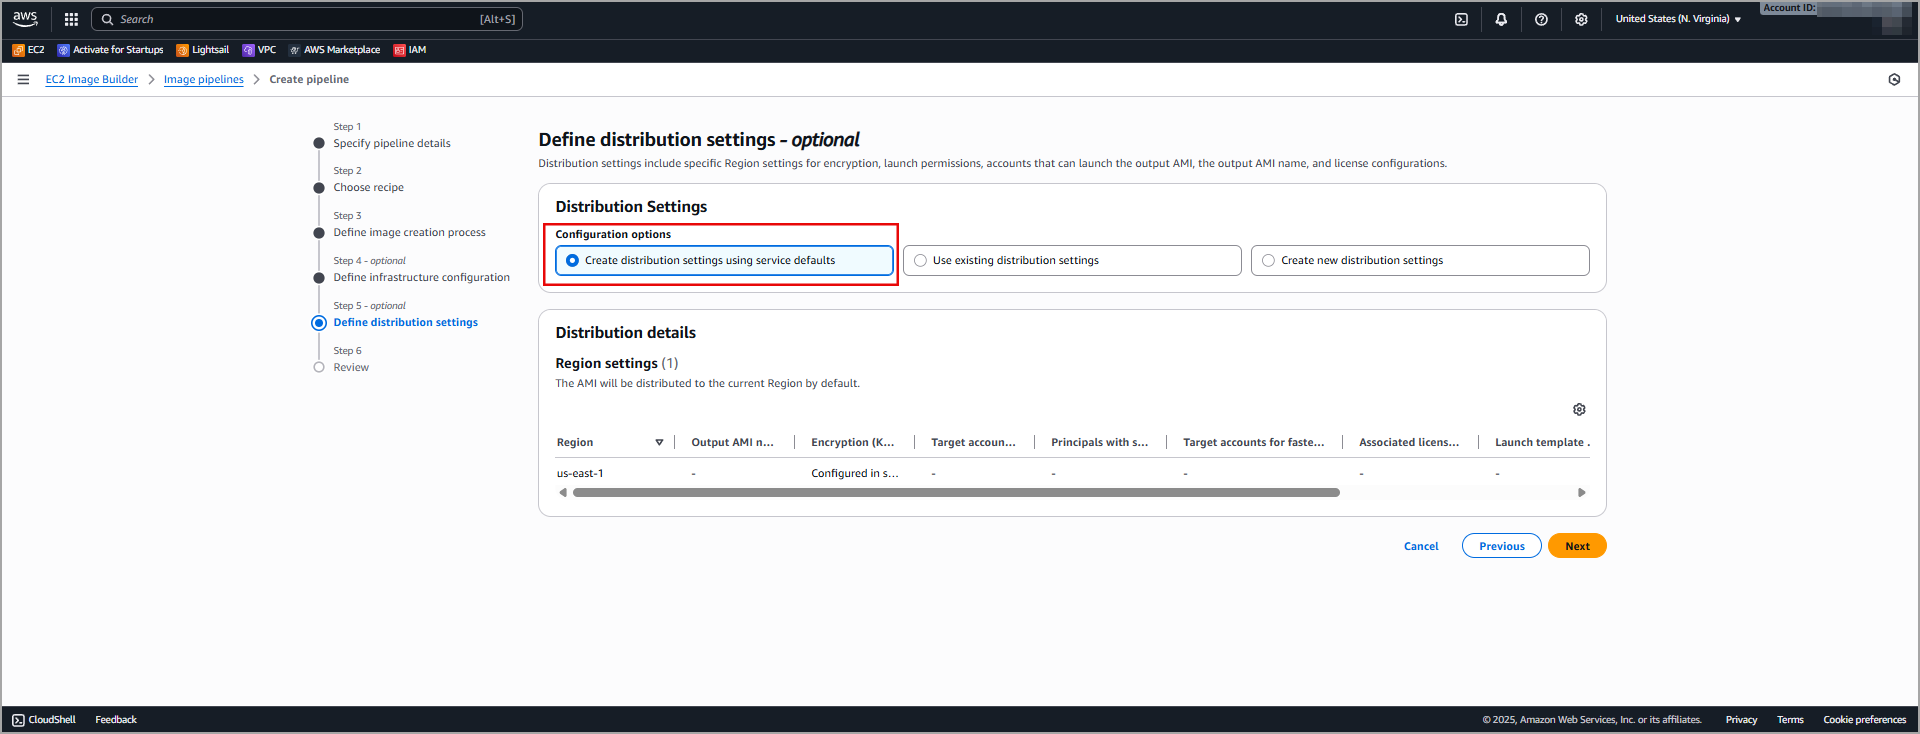
- In the Define distribution settings section, create the new distribution settings or select existing distribution settings.
- Review the pipeline configuration details and click Create pipeline. The new pipeline is created for the selected image recipe.
Create Image for Cloud Agent
Perform the following steps to create an image for the Cloud Agent component.
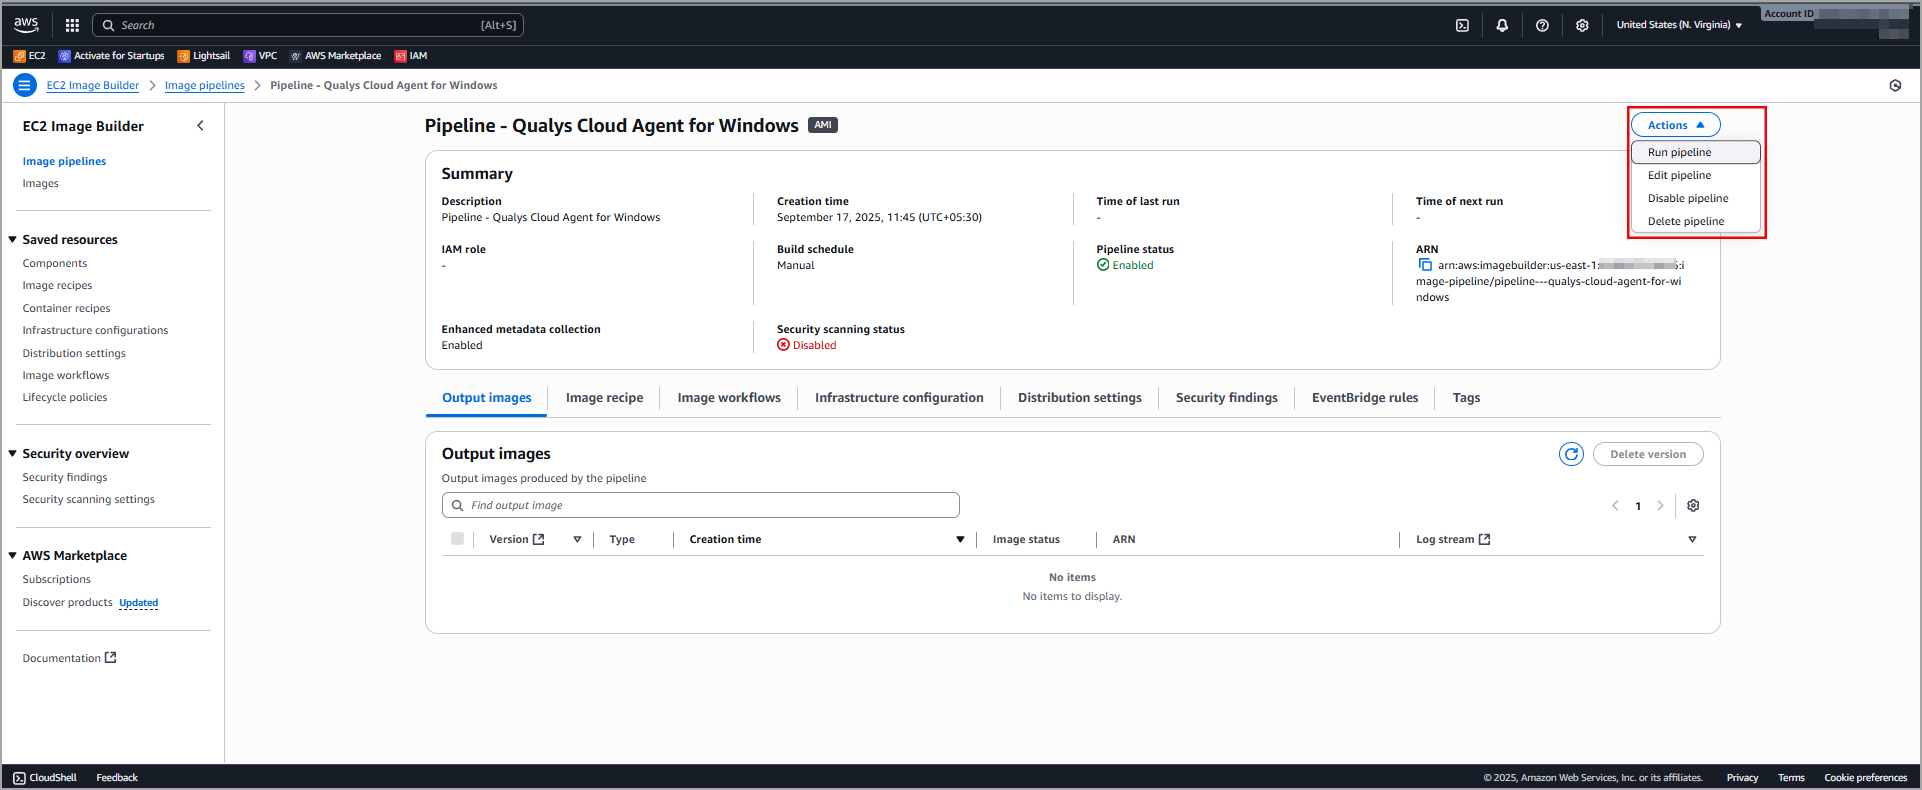
- Navigate to the EC2 Image Builder > Image pipelines.Select a newly created pipeline for Qualys Cloud Agent.
- Click Run Pipeline to create an image for Qualys Cloud Agent.
- You can view this image in the EC2 Image Builder > Images section. Select an image recipe to view the newly created Amazon Machine Image (AMI).
- The AMI is listed under EC2 > Images > AMIs.
Create an Instance
The following are the steps to create an instance with pre-installed Qualys Cloud Agent.
- Select the Qualys Cloud Agent AMI listed under EC2 > Images > AMIs.
- Click Launch instance. A new instance is created with the pre-installed Qualys Cloud Agent.