Create Schedules
You need to set up at least one schedule. You may eventually want many more. Once a schedule is created, the sync between the source and CMDB works as per the defined schedule. Scheduled synchronization also includes database instance records when the Enable Database Instance Sync for Software Instances property is enabled. These records are synchronized along with software installation data.
Qualys to ServiceNow Scheduling
Perform the following steps to set up Qualys to ServiceNow sync schedule:
- Go to Qualys CMDB Bi-directional Sync App > Schedules and select 'Qualys to ServiceNow' for Sync Direction.
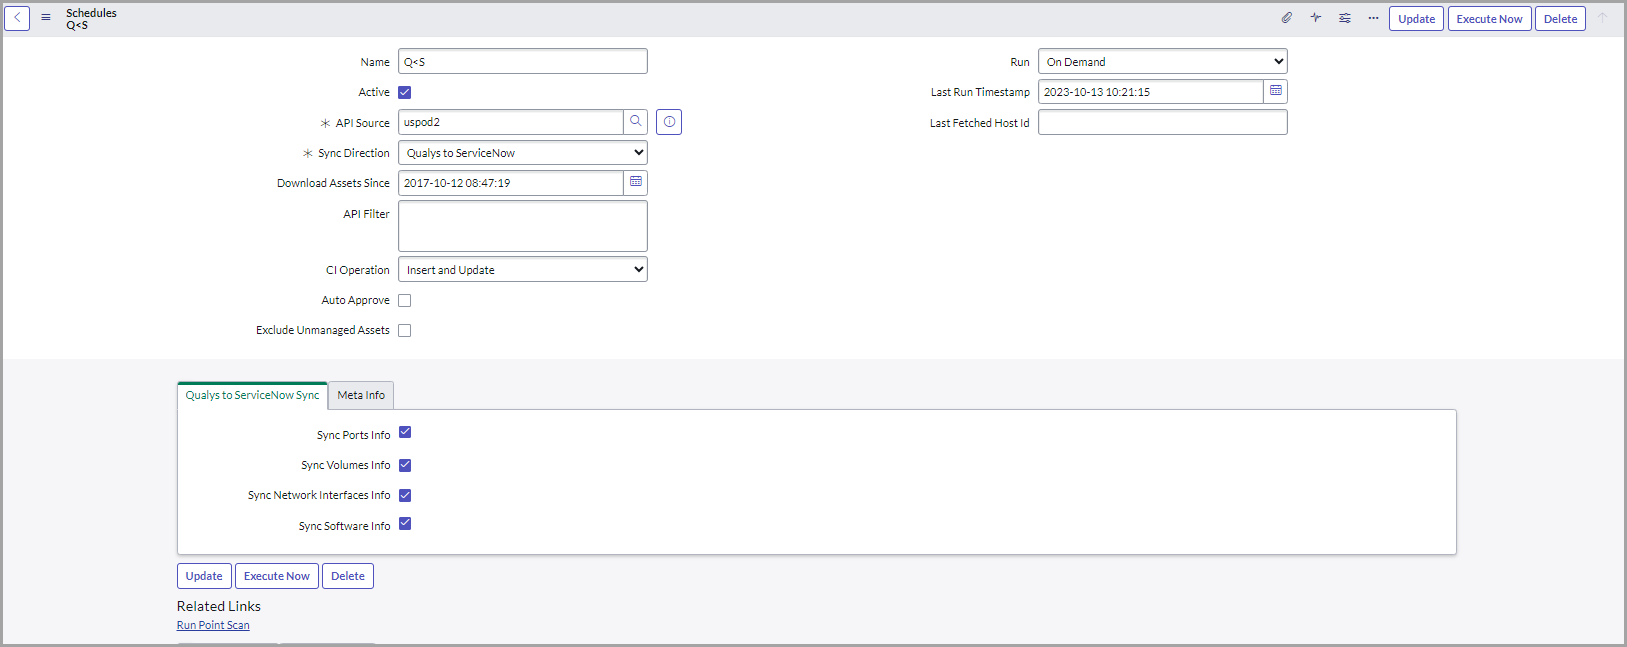
- Enter required details to configure the schedule:
Name - Provide a unique name for your schedule that helps you identify your schedule.
Active - Select to enable and activate the schedule you create. If you want to activate a schedule sometime later, you can disable this checkbox.
API Source - Select the API Source.
Sync Direction - Select Qualys to ServiceNow.
Download Assets Since: Define the date and time to sync assets from Qualys to ServiceNow. The schedules are download the assets after the defined time. The number of assets to be downloaded depends on the Size of Download batch property. For more information on changing the number of assets to be downloaded, refer to the Update Properties section.
API Filter: Use search tokens to filter the assets as per the requirement.
Example: operatingSystem.category1:'Linux’
This token will list all the assets with the Linux operating system.
For help on using the search tokens refer to Search Tokens page.
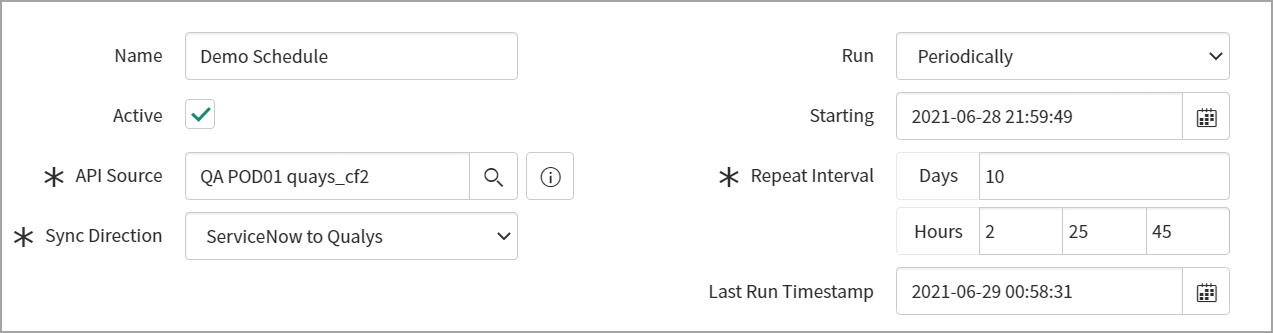
Run, Starting, Repeat Interval - Tell us the frequency of the schedule to be executed. For example, you could schedule it periodically every 15 minutes.
Auto Approve - Select this to enable auto-approval of assets. This will save the effort of manually approving the assets to be staged on the production tables.
Exclude Unmanaged Assets - Enable this checkbox if you want to exclude unmanaged assets or do not want to sync unmanaged assets from Qualys to ServiceNow.
CI Operation - This field provides three CI operations on target CI Class.
Insert - Inserts new records if CI is absent.
Update - Updates the CI record if a CI is present.
Insert and Update - Updates existing CI records and creates a new record if it is absent.
Qualys to ServiceNow Sync - Select the information we should fetch for each asset: Sync Ports Info, Sync Volumes Info, Sync Network Interfaces Info, Sync Software Info.
For initial sync from Qualys to ServiceNow, we recommend that you plan your schedules at an interval of every ten minutes.
Once you have configured your selections, click Submit to create the schedule.
The Meta Info fields and few other blank fields such as Last Run Timestamp, Last Fetched Host Id are populated with information only after the schedule is executed.
ServiceNow to Qualys Scheduling
Perform the following steps to set up ServiceNow to Qualys sync schedule:
- Go to Qualys CMDB Bi-directional Sync App > Schedules and select 'ServiceNow to Qualys' for Sync Direction.
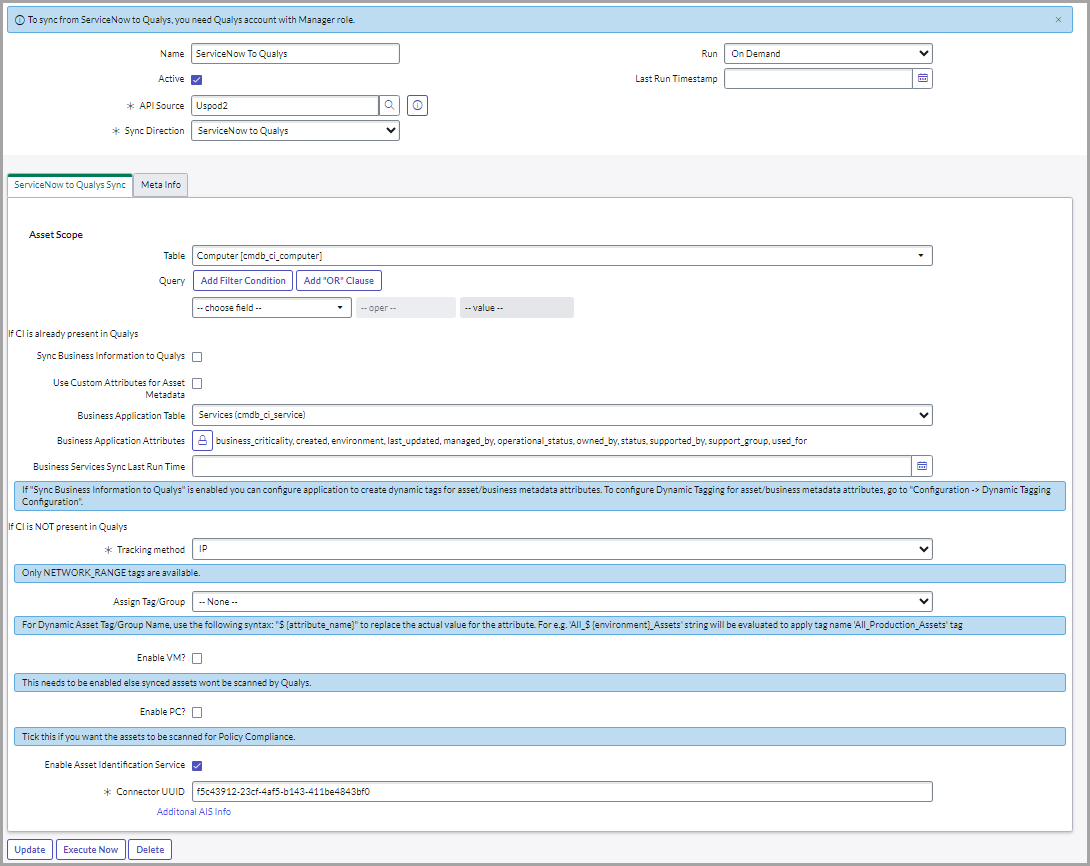
- Enter required details to configure the schedule:
Name - Provide a unique name for your schedule that helps you identify your schedule.
Active - Select to enable and activate the schedule you create. If you want to activate a schedule sometime later, you can disable this option.
API Source - Select the API source.
Sync Direction - Select ServiceNow to Qualys.
Run, Starting, Repeat Interval - Tell us the frequency of the schedule to be executed. For example, we could configure to execute schedule only on-demand.
ServiceNow to Qualys Sync - You can sync the IPs and Asset Metadata from ServiceNow to Qualys.
For initial sync from ServiceNow to Qualys, we recommend that you plan your schedules at an interval of every ten minutes.
Asset Scope: - Define the scope of assets to be synced.
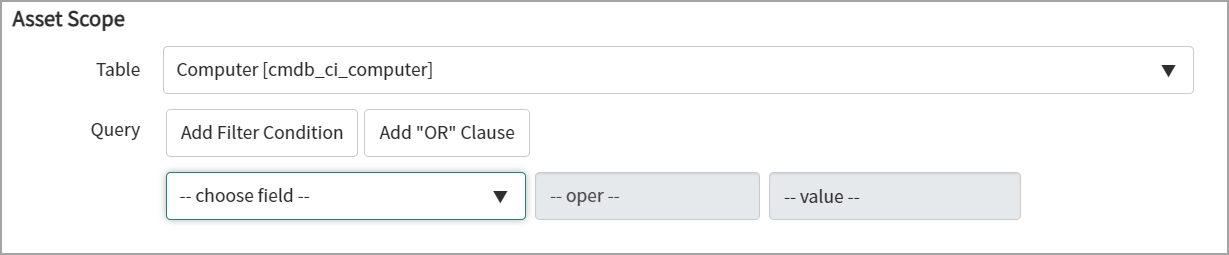
The Table and Query components allow you to select the asset metadata table as per your requirement.
Filter the query by choosing from the default fields to sync asset metadata to Qualys.
If CI is already present in Qualys
Configuration Item (CI) includes the base configuration for all the assets in the CMDB table
.
You can sync business information along with asset metadata to Qualys and then enable the Sync Business Information to Qualys checkbox.
If you do not enable the checkbox then the asset metadata will not get synced. Only the asset with new IP addresses will get synced to Qualys.
Asset Metadata Attributes: Unlock the Asset Metadata Attributes option by clicking the unlock button ![]() > click Add/Remove multiple option.
> click Add/Remove multiple option. 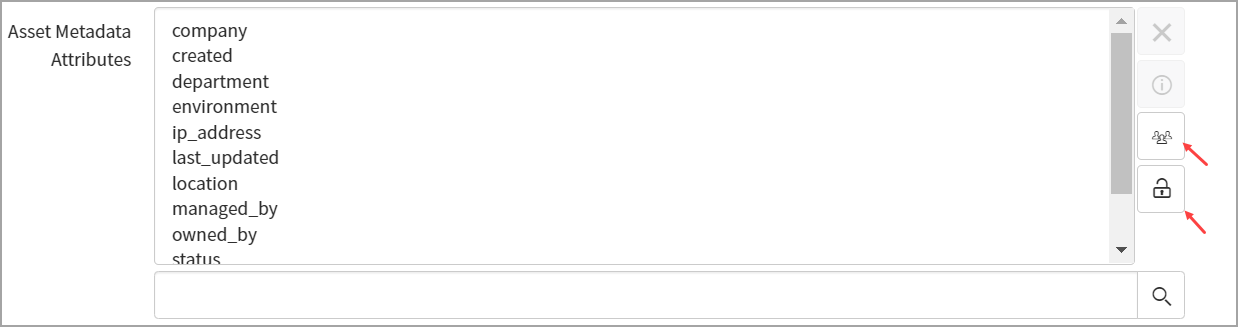
A new pop-up window appears, and you can select the attributes from the list. Use Add Filter and Run Filter options to isolate the records > click Save > click ![]() to lock your selected attributes.
to lock your selected attributes. 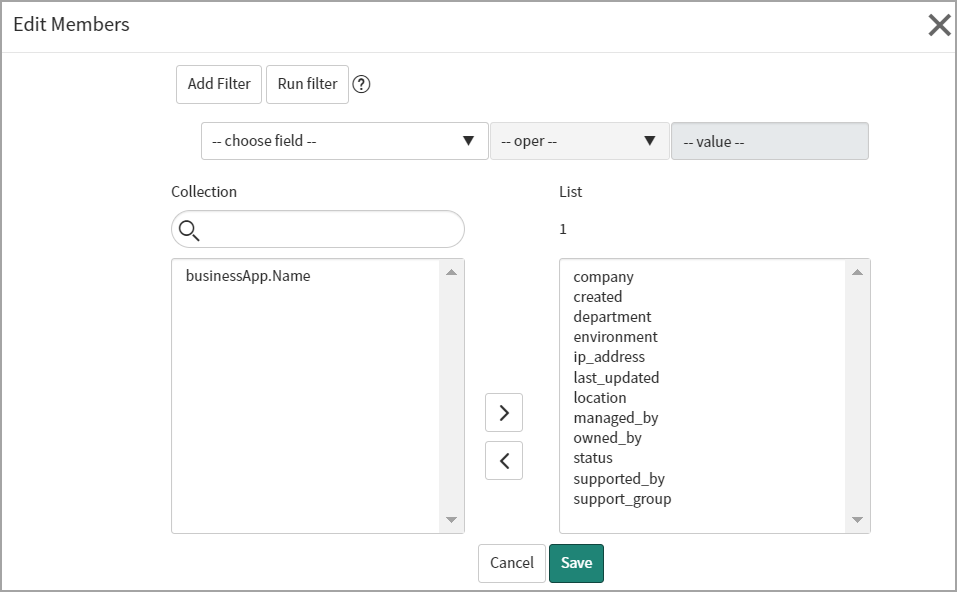
All of the selected attributes from the list can sync asset metadata from ServiceNow to Qualys.
Go to Appendix to view the mapping of the fields for asset and business application metadata.
Business Application Table: All of the selected table for business applications or services can get synced from ServiceNow to Qualys.
- Business applications: Use to sync the CMDB configuration item application data.

- CSDM: Use to sync the Business application data which are linked to services of CMDB configuration item.

- Services: Use to sync the CMDB configuration item services data.

Business Application Attributes: Unlock the Business Application Attributes option by clicking the unlock button
 > click Add/Remove multiple option.
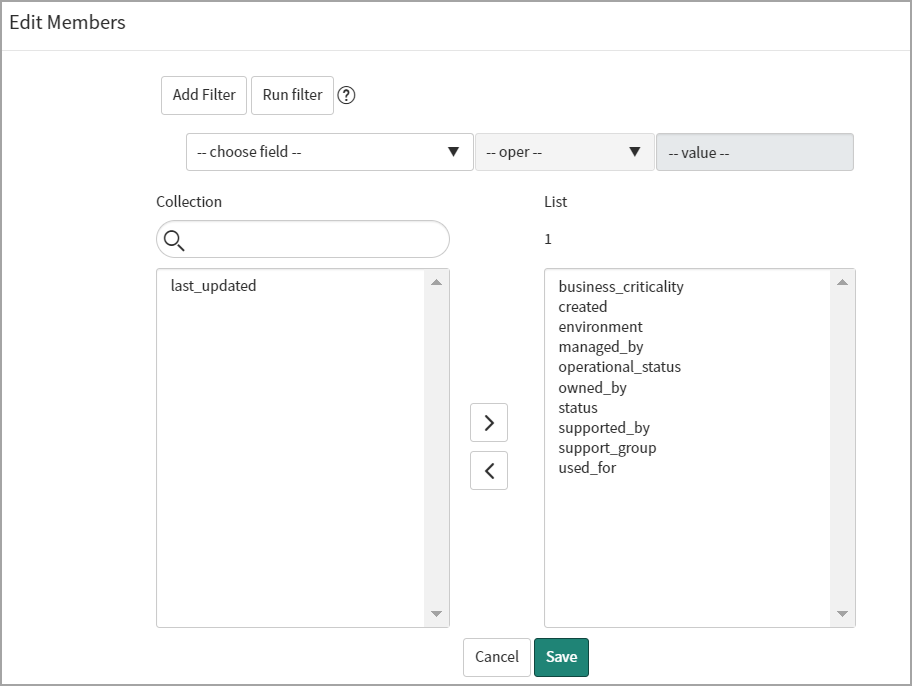
A new pop-up window appears, and you can select the attributes from the list. Use Add Filter and Run Filter options to isolate the records > click Save > click
to lock your selected attributes.All of the selected attributes for the business applications or services can get synced from ServiceNow to Qualys.
- For Business Metadata sync, if CI is present in Qualys, then it must be synced into ServiceNow and transformed to CMDB tables at least once. That CI is associated with a Qualys Asset ID, which is used to sync Business Metadata from ServiceNow to Qualys.
- For Asset Metadata and Business Applications, the 'created' and 'last updated' fields are mandatory for asset metadata sync and should not be removed; if these fields are removed, API calls to sync data fail.
Database instances are synchronized as part of the software installation synchronization process. Ensure this schedule is active to allow database instance records to be created and updated in CMDB.
Use Custom Attributes for Asset Metadata
A custom attribute is a piece of information about the asset you wish to discover in the Qualys CSAM Inventory. You can specify any custom attributes from a list or fetch them with your script. The value is visible in Asset System information > Custom attributes. You can further filter assets or perform operations based on the custom attributes.
- SET: When Use Custom Attributes for Asset Metadata value is ‘SET’, the application deletes previously created custom attribute and will SET new attribute.
- ADD : When Use Custom Attributes for Asset Metadata value is ‘ADD’, the application adds a new attribute.
Add a Custom Attribute
Perform the following steps to add custom attribute:
- Click New on the Custom Attributes section. A new record screen opens up. The source table field is auto-populated with the asset scope table configured when selecting the ServiceNow to Qualys schedule.
- Provide the Target key. The Target key is the custom attribute key displayed on the Qualys Portal once the custom attribute is synced from ServiceNow to Qualys.
- Select the Source Type as Source Field to sync the value in the source table field below or select Script to sync the output of the custom script.
- For Source Field, select from the list of available source types, and the selected value is synced with Qualys Asset Inventory.
- For Script, provide the script to fetch the attribute data from a desired table.
- Click Submit to create your Custom Attribute.
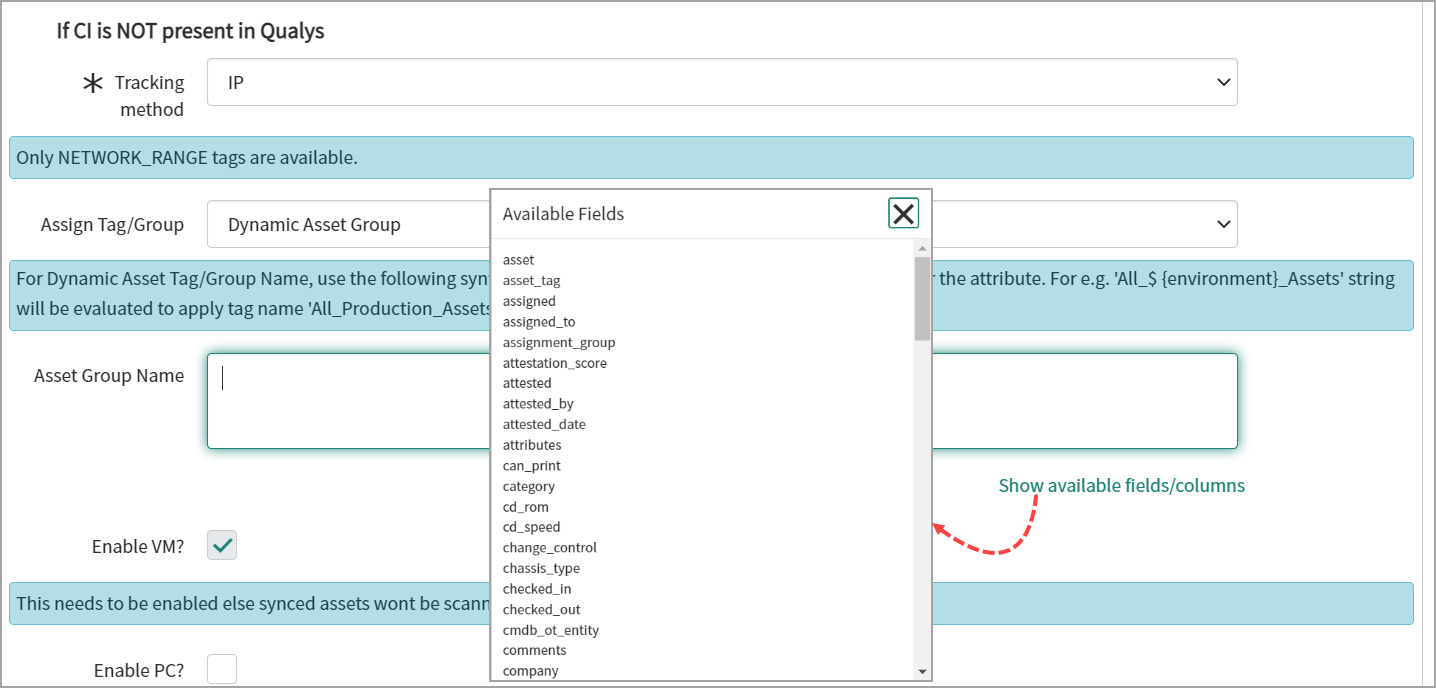
If CI is NOT present in Qualys
If the CI configuration does not exist in the Qualys configuration environment, you can get only IPs from ServiceNow to Qualys.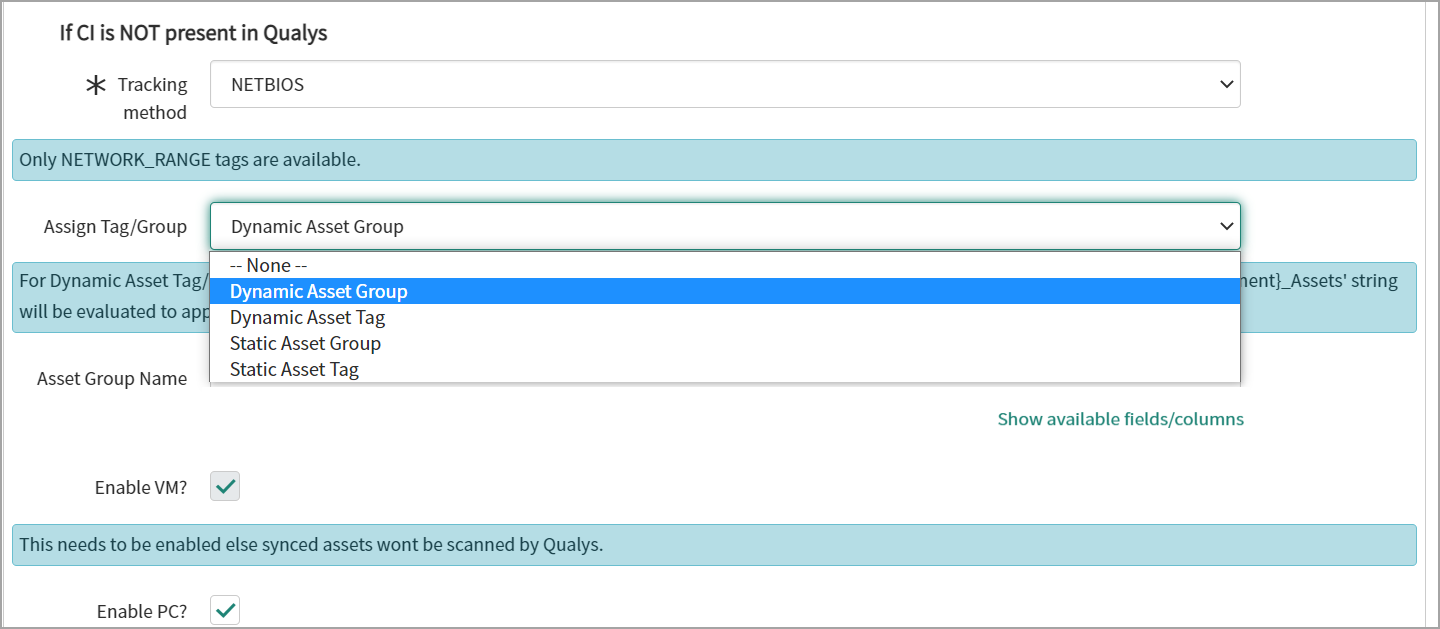
Tracking Method—When syncing from ServiceNow to Qualys, Choose the tracking method from IP, DNS, or NETBIOS for assets.
Assign Tag/Group (Optional) - We modified this functionality by adding a dropdown that includes Dynamic Asset Group, Dynamic Asset Tag, Static Asset Group, and Static Asset Tag.
When you select Dynamic Asset Group from the dropdown, an empty text box appears, which you can use to create the asset group on the runtime to sync the assets or CI with the Qualys.
When you select the Dynamic Asset Tag, an empty text box appears. You can use this to create a dynamic asset tag at runtime to sync the assets or CI with Qualys.
- To create the dynamic asset group name or tag name, a plain string and attributes name can be used. The attribute name can be used in format ${attribute name} for example, ${environment}
You can use the Show available fields/columns option to add the attributes from the target table. It is a read-only list of available attributes from the target table, where you can copy the available attributes and paste them into the dynamic group or tag name field using the format ${attribute_name}.
- If the dynamic tag name or group name is already present in staging tables, i.e., x_qual5_itam_nwapp_qualys_asset_groups or x_qual5_itam_nwapp_qualys_asset_tags - in that case, the CMDB Bi-directional Sync app do not initiate to create a call for another duplicate group or tag name. Instead, it will fetch and use the tag id or group id of the existing tag/group from staging tables.
When you select Static Asset Group, an empty text box appears, which you can use to search and enter the existing qualys asset group. Click Search to select the Qualys asset group from the list.
When you select Static Asset Tag, an empty text box appears, which you can use to search and enter the existing qualys asset tag. Click Search to select the qualys asset tag from the list.
A Static Asset Tag or Static Asset Group: The Static Asset Tag or 'Static Asset Group' box assigns a tag in Qualys Enterprise TruRisk™ Platform to any assets synced from ServiceNow.
The Asset Tags that belong to only the NETWORK_RANGE type are populated. All other asset tags are ignored.
We also highly recommend adding filter conditions (at minimum IP Address) to assets to be synced. When selecting a TABLE, ensure that the table has a column with the 'ip_address' name; otherwise, the ServiceNow > Qualys sync may not function.
VM (Vulnerability Management) is optional but disabled by default to scan the assets you sync. We recommend that you enable this option. Enabling PC (Policy Compliance) is also optional.
Once you configure your selections, click Submit to create the schedule.
- The Meta Info fields and few other blank fields such as Last Run Timestamp are populated with information only after the schedule is executed.
- If both VM and PC options are disabled, the Add IP flow will not work.
Enable Asset Identification Service
Enable Asset Identification service for the schedule to have the CIs selected in the Asset Scope sent to Qualys. The Qualys Asset Identification Service tries to match the CI to existing assets using Asset Identification Rules set in Qualys for the ServiceNow Connector used by the schedule. These Asset Identification Rules attempt to match the CI to an existing Qualys asset. If a match has been found, the asset in Qualys is updated with CI attributes. If no match has been found, a new unmanaged asset is added to Qualys, allowing you to activate the asset later for management with Qualys VMDR, Certificate View, or Policy Compliance modules.
ServiceNow Configuration
To enable the Asset Identification service for Unmanaged/Managed Assets, set the Enable Enable AIS (Beta)—Asset Identification Service to sync managed and unmanaged Assets to Qualys sync option to true on the Properties page.
- Next, go to Schedule and click New.
- Create a ServiceNow to Qualys Schedule.
- Check the option to Enable Asset Identification Service.
- Add Connector UUID - Provide the unique identifier of the Qualys ServiceNowConnector.
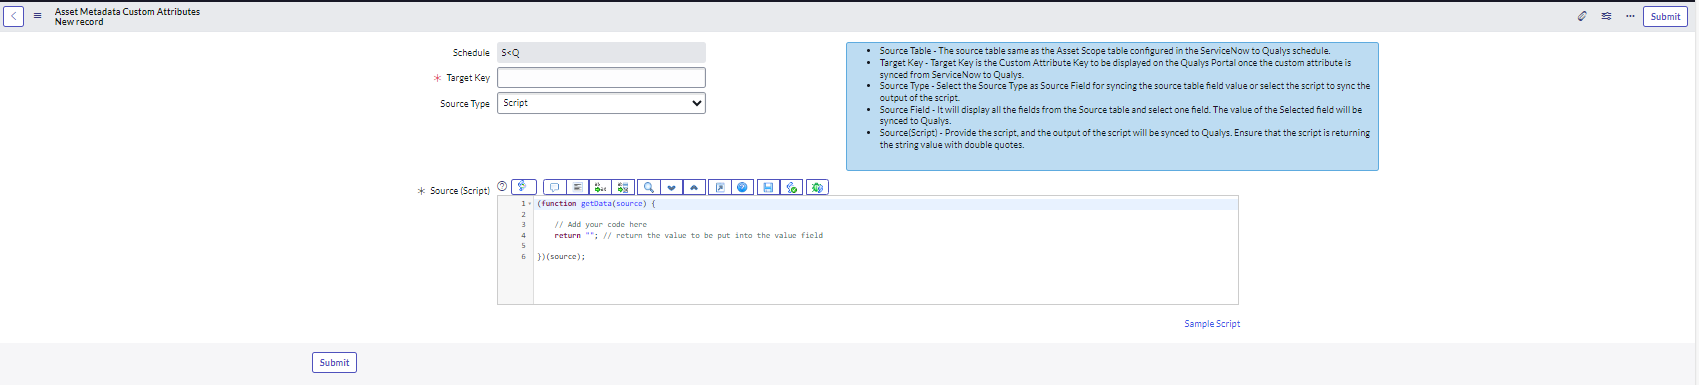
Add a Custom Attribute
You can add custom attributes to the schedule if you want to send them to Qualys.
- In Asset Metadata Custom Attributes related list, click New. A new record screen opens up. The source table field is auto-populated with the asset scope table configured when selecting the ServiceNow to Qualys schedule..

- Provide the Target Key. The target key is the custom attribute key displayed on the Qualys Portal once the custom attribute is synced from ServiceNow to Qualys.
- Select the Source Type as Source Field to sync the value in the source table field below or select Script to sync the output of the custom script.
- For Source Field, select from the list of available source types, and the selected value is synced with Qualys Asset Inventory.

- For Script, provide the script to fetch the attribute data from a desired table.
- For Source Field, select from the list of available source types, and the selected value is synced with Qualys Asset Inventory.
-
Click Submit to create your Custom Attribute.
Run Schedules
Navigate to Schedules > ServiceNow to Qualys to run your schedule.
Click Execute Now from the top right.

Navigate to the bottom of the screen to view the Sync Queues tab, which lists your current execution status. If the execution succeeds, you can see the changes in the Asset Inventory.
As per product design, the AIS feature in CMDB Sync CMDB Bi-directional Sync app gives correct results with 175k assets. The number of assets can vary depending on the environment and data load.