mROC Users Management
Learn more about the user management tasks that can be performed from the Managed Risk Operations Center (mROC) Administration > Users tab:
Partners with the Manager role can see the Administration > Users tab and can add, edit, delete users, and reset user passwords.
Add a User
You can add a user from the Administration > Users tab. Adding a user means adding a Partner with a Manager or Sub Manager role.
1. Go to Administration > Users and click Add Users.
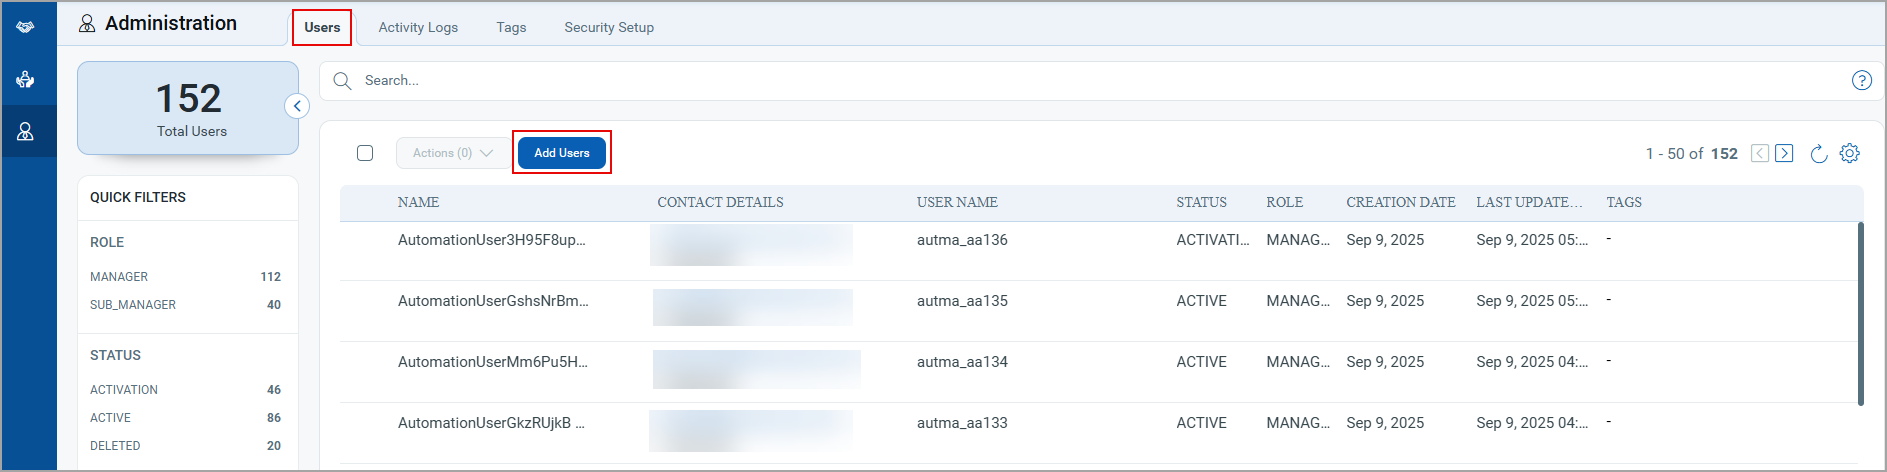
2. Provide the following details to the Add New: User page.
|
User Input
|
Description
|
||
|---|---|---|---|
|
First Name |
Enter the first name. |
||
|
Last Name |
Enter the last name. |
||
|
User Role |
Select the required user role. The available user roles are MANAGER and SUB_MANAGER. |
||
|
Contact Number |
Enter a 10-digit contact number. |
||
|
Email Id |
Enter your email ID. After the user is created, an email is sent to the user. Using the details provided in that email, you can log in to the mROC portal. For more information, see Logging in to MSSP Portal for the First Time. |
||
|
External ID |
Enter the external id for the user. |
||
|
SAML Authentication |
(Optional) Select the checkbox next to SAML Authentication. Note: This checkbox is available only if the SAML authentication is enabled for the associated partner from the MSSP Back Office application. |
||
|
VIP Two Factor Authentication
|
(Optional) Select the checkbox next to VIP Two Factor Authentication. If you select this checkbox, you must complete the VIP registration as one of the mandatory processes when you log in to the mROC Portal for the first time. For more information, see Logging in to MSSP Portal for the First Time. Also, apart from the first time MSSP login, whenever you log in to MSSP portal later, you are required to complete this step if this setting is enabled at the time of user creation. |
When you create a user with the SUB_MANAGER role, you can select customers, select customers using tags.
- Select Customers: Add customers that this user will be managing.
- Select Using Tags: Add customers that this user will manage by adding the required customer and partner tags.
3. Click Save.
What Happens Next?
The user is added with the status ACTIVATION. You can see the details on the Users page. After an email is sent to the user and the user completes the Logging in to mROC Portal for the First Time steps, the user's status changes from ACTIVATION to ACTIVE.
What to do Next?
You can assign the required tag to the users so that the user becomes a part of the group created based on the tag. For more information, see Manage Tags.
Edit a User
You can edit the user details from the Administration > Users tab.
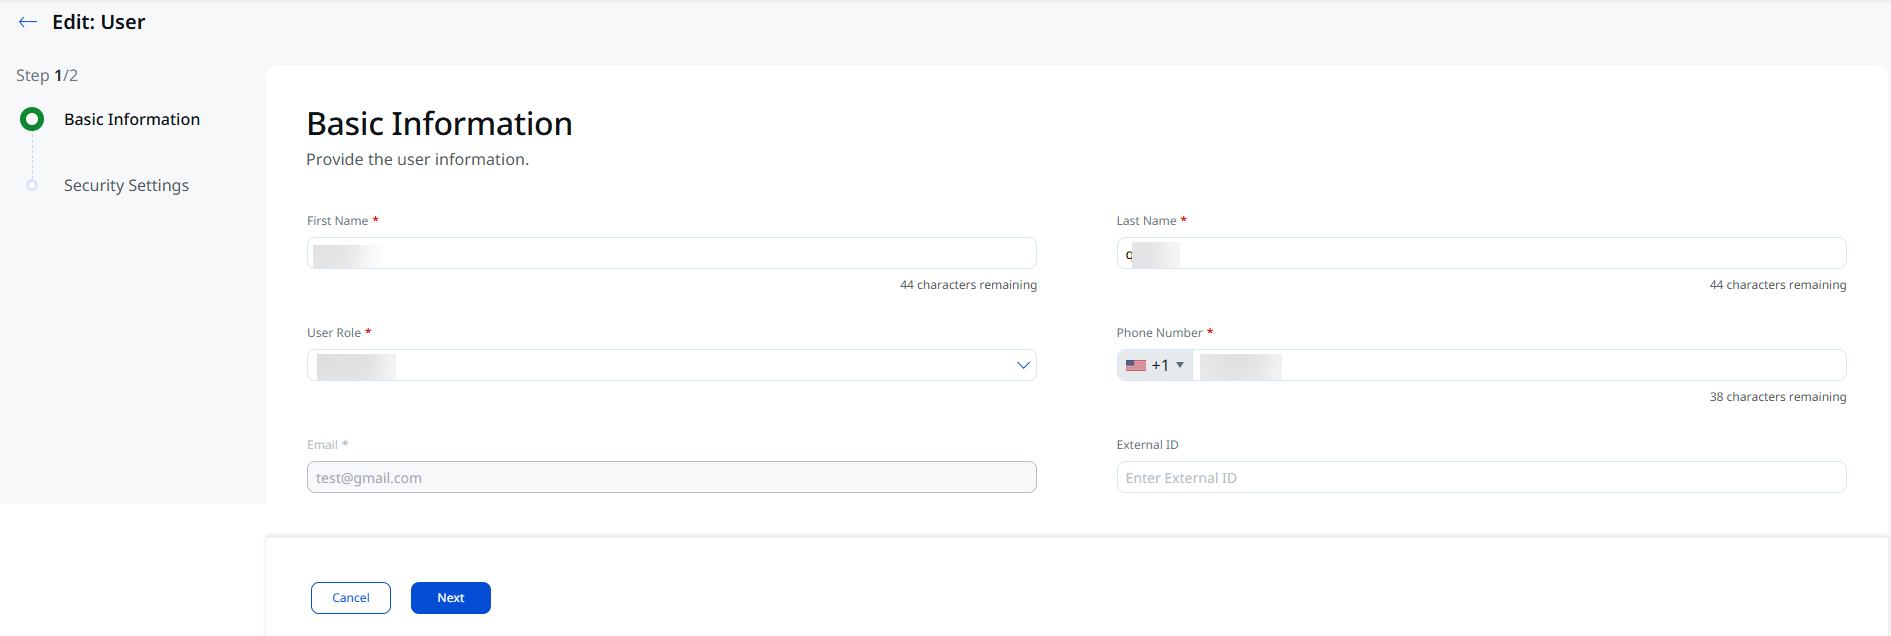
- Click Edit from the Quick Actions Menu of the user.
- From the Edit User page, you can edit the user by making the following changes and then clicking Save.
- Edit the required personal and contact details.
- Also, you can choose to:
- Select Customers: Add customers that this user will be managing.
- Select Using Tags: Add customers or partners that this user will manage by adding the required customer and partner tags.
- Clear the VIP Two Factor Authentication security setting.
- Deregister VIP Credentials.
When you deregister the VIP credentials, The Deregister Credentials pop-up mentions that you need to provide the credential ID or the token ID, and the security codes twice to deactivate the credentials.
Reset a User Password
You can reset the user password from the Administration > Users tab.
- Go to the Administration > Users tab, and click Reset Password from the Quick Actions menu of the respective user.
- On the Reset Password popup, click Reset Password.
You are asked to confirm whether you want to reset the password for the selected user.
The message is shown in the top right pane of the MSSP portal that mentions that the reset password link has been sent successfully.
Delete Users
You can delete an individual or multiple users from the Administration > Users tab.
- To delete multiple users, click the checkboxes next to users and click Delete from the Actions list.
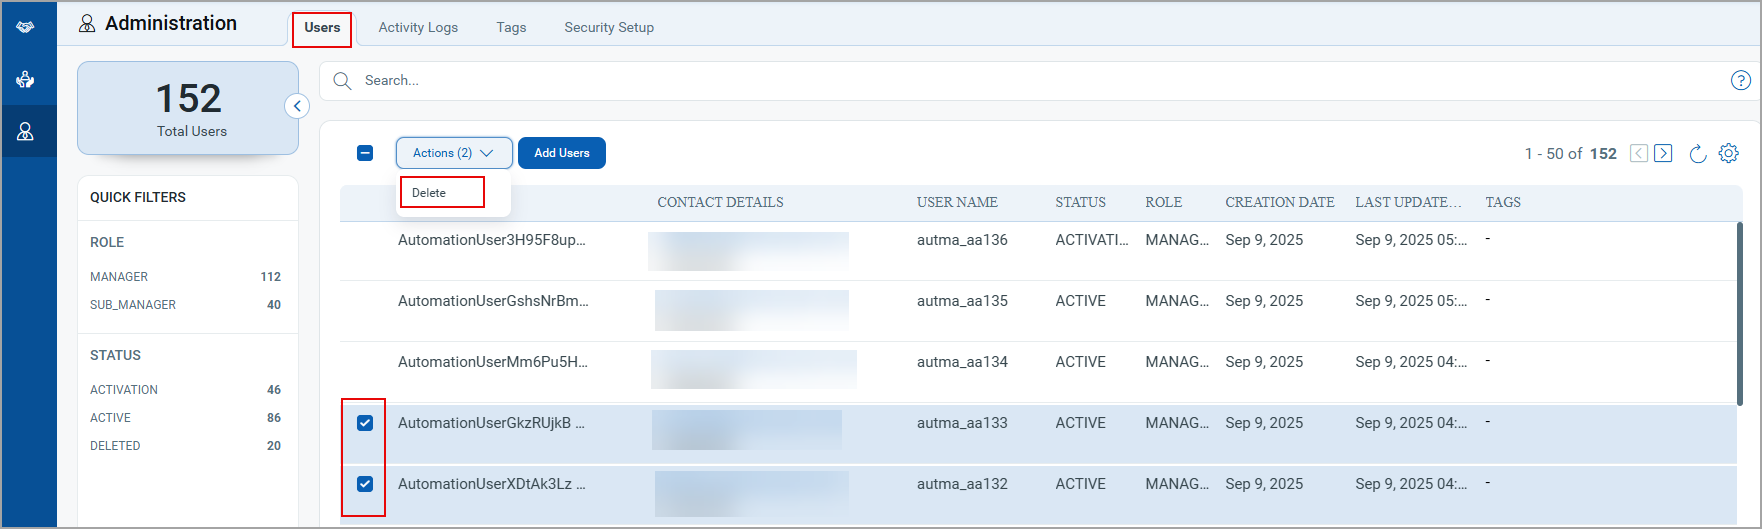
The message is displayed, mentioning the selected users have been successfully deleted.
- To delete an individual user, click Delete from the Quick Actions Menu of the user.
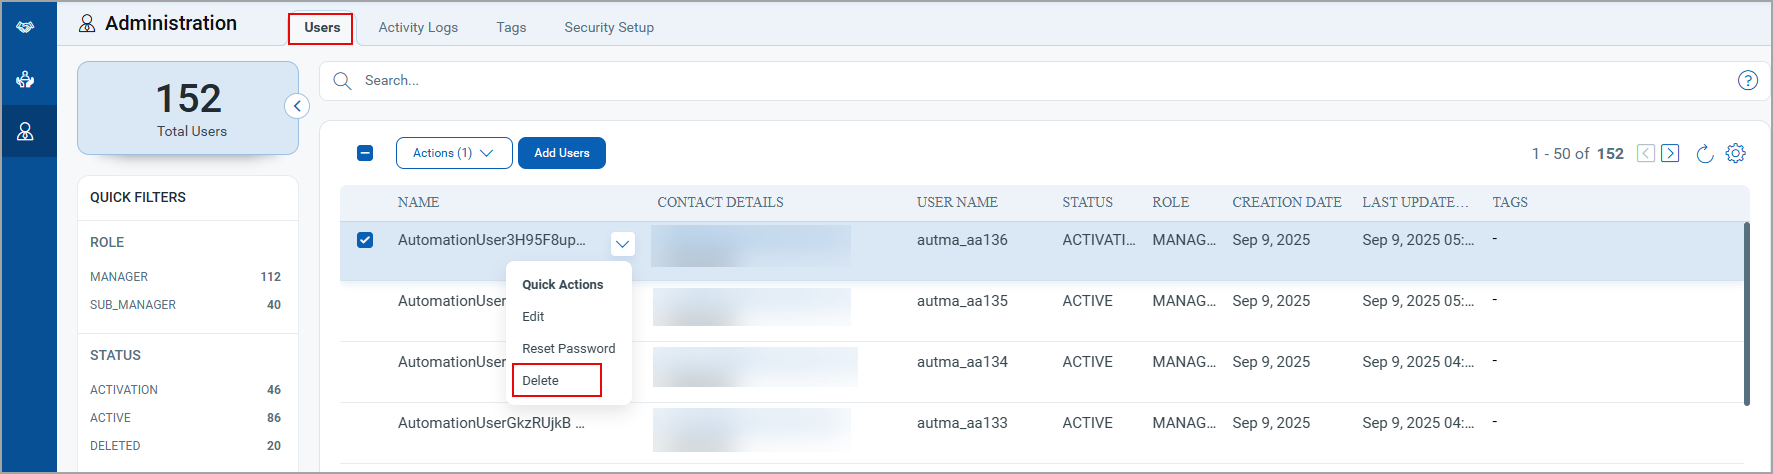
The message is displayed, mentioning the selected user has been successfully deleted.