Details of a View
You can create a risk elimination view to include the required vulnerabilities, set the priority for the view and assign users who can access the view. A view helps you to categorize the vulnerabilities as per the severities: Critical, High, Medium, and Low.
- You can save up to 200 vulnerabilities in a view.
- You can create a maximum of 1000 views per subscription.
You can select the vulnerabilities from the following three locations:
Using VMDR Vulnerabilities tab
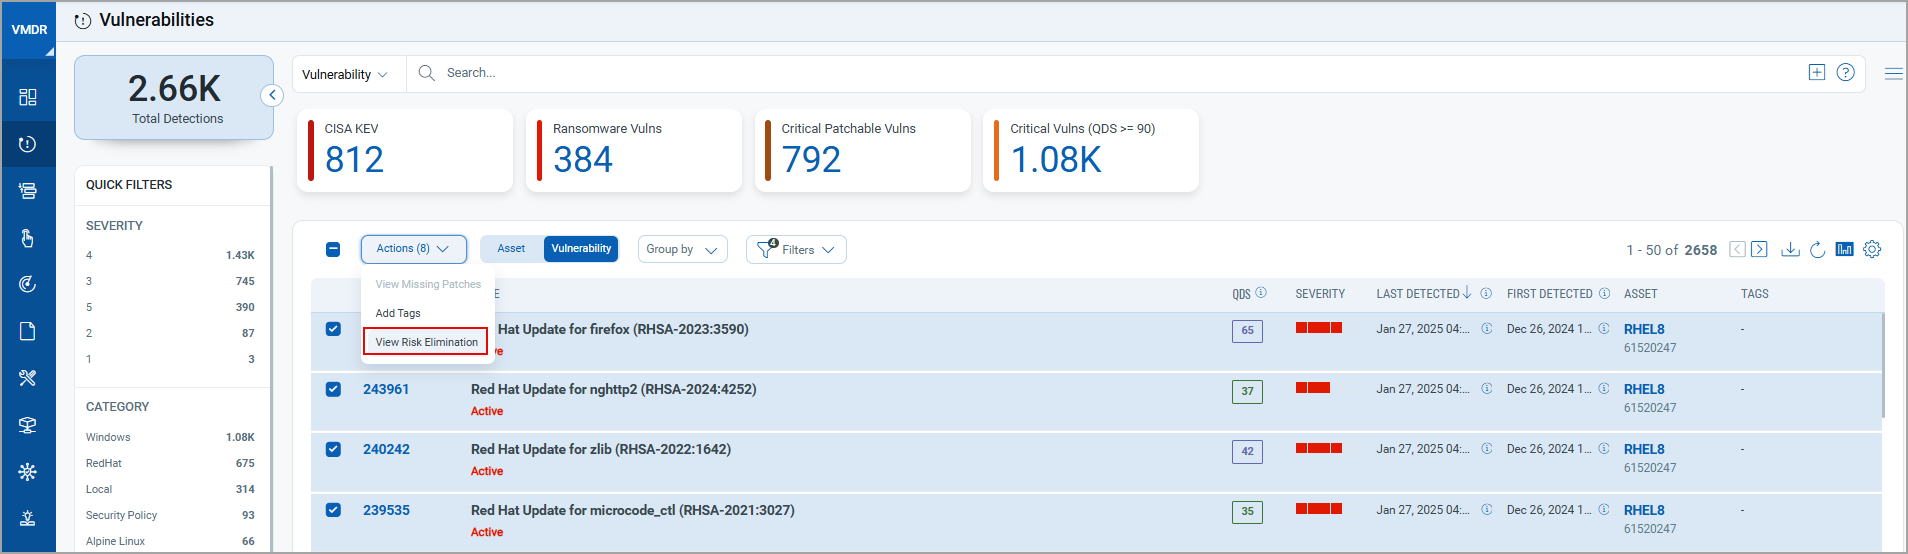
Navigate to this tab, select the required vulnerabilities, and click View Risk Elimination from the Actions menu.
Using VMDR Prioritization tab
VMDR > Prioritization: Navigate to this tab. On the Reports tab, start prioritization, select at least one asset tag, and click Prioritize Now. Select the required vulnerabilities and from the Actions menu, click View Risk Elimination.
You can also select multiple options such as Detection or Vulnerability and the Real-Time Threat Indicators (RTI) parameters. For more information, see Prioritize your Vulnerabilities.
You can create a new view and add the selected vulnerabilities into it or add to an existing view. For more information, see Creating a View.
On the Eliminations tab, you can download the VMDR Vulnerability report through the Actions > Patch with MECM option. You can also download and install the Qualys TruRisk Eliminate MECM plugin. For more information, see Manage TE Licenses.
Using ETM Risk Workbench tab
Navigate to the Risk Workbench tab, prioritize the vulnerabilities, define the scope, filter the findings, hand off the prioritization plan to IT Ops, and save the Risk Elimination plan. From the plan, select the vulnerabilities and from the Actions menu, click Create Remediation Job. For more information, see Risk Remediation from ETM.
Details of the Risk Elimination Plan tab
From the Risk Elimination Plan tab, you can:
- View the various details from the columns, such as source of the view, type, assigned findings, affected assets, available patches, fix findings, priority of the view, user who created the view, and the users to whom the view is assigned.
- Select a view and from the Quick Actions menu, view, edit, or delete the view.
You can edit and delete the views created from VMDR. You can delete a view created from ETM only via the ETM > Risk Workbench tab, but cannot edit a view created from ETM.
- Select multiple views and perform bulk delete of views.
- Search views using the QQL tokens. For more information, see Search for Views.
- Use the Search Actions menu to view the recent searches, save search queries added in the search box, and manage saved searches.
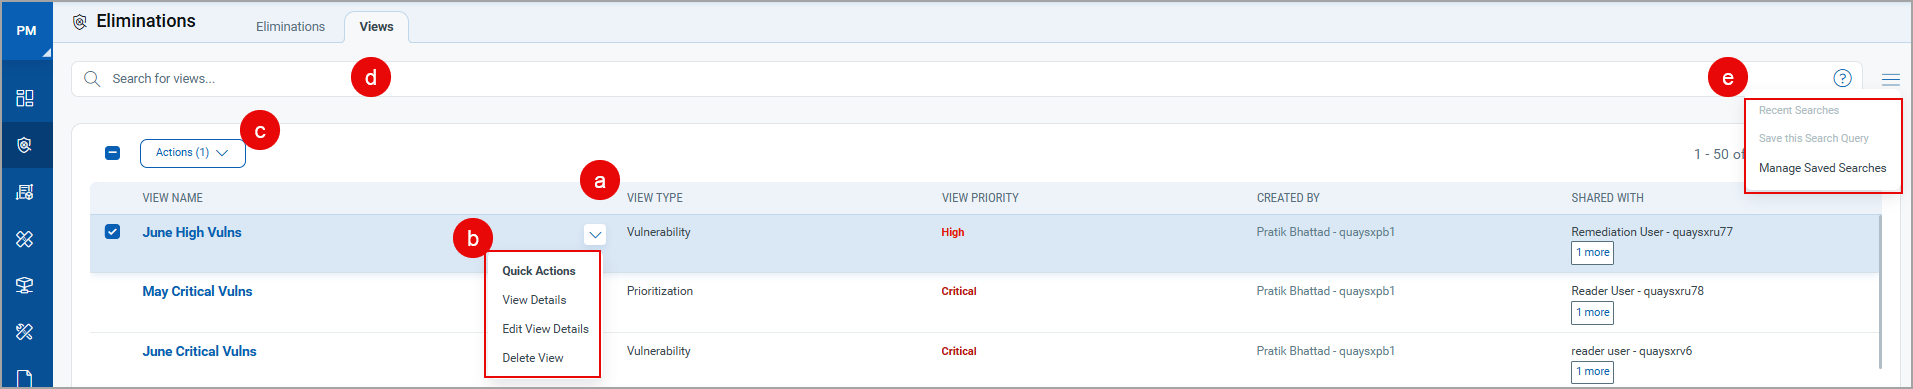
You can further edit and delete the view. For more information, see View Quick Actions.
Managing Views
Learn to create and manage quick actions on a view.