Deploy Qualys Virtual Scanner Appliance in IBM Cloud VPC Using Console
Perform the following steps to deploy Virtual Scanner via IBM Cloud VPC.
- Click the menu icon from the top left corner of the window.
- Navigate to VPC Infrastructure > Compute > Virtual server instances.
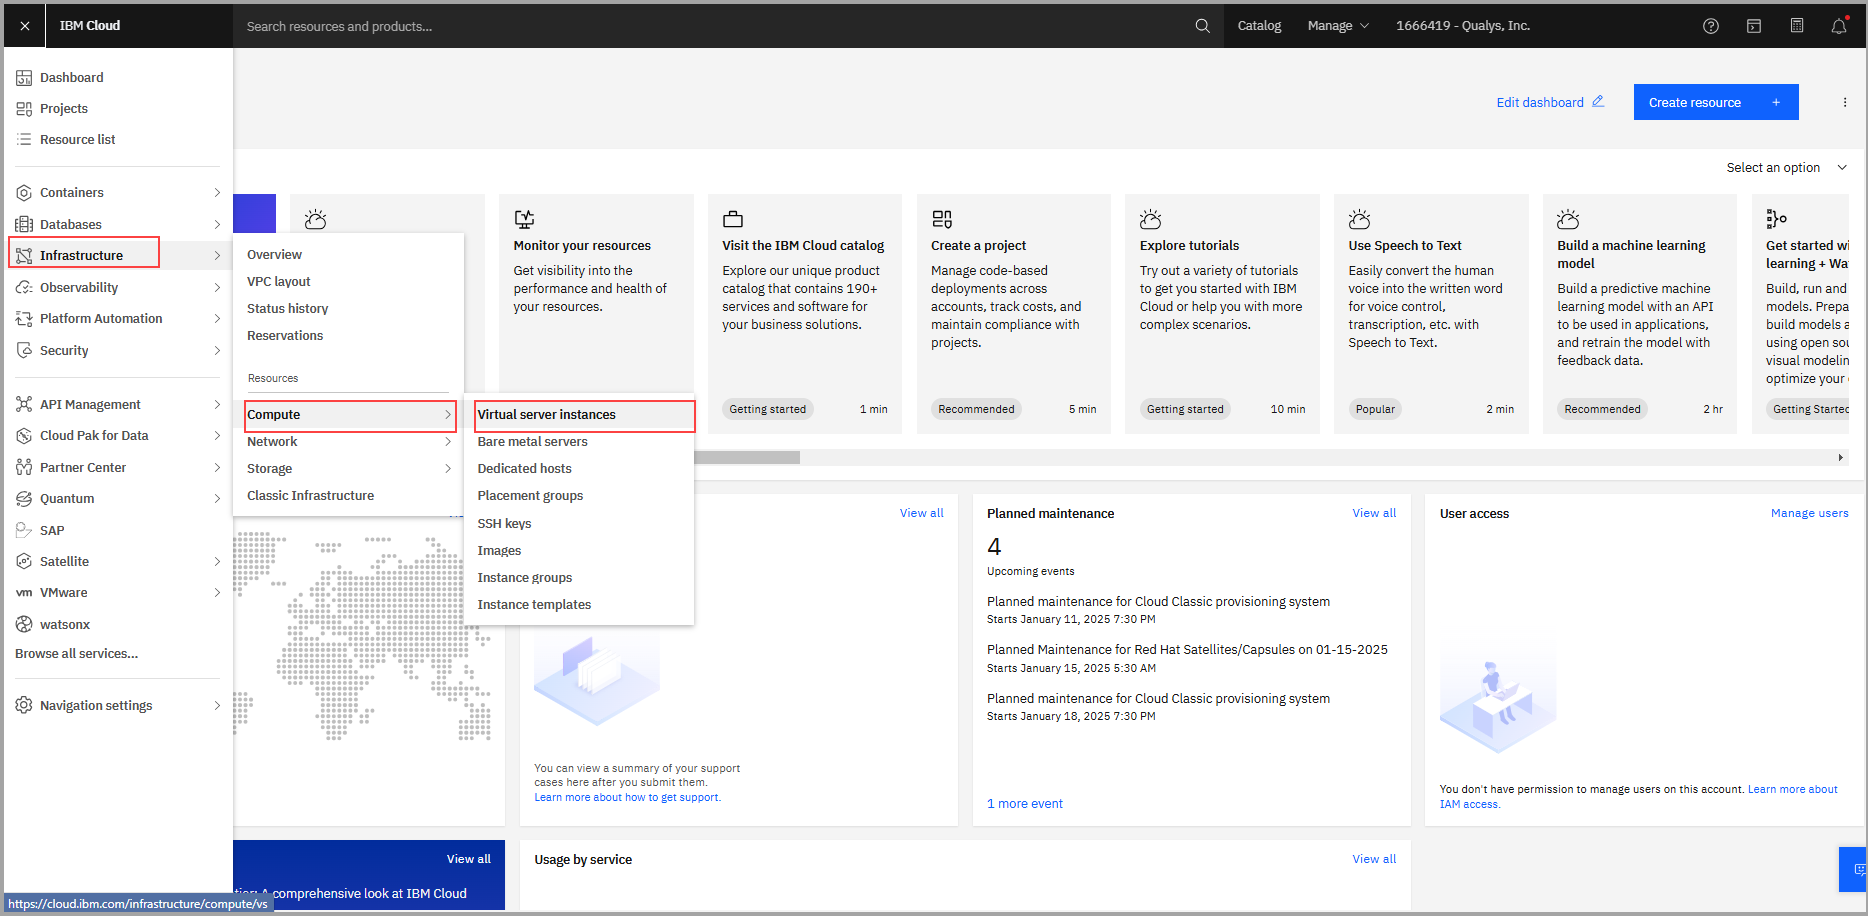
- On Virtual server instances for VPC section, click Crete.

A virtual server for VPC creation page is displayed.
- Enter the details like Resource Group, Image and Profile, SSH Keys, Storage, Networking and Advanced Option.
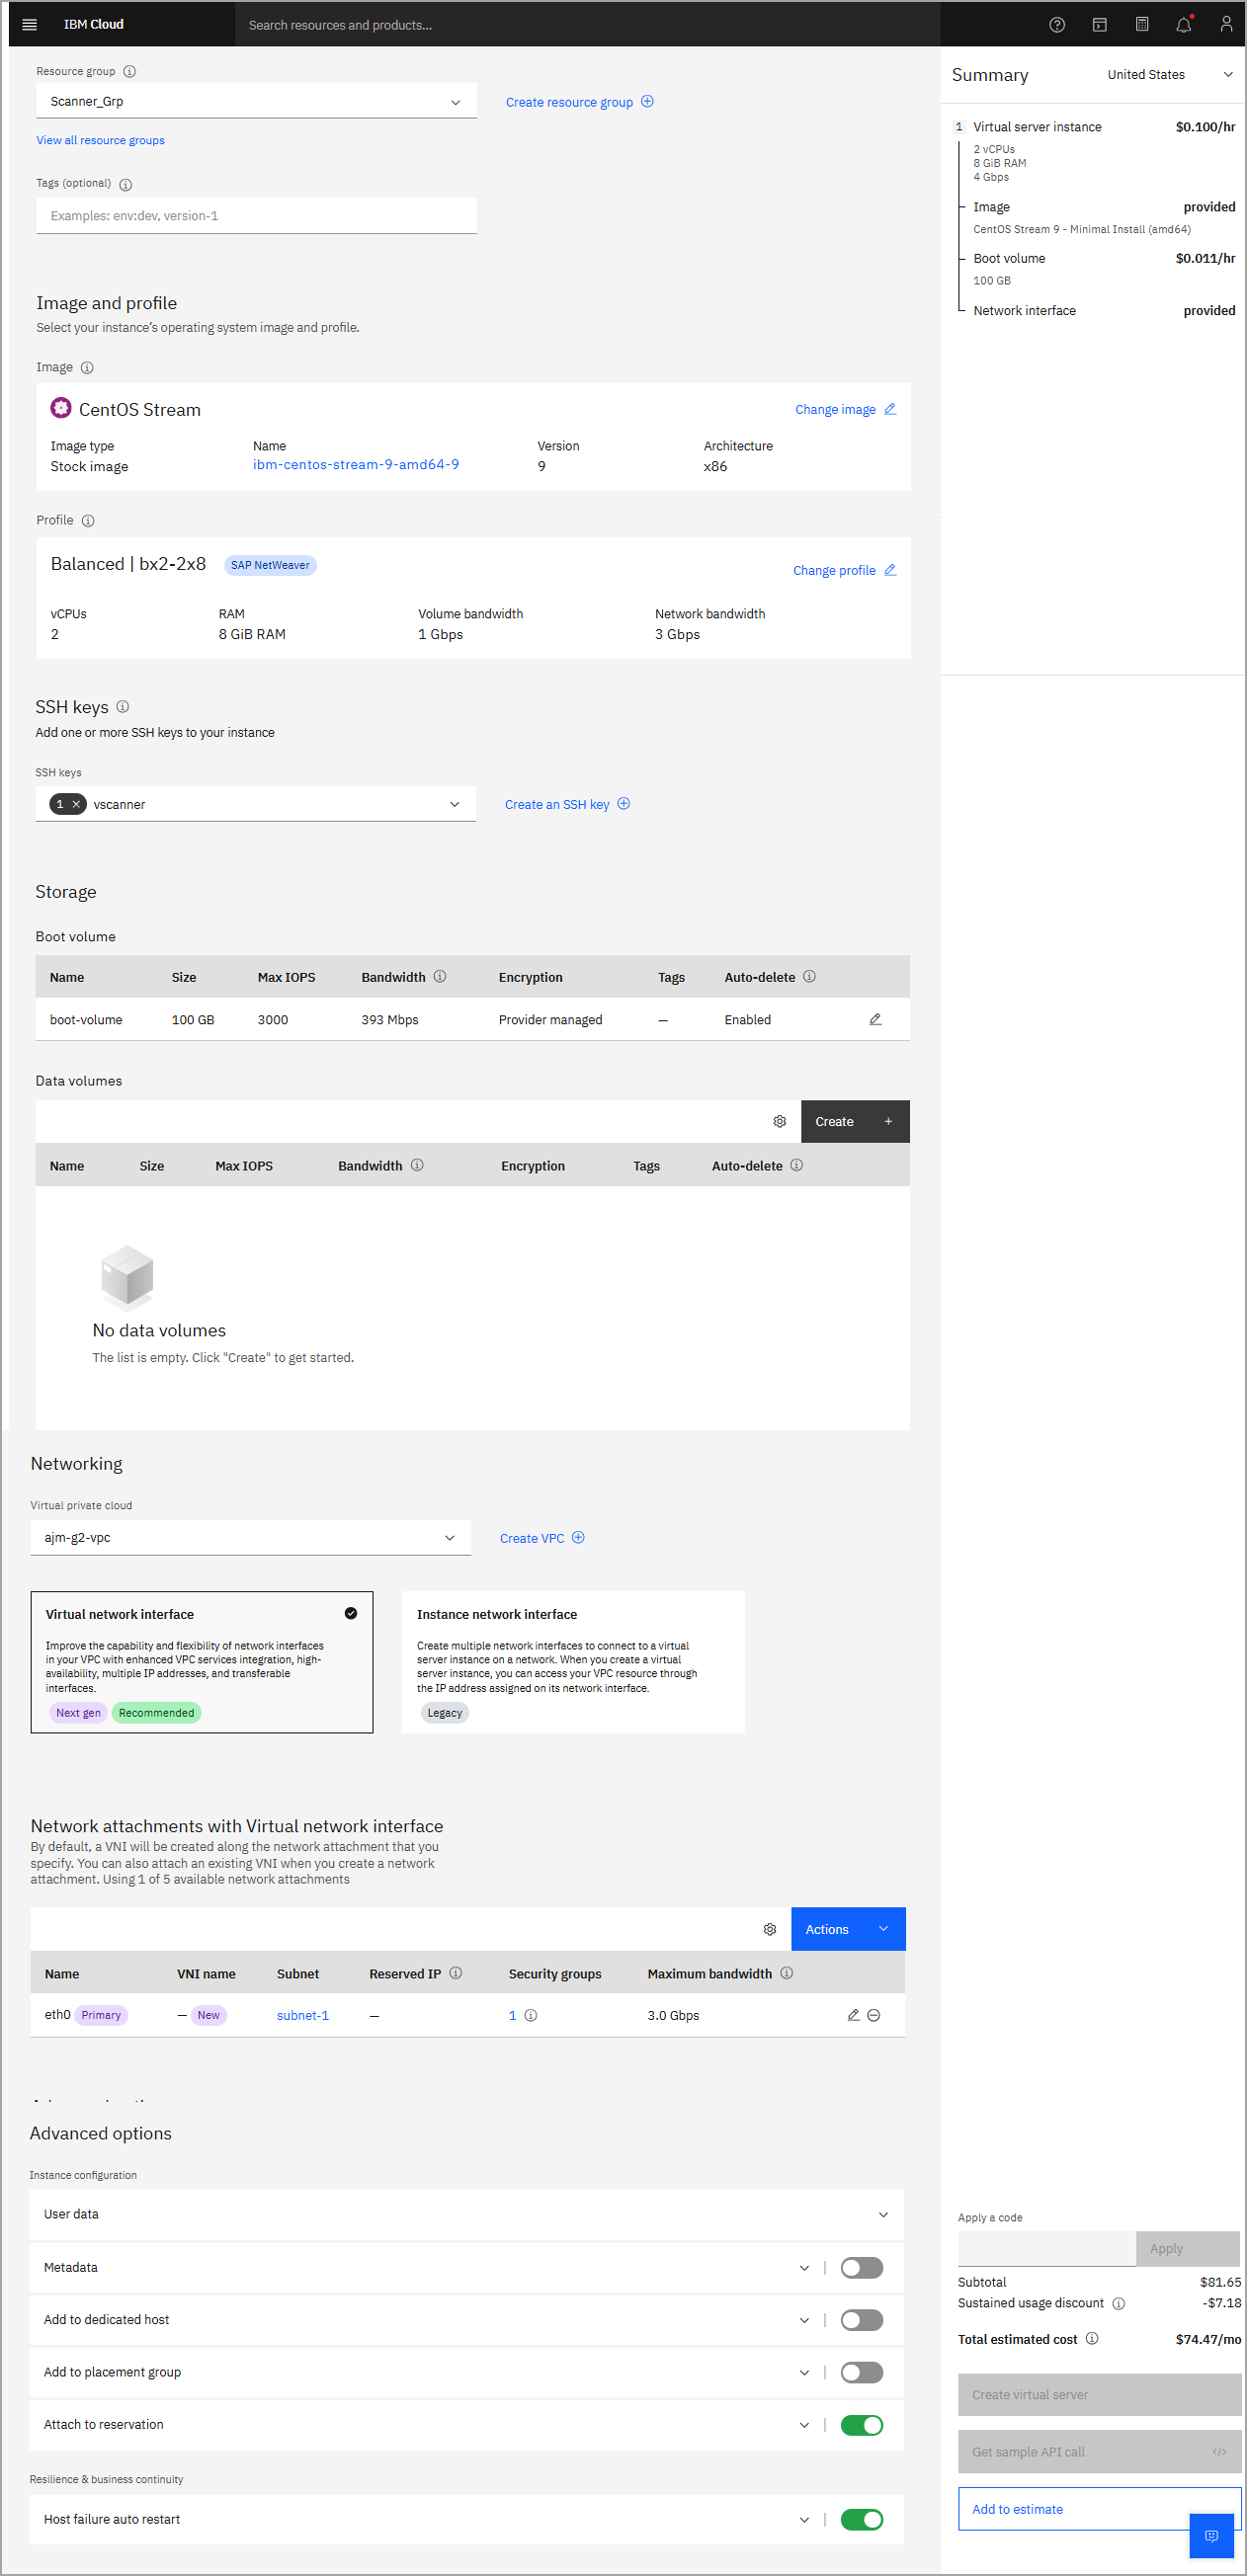
Refer to the following table for details of the fields and values.
Fields Details Location Choose a data center where the scanner(s) will be deployed. Name Name the scanner VM. Resource group Select the Resource group for Scanner VM. Image Custom image should be preselected. Profile Choose a profile that has the required RAM size & Storage. SSH keys Keep the default option “None”. Qualys Scanners Appliance is locked down and SSH access is not allowed on the scanner. Networking Virtual private cloud: Choose the VPC that can connect to Qualys Servers. Advanced Options Instance configuration > User data: We use the User data field to inject PERSCODE (mandatory) and PROXY_URL (optional) into the Qualys scanner. You can configure the scanner to use SSL proxy for all outbound communication with the Qualys Enterprise TruRisk™ Platform.
We support both IP and FQDN for the proxy server configuration.
You can specify the proxy server URL using this format:
PROXY_URL=proxy_user:proxy_pass@proxyhost:portPERSCODE and PROXY_URL should be placed on separate lines with no extra whitespaces or blank lines, just like this:
PERSCODE=12345678901234
PROXY_URL=proxy_user:[email protected]:3128 - Select Create virtual server to create scanner VM.
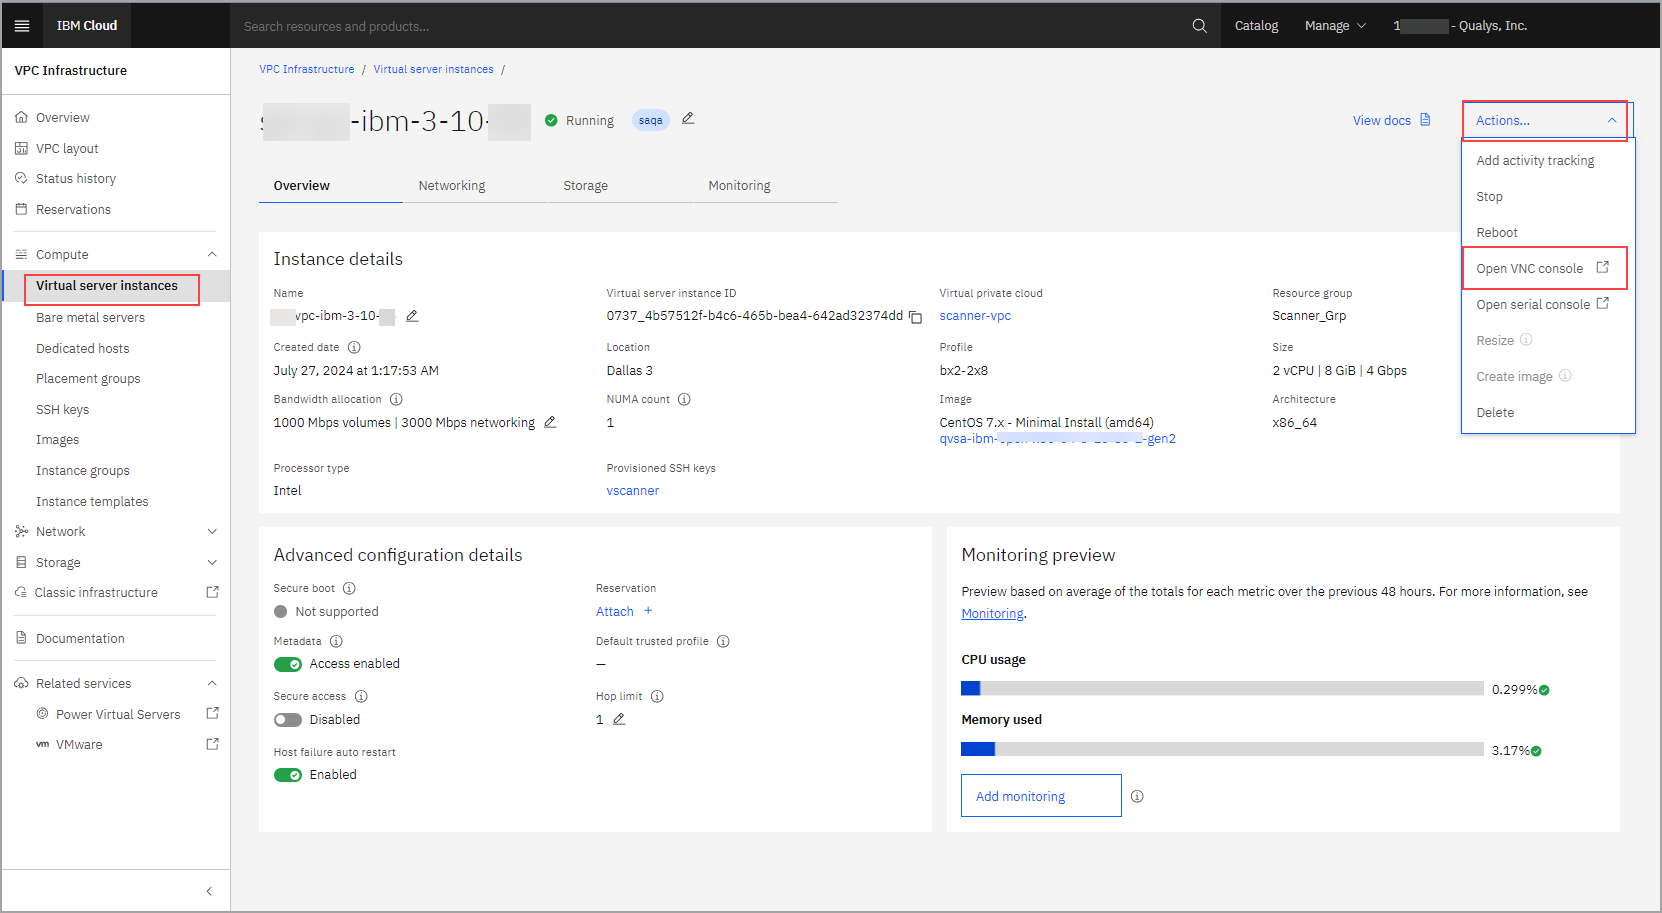
- Optionally, you can personalize the scanner and configure the proxy using the VNC console of the scanner VM.
- Navigate to Virtual server instances for the VPC table.
- Locate the Scanner VM and click to open scanner VM details.
- Click the Actions and select Open VNC console.
Next Step
Step 4: Access your Qualys Scanner on the private network