Launch Scan
You can launch a new scan using the New Scan option in the Scans tab. You can also launch scans by selecting model from the Models tab using the Launch Scan option from the Quick Actions menu.
Steps to Launch a New Scan
In the Scans tab, click New Scan.
Basic Information
Provide the name and select the model to be scanned in the Scan Target.
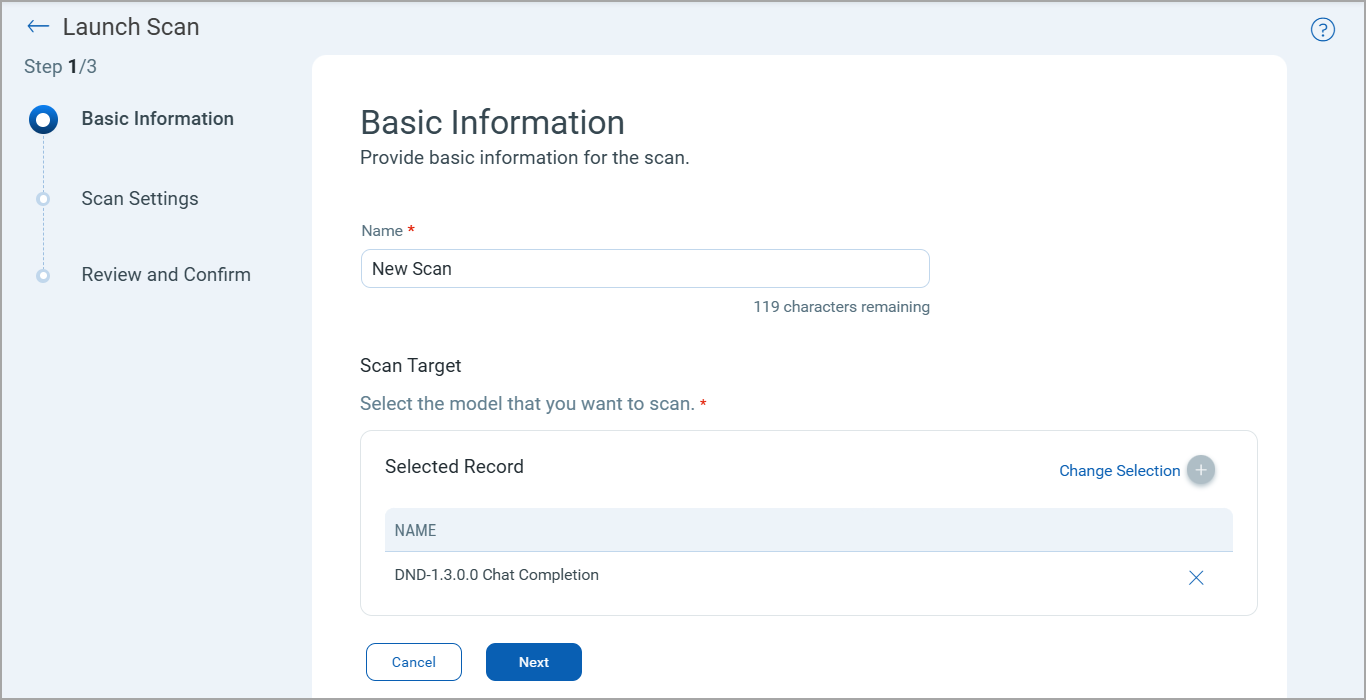
Scan Target
Select a model from the list models in the scan target.
Scan Settings
In the Scan Settings, select an option profile and scanner appliance to be used for the model scan.
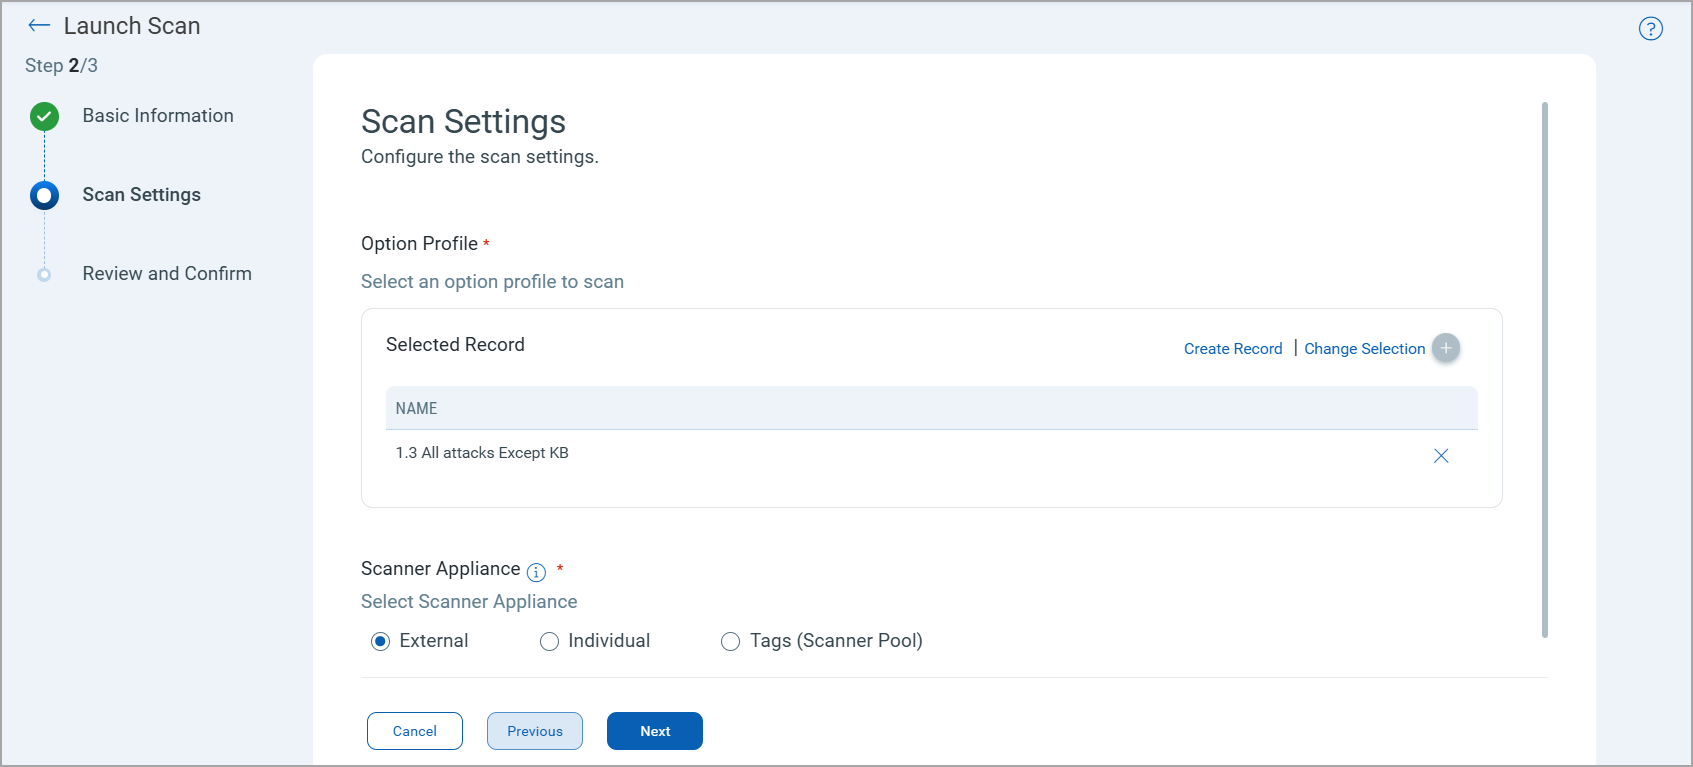
Option Profile
The option profile contains the scan settings and detection scope for the model scan. You can select from the existing option profiles or create a new option profile using the Create Record option.
For details on new option profile creation, see Option Profile Creation.
Scanner Appliance
Select one of the following options:
- Select External for perimeter scanning. For details of external scanners, see External Scanner IPs.
- Select Internal and select the scanner appliance from the list. For details, see Internal Scanner Appliance.
- Select Tags and select a tag. The scanner appliance associated with the selected tag is selected for model scan. For details, see All Scanners in TagSet.
Review and Confirm
Review the defined settings and click Launch Scan.
The scan is displayed in the Scans tab.
Once the scan is launched, it is available in the Scans tab. You can view the scan details or relaunch the scan using the Quick Actions menu.