Reporting Schedule
Using Reporting Schedule, you can share dashboard-based reports via email to the selective recipient(s). Reporting schedule can be generated only for VMDR and TP applications. You can create a schedule per your preferred timezone and frequency between Daily, Weekly, or Monthly. The reports are downloaded in PDF format with Portrait or Landscape orientation.
Currently, Report Scheduling can be performed for Numerical (except Average Function Type), Bar, Table, Pie, and TruRisk Score widgets. However, the expanded view of the Multi-Grouped Table Type is not supported. Report Scheduling currently does not support Custom Labels in the widgets.
When you create a dashboard scheduling report that includes a Bar chart, all the bars in the scheduling report are displayed in the same color.
You can create up to five On Demand or Schedule dashboard reports. These reports will contain widgets only for TP or VMDR applications.
This section includes the actions that you can perform in Reporting Schedule:
Scheduling a Dashboard Report
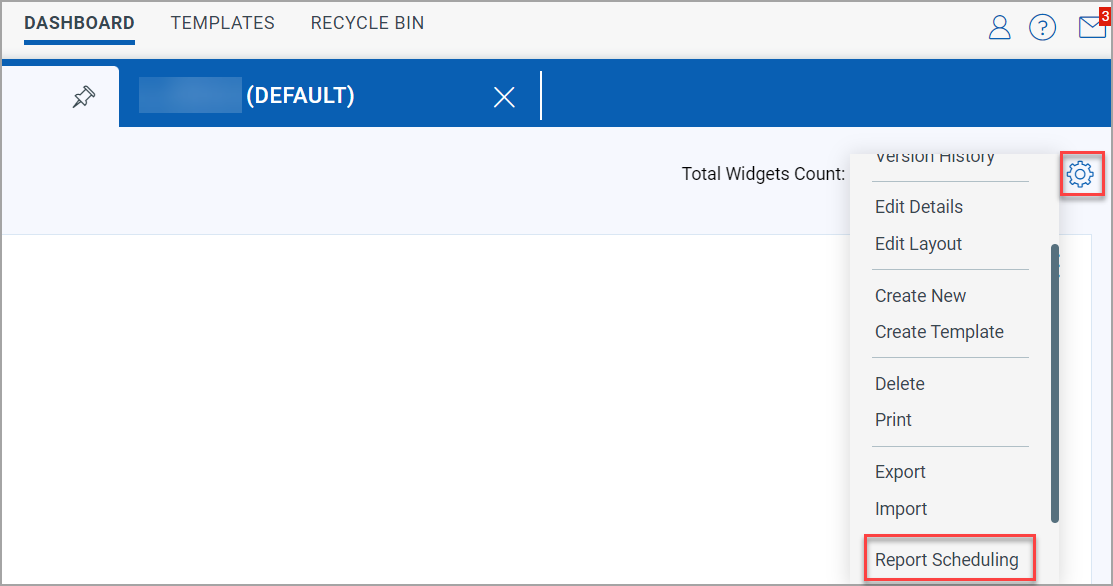
Perform the following steps to create a schedule for the dashboard report from the Dashboard tab:
- Click the Tools
 menu, and click Report Scheduling.
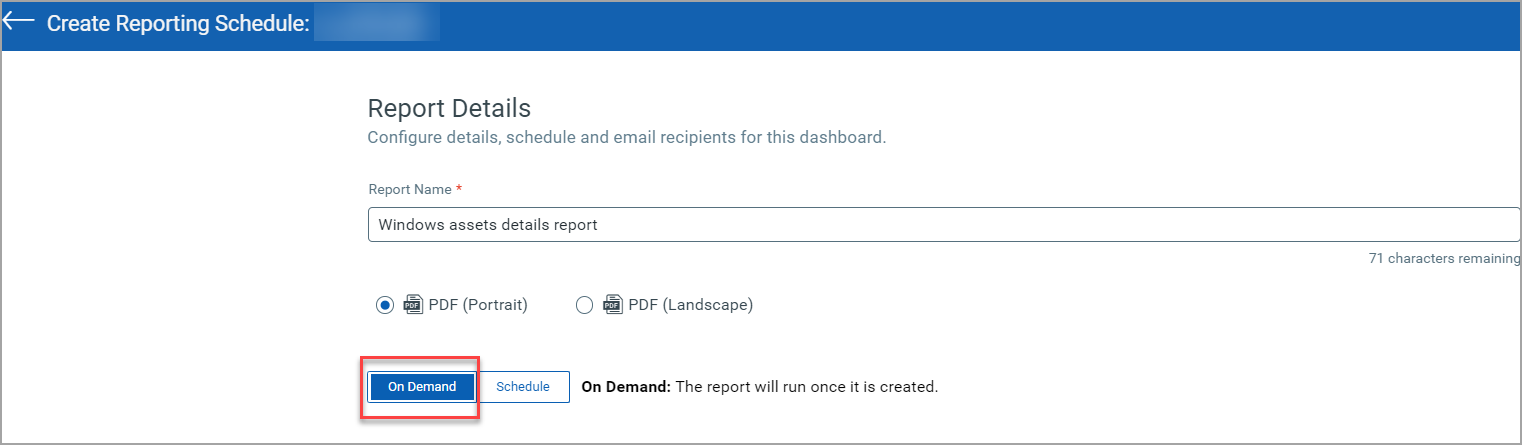
- Click Create Schedule and provide the name in the Report Name field. The Report Name can include alpha-numeric characters, underscore(_), hyphen (-), single quotation mark ('), and round brackets().
Sample Report Name: Windows assets - (2023)_'march'
- Select the required orientation between Portrait or Landscape for PDF output.
- Select any one of the following two options:
For any of these two options, you cannot select a previous Start Date or End Date that is previous to your current date.
- Option 1 - On Demand: Select this option if you want the report to run once.
- Option 2 - Schedule: Select this option to run a report on a specific date and time.
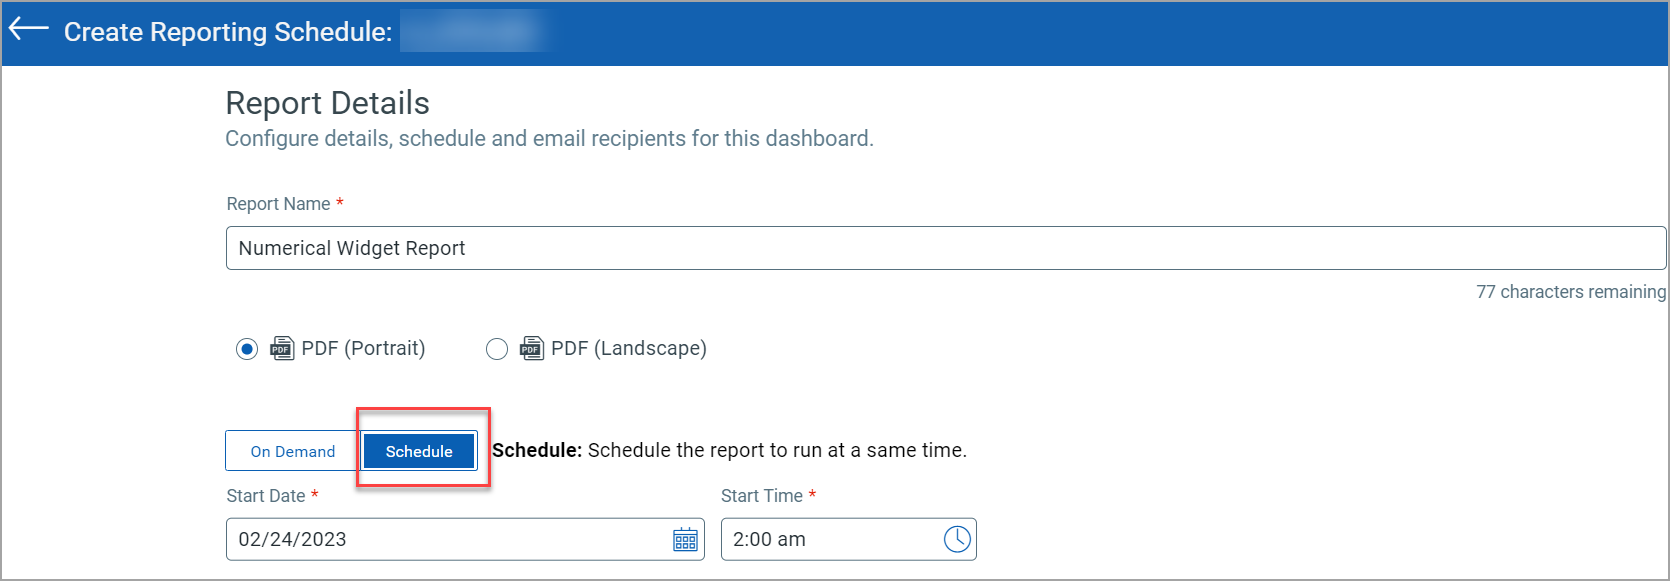
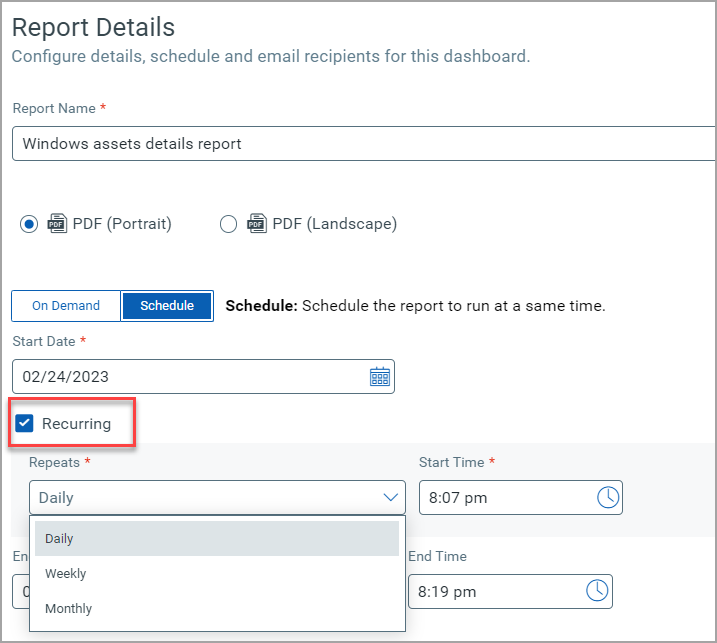
- If you have selected the option as Schedule from the Repeats drop-down, select any of the following Recurring options:
- Daily: Select this option if you want the dashboard report daily at a specific date and time.
- Weekly: Select this option if you want the dashboard report on a specific day(s) of the week.
- Monthly: Select this option based on the date of the month or day of the week.
If you select the Start Time that is previous to the current time, the Schedule report for Daily, Weekly, or Monthly recurring options will also be triggered for that day and time.For Example: Assume your current date is 24th February and the time is 10:00 PM. Thus, the Start Date is by default shown as 24th February. If you change the Start Time to 8:00 PM for the Recurring option Daily, the Schedule report will also be triggered for 24th February.
- Option 1 - On Demand: Select this option if you want the report to run once.
- From the Timezone Settings drop-down, select the timezone for dates to include in the report.
- Enter Recipients, Subject, and Custom Message to send the dashboard reports. The Subject and Custom Message field can include alpha-numeric, underscore(_), hyphen(-), slash(/), series of single dots(...), number sign(#), round brackets(), ampersand(&), semi-colon(;), comma(,), dollar($), and curly brackets({}).
For Example: Subject: Nume1rical_widget-2023...
- Click Create.
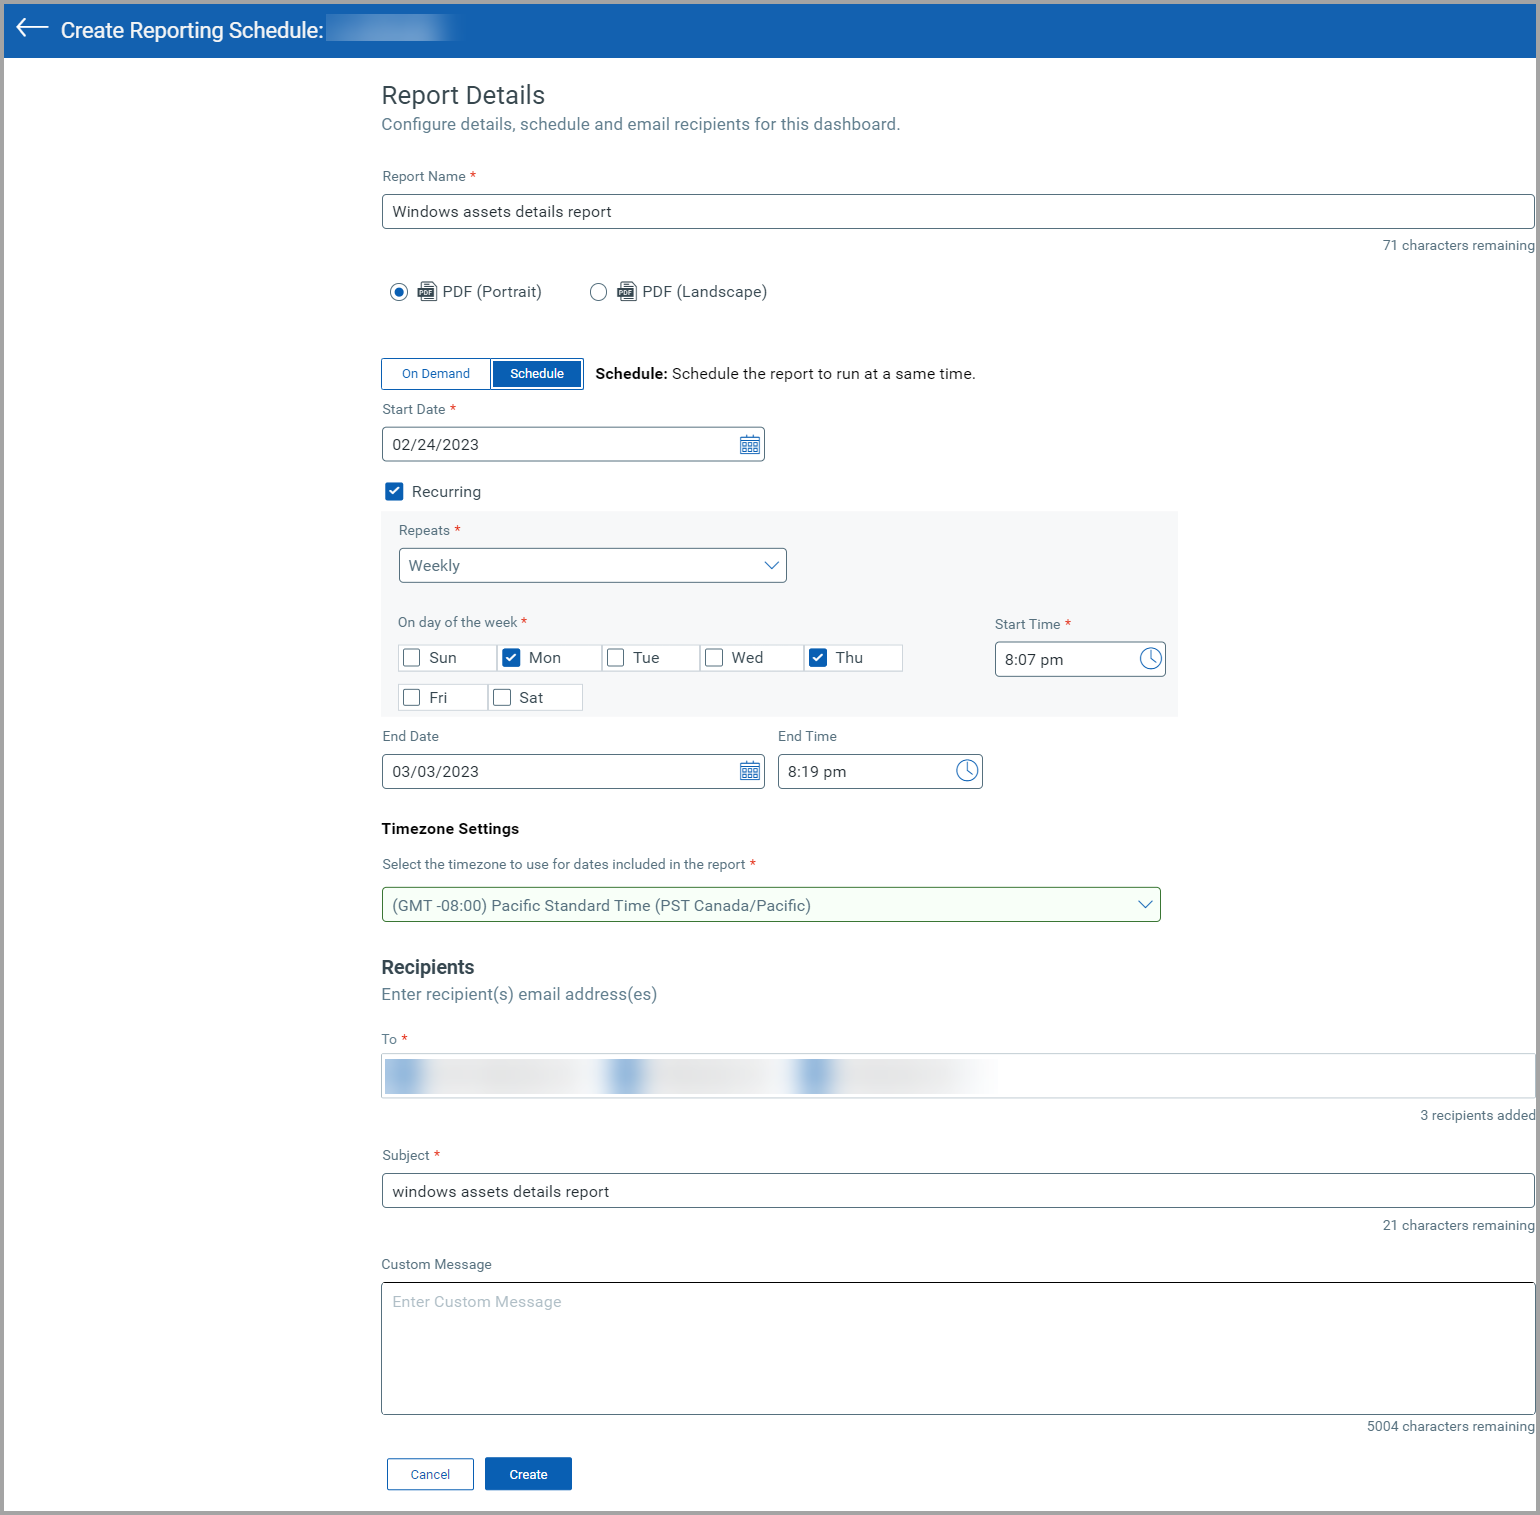
- A notification at the top right corner of the screen notifies once the dashboard report is successfully created.
- The created report is listed on the Reporting Schedule page. The following screenshot displays a sample schedule queued report in PDF format:

Reporting Schedule: Quick Actions
Once the dashboard report is listed on the Reporting Schedule page, you can perform Edit, Activate, and other options from the Quick Actions menu. This menu's Edit, Activate, and Deactivate options do not apply to the On Demand report.
Select any of the following options from the Quick Actions menu:
- Edit: Edit an existing Schedule report by making changes.
- Clone: You can clone an On Demand or Schedule report with the Active, Inactive, or Finished status. The report name of the clone report should be different from the existing reports.
- Activate: A report name with an Inactive status can be Active by selecting the Activate option.
- Deactivate: A report name with Active status can be Inactive by selecting the Deactivate option. An Inactive status implies the report creation is paused. However, the chosen time frame of the Schedule report is not paused.
- Delete: You can delete an On Demand or Schedule report with the Active, Inactive, or Finished status. In the Confirmation window, click Yes if you are sure to delete the report.
The following screenshot is an example of the Quick Actions menu: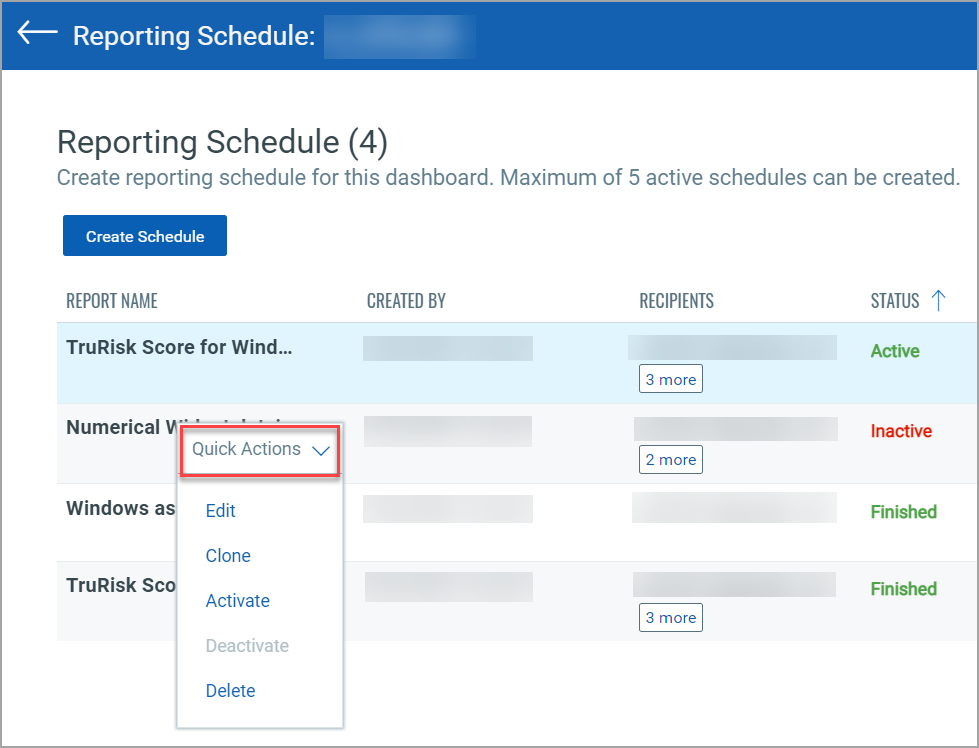
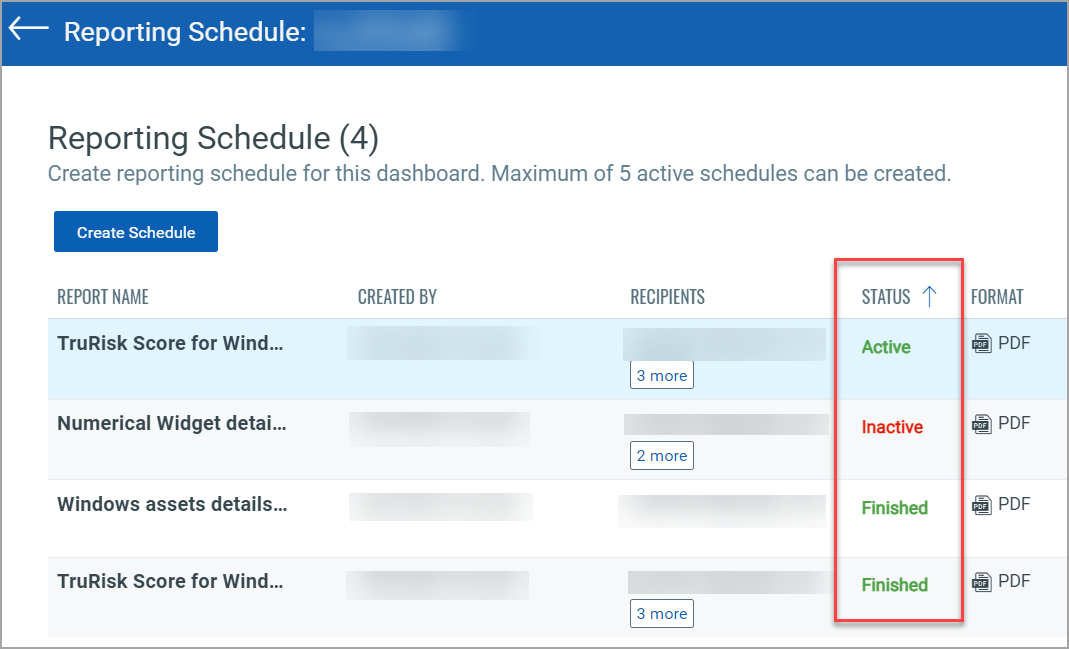
Reporting Schedule: Status
Once the dashboard report is listed on the Reporting Schedule page, the Status column displays the On Demand or Schedule report:
The Status column does not signify the email status sent to the recipient(s).
| Status | On Demand | Schedule |
|
Active |
Not applicable Depending on the queue load, the report can be Active for some time. |
The report will be in Active Status once the scheduled report is created. |
|
Inactive |
Not applicable. |
An Inactive status implies that the report generation is paused. However, this will not change the Daily, Weekly, or Monthly time frame. |
|
Finished |
The Finished status means that the report creation is completed. You can not edit a Finished report. |
|
The following screenshot is an example of the Status column: