Configuring Response Templates
Qualys Context XDR allows you to configure response templates for the following notification applications:
Follow these steps to configure an email template:
1. On the Qualys Context XDR UI, navigate to Configuration > Response Templates > Email.
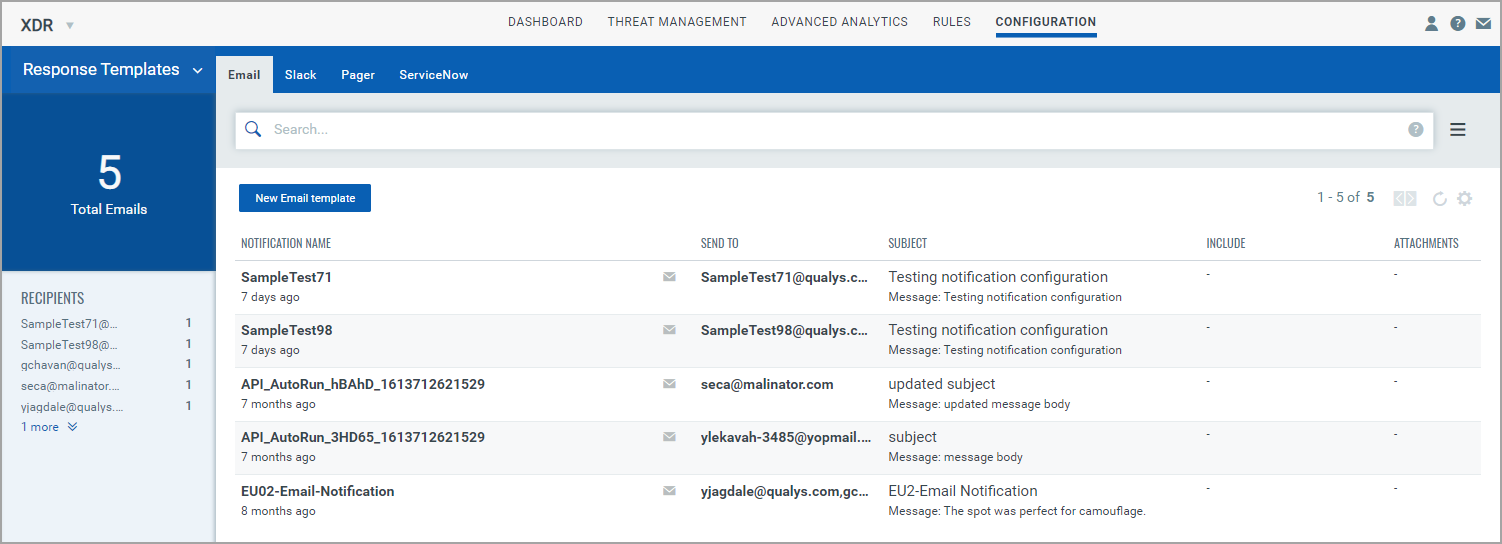
2. The Email sub-tab displays a list of existing email templates. Click New Email Template to create a new template.
3. On the New Email template page, enter the following details:
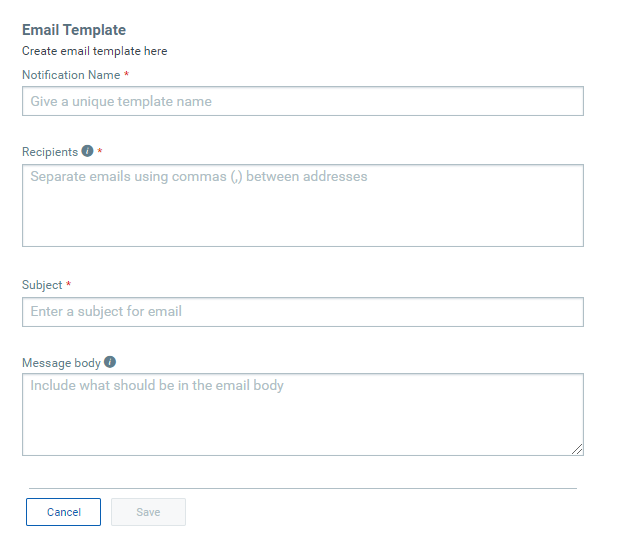
a. Notification Name – Name to identify the template
b. Recipients – Email addresses of the recipients of the notification. Separate each address with a comma. XDR limits the number of recipients to 50.
c. Subject – Subject of the email that recipients would receive
d. Message Body – Body of the email message that recipients would receive
4. Finally, click Save to create your notification template. The new template is displayed under the Email sub-tab.
On the Email sub-tab, use the filters on the left pane or QQL tokens to search for specific templates. See the Email Response Templates section for a complete list of tokens supported on this page.
Follow these steps to configure a Slack response template:
1. On the Qualys Context XDR UI, navigate to Configuration > Response Templates > Slack.
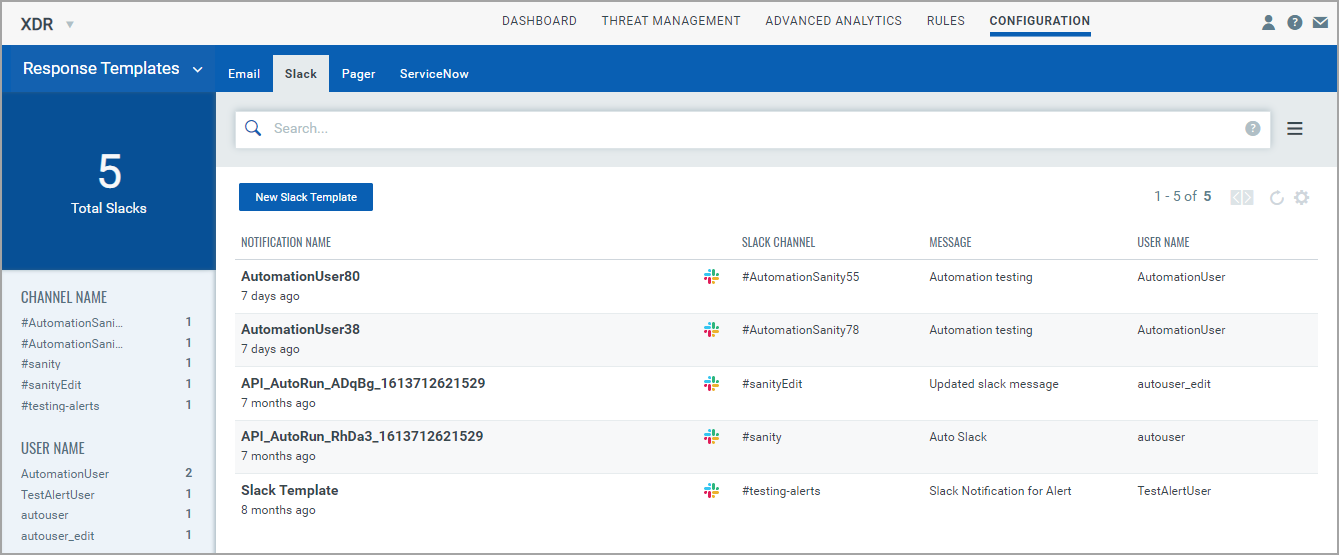
2. The Slack sub-tab displays a list of existing Slack response templates. Click New Slack Template to create a new template.
3. On the New Slack template page, enter the following details:
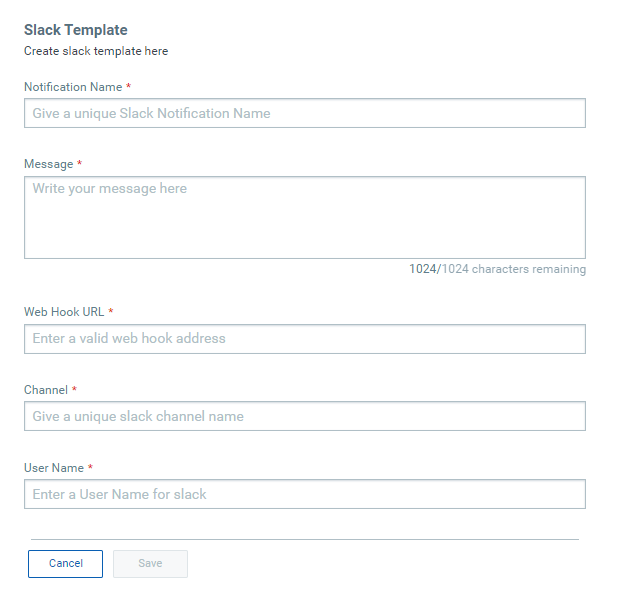
a. Notification Name – Name to identify the template
b. Message – Text message that recipients would see on Slack
c. Web Hook URL – Web hook URL of the Slack connection
d. Channel – Unique Slack channel name
e. User Name – A user name for Slack
4. Finally, click Save to create your notification template. The new template is displayed under the Slack sub-tab.
On the Slack sub-tab, use the filters on the left pane or QQL tokens to search for specific templates. See the Slack Response Templates section for a complete list of tokens supported on this page.
Follow these steps to configure a Pager notification template:
1. On the Qualys Context XDR UI, navigate to Configuration > Response Templates > Pager.
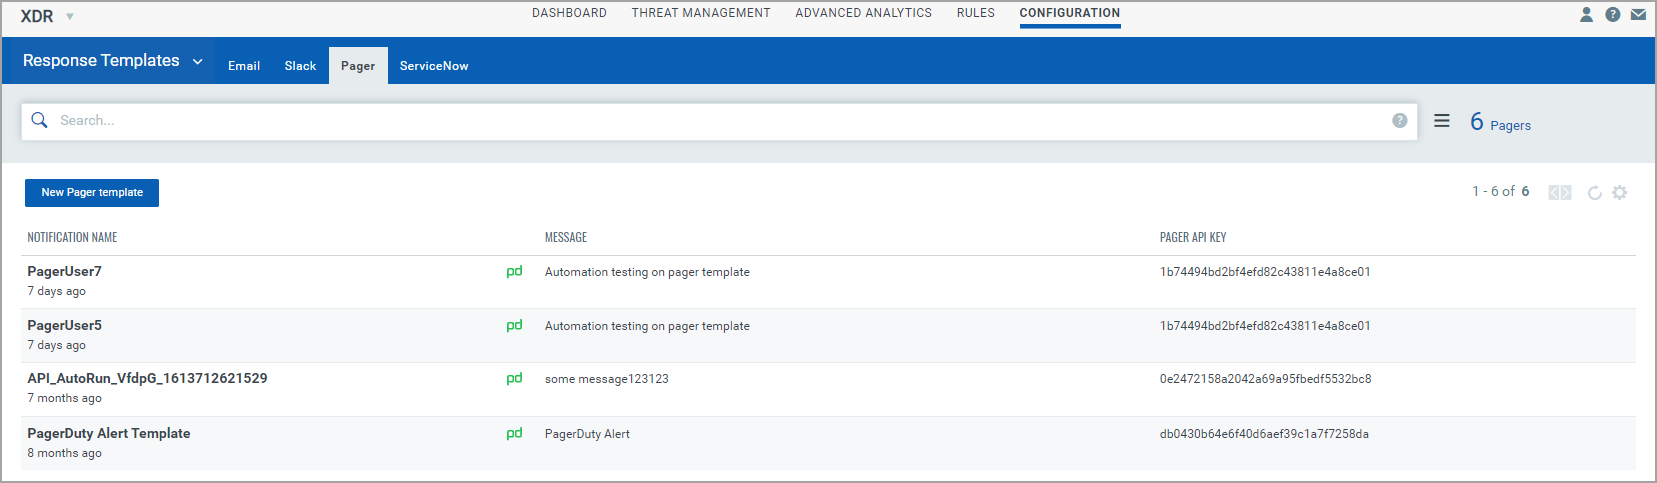
2. The Pager sub-tab displays a list of existing Pager notification templates. Click New Pager Template to create a new notification template.
3. On the New Pager template page, enter the following details:
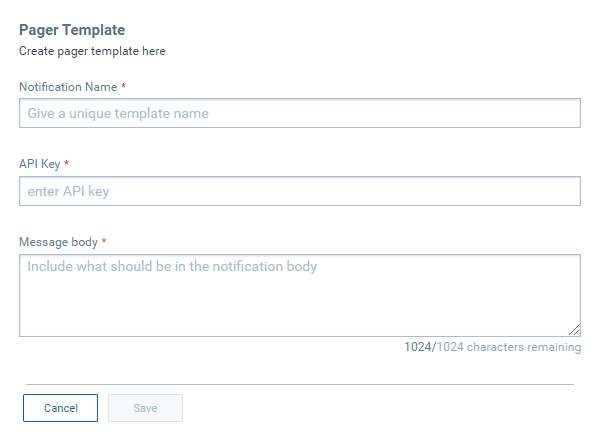
a. Notification Name – Name to identify the template
b. API Key – The API key to connect to the Pager application
c. Message Body – Body of the email message that recipients would receive
4. Finally, click Save to create your notification template. The new template is displayed under the Pager sub-tab.
On the Pager sub-tab, use QQL tokens to search for specific templates. See the Pager Response Templates section for a complete list of tokens supported on this page.
Follow these steps to configure an servicenow template:
1. On the Qualys Context XDR UI, navigate to Configuration > Response Templates > ServiceNow.
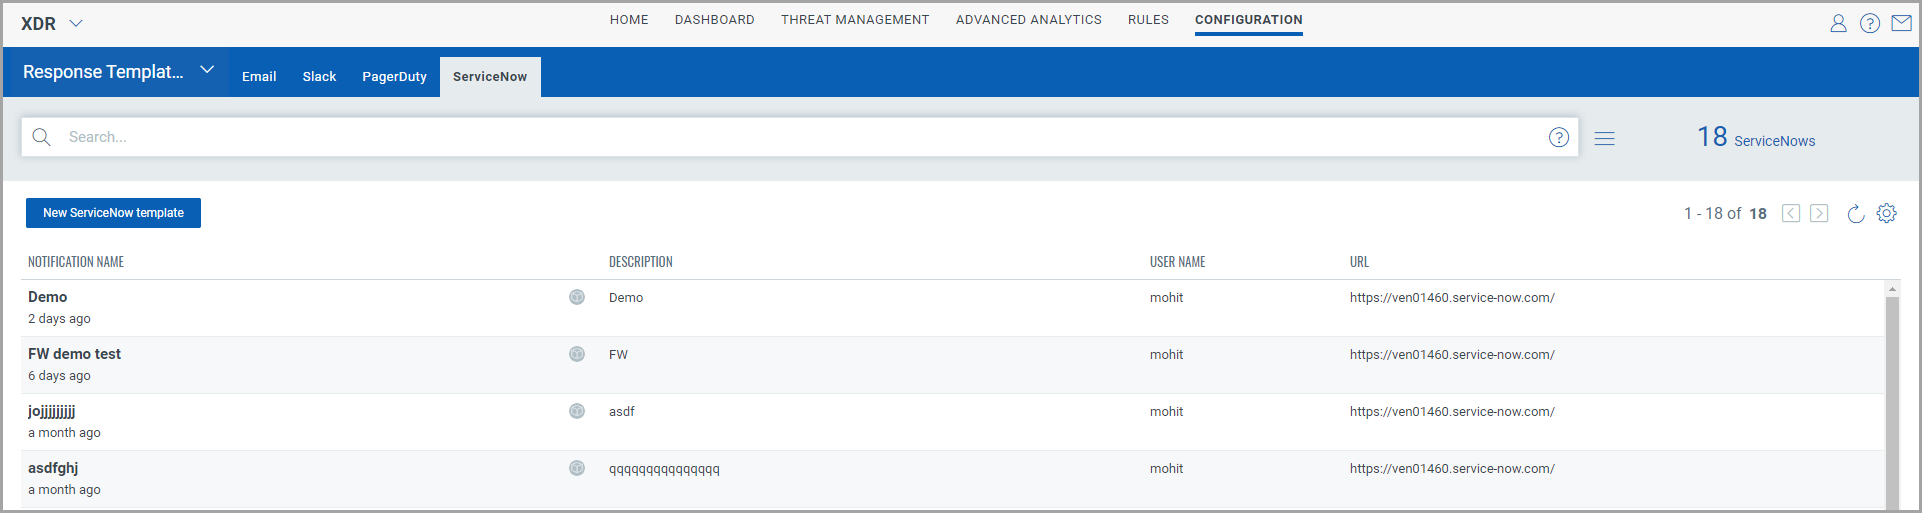
2. The ServiceNow sub-tab displays a list of existing servicenow templates. Click on New ServiceNow Template to create a new template.
3. On the ServiceNow Template page, enter the following details:
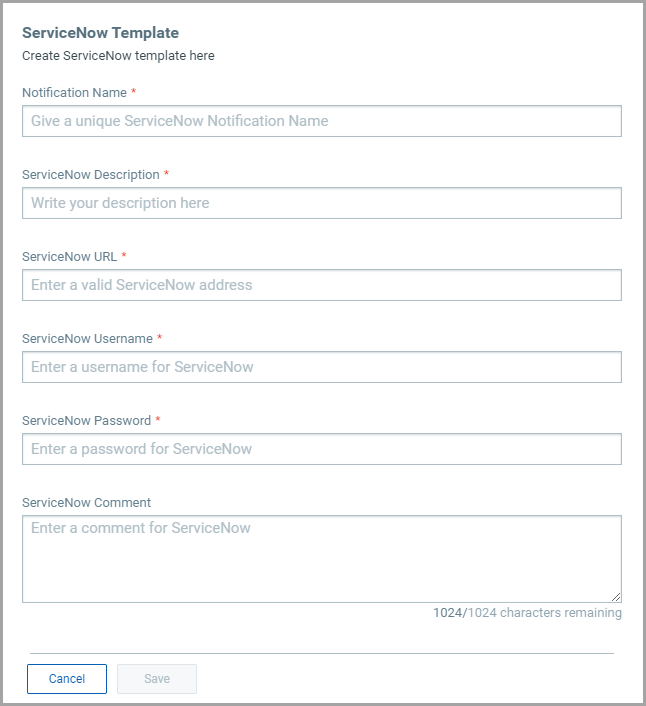
a. Notification Name – Name to identify the template
b. ServiceNow Description – Write description that recipients would see
c. ServiceNow URL – Enter a valid ServiceNow URL address
d. ServiceNow Username – Enter a user name for ServiceNow
e. ServiceNow password – Enter a password for ServiceNow
f. ServiceNow Comment – Add a comment for ServiceNow
4. Finally, click Save to create your notification template. The new template is displayed under the ServiceNow sub-tab.
On the ServiceNow sub-tab, use the filters on the left pane or QQL tokens to search for specific templates. See the ServiceNow Response Templates section for a complete list of tokens supported on this page.
You can define multiple templates for each application and then use these templates as a response to rules. See the Create a New Rule section for information on using these response templates in rules.

For each notification template, see the Quick Actions menu to:
- View Details: Displays the basic Information details of the selected response template and the associated rules with it.
- Edit: Allows you to modify the already configured response template.
- Delete: Deletes the selected response template.
NOTE: The response template only gets deleted, if the selected template is not associated with any of the rules. Else, it displays a warning dialog box with the list of associated rules.
You can also watch out the following tutorial for how to configure Response Templates: