Create Custom Scripts
With Custom Scripts, you can create and deploy your own scripts to target specific assets in your environment. When creating a script, you can define its scope by selecting the assets it should run on and labeling the script according to its purpose, such as Detection (to identify issues) or Response (to detect and remediate issues).
You can execute the custom script on assets across any Qualys applications you have subscribed to.
You can also import a script. For information on importing scripts, refer to Importing Scripts.
Create a Script
To create a script, follow these steps:
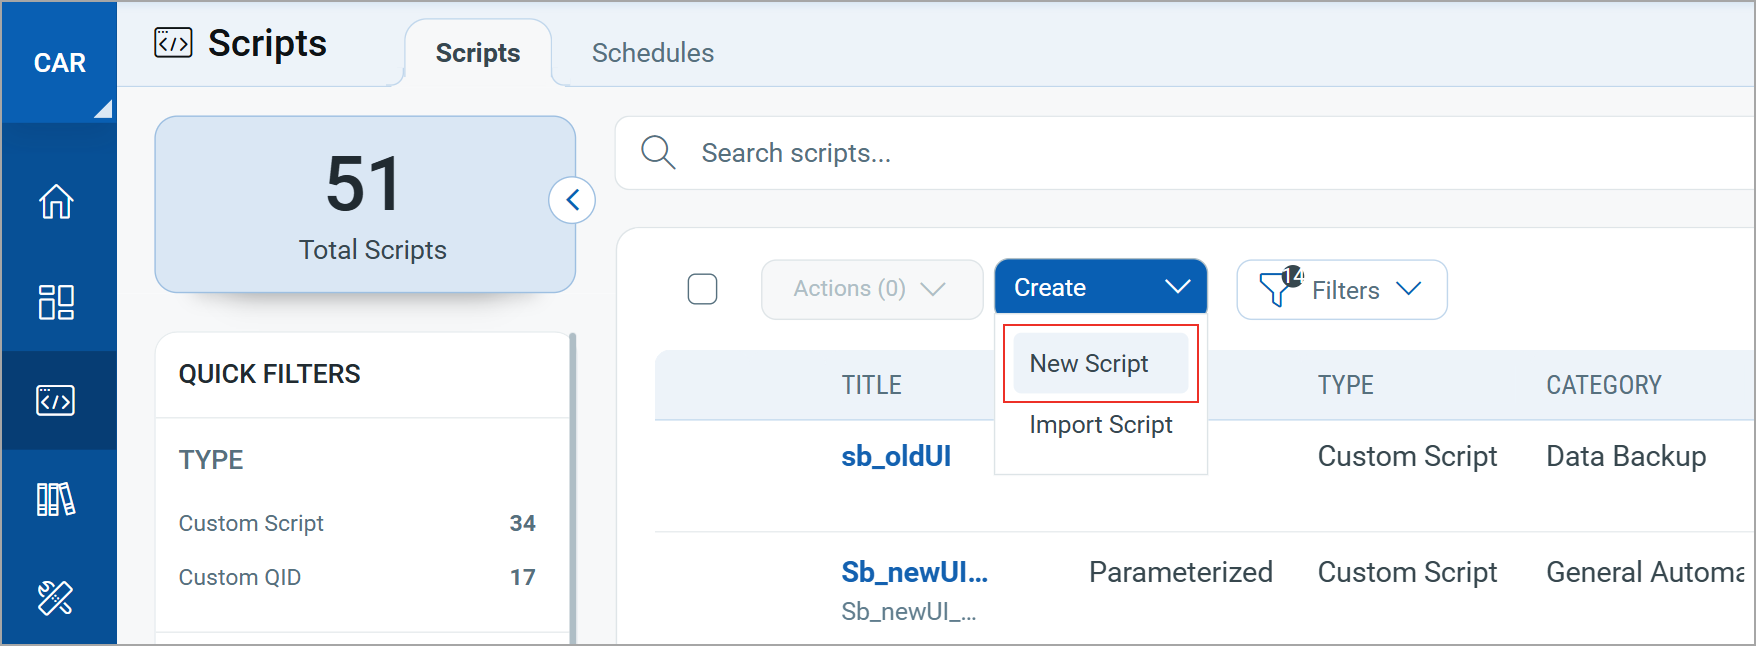
- Navigate to the Scripts > Scripts > Create > New Script.
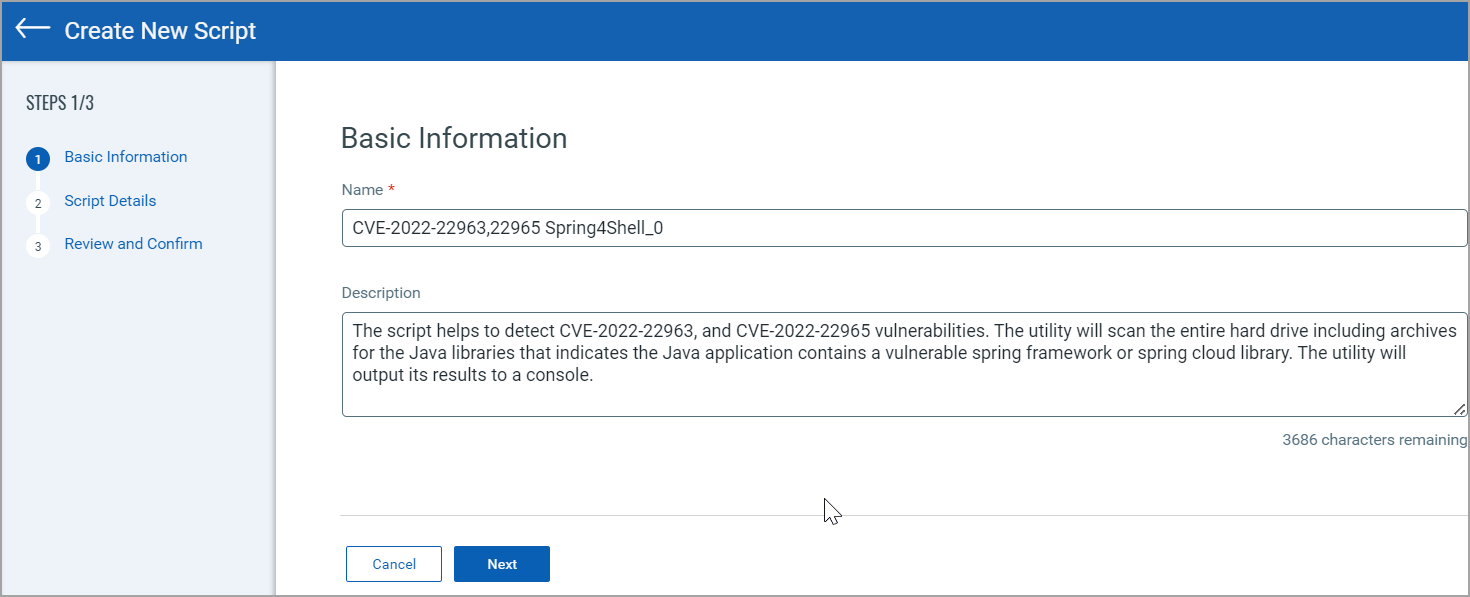
- In the Basic Information page, enter a Name and Description for the script.
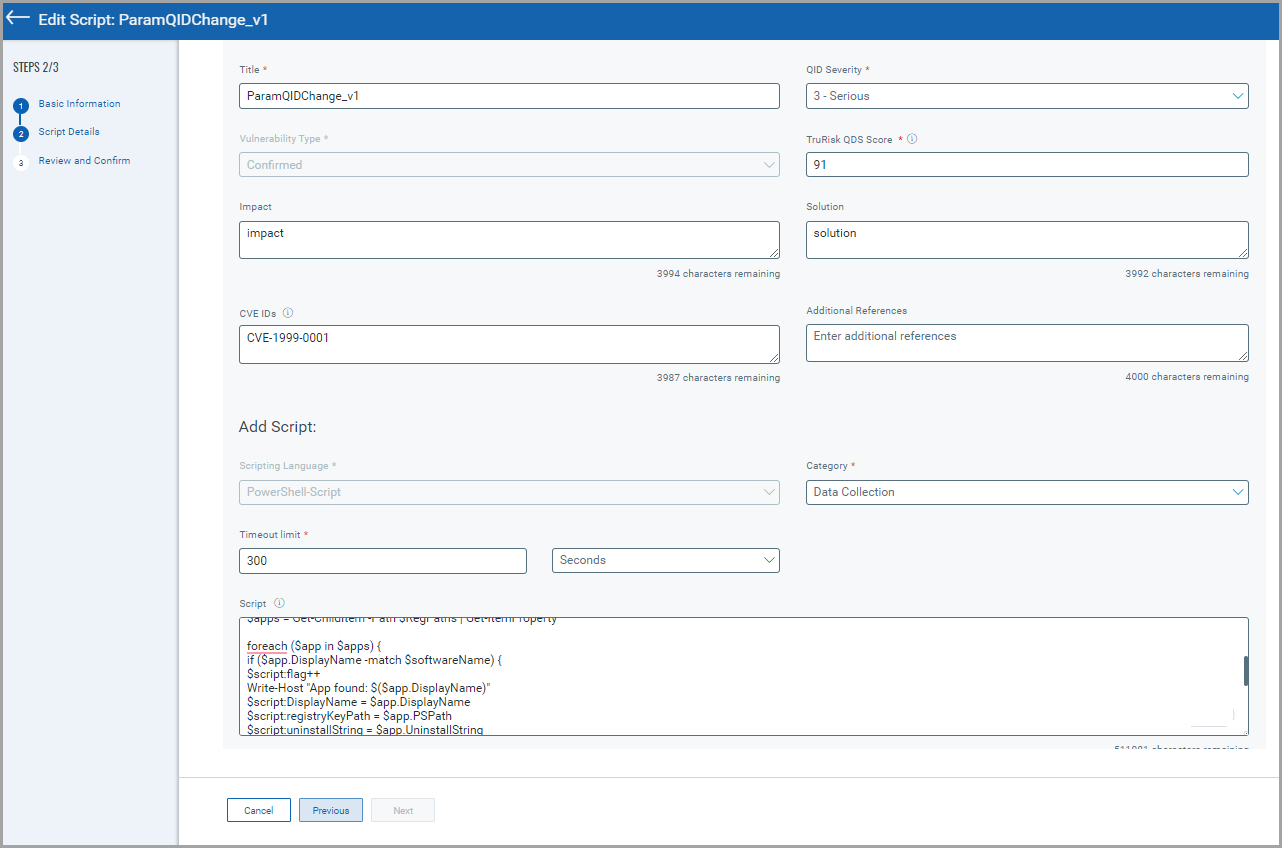
- In the Script Details page, complete the following fields:
Field Description Type of Script Select a script type from the list: - Custom Script
- Custom QID
Select Custom Script from the options listed. If you want to create a custom QID script, refer to Creating Custom QID Scripts.
Platform Select a platform from the list: - Unix
- Windows
- Linux
- Mac
Subtype Select a subtype for your custom script: - Detection: Select this if your script's purpose is for detection only.
- Response: Select this if your script's purpose is for detection and remediation.
The Subtype field is only applicable to Custom Scripts.
Scripting Language Select a required Scripting Language from the list. The Scripting Language options change as per the selected platform. If you have selected the Windows platform, the following languages are displayed:
- PowerShell-Command
- PowerShell-Script
- Python
- VBScript
If you have selected the Linux, Unix, or Mac platform, the following languages are displayed:
- Lua
- Perl
- Python
- Shell
Category Select a category for the script from the list. Timeout limit Specify the Timeout limit in seconds, minutes, or hours. The Timeout limit lets you specify how long a script must be in execution. The Timeout limit field only accepts whole numbers (integers).
Severity Select a severity value from the list ranging from 1 to 5, with 5 being the most severe and 1 the least severe. - In the Scripts section, select one of the following options to provide the script:

You have the option to create a parameterized script using any of these four options. For more information, refer to Creating Parameterized Script.
- Click Next to view the Review and Confirm page.
- Review the script and click Confirm & Save to create the script.
After creating a script, you can test and execute the script. For more information, refer to Testing Scripts and Executing Scripts.
Previously, Scripts used to have Assets and tags that are no longer visible on the Script Details page.
Edit the Approved Script Content
The user with the manager role can edit the content of the approved script.
To modify the approved script, follow these steps:
- Navigate to the Scripts tab.
- To edit a script, select an approved script and click Edit on the Quick Actions menu.

- In the Basic Information page, click Next.
The Script Details page is displayed.
- Modify the editable content as required.
- Provide the Reason for Edit.
- Click Next to view the Review and Confirm page.
- Review the script and click Update to save the changes to the script.
Script Input Options
While creating a script, the following options are available to provide the script content:
Enter Script
You can manually type the script in the Script text box. This method is recommended only for signed scripts. The script size limit for any asset on both Windows and Linux platforms is 500 KB.
To enter a script, follow these steps:
- Select the Enter script option on the Script Details page.
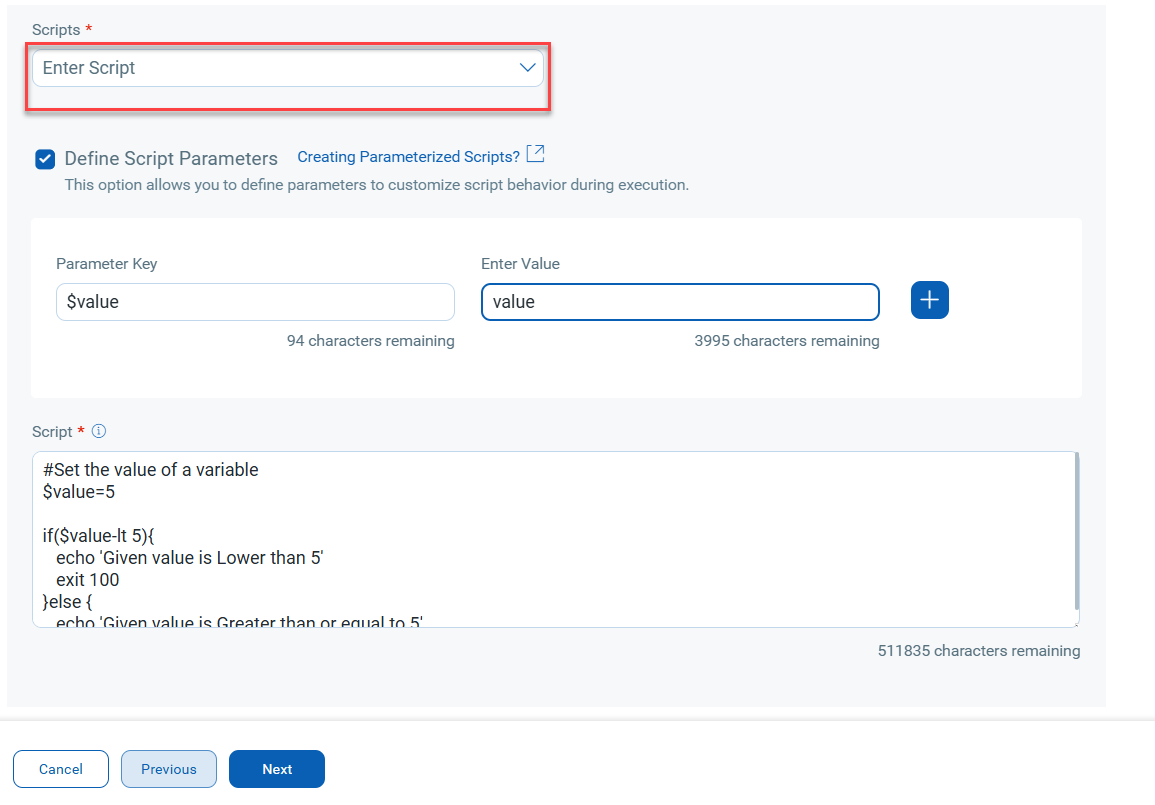
- Type the script in the Script box.
- If you want to define parameters for the script, turn on the Define Script Parameters toggle and provide the parameters along with their values.
Defining parameters customizes the script behavior during the script execution.
- Click Next.
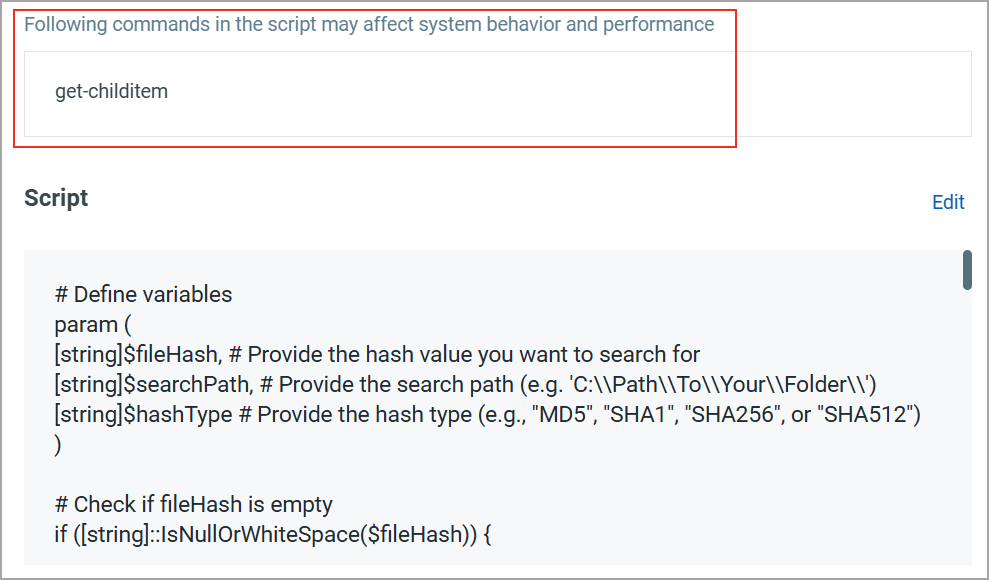
The Review and Confirm page displays your script selections and highlights whether the script you entered contains any commands that may potentially impact system behavior and performance.
Upload Script
You can upload a script from your local drive. The script size limit for any asset on both Windows and Linux platforms is 500 KB.
To upload a script, follow these steps:
- Select the Upload Script option on the Script Details page.
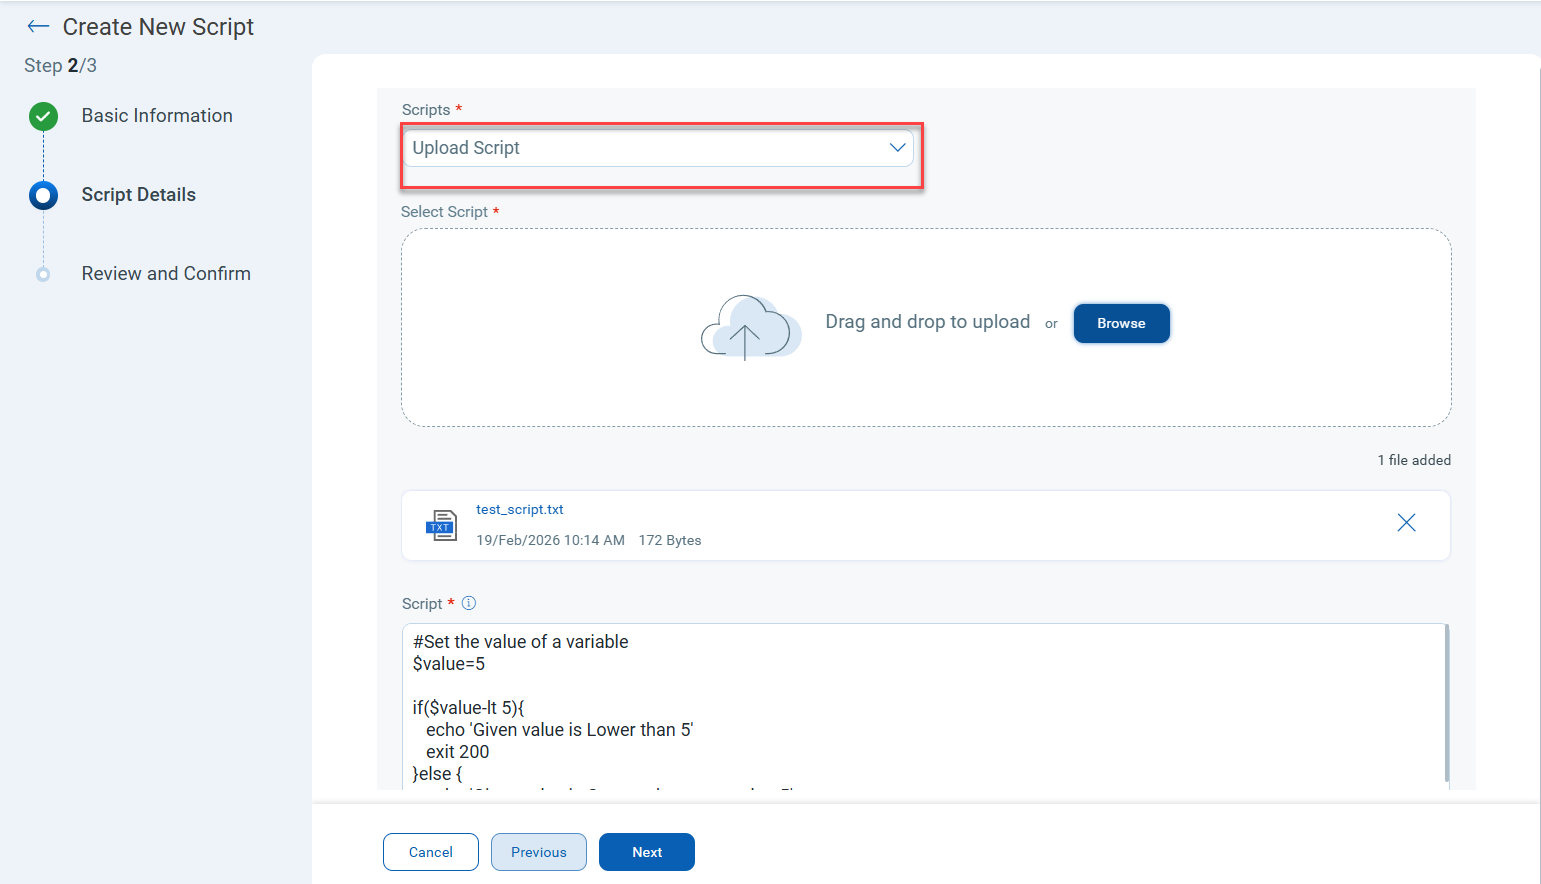
- Click Browse to navigate and upload the required script.
Once uploaded, the script content is displayed in read-only format in the Script text box.
If you are using a signed script, always use the browse mechanism to select it. This ensures that the signed script remains intact and can be executed on assets if the execution policy is set to AllSigned.
- Click Next.
The Review and Confirm page displays the selections you have made for the script. It also highlights if the script you have entered contains any commands that may potentially impact the system's behavior and performance.
Import from GitHub
To import a script from GitHub, follow these steps:
- Select the Import from GitHub option on the Scripts Details page.
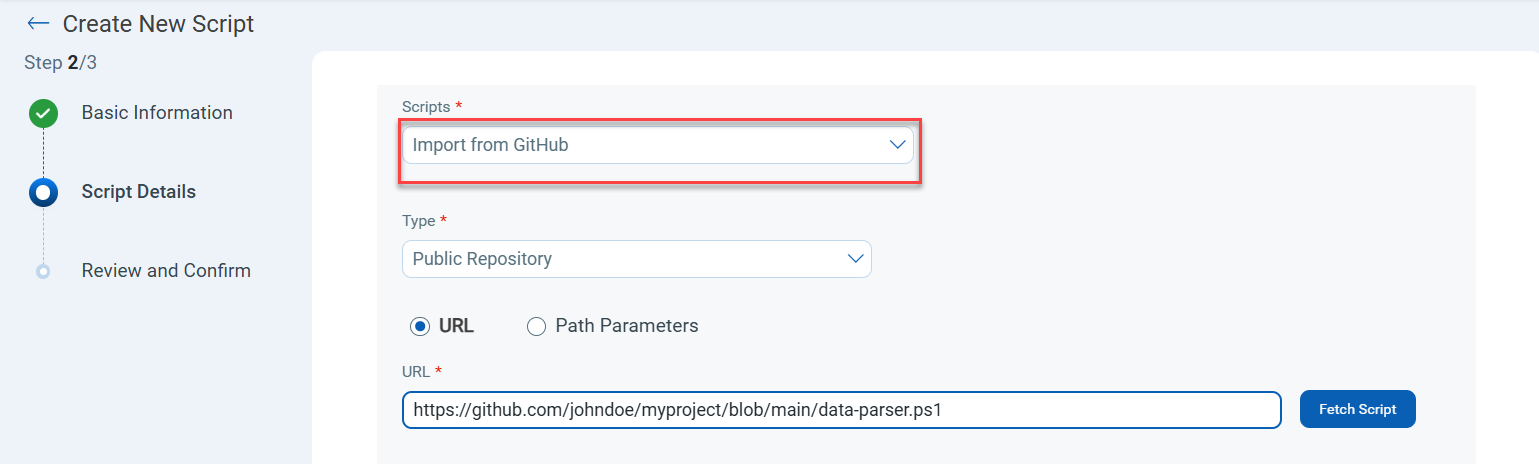
- Select a repository Type from the list to specify whether you want to import from a Private or Public Repository.
The following options are displayed if you select Private Repository:
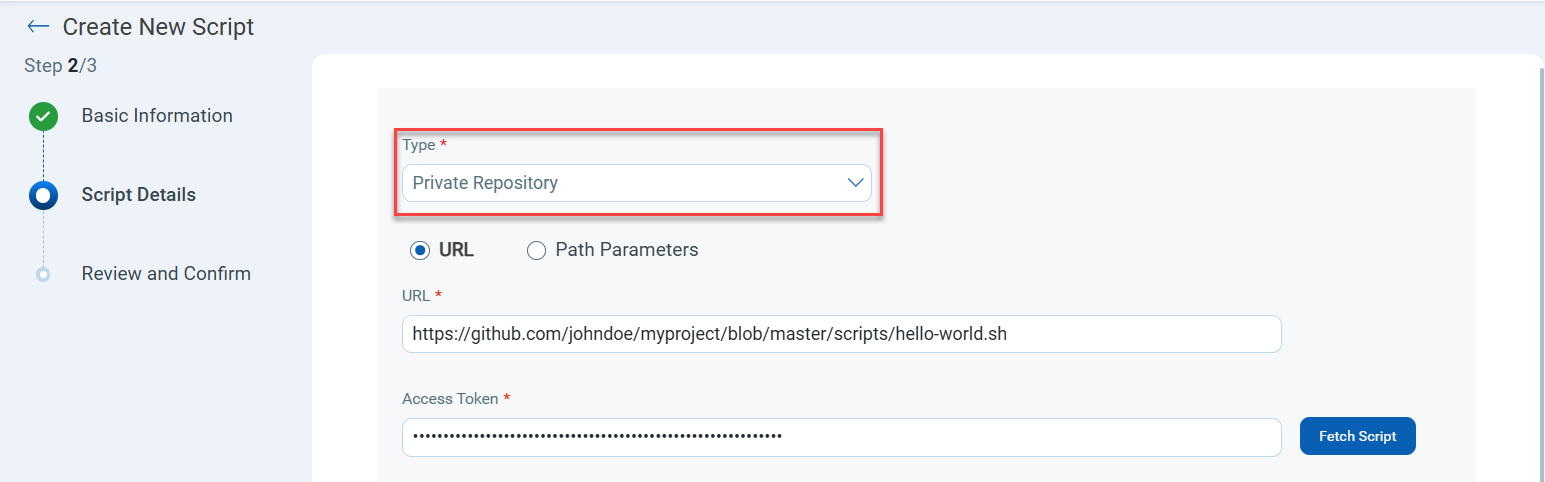
Option Usage URL
- In the URL text box, enter the URL of the file/folder for the GitHub private repository.
- In the Access Token text box, enter the token to access the private repository you have specified.
Only GitHub classic tokens are supported.
Qualys recommends that you provide an access token that has no expiration limit.
Path Parameters
- In the Owner text box, enter the username of the GitHub repository.
- In the Repository name text box, enter the name of the private repository that you want to access.
- In the Branch text box, provide the branch name of the repository from which the file is to be imported. This is an optional requirement.
- In the Access Token text box, enter the token to access the private repository you have specified.
Only GitHub classic tokens are supported.
Qualys recommends that you provide an access token that has no expiration limit.
The following options are displayed if you select Public Repository:
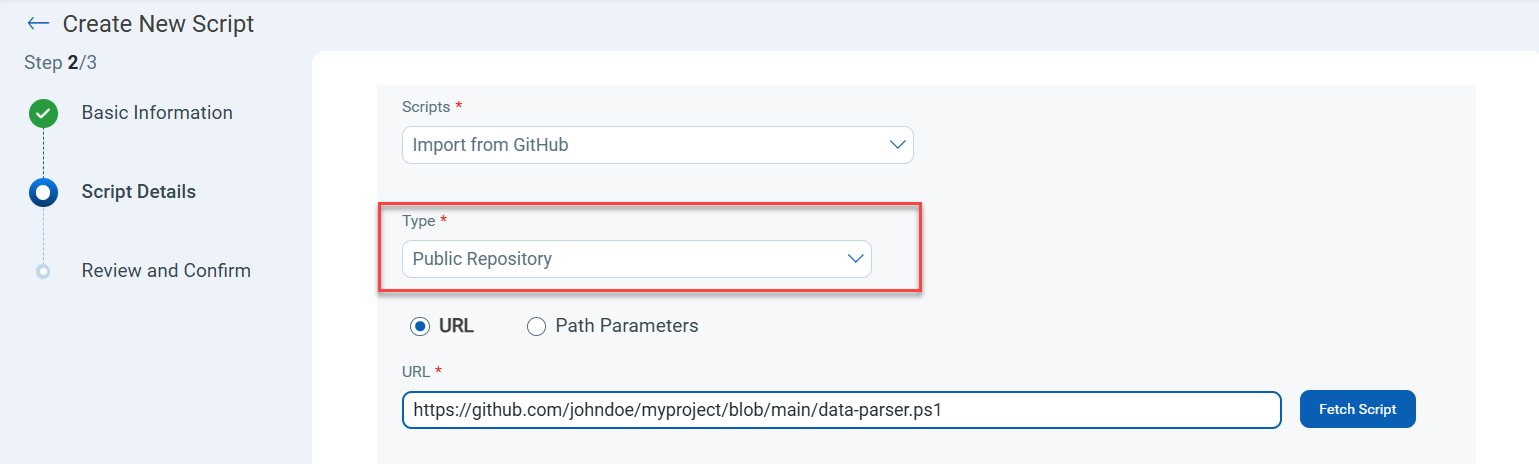
Option Usage URL
In the URL text box, enter the URL of the file or folder for the GitHub public repository.
Path Parameters
- In the Owner text box, enter the owner name of the GitHub repository.
- In the Repository name text box, enter the name of the public repository that you want to access.
- In the Branch text box, provide the branch name of the repository. This is an optional requirement.
- Click Fetch Script.
- Turn on the Sync the script with GitHub toggle to sync the script with GitHub.
The following options become available:
- On Demand: Select if you want to manually sync the script with GitHub.
- Automated: Select if you want the script to sync automatically with the GitHub repository, which occurs every four hours.
Even if you select the Automated option, you can initiate an on-demand sync with GitHub at any point from the Scripts tab by selecting Quick Actions > Sync with GitHub now. Similarly, you can disable auto-sync by selecting Quick Actions > Disable auto sync.
- Select the Create script in approved state checkbox if you want the script to be ready for execution without approval.
This option is available only to the Manager user accounts.
-
Click Next.
If the script is not created in an approved state, it is listed as Pending Test on the Scripts tab.
Import from GitLab
To import a script from GitLab, follow these steps:
- Select the Import from GitLab option on the Scripts Details page.
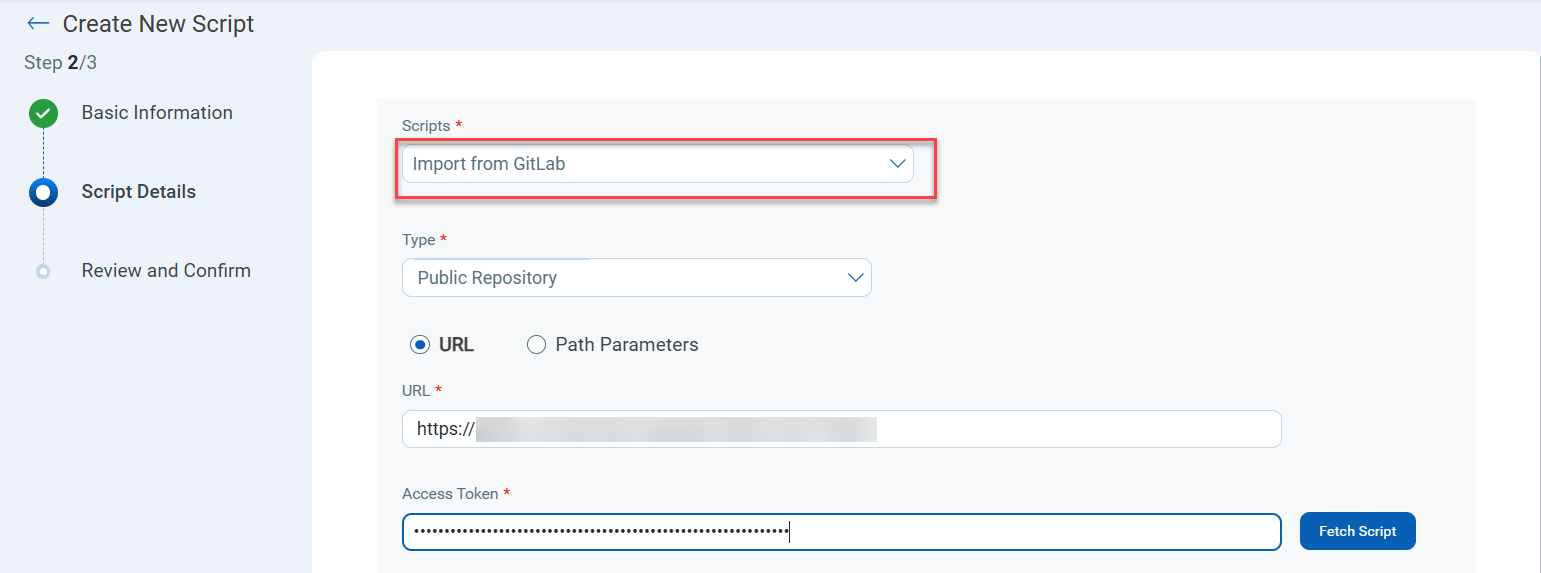
- Select a repository Type from the list to specify whether you want to import from a Private or Public Repository.
The following options are displayed if you select Private Repository:
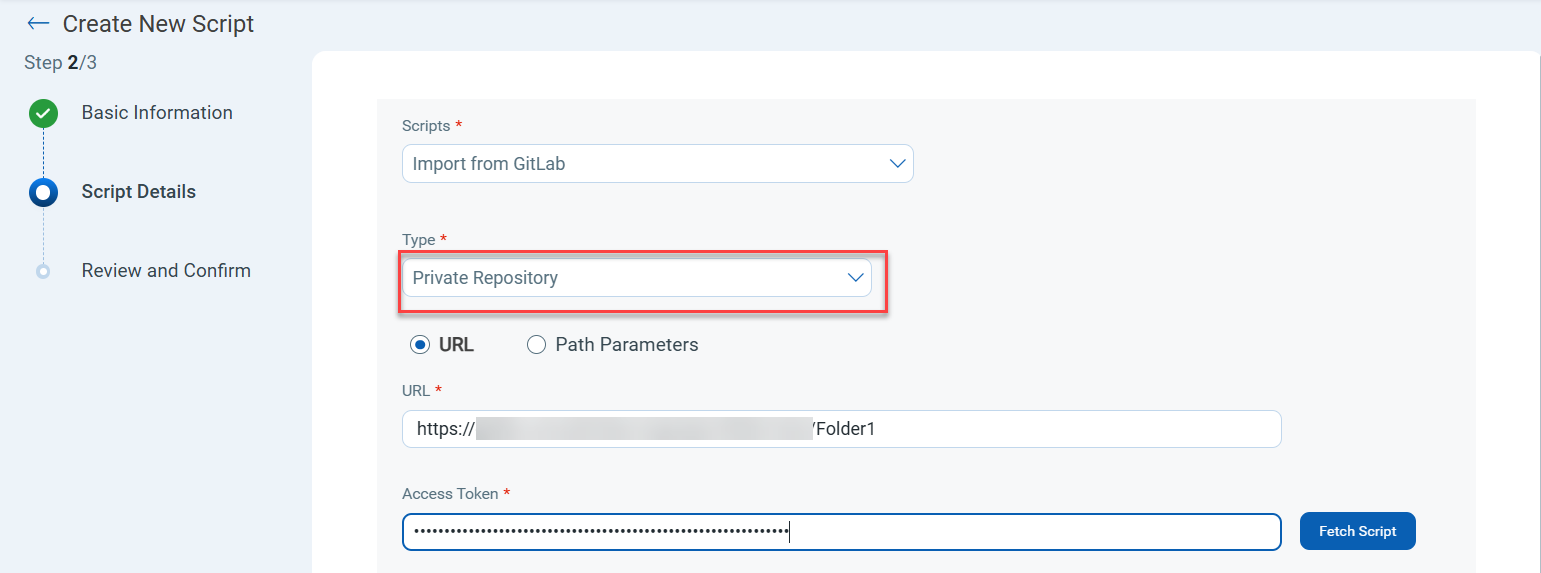
Option Usage URL
-
In the URL field, enter the URL of your GitLab private repository.
You can specify any GitLab domain, including a self‑hosted or custom domain (Ex.https://).gitlab.yourcompany.com or hostname or domain name -
Ensure the URL points to the correct repository path from which the script will be fetched.
- In the Access Token field, enter the token to access the private repository you have specified.
Qualys recommends that you provide an access token that has no expiration limit.
- Do not use a permalink from GitLab to fetch a script. A permalink points to a specific version of a file at a particular commit (for example:
https://gitlab.yourcompany.com/username/project/-/blob/abcd1234/file.txt, whereabcd1234is the commit hash). Using a permalink prevents the script from syncing because it always refers to an older, fixed commit. - Always use the Web URL from the browser’s address bar instead. Ensure you always copy the Web URL only up to the
filename.extension. Do not copy the text "?ref_type=heads" from the URL.
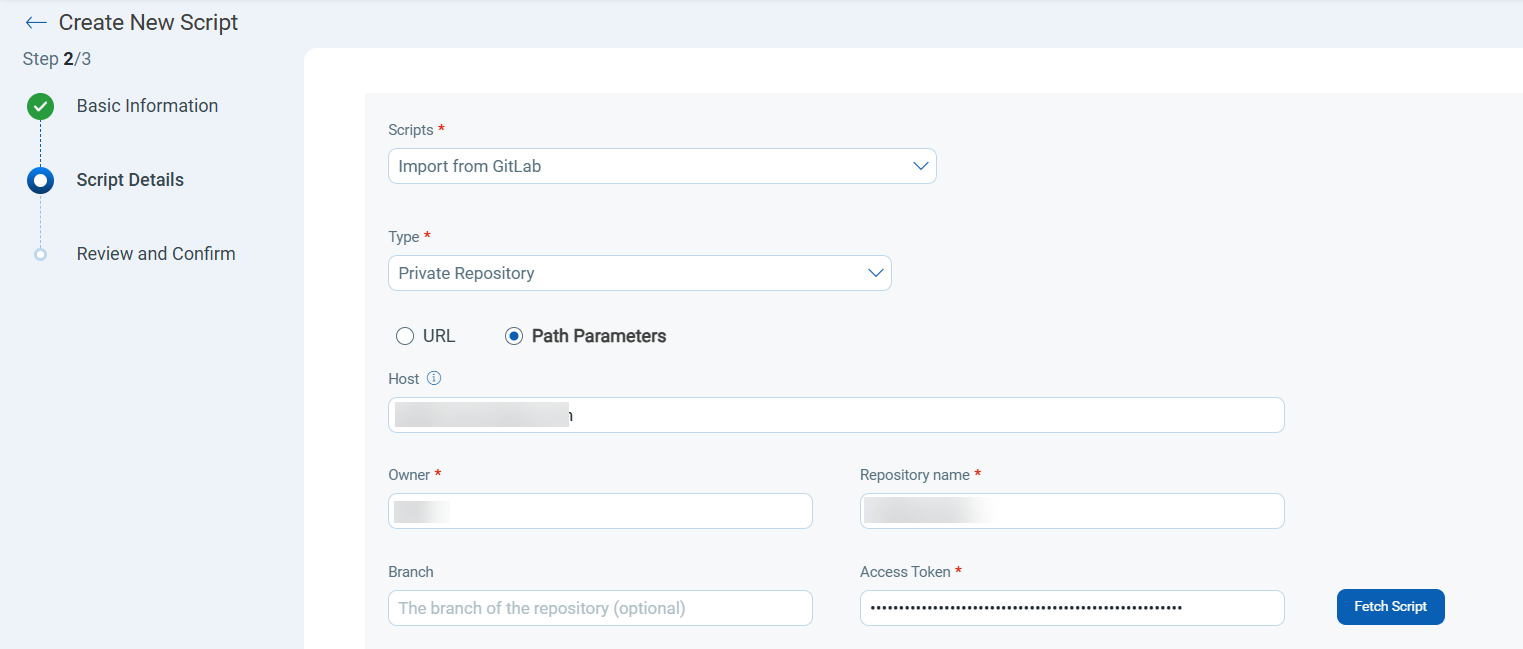
Path Parameters
- In the Host field, enter the
GitLab hostnameordomain name(Ex.gitlab.yourcompany.com or hostname or domain name).
If left blank,gitlab.comis used by default. - In the Owner field, enter the owner name of the GitLab repository.
- In the Repository name field, enter the name of the private repository that you want to access.
- (Optional) In the Branch field, provide the branch name of the repository from which the file is to be imported.
- In the Access Token text box, enter the token to access the private repository you have specified.
Qualys recommends that you provide an access token that has no expiration limit.
The following options are displayed if you select Public Repository:
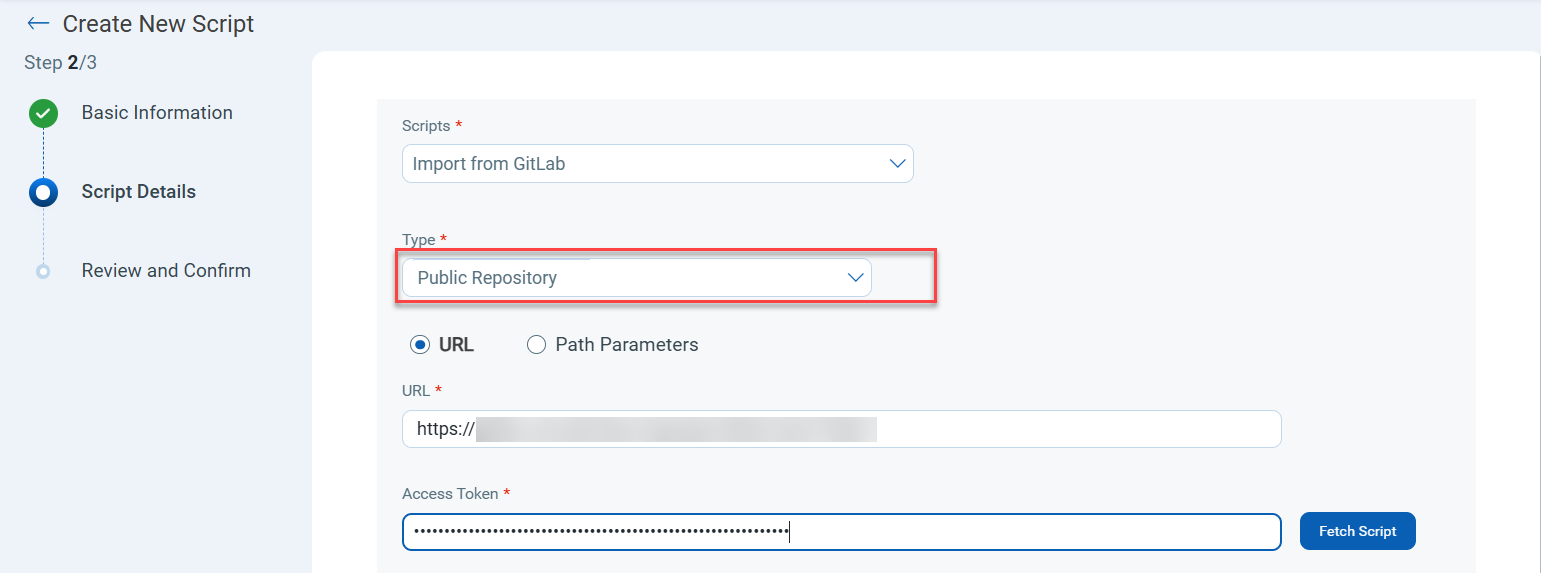
Option Usage URL
In the URL field, enter the URL of the GitLab public repository.
You can specify any GitLab domain, including a self‑hosted or custom domain (for example:
https://gitlab.yourcompany.com or hostname or domain name).- Do not use a permalink from GitLab to fetch a script. A permalink points to a specific version of a file at a particular commit (for example:
https://gitlab.yourcompany.com/project/-/blob/abcd1234/file.txt, whereabcd1234is the commit hash). Using a permalink prevents the script from syncing because it always refers to an older, fixed commit. - Always use the Web URL from the browser’s address bar instead. Ensure you always copy the Web URL only up to the
filename.extension. Do not copy the text "?ref_type=heads" from the URL.
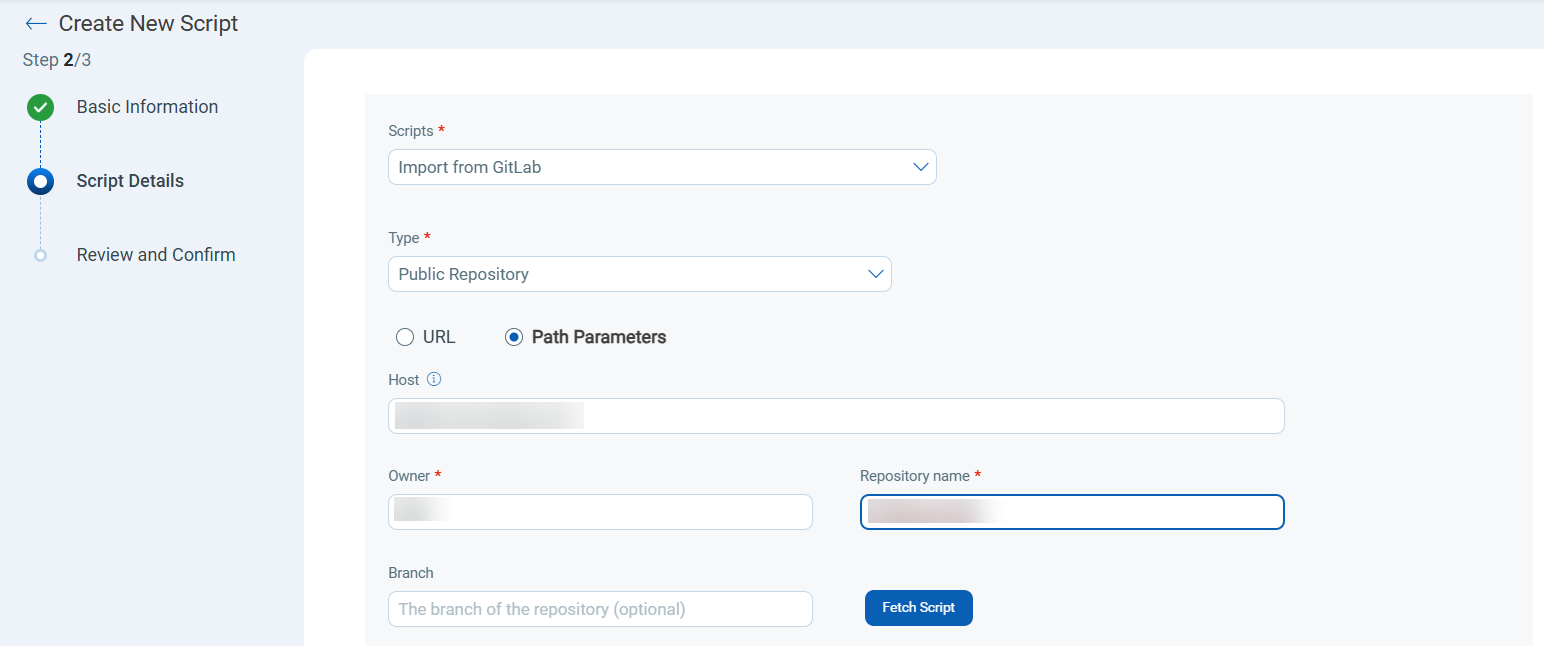
Path Parameters
- In the Host field, enter the
GitLab hostnameordomain name(Ex.gitlab.yourcompany.com or hostname or domain name).
If left blank,gitlab.comis used by default. - In the Owner field, enter the username of the GitLab repository.
- In the Repository name field, enter the name of the public repository that you want to access.
- (Optional) In the Branch field, provide the branch name of the repository.
Ensure that the self-hosted GitLab Host URL is accessible from the Qualys Enterprise TruRisk™ platform. If the URL is not accessible, contact your Technical Account Manager (TAM) for assistance.
-
- Click Fetch Script.
If your provided URL contains a folder with many scripts, you can navigate and select the script you want.
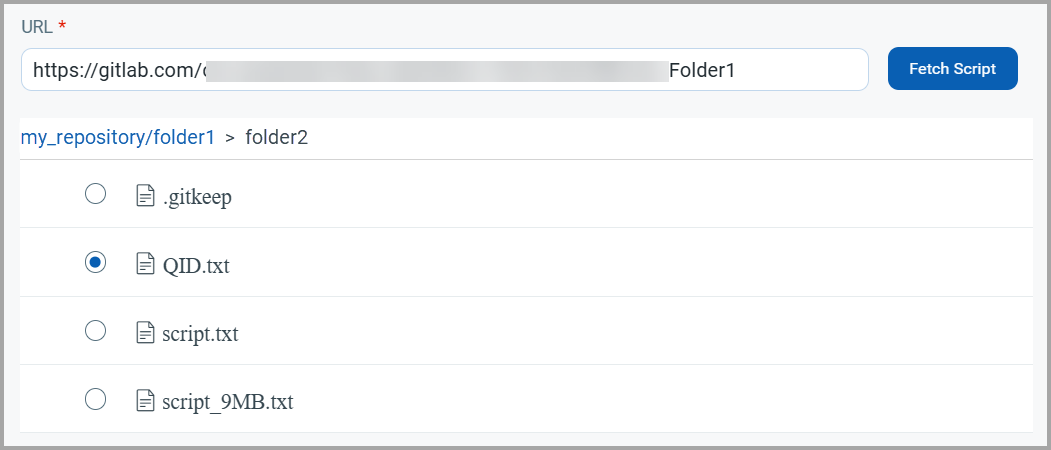
Your selected script content will be displayed.
- Turn on the Sync the script with GitLab toggle.
The following sync options become available:
- On Demand: Select if you want to manually sync the script with GitLab.
- Automated: Select if you want the script to sync automatically with the GitLab repository, which occurs every four hours.
Even if you select the Automated option, you can initiate an on-demand sync with GitLab at any point from the Scripts tab by selecting Quick Actions > Sync with GitLab now. Similarly, you can disable auto-sync by selecting Quick Actions > Disable auto sync. For more information on all quick actions, refer to Quick Actions for Scripts.
- Select the Create script in approved state checkbox if you want to create the script in the approved state.
This option is available only to the Manager user accounts.
-
Click Next.
You can view the created script in the Scripts tab. If the script is not created in an approved state, it is listed as Pending Test.
Import a Predefined Script
CAR offers a collection of predefined scripts curated and maintained by the dedicated research team at Qualys. These scripts have customizable parameters, allowing you to modify and input values as needed to suit your specific requirements.
To import a predefined script, follow these steps:
- Select the Select a Predefined Script option on the Scripts Details section.
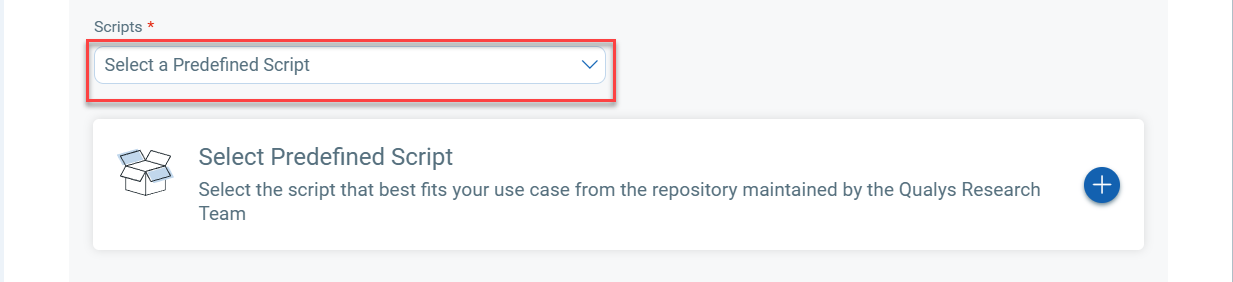
- Click
 to add a predefined script.
 - Select the required script type.
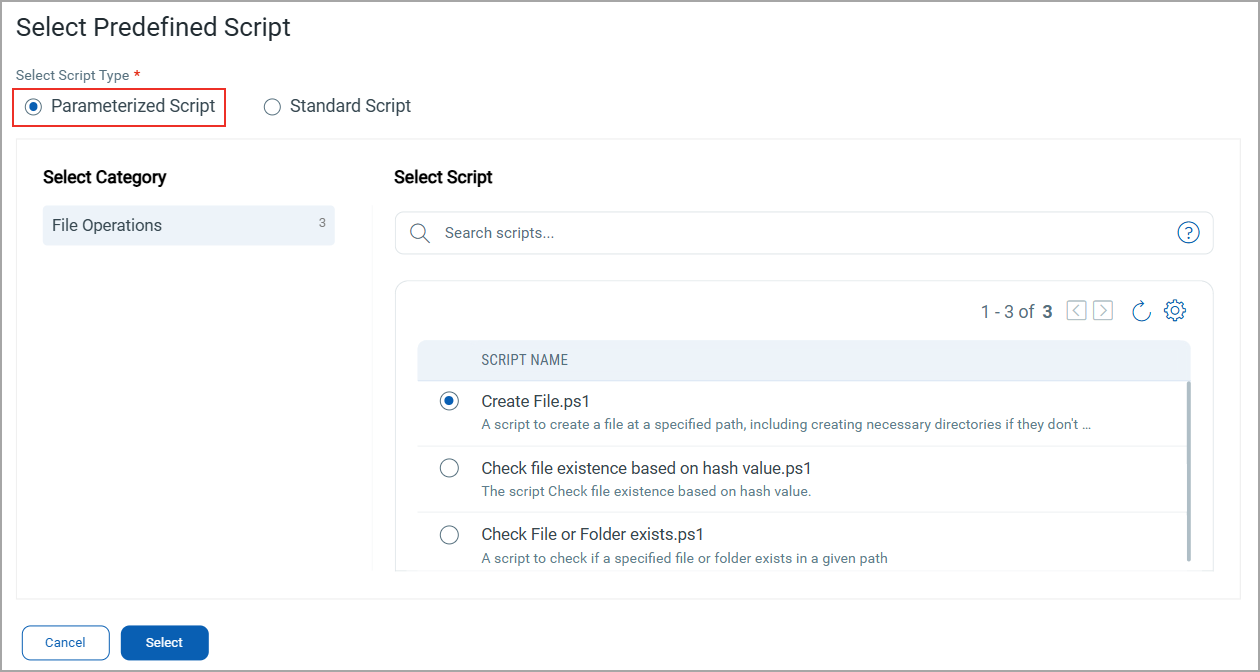
- Select the required category and script.
- Click Select.
The selected script is displayed.
- Click Next.
Related Topics
Reviewing and Approving Scripts
Exporting and Importing Scripts