Custom QID Scripts
The CAR application is now closely integrated with the VM/VMDR application. The integration between CAR and VM/VMDR allows you to create custom QIDs for vulnerabilities unique to your environment. You can identify potential risks in first-party and open-source software using VM/VMDR and CAR integration. You can create custom vulnerability definitions using detection scripts in the CAR application, providing a comprehensive overview of all vulnerabilities in your environment.
You can execute the Custom QID scripts only on the assets enabled for the VM/VMDR application.
Availability of Custom QID Detections in VMDR
The vulnerabilities detected by the script are shared with VMDR every four hours in UTC.
Example:
If a vulnerability is detected at 05:30 UTC, it will be available in VMDR after the next synchronization cycle, which runs at 08:00 UTC.
Creating Custom QID Script
You can configure the custom QID detection logic based on the script output or based on the return code.
For more information on this detection logic, refer to Configure Custom QID Detection Logic.
You can create up to 5000 Custom QIDs per subscription.
To create a Custom QID script, follow these steps:
- Navigate to Scripts > Scripts > Create > New Script.
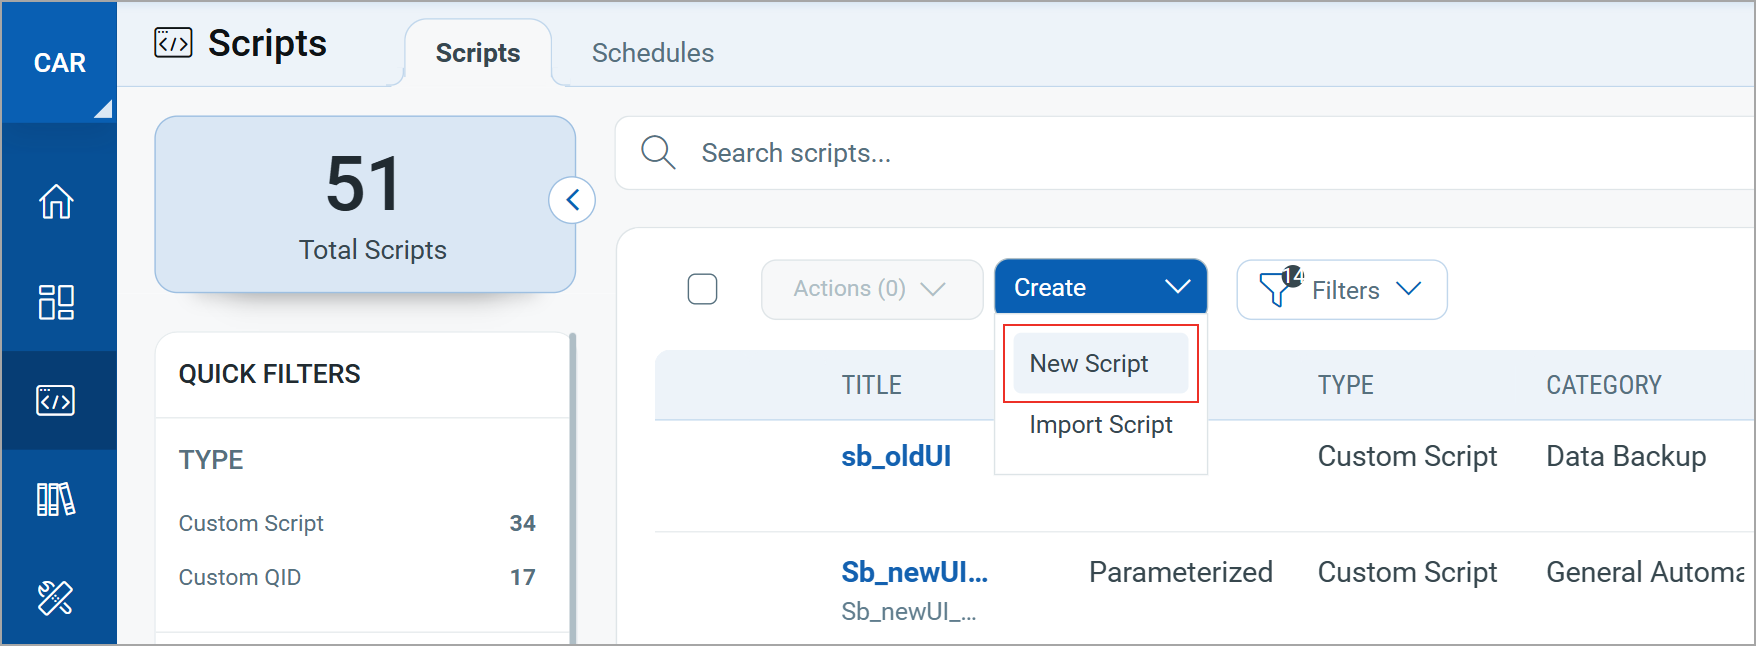
The Create New Script page is displayed.
- Enter a Name and Description for the script.
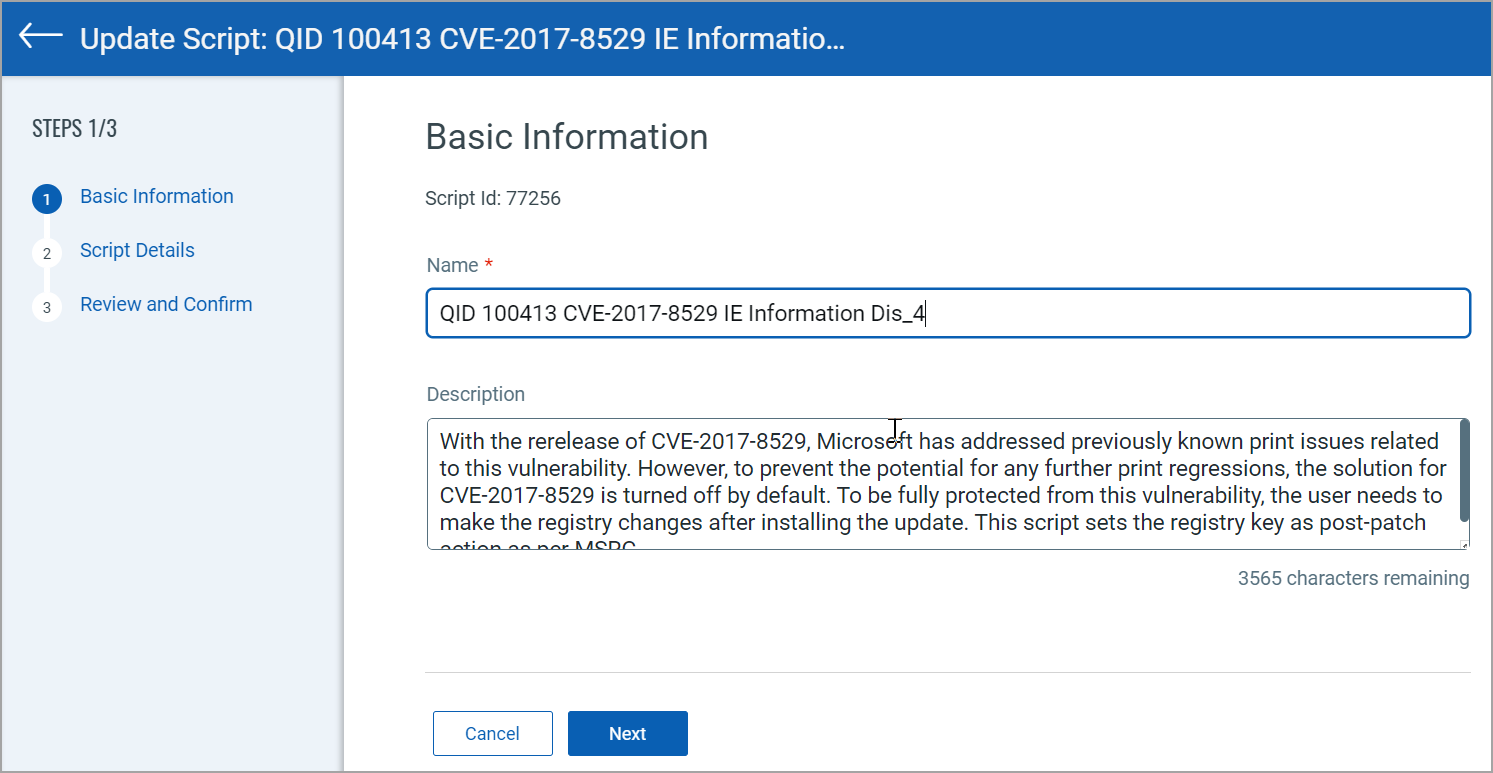
The Name of the script serves as the QID title by default. However, it can be customized.
The Description is a script description that serves as a vulnerability description. It is a part of 'Detection Summary' under 'Vulnerability Details'.
- Click Next to view the Script Details page is displayed.
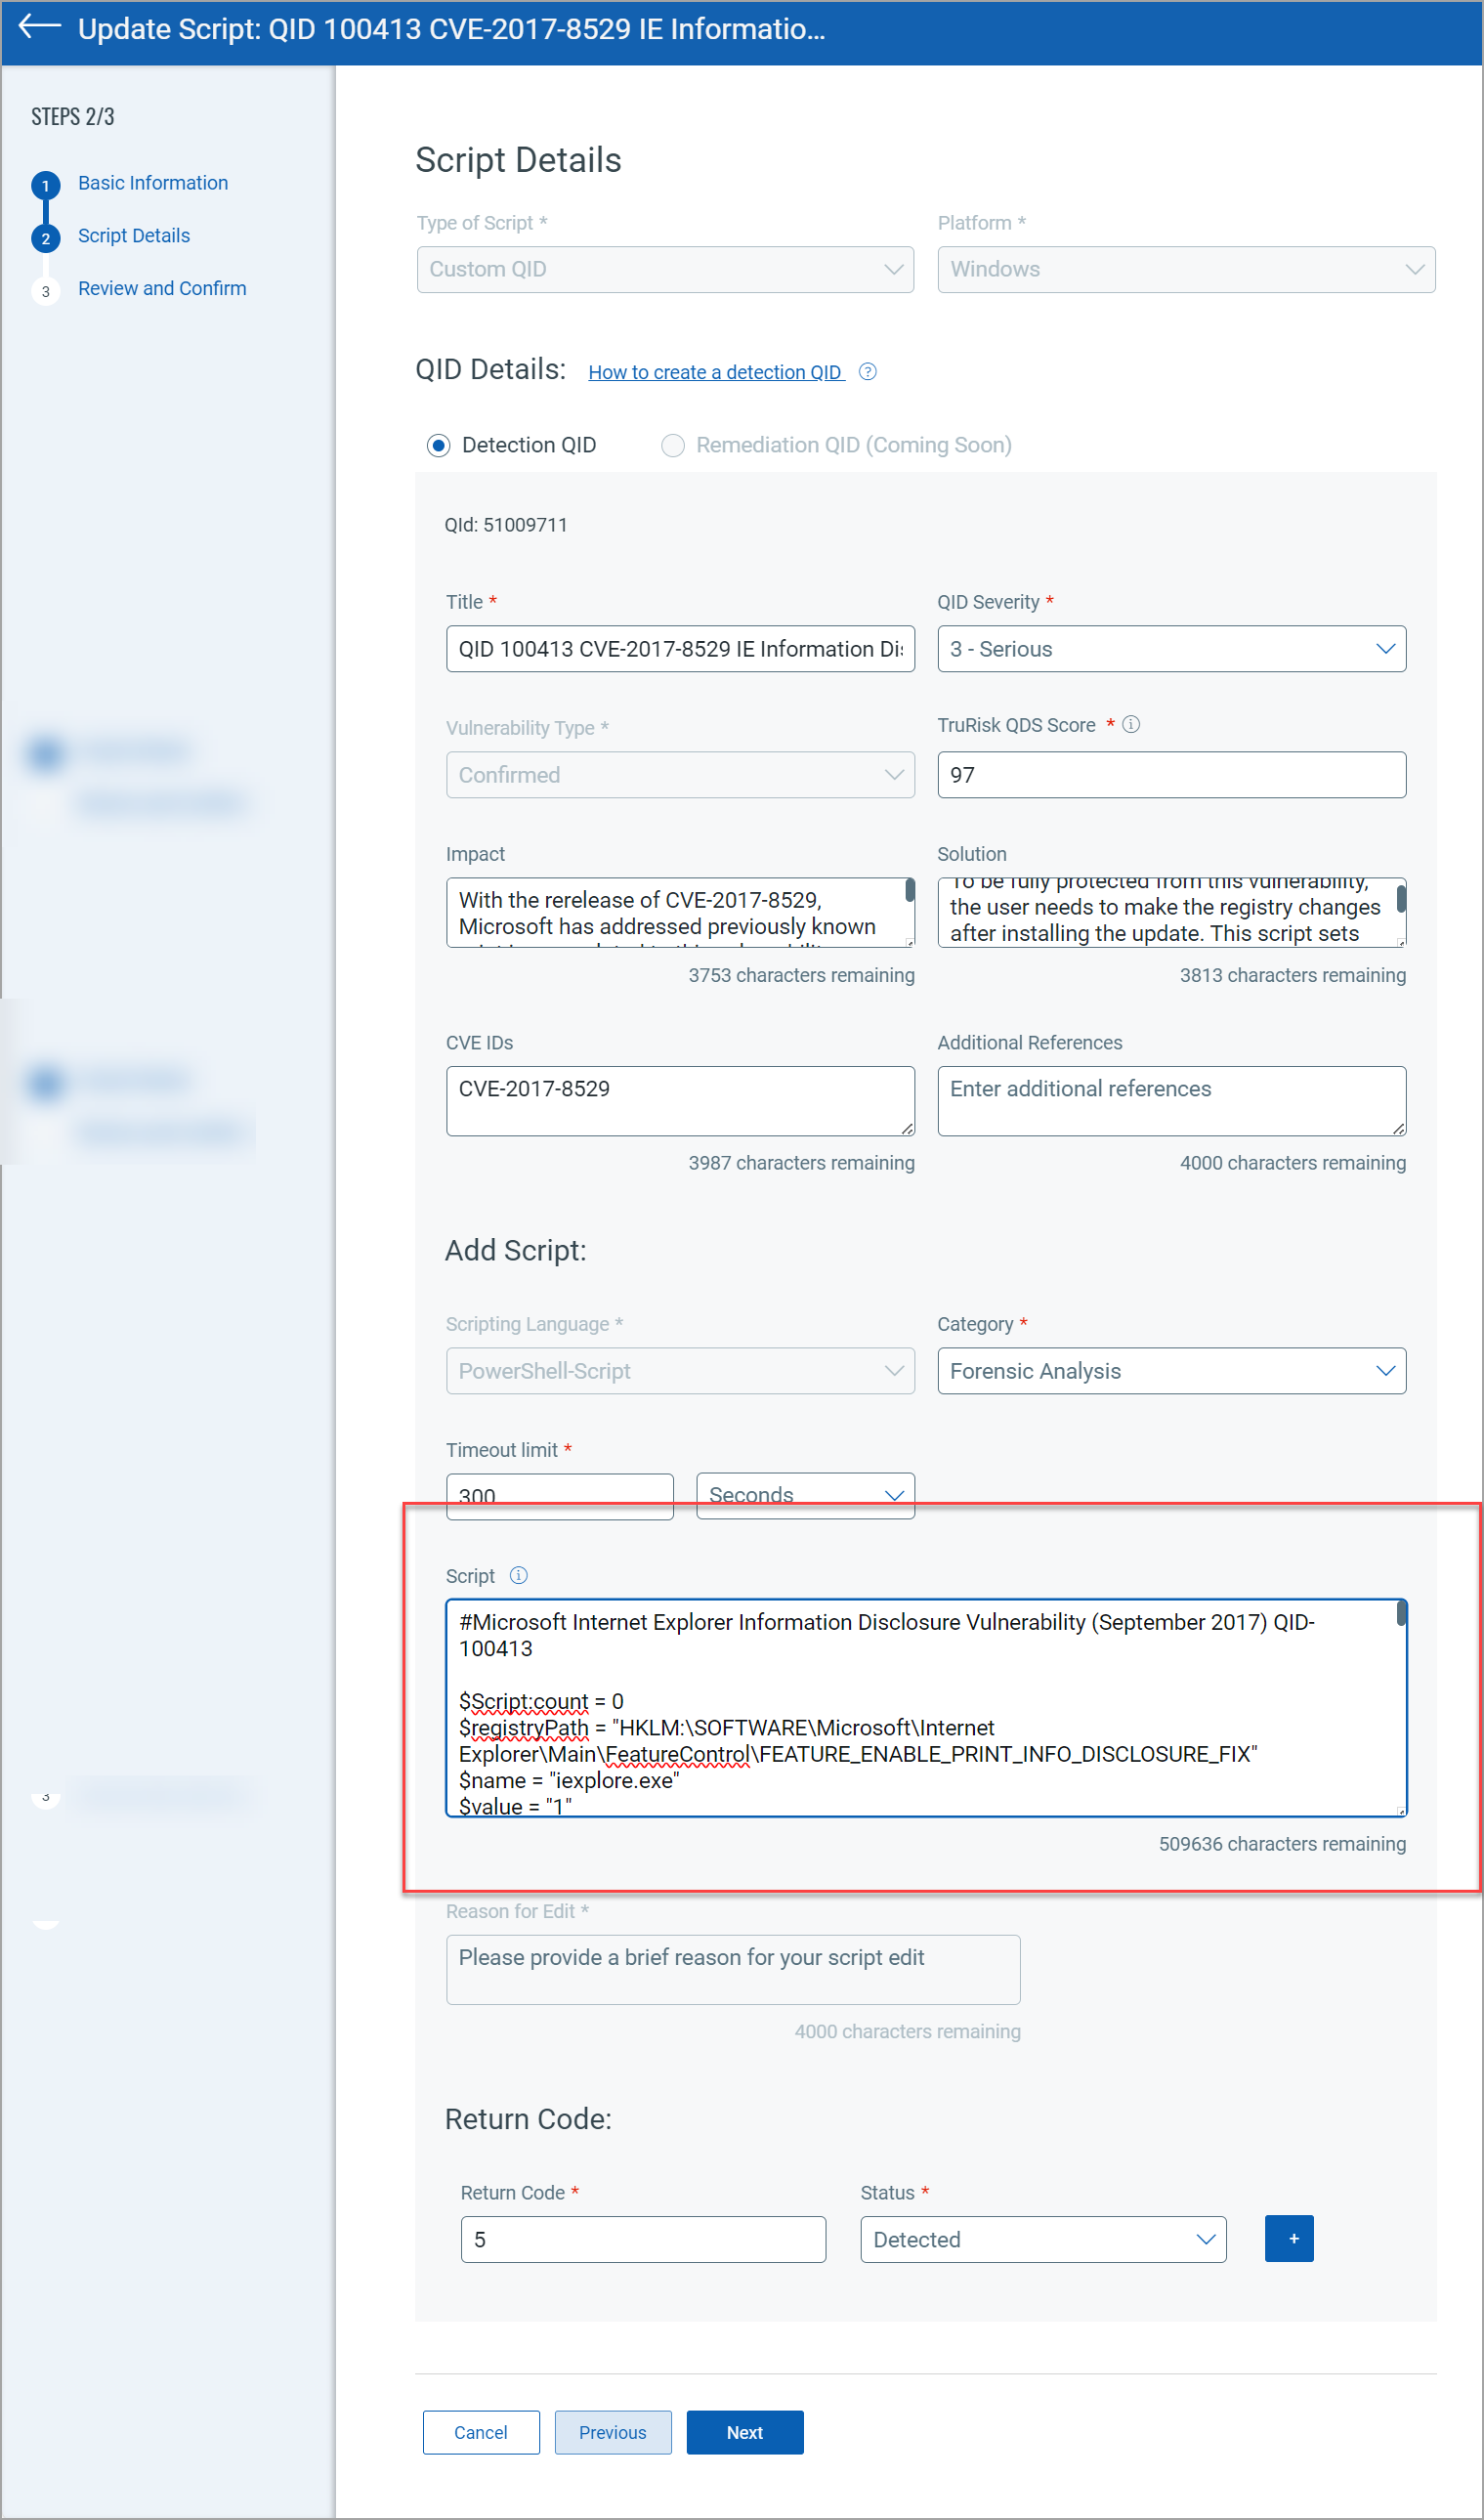
- Select the Type of Script as Custom QID.
The Detection QID option is automatically selected.
- Select Platform (Unix, Windows, Linux, MAC).
- Complete the following QID details:
Fields Description Title Provide a title to your QID. QID Severity It is a QID Severity. You can select from values 1 to 5. Vulnerability Type Select the vulnerability type as Confirmed, Potential, or Information Gathered. For Vulnerability Type, Potential and Confirmed, you can provide the TruRisk QDS Score. However, for Vulnerability Type, Information Gathered, you can not provide the TruRisk QDS Score.
TruRisk Qualys Detection Score (QDS) Provide TruRisk QDS score. Impact Provide the details of the possible outcome if the vulnerability is exploited. Solution Provide a verified solution for the impact. CVE IDs Provide a CVE ID that is associated with a specific QID. Additional References Provide a URL or an ID as an additional reference. - From Add Script, select the Scripting Language from the list.
- Select the Scripting language in which you want to write the script.
The list of scripting languages for Windows, Unix, and Linux is different. When you select Linux or Unix as a Platform, you get scripting languages such as Lua, Perl, Python, and Shell in the drop-down list. Similarly, for Windows, we support scripting languages such as PowerShell-Command, PowerShell-Script, Python, and VBScript.
- Select a Category to label the script based on the use case.
- Specify the Timeout Limit in seconds, minutes, or hours.
The Timeout Limit lets you define how long a script must be in execution.
The Timeout Limit for all Windows, Linux, and Unix assets ranges from one second to 48 hours. The default value is 300 seconds.
- In the Scripts section, select Enter Script and manually enter the script by typing or copy-pasting it from another source.
You also have the following options to provide the script:
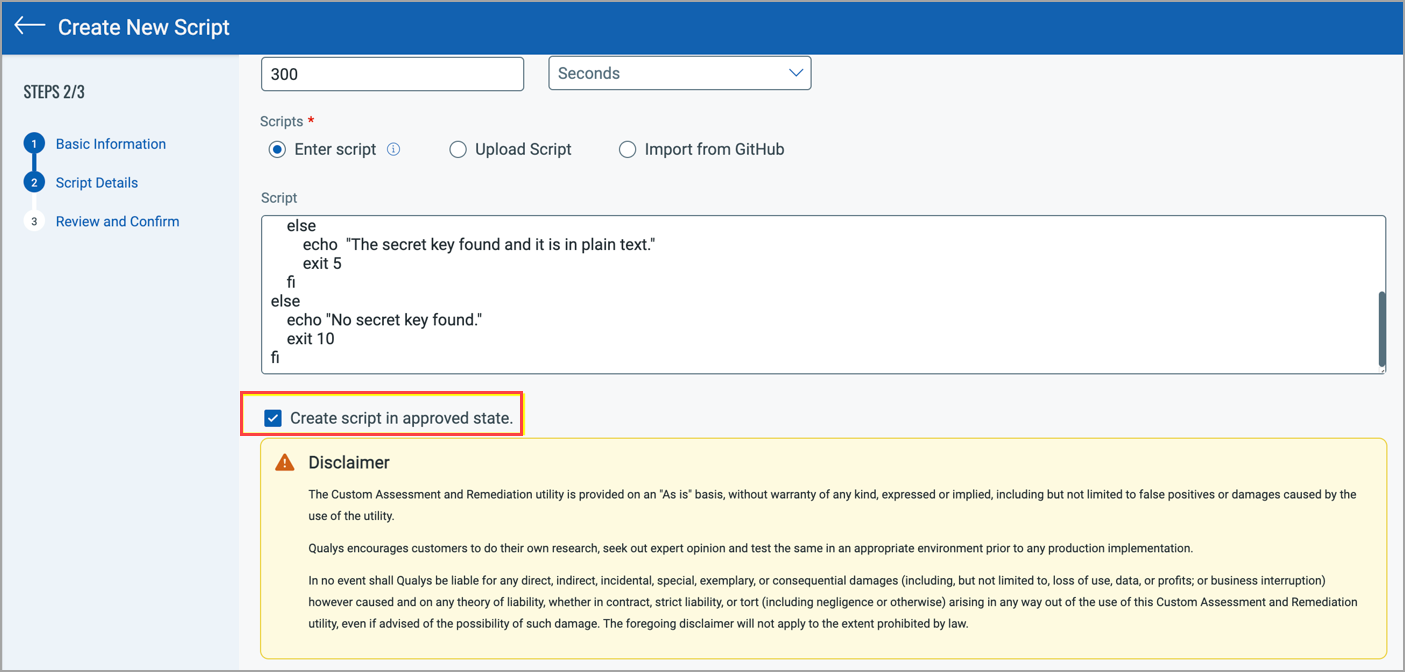
- Select the Create Script in the Approved state checkbox.
This option is available only for the manager role.
The user with any other user role must get the script approved by the authorized user. You can view the details on Qualys CAR RBAC.
- Select the Detection Logic for your script.
Click drop-downs below to select and configure the detection logic:
Based on Return CodeBased on Return Code
Based on Script OutputBased on Script OutputTo configure detection logic Based on Return Code, follow these steps:
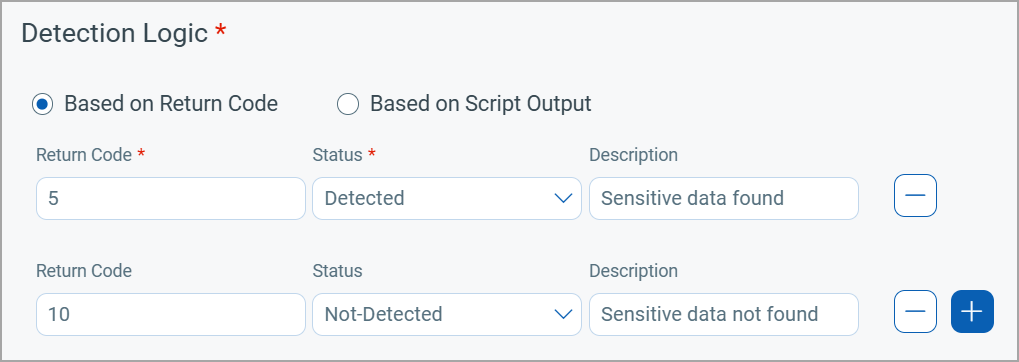
- Enter a Return Code based on the provided script.
- Select a Status from the list to associate it with the Return Code.
You can select the Status of the return code as Detected or Not-Detected. - (Optional) Enter a Description to each return codes.
For more information on detection logic based on return code, refer to Detection based on Return Codes.
You can provide multiple return codes for multiple scenarios. We recommend to avoid using the reserved operating system return codes.
QID is marked detected or not detected based on the exit code returned by the script you provide. We recommend you customize the script to return different exit codes based on your requirements.
You may want to use multiple exit codes in a custom QID script for detection. Therefore, we added the capability to add multiple return code mappings while creating a custom QID.
Example script for the Return Code
#!/bin/bash
# Start the timer
SECONDS=0
# Function to find OpenSSL versions in specified libraries
lib_openssl_ver() {
    local lib_name=$1

    # Find libraries while excluding specific file systems
    lib_list=$(find / -name "$lib_name" -xdev \
        ! -fstype nfs ! -fstype nfs4 ! -fstype cifs ! -fstype smbfs \
        ! -fstype gfs ! -fstype gfs2 ! -fstype safenetfs ! -fstype secfs \
        ! -fstype gpfs ! -fstype smb2 ! -fstype vxfs ! -fstype vxodmfs \
        ! -fstype afs ! -fstype acfs 2>/dev/null)

    for i in $lib_list; do
        if ! command -v strings &>/dev/null; then
            ver=$(grep --text -o 'OpenSSL [[:digit:]][^ ]*' "$i" 2>/dev/null |
                sort | uniq | tail -n 1 | awk '{print $2}' 2>/dev/null)
        else
            ver=$(strings "$i" 2>/dev/null |
                grep -i -E "^openssl[[:blank:]]+[[:digit:]][^ ]*" 2>/dev/null |
                sort | uniq | tail -n 1 | awk '{print $2}' 2>/dev/null)
        fi

        if [[ -n $ver ]]; then
            echo "Path: $i" | tee -a /usr/local/qualys/cloud-agent/openssl_findings.stdout 2>/dev/null
            echo "Version(s): $ver" | tee -a /usr/local/qualys/cloud-agent/openssl_findings.stdout 2>/dev/null
            echo "----------------------------------------" | tee -a /usr/local/qualys/cloud-agent/openssl_findings.stdout 2>/dev/null

            ver_chk=$(echo "$ver" | grep -E "3\.0\.[0-6]" 2>/dev/null)
            if [[ -n $ver_chk ]]; then
                flag=$((flag + 1))
            fi
        fi
    done
}
# Initialize output file and flag
output_file="/usr/local/qualys/cloud-agent/openssl_findings.stdout"
echo "Detecting OpenSSL version in libssl.so* and libcrypto.so*" | tee "$output_file" 2>/dev/null
echo "----------------------------------------" | tee -a "$output_file" 2>/dev/null
flag=0
# Scan for OpenSSL versions in specific libraries
lib_openssl_ver "libssl.so*"
lib_openssl_ver "libcrypto.so*"
echo "vulnerabilitiesFound: $flag" | tee -a "$output_file" 2>/dev/null
duration=$SECONDS
echo -e "\n$((duration / 60)) minutes and $((duration % 60)) seconds elapsed in script execution" | tee -a "$output_file" 2>/dev/null
# Check if the output file was created successfully
if ls "$output_file" &>/dev/null; then
    echo -e "\nScan Result File: $output_file"
else
    echo -e "\nCannot create output file: $output_file"
fi
Return Code:
99 - Detected
100 - Not Detected
You can configure multiple detection conditions for when to detect and when not to detect custom QIDs.
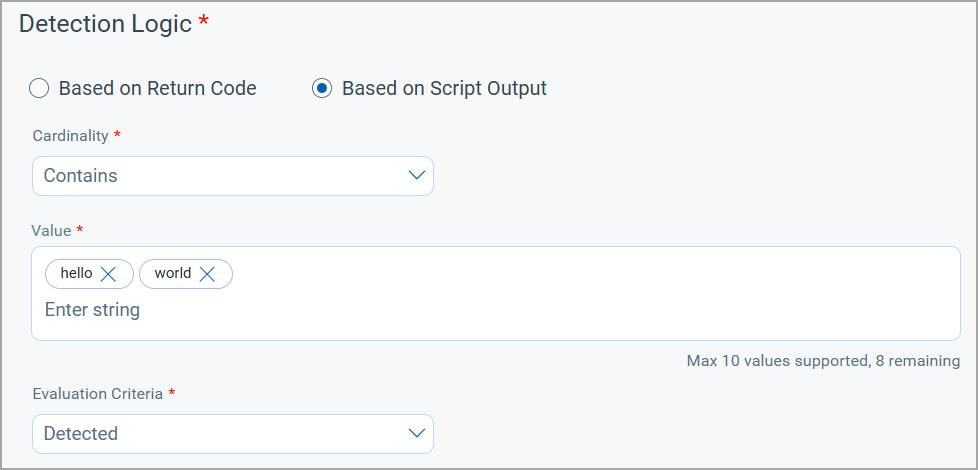
To configure detection logic Based on Script Output, follow these steps:- Select a Cardinality from the list.
- Enter detection Value.
You can enter maximum 10 values, including regular expressions or string values.
- Select a Evaluation Criteria from the list.
You can select the criteria as Detected or Not-Detected.
For more information on detection logic based on script output, refer to Detection Based on Script Output
- Click Next to view the Review and Confirm page.
- Review the details and click Save, or you can click Save and Create Schedule to create a QID scan schedule.
To create a schedule, refer to Scheduling Scripts.
A unique QID number is generated. Additionally, the Custom QID Script is created and is available for viewing under the Scripts tab for easy access and management.
Once created, you can edit the script. However, you can not edit the Vulnerability Type while editing the script.
After the custom QID script is created you can execute the script. For more information, refer to Executing Scripts.
Script Input Options
While creating a script, the following options are available to provide the script content:
Enter Script
You can manually type the script in the Script text box. This method is recommended only for signed scripts. The script size limit for any asset on both Windows and Linux platforms is 500 KB.
To enter a script, follow these steps:
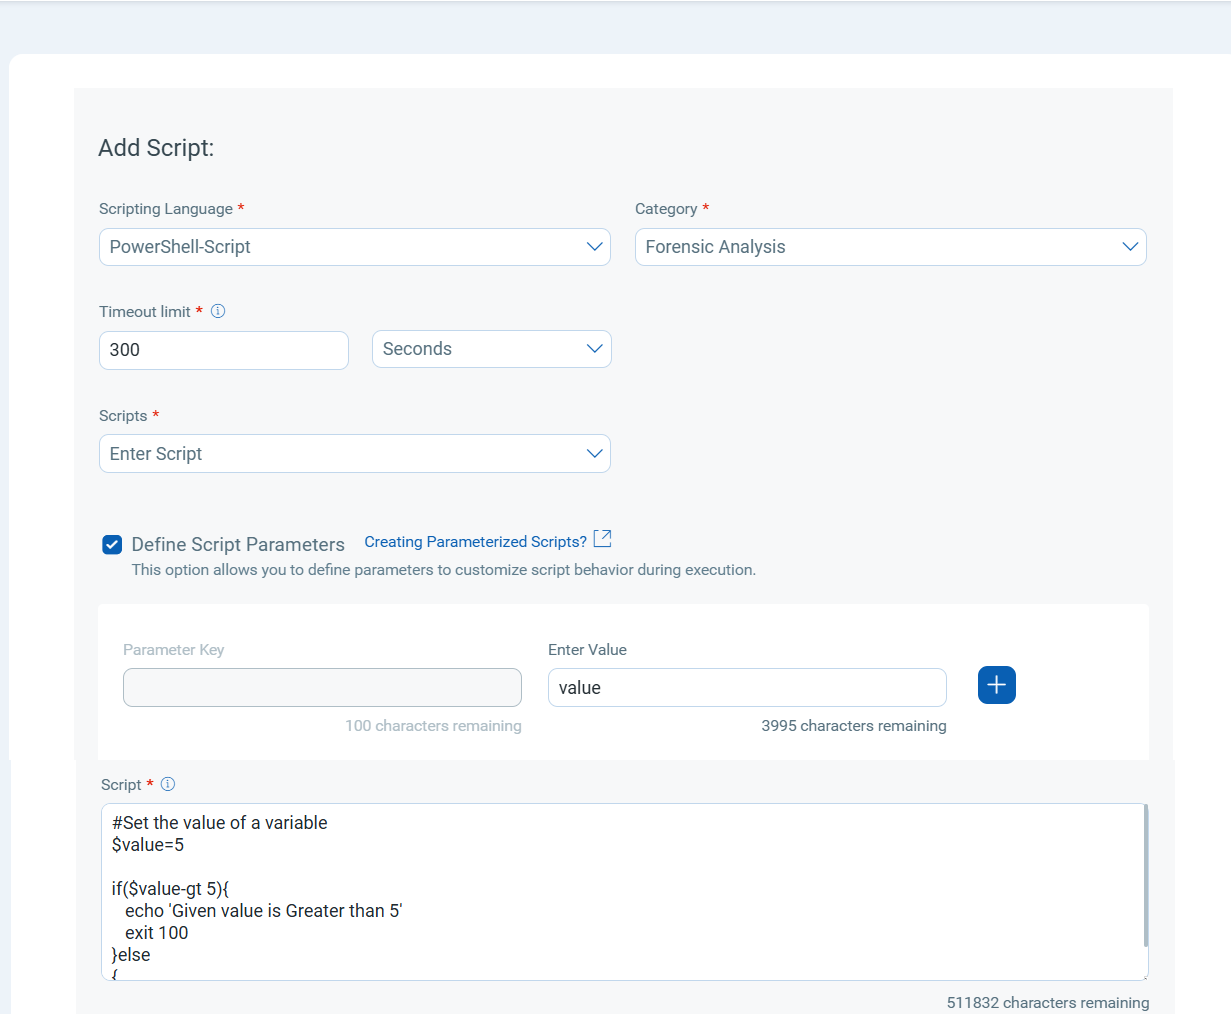
- Select the Enter script option on the Script Details page.
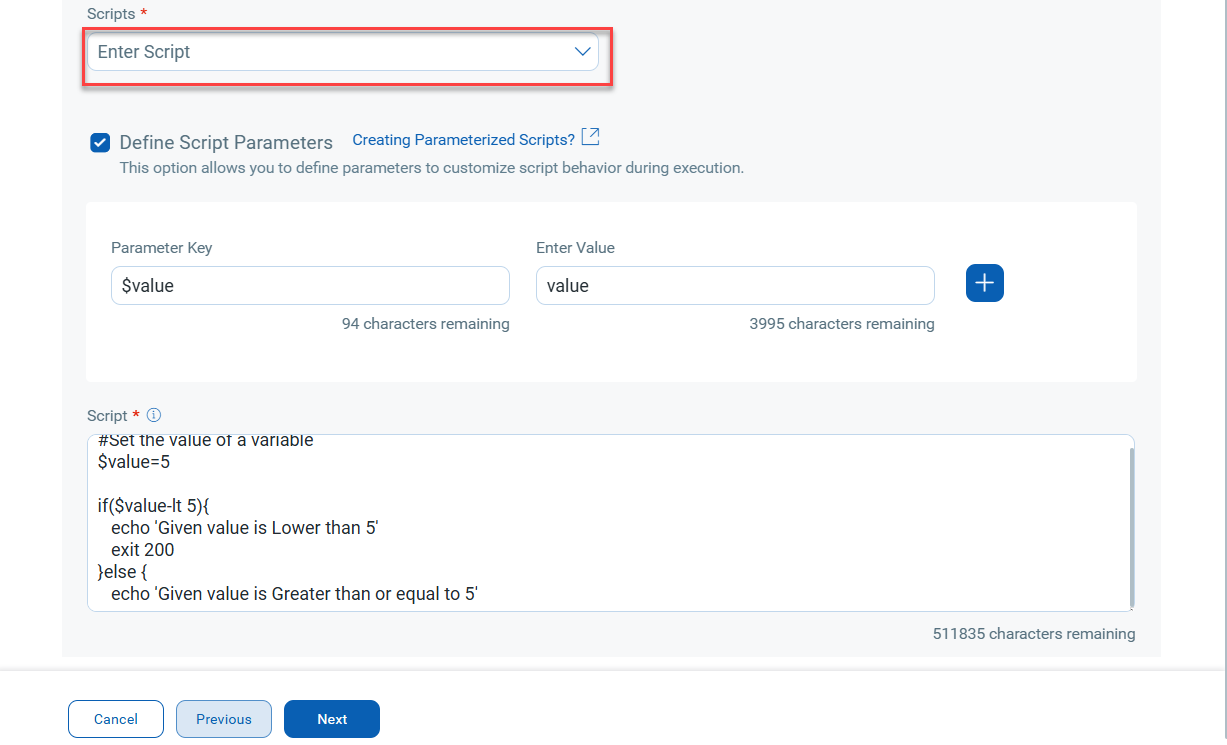
- Type the script in the Script box.
- If you want to define parameters for the script, turn on the Define Script Parameters toggle and provide the parameters along with their values.
For more information on parameterized script, refer to Creating Parameterized Script. - Select the Create Script in the Approved state checkbox.
This option is available only for the manager role.
The user with any other user role must get the script approved by the authorized user. You can view the details on Qualys CAR RBAC.
- Select the Detection Logic for your script.
The following detection logic are provided:
- Based on Return Code
- Based on Script Output
For more information on these detection logics, refer to Configure Custom QID Detection Logic.
- To configure detection logic Based on Return Code, follow these steps:
- Enter a Return Code based on the provided script.
- Select a Status from the list to associate it with the Return Code.
You can select the Status of the return code as Detected or Not-Detected. - (Optional) Enter a Description to each return codes.
For more information on detection logic based on return code, refer to Detection based on Return Codes.
You can provide multiple return codes for multiple scenarios. We recommend to avoid using the reserved operating system return codes.
QID is marked detected or not detected based on the exit code returned by the script you provide. We recommend you customize the script to return different exit codes based on your requirements.
You may want to use multiple exit codes in a custom QID script for detection. Therefore, we added the capability to add multiple return code mappings while creating a custom QID.
Example script for the Return CodeExample script for the Return Code
#!/bin/bash
# Start the timer
SECONDS=0
# Function to find OpenSSL versions in specified libraries
lib_openssl_ver() {
    local lib_name=$1

    # Find libraries while excluding specific file systems
    lib_list=$(find / -name "$lib_name" -xdev \
        ! -fstype nfs ! -fstype nfs4 ! -fstype cifs ! -fstype smbfs \
        ! -fstype gfs ! -fstype gfs2 ! -fstype safenetfs ! -fstype secfs \
        ! -fstype gpfs ! -fstype smb2 ! -fstype vxfs ! -fstype vxodmfs \
        ! -fstype afs ! -fstype acfs 2>/dev/null)

    for i in $lib_list; do
        if ! command -v strings &>/dev/null; then
            ver=$(grep --text -o 'OpenSSL [[:digit:]][^ ]*' "$i" 2>/dev/null |
                sort | uniq | tail -n 1 | awk '{print $2}' 2>/dev/null)
        else
            ver=$(strings "$i" 2>/dev/null |
                grep -i -E "^openssl[[:blank:]]+[[:digit:]][^ ]*" 2>/dev/null |
                sort | uniq | tail -n 1 | awk '{print $2}' 2>/dev/null)
        fi

        if [[ -n $ver ]]; then
            echo "Path: $i" | tee -a /usr/local/qualys/cloud-agent/openssl_findings.stdout 2>/dev/null
            echo "Version(s): $ver" | tee -a /usr/local/qualys/cloud-agent/openssl_findings.stdout 2>/dev/null
            echo "----------------------------------------" | tee -a /usr/local/qualys/cloud-agent/openssl_findings.stdout 2>/dev/null

            ver_chk=$(echo "$ver" | grep -E "3\.0\.[0-6]" 2>/dev/null)
            if [[ -n $ver_chk ]]; then
                flag=$((flag + 1))
            fi
        fi
    done
}
# Initialize output file and flag
output_file="/usr/local/qualys/cloud-agent/openssl_findings.stdout"
echo "Detecting OpenSSL version in libssl.so* and libcrypto.so*" | tee "$output_file" 2>/dev/null
echo "----------------------------------------" | tee -a "$output_file" 2>/dev/null
flag=0
# Scan for OpenSSL versions in specific libraries
lib_openssl_ver "libssl.so*"
lib_openssl_ver "libcrypto.so*"
echo "vulnerabilitiesFound: $flag" | tee -a "$output_file" 2>/dev/null
duration=$SECONDS
echo -e "\n$((duration / 60)) minutes and $((duration % 60)) seconds elapsed in script execution" | tee -a "$output_file" 2>/dev/null
# Check if the output file was created successfully
if ls "$output_file" &>/dev/null; then
    echo -e "\nScan Result File: $output_file"
else
    echo -e "\nCannot create output file: $output_file"
fi
Return Code:
99 - Detected
100 - Not Detected
- You can configure multiple detection conditions for when to detect and when not to detect custom QIDs.
To configure detection logic Based on Script Output, follow these steps:- Select a Cardinality from the list.
- Enter detection Value.
You can enter a maximum of 10 values, including regular expressions or string values. - Select an Evaluation Criteria from the list.
You can select the criteria as Detected or Not-Detected.For more information on detection logic based on script output, refer to Detection Based on Script Output.
- Enter the Return Code, Status, and Description based on the provided script.
You can provide multiple return codes for multiple scenarios. We recommend to avoid using the reserved operating system return codes.
QID is marked detected or not detected based on the exit code returned by the script you provide. We recommend you customize the script to return different exit codes based on your requirements.
You may want to use multiple exit codes in a custom QID script for detection. Therefore, we added the capability to add multiple return code mappings while creating a custom QID.
Upload Script
You can upload a script from your local drive. The script size limit for any asset on both Windows and Linux platforms is 500 KB.
To upload a script, follow these steps:
- Select the Upload Script option on the Script Details page.
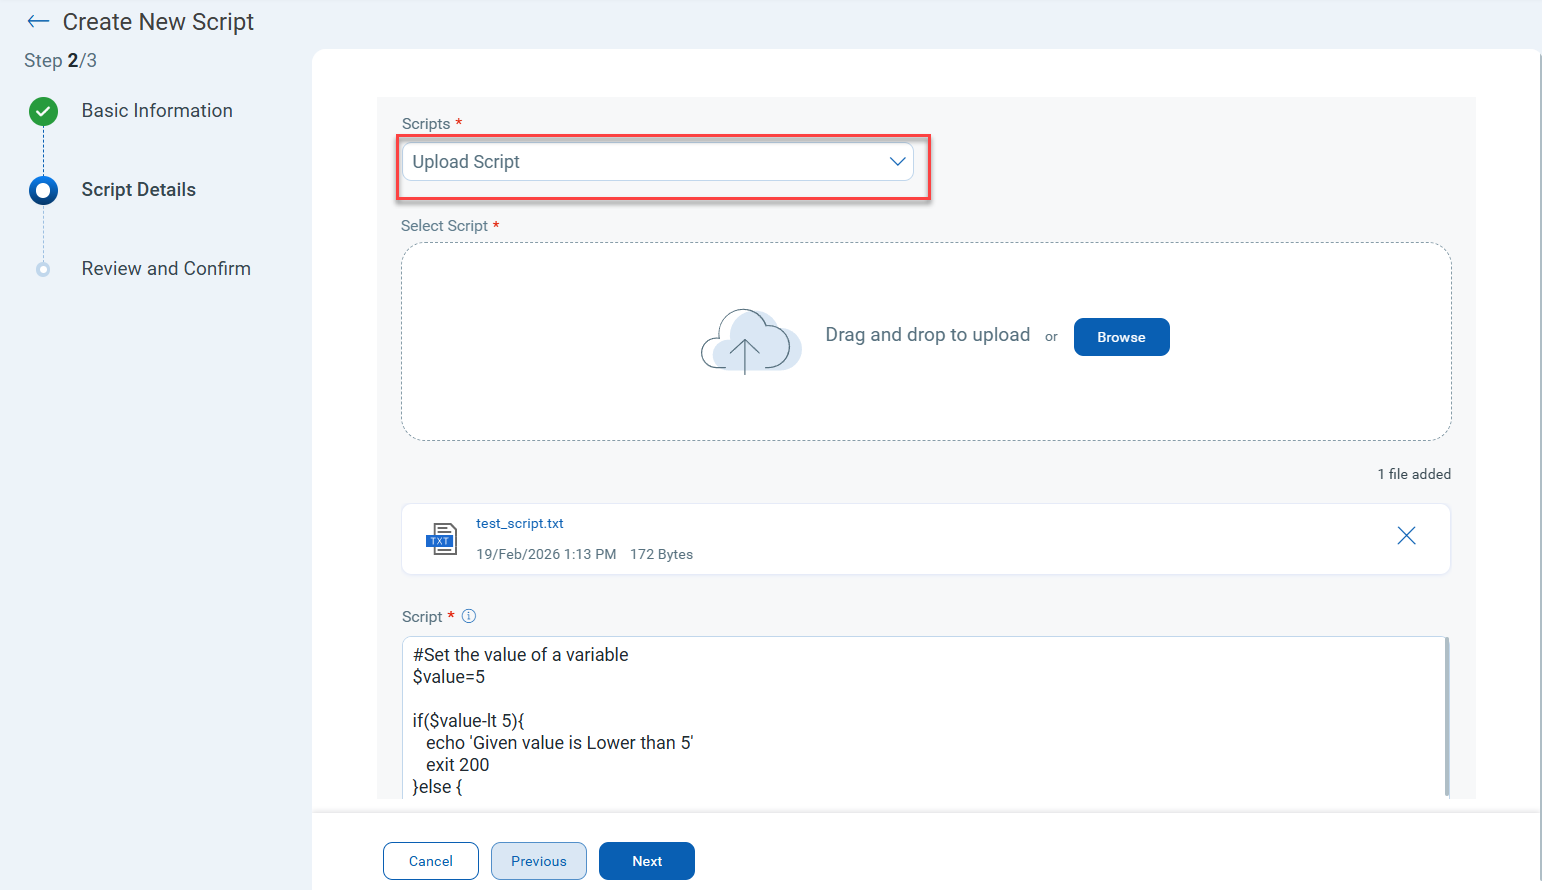
- Click Browse to navigate and upload the required script.
Once uploaded, the script content is displayed in read-only format in the Script text box.
If you are using a signed script, always use the browse mechanism to select it. This ensures that the signed script remains intact and can be executed on assets if the execution policy is set to AllSigned.
- Click Next.
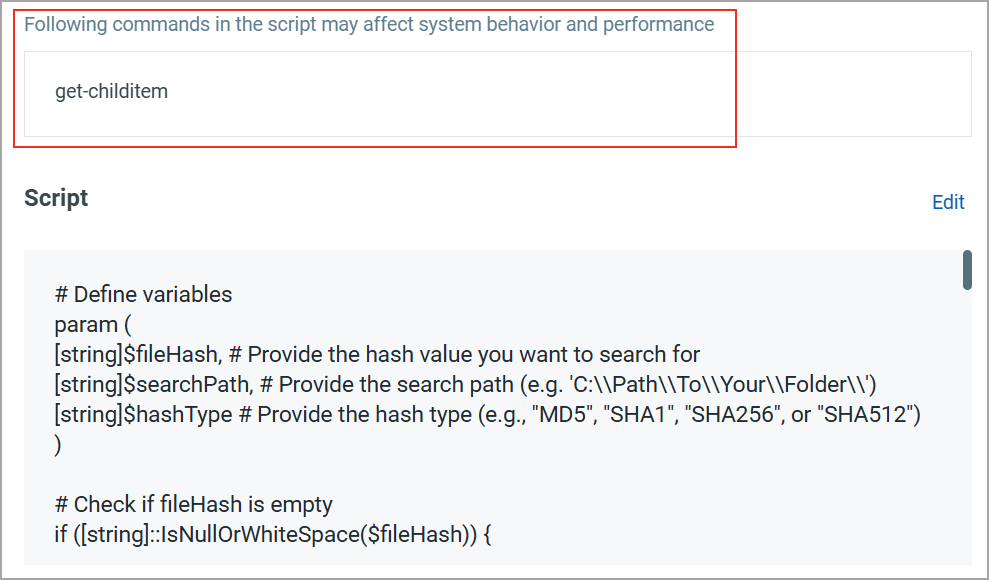
The Review and Confirm page displays the selections you have made for the script. It also highlights if the script you have entered contains any commands that may potentially impact the system's behavior and performance.
Import from GitHub
To import a script from GitHub, follow these steps:
- Select the Import from GitHub option on the Scripts Details page.

- Select a repository Type from the list to specify whether you want to import from a Private or Public Repository.
The following options are displayed if you select Private Repository:
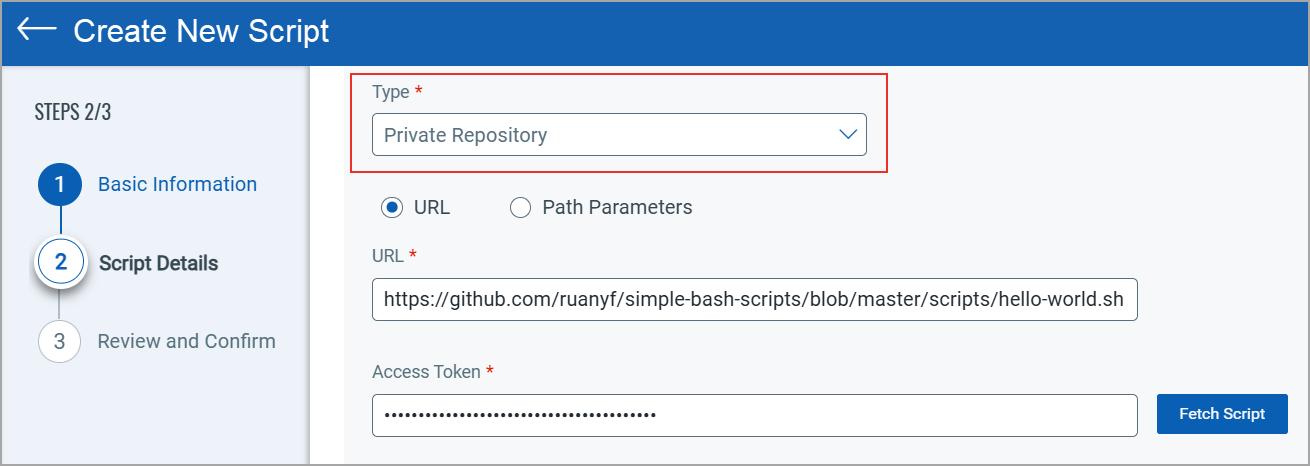
Option Usage URL
- In the URL text box, enter the URL of the file/folder for the GitHub private repository.
- In the Access Token text box, enter the token to access the private repository you have specified.
Only GitHub classic tokens are supported.
Qualys recommends that you provide an access token that has no expiration limit.
Path Parameters
- In the Owner text box, enter the username of the GitHub repository.
- In the Repository name text box, enter the name of the private repository that you want to access.
- In the Branch text box, provide the branch name of the repository from which the file is to be imported. This is an optional requirement.
- In the Access Token text box, enter the token to access the private repository you have specified.
Only GitHub classic tokens are supported.
Qualys recommends that you provide an access token that has no expiration limit.
The following options are displayed if you select Public Repository:
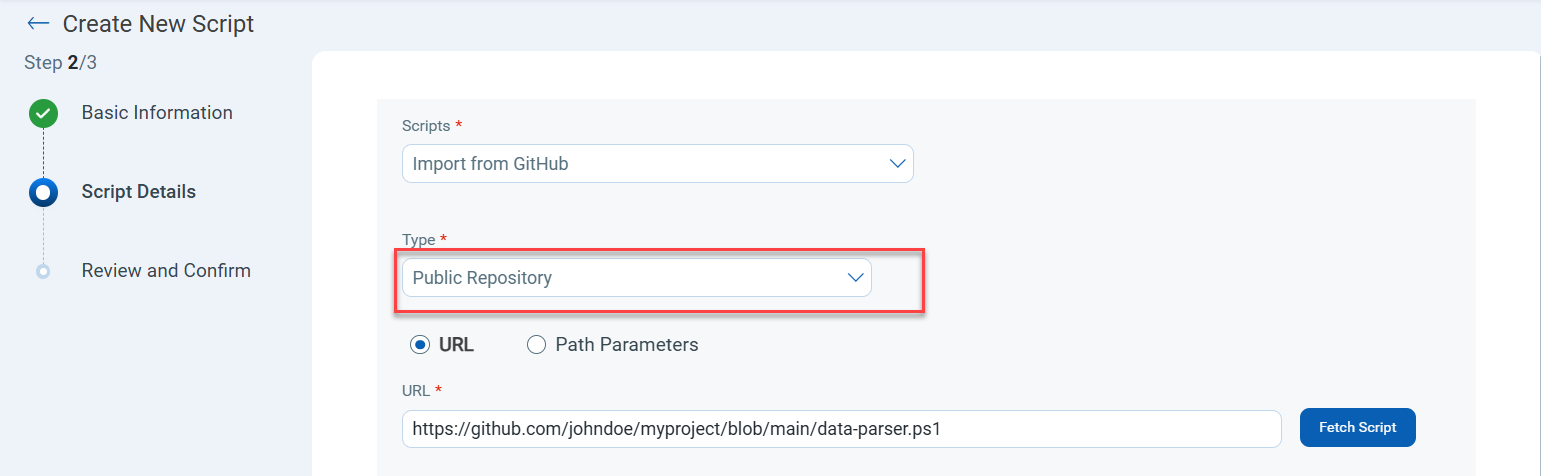
Option Usage URL
In the URL text box, enter the URL of the file or folder for the GitHub public repository.
Path Parameters
- In the Owner text box, enter the username of the GitHub repository.
- In the Repository name text box, enter the name of the public repository that you want to access.
- In the Branch text box, provide the branch name of the repository. This is an optional requirement.
- Click Fetch Script.
- Turn on the Sync the script with GitHub toggle to sync the script with GitHub.
The following options become available:
- On Demand: Select if you want to manually sync the script with GitHub.
- Automated: Select if you want the script to sync automatically with the GitHub repository, which occurs every four hours.
Even if you select the Automated option, you can initiate an on-demand sync with GitHub at any point from the Scripts tab by selecting Quick Actions > Sync with GitHub now. Similarly, you can disable auto-sync by selecting Quick Actions > Disable auto sync.
- Select the Create script in approved state checkbox if you want the script to be ready for execution without approval.
This option is available only to the Manager user accounts.
-
Type "I have reviewed the script and accept the risk" in the Risk Acceptance text box and click Next.
If the script is not created in an approved state, it is listed as Pending Test on the Scripts tab.
Import from GitLab
To import a script from GitLab, follow these steps:
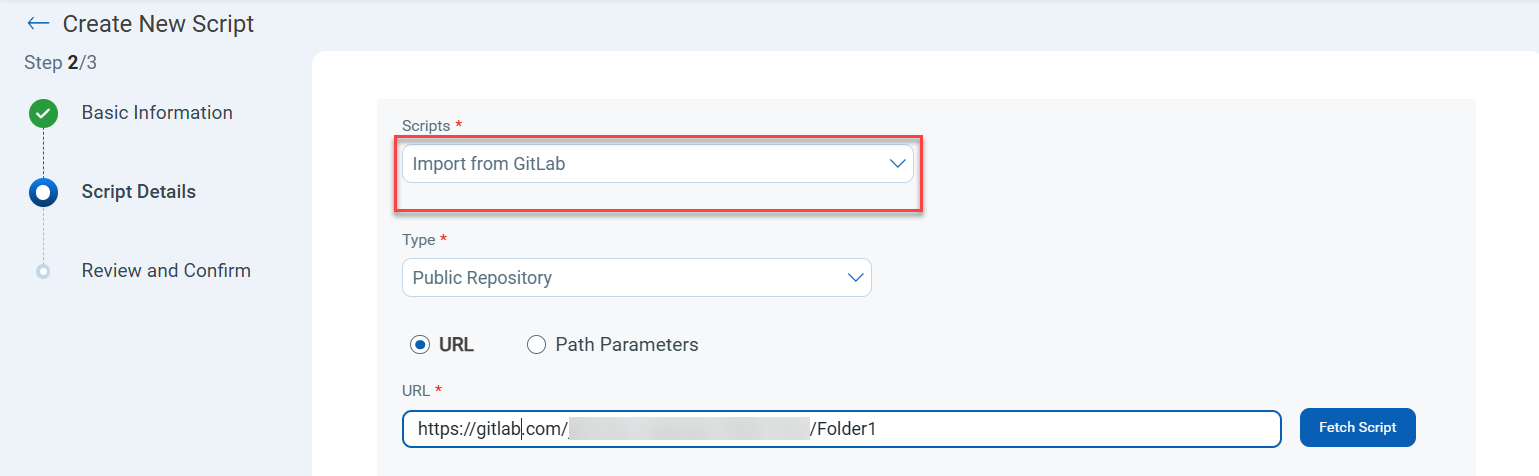
- Select the Import from GitLab option on the Scripts Details page.
- Select a repository Type from the list to specify whether you want to import from a Private or Public Repository.
The following options are displayed if you select Private Repository:
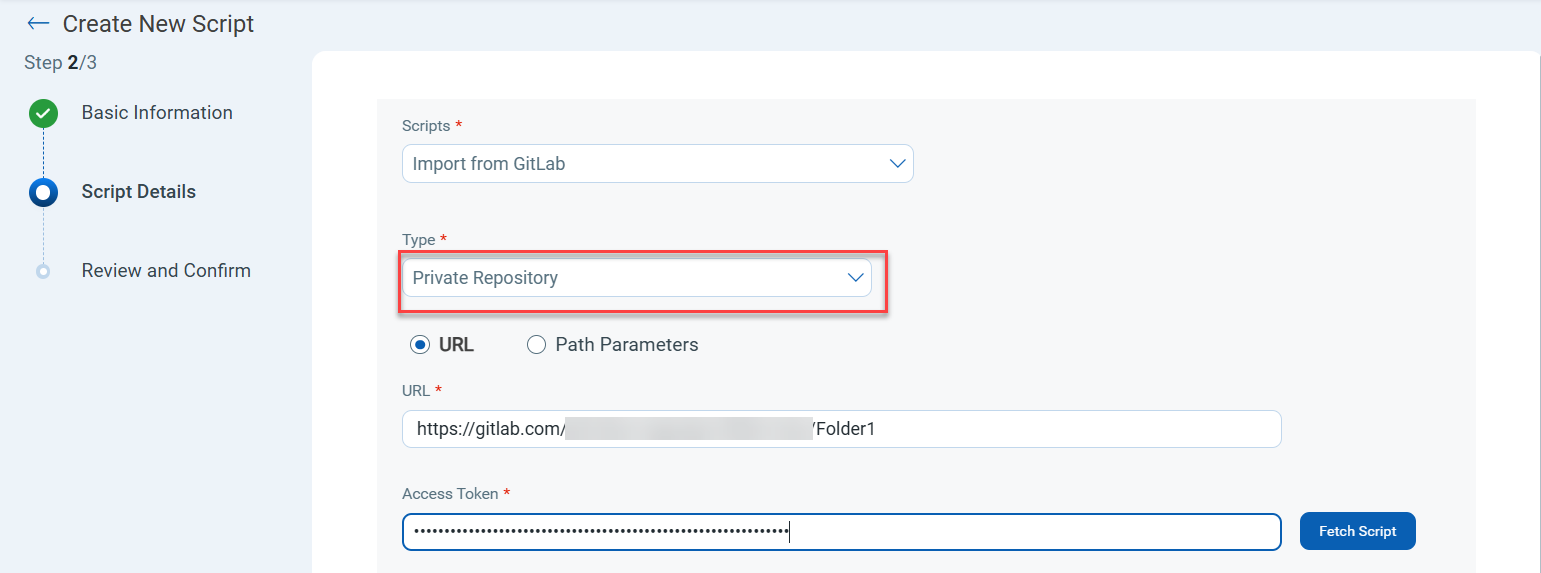
Option Usage URL
- In the URL text box, enter the URL of the file/folder for the GitLab private repository.
- In the Access Token text box, enter the token to access the private repository you have specified.
Qualys recommends that you provide an access token that has no expiration limit.
- Do not use a permalink from GitLab to fetch a script. A permalink points to a specific version of a file at a particular commit (for example:
https://gitlab.com/username/project/-/blob/abcd1234/file.txt, whereabcd1234is the commit hash). Using a permalink prevents the script from syncing because it always refers to an older, fixed commit. - Always use the Web URL from the browser’s address bar instead. Ensure you always copy the Web URL only up to the
filename.extension. Do not copy the text "?ref_type=heads" from the URL.
Path Parameters
- In the Owner field, enter the owner name of the GitLab repository.
- In the Repository name field, enter the name of the private repository that you want to access.
- (Optional) In the Branch field, provide the branch name of the repository from which the file is to be imported.
- In the Access Token text box, enter the token to access the private repository you have specified.
Qualys recommends that you provide an access token that has no expiration limit.
The following options are displayed if you select Public Repository:
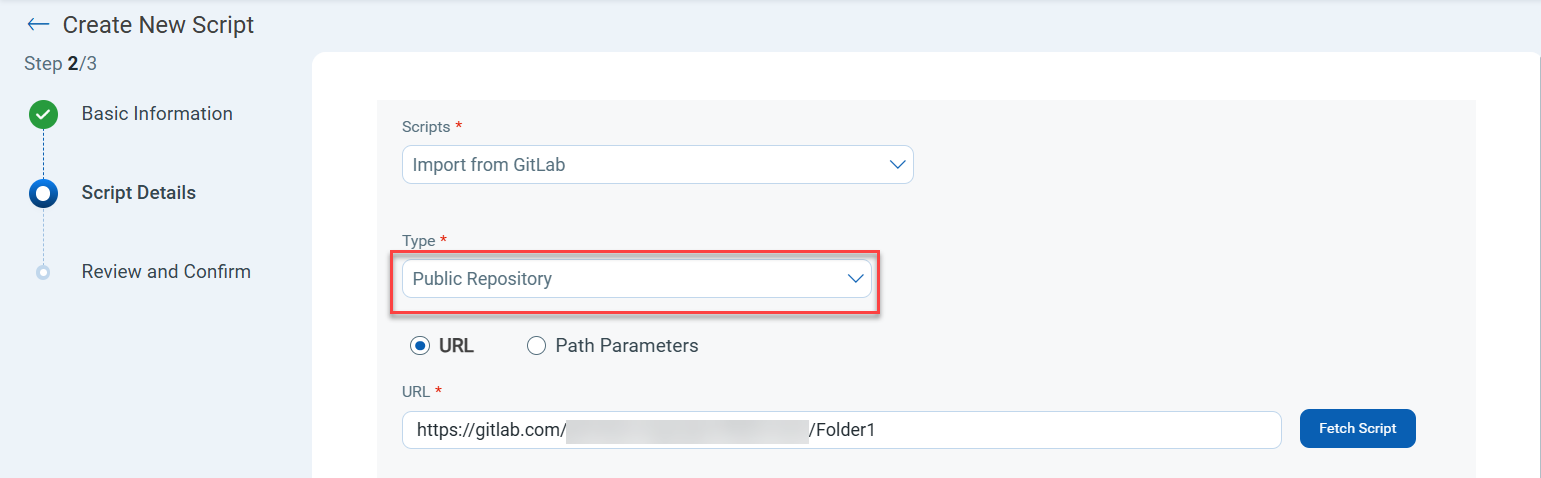
Option Usage URL
In the URL text box, enter the URL of the file or folder for the GitLab public repository.
- Do not use a permalink from GitLab to fetch a script. A permalink points to a specific version of a file at a particular commit (for example:
https://gitlab.com/username/project/-/blob/abcd1234/file.txt, whereabcd1234is the commit hash). Using a permalink prevents the script from syncing because it always refers to an older, fixed commit. - Always use the Web URL from the browser’s address bar instead. Ensure you always copy the Web URL only up to the
filename.extension. Do not copy the text "?ref_type=heads" from the URL.
Path Parameters
- In the Owner field, enter the owner name of the GitLab public repository.
- In the Repository name field, enter the name of the GitLab public repository that you want to access.
- (Optional) In the Branch field, provide the branch name of the repository.
- Click Fetch Script.
If your provided URL contains a folder with many scripts, you can navigate and select the script you want.
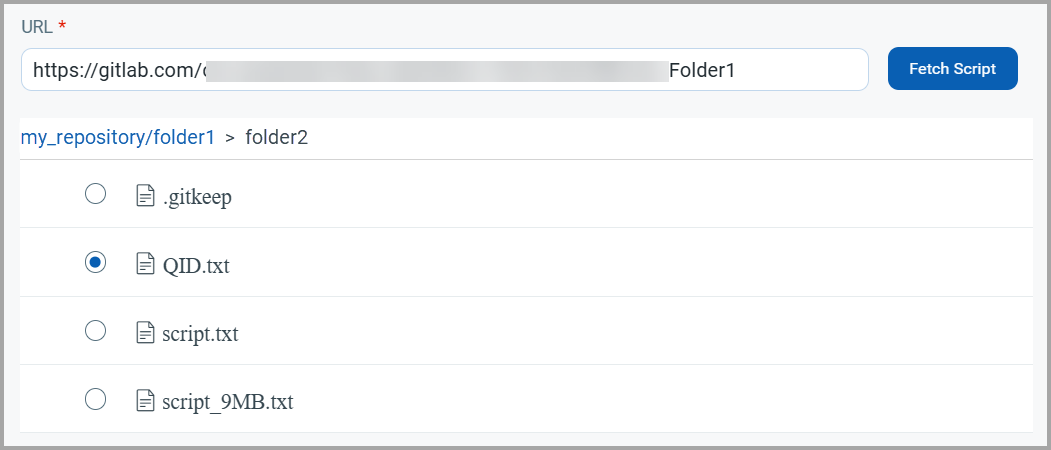
Your selected script content will be displayed.
- Turn on the Sync the script with GitLab toggle.
The following options become available:
- On Demand: Select if you want to manually sync the script with GitLab.
- Automated: Select if you want the script to sync automatically with the GitLab repository, which occurs every four hours.
Even if you select the Automated option, you can initiate an on-demand sync with GitLab at any point from the Scripts tab by selecting Quick Actions > Sync with GitLab now. Similarly, you can disable auto-sync by selecting Quick Actions > Disable auto sync. For more information on all quick actions, refer to Quick Actions for Scripts.
- Select the Create script in approved state checkbox if you want to create the script in the approved state.
This option is available only to the Manager user accounts.
-
Click Next.
You can view the created script in the Scripts tab. If the script is not created in an approved state, it is listed as Pending Test.
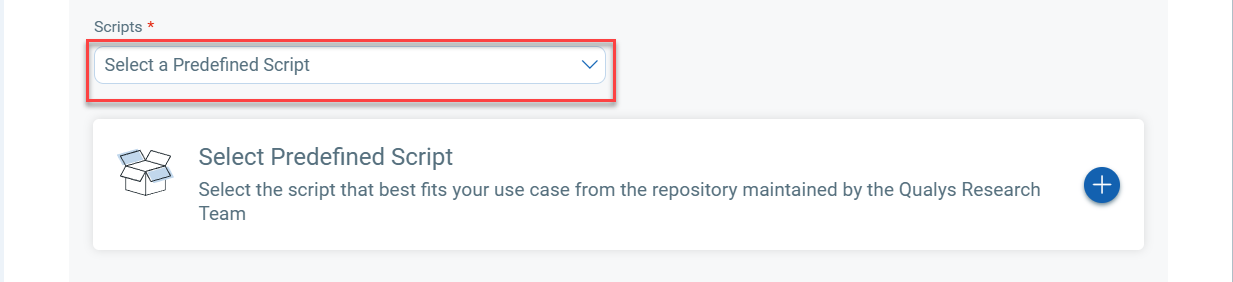
Import a Predefined Script
CAR offers a collection of predefined scripts curated and maintained by the dedicated research team at Qualys. These scripts have customizable parameters, allowing you to modify and input values as needed to suit your specific requirements.
To import a predefined script, follow these steps:
- Select the Select a Predefined Script option on the Scripts Details section.
- Click
 to add a predefined script.
 - Select the required script type, category, and script.
- Click Select.
The selected script is displayed.
Modify the Approved Script Content
The manager role can edit the content of the approved script.
To modify the approved script, follow these steps:
- Navigate to the Scripts tab.
- To edit a script, select an approved QID script and click Edit on the Quick Actions menu.

The Basic Information page is displayed.
-
Click Next to view the Scripts Details page.
- Modify the editable content as required.
- Provide the Reason for Edit.
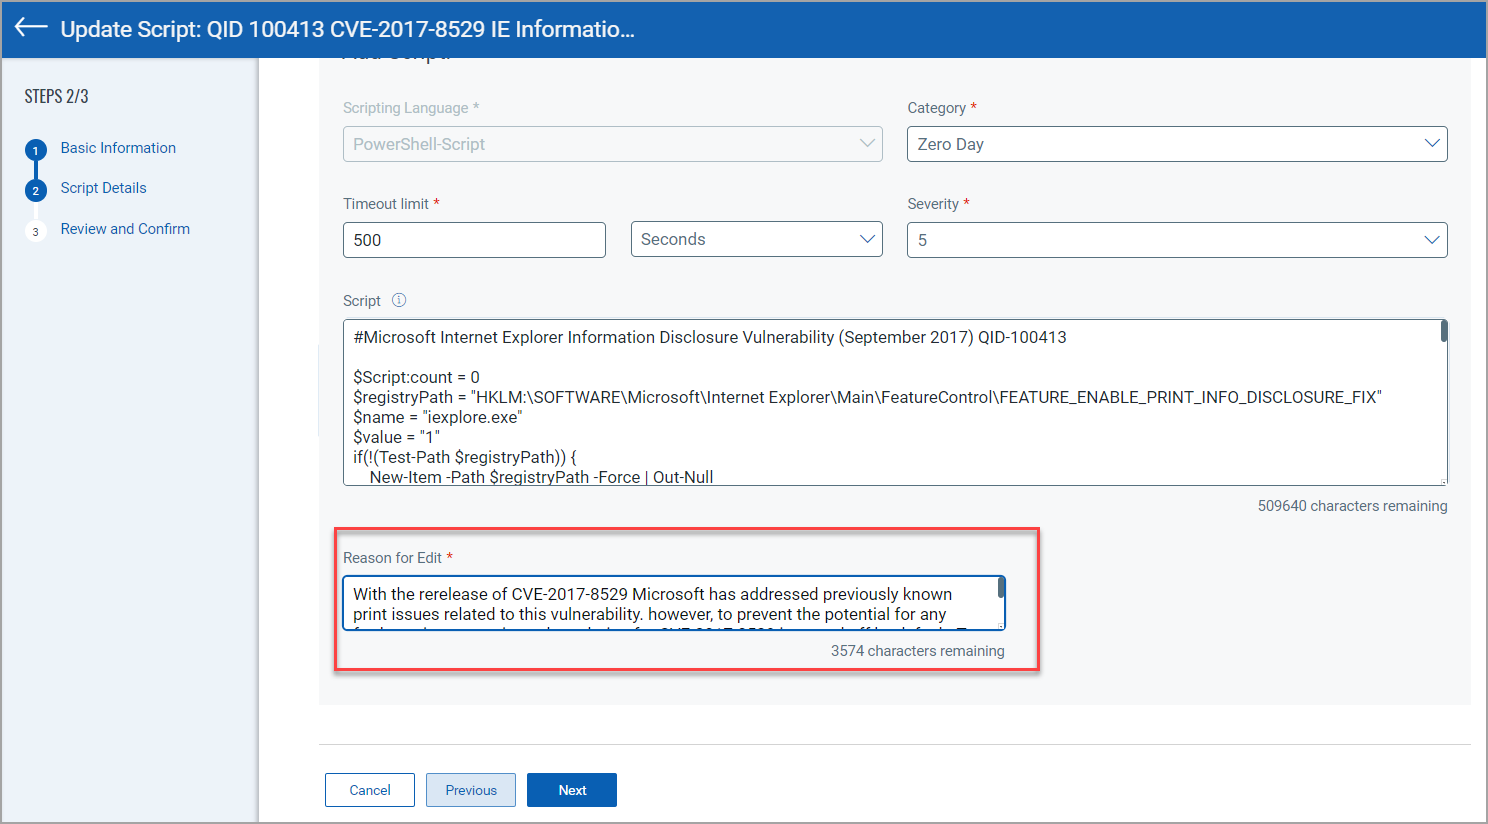
- Click Next to view the Review and Confirm page.
- Review the script and click Update to save the changes to the script.