Configure External Attack Surface Management Profiles
To configure an EASM Profile, follow these steps:
- Navigate to Configuration > EASM Configuration.
- Click Add Profile.
The Manage Configurations page is displayed.
- Enter a Profile Name.
- Provide the include and exclude filter criteria to discover externally exposed assets and hosts to manage your asset inventory.
For more information on filter criteria, refer to Filter Criteria in EASM Configuration.
You can import the EASM configuration from a JSON file by clicking Import from the Manage Configurations page. After you import the EASM profile configuration, you can make changes on top of it. For more information, see Import an existing EASM Profile Configuration from a JSON file.
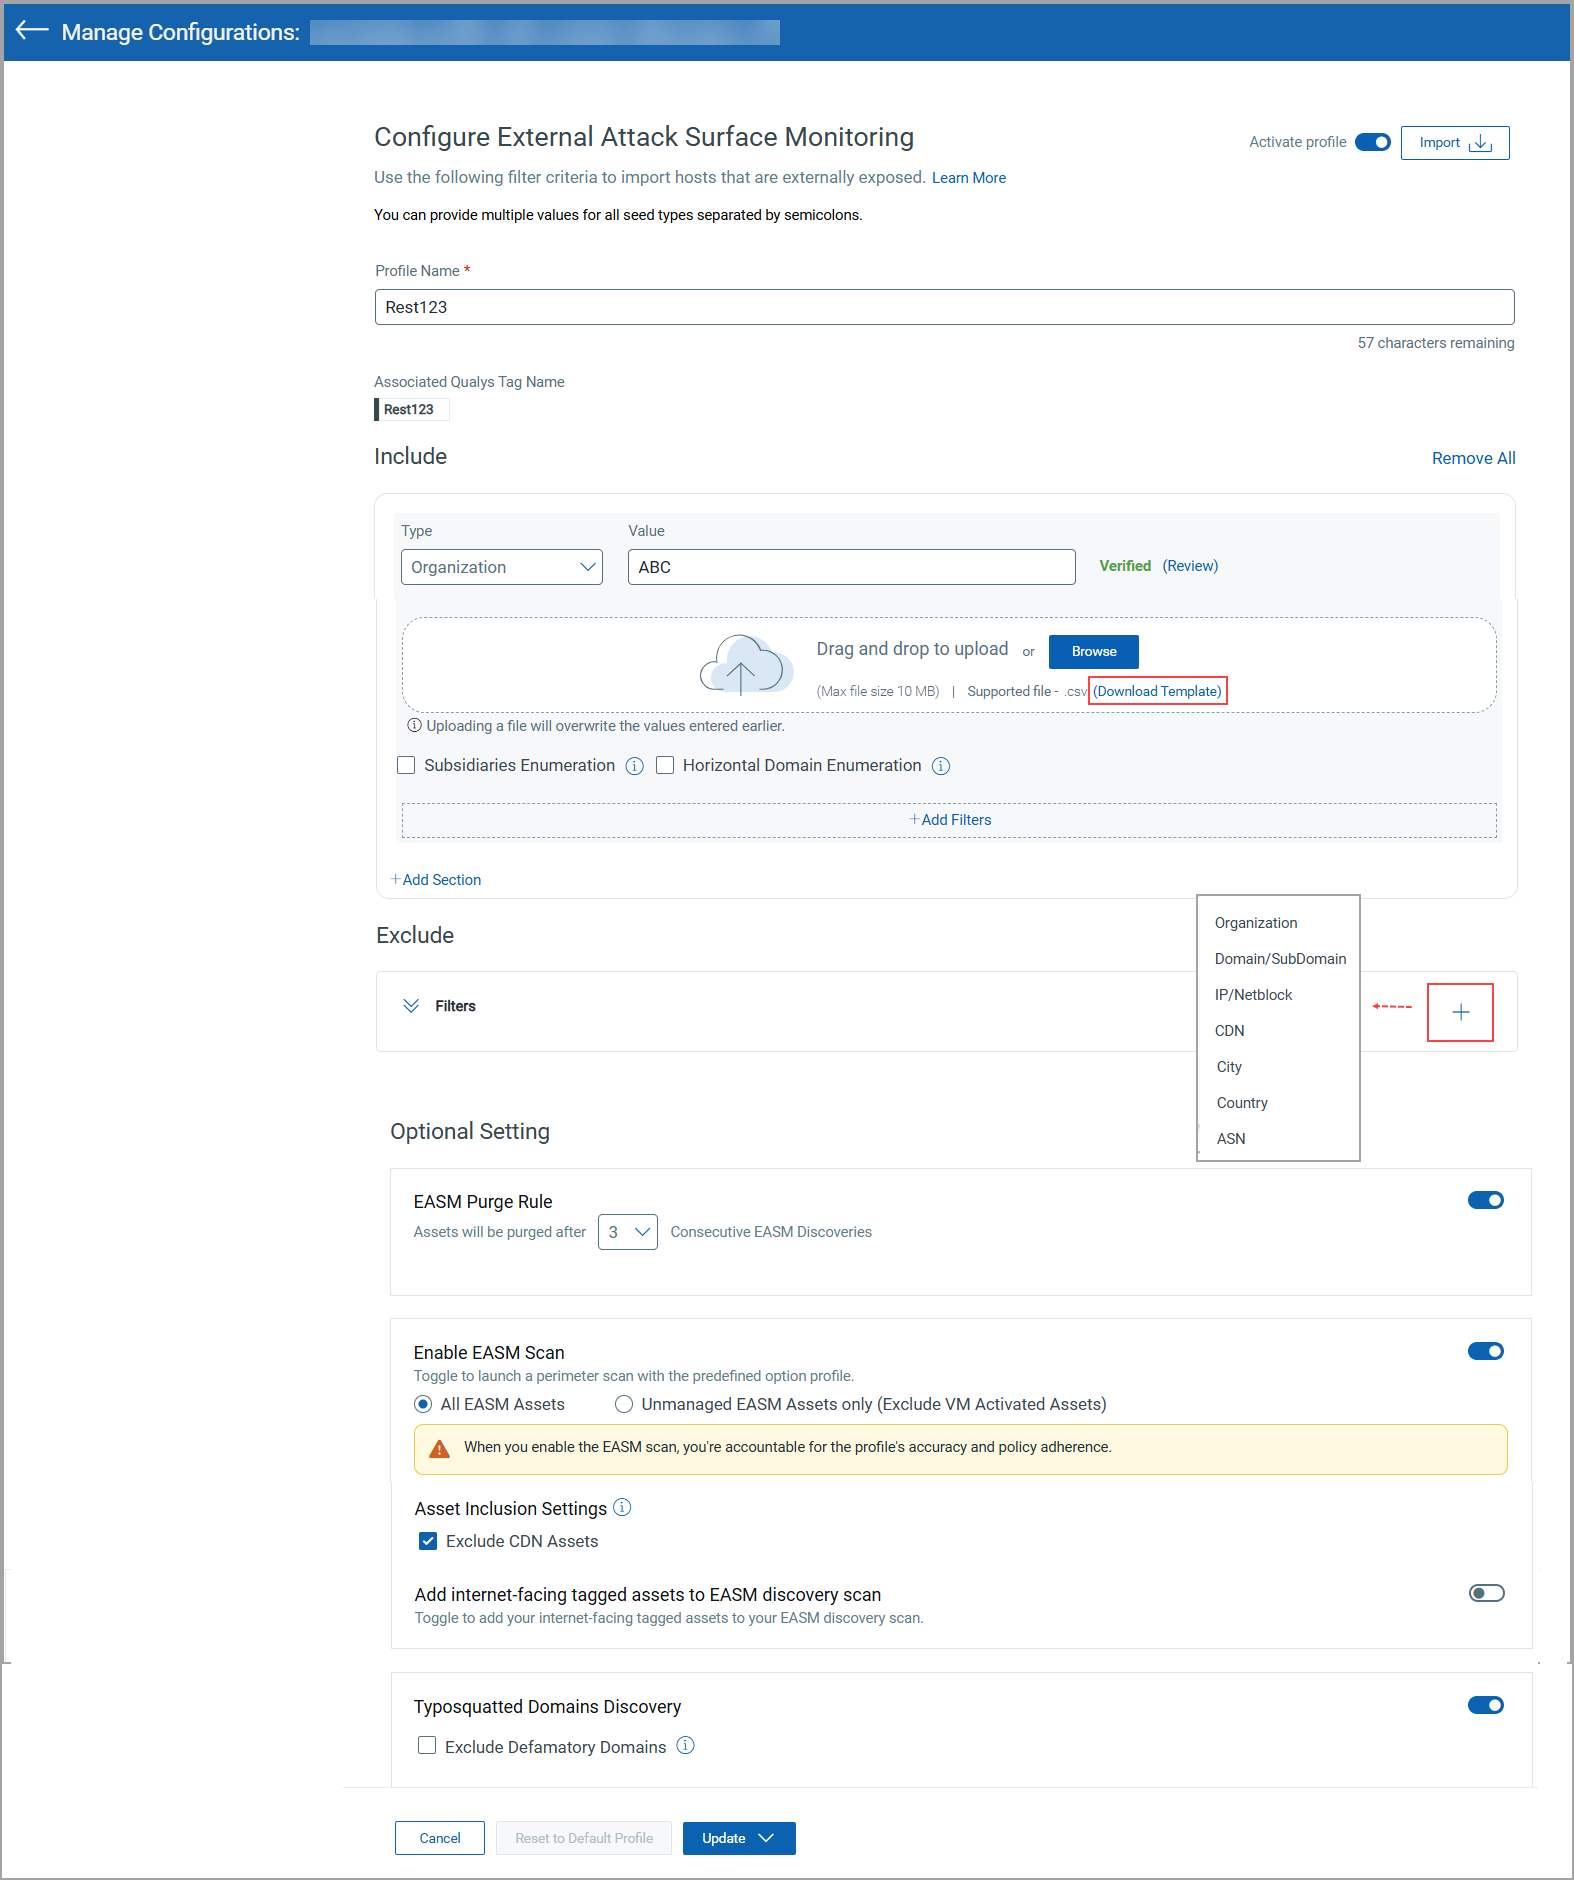
If you want to delete the EASM configuration and the EASM data, click Remove All.
- After you add or update the proper filter criteria and select the required optional settings, click Save to discover assets.
You can also choose to save the profile as a default preference file by clicking Save as Default.
If you edit the profile but want to disregard the changes, you can choose to Reset the changes to the default. This option retains your original profile, and the changes made are not applied to it until you save the profile.
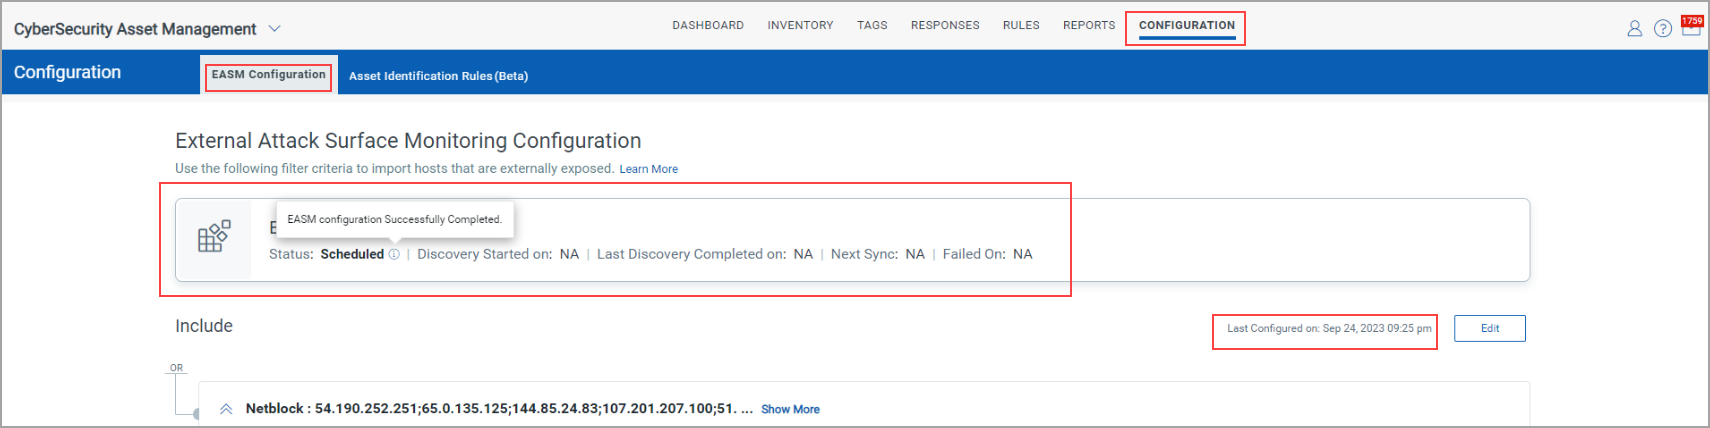
Once you validate and save your profile, your sync will start within a couple of hours. This sync automatically repeats after every two days. The sync time depends on the number of assets, and it varies from 2 to 6 hours.
If you edit the existing profile but want to disregard the changes, you can choose to Reset the changes to default. The benefit of this option is your original profile is retained, and the changes made are not applied to it until you save the profile.
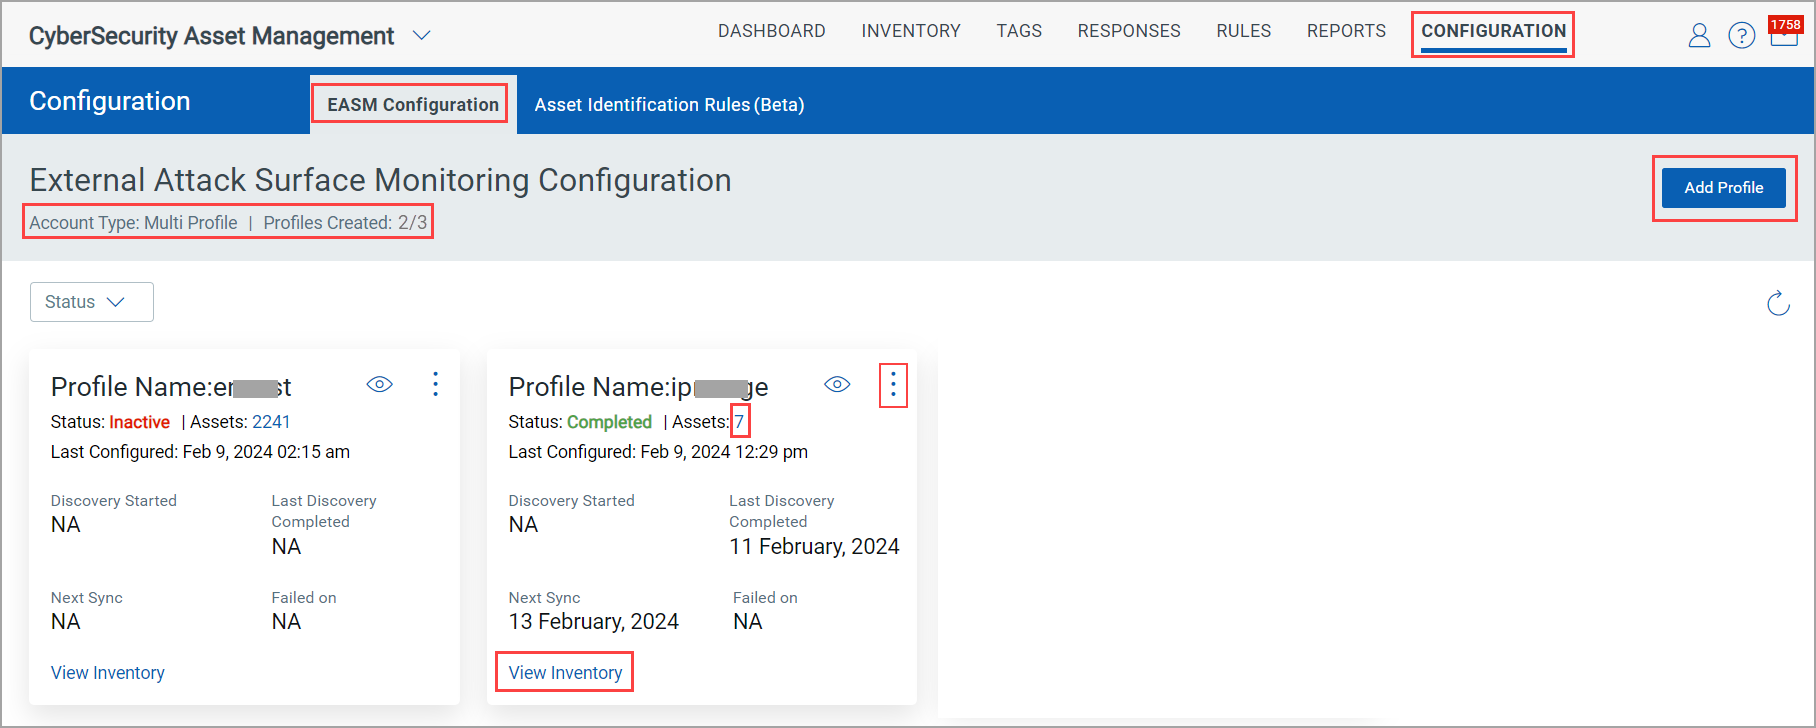
You can see the EASM discovery statuses on the EASM Configuration Page. As a result, you get a better insight into the EASM discovery progress. For more information, see EASM Discovery Statuses.
You can see the EASM assets from only the latest three scans. The assets that are not discovered from these scans are purged.
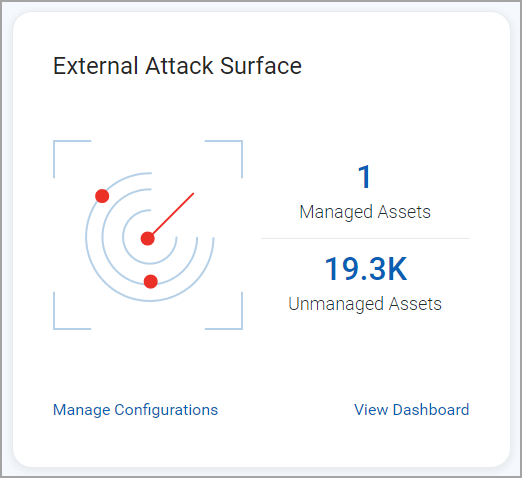
Once assets are discovered, they can be seen in the External Attack Surface tile on the Home page and on the Inventory tab.
Good to know!
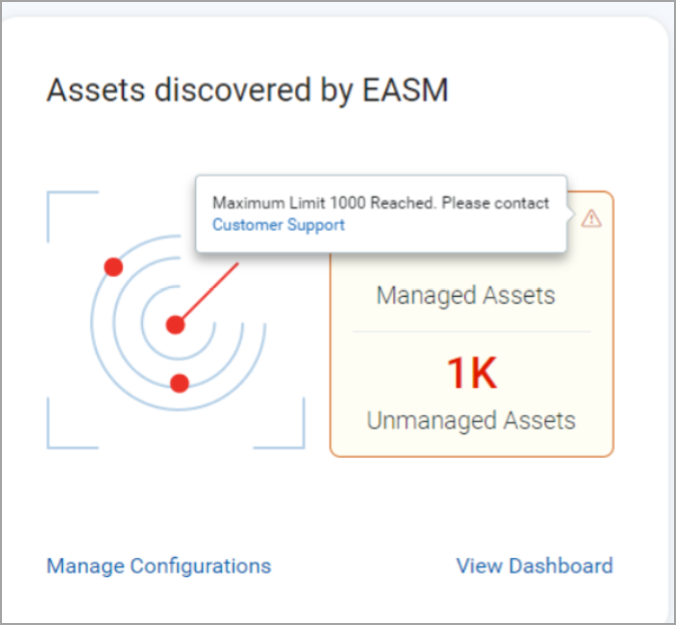
If the configured maximum asset sync limit is reached for an EASM profile, a warning message is displayed.
Suppose the maximum limit of 1000 assets is reached, a warning message is displayed on the Assets discovered by EASM tile. To increase the asset limit of your EASM profile for the specific account, contact Qualys TAM. After the asset limit is increased, in the next sync, you can see the discovered assets and the warning message will not be shown anymore.