View Software
The Software tab lists the software on the assets in your organization, with its license, platform, life cycle stage, end of life details, and authorization status.
Navigate to: Inventory > Assets > Software
Use this to
- Find the software that is reaching end of life.
- Mark software as authorized or unauthorized with a rule.
- See the assets a software title is installed on.
- Download the install list as CSV, HTML, or XML.
Explore the Software tab
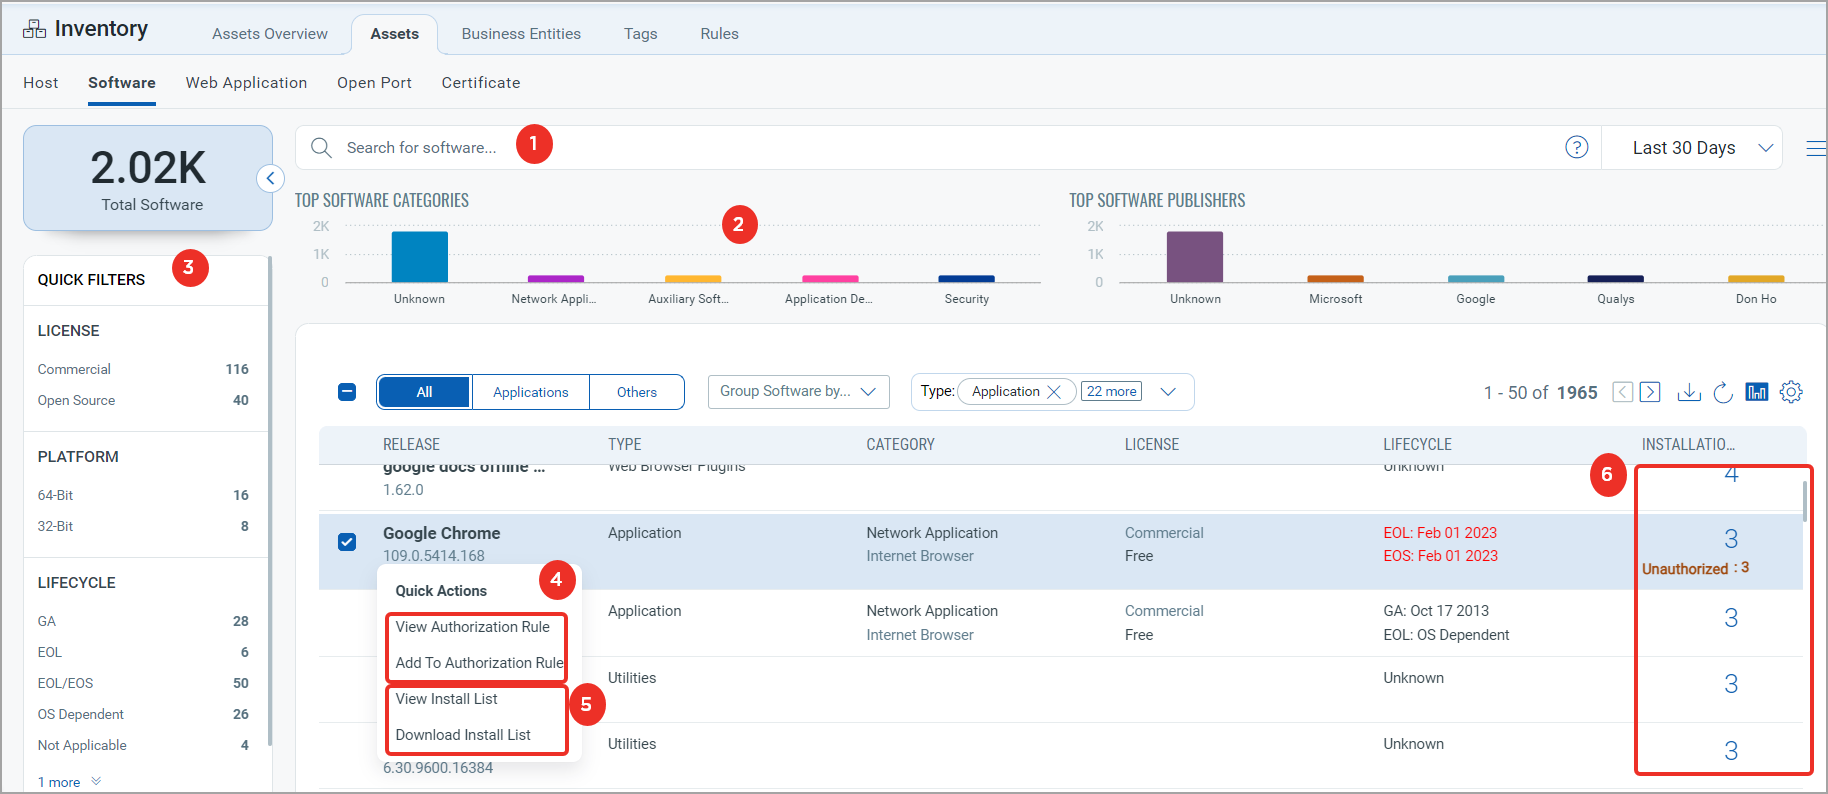
- Search for software using a Qualys Query Language (QQL) query for a specific time frame. For more information, see Search Tokens.
For all the date-related tokens, the date search is evaluated only for UTC format. The actual search results might show you the date as per your time zone.
- View bar charts for the top software categories and software publishers.
- Read the software attribute summaries in the left pane. Click a count to list that software.
Summary What it shows License The license types, with the number of software in each. Platform The software platforms, with the number of software on each. Lifecycle The software life cycle stages, with the number of software in each. End of life The software end of life dates, with the number of software for each. Use this to identify the software that needs an upgrade. Authorization The software authorization status (authorized, unauthorized, or needs review), with the number of software in each. - Click a count in the Installations column to open the Assets tab and see the assets that software is installed on.
Start from the End of life summary in the left pane to build an upgrade list, then use the Installations count to see which assets are affected.
Add software to an authorization rule
Add a software title to an authorization rule, and see the authorization rule already associated with it.
Before you begin: Decide whether the software is authorized or unauthorized in your organization before you add it to a rule, because the authorization you select determines how the software is reported on your assets.
- For the software you want to authorize, click Add To Authorization Rule from the Quick Actions menu.
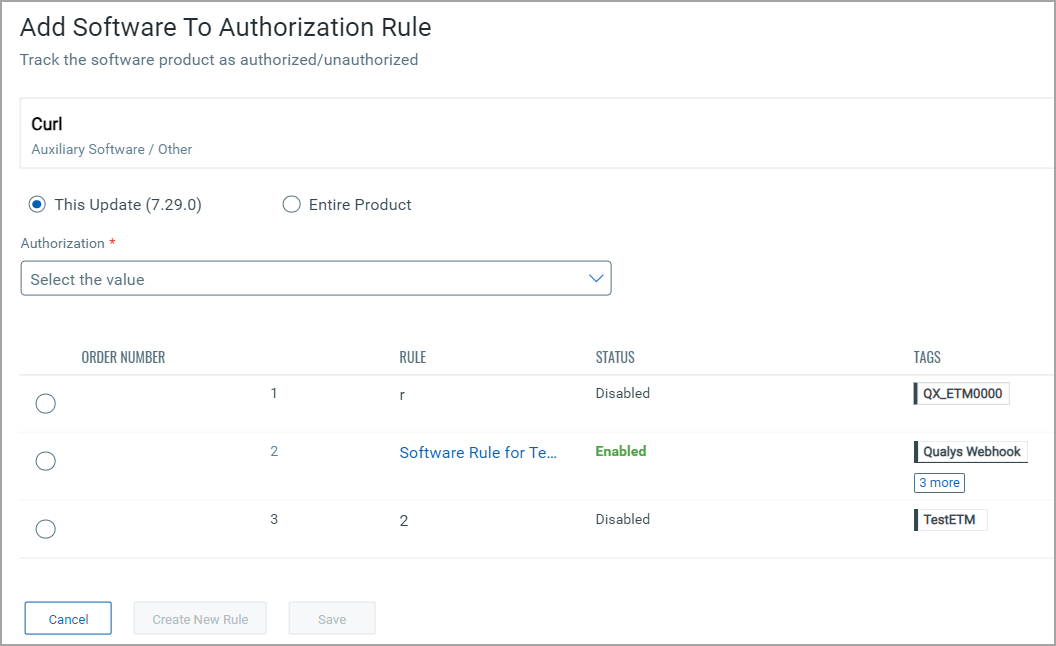
If the software has no update, only one radio button appears — "Entire Product" — and it is selected for you.
- Select Authorization from the drop-down list.
- Choose an existing rule, or create new rule to add the software to.
- Click Save.
If you set Authorization to 'Authorized,' you can also mark the software as "Required" with the Mark as Required radio button. Required software must be installed on the asset. If it is not, the asset is flagged as 'missing required software'.
For more information, see Track Authorized/Unauthorized Software.
View software installation details
Click View Install List from the Quick Actions menu. The Installation Details page opens with the installation details for that software.
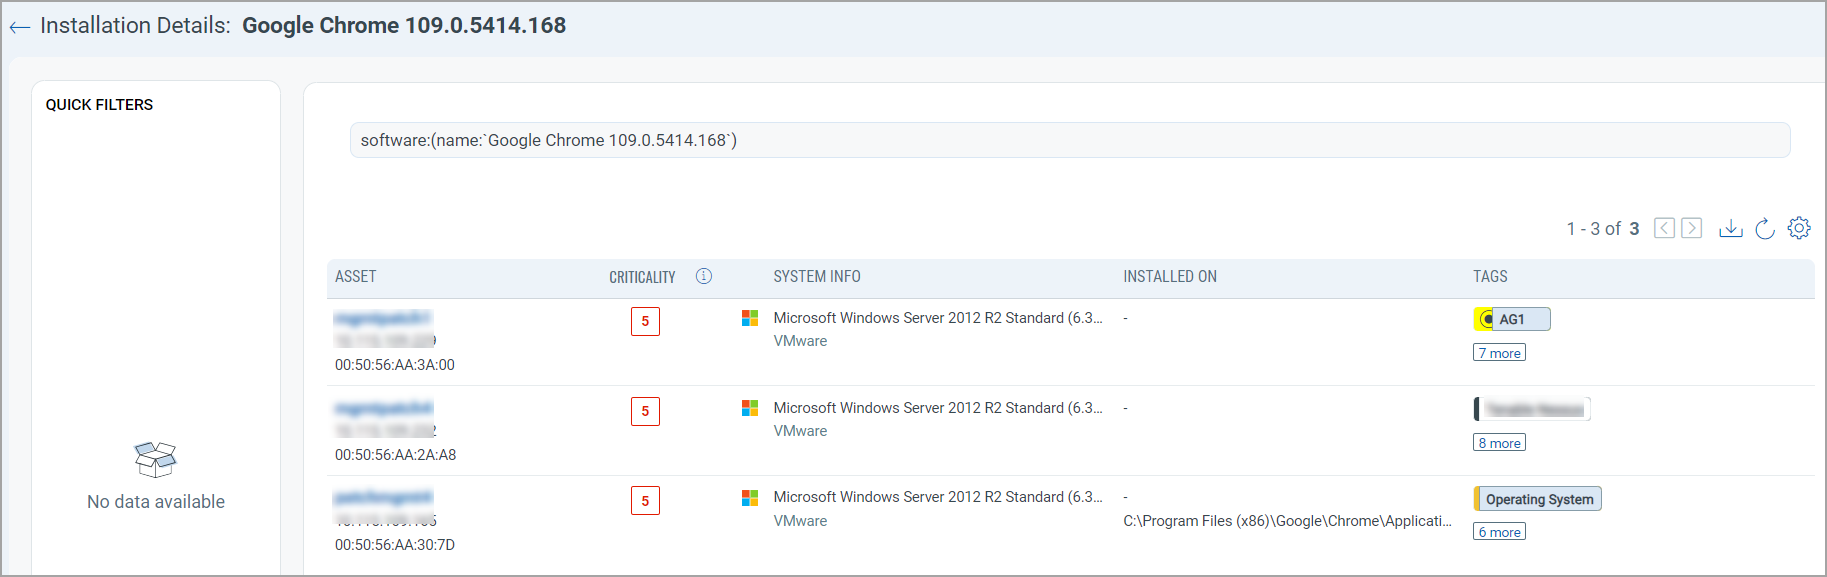
The number of columns on this page changes when you list software with the “Group by” and "Type" filters. Filter software with the Application, Unknown, and All checkboxes.
Click an individual asset to open its Asset Details page. Click the Download icon to download the asset list as CSV, HTML, or XML. The report carries these attributes:
- Asset attributes — Asset ID, Asset Name, Criticality Score, MAC Address, IP Address, BIOS Serial Number, Operating System, Operating System Category, Hardware, and Hardware Category.
- Software attributes — Software Name, Software Release, Install Date, Install Path, License Category, License Sub-Category, Lifecycle Stage, Lifecycle GA Date, Lifecycle EOL Date, Lifecycle EOS Date, Lifecycle EOL Support Stage, and Lifecycle EOS Support Stage.
Download the install list
- Click Download Install List from the Quick Actions menu. The download covers the assets a particular software is installed on.
- Select the timezone to use for the dates in the report, and choose a download format: CSV, HTML, or XML.
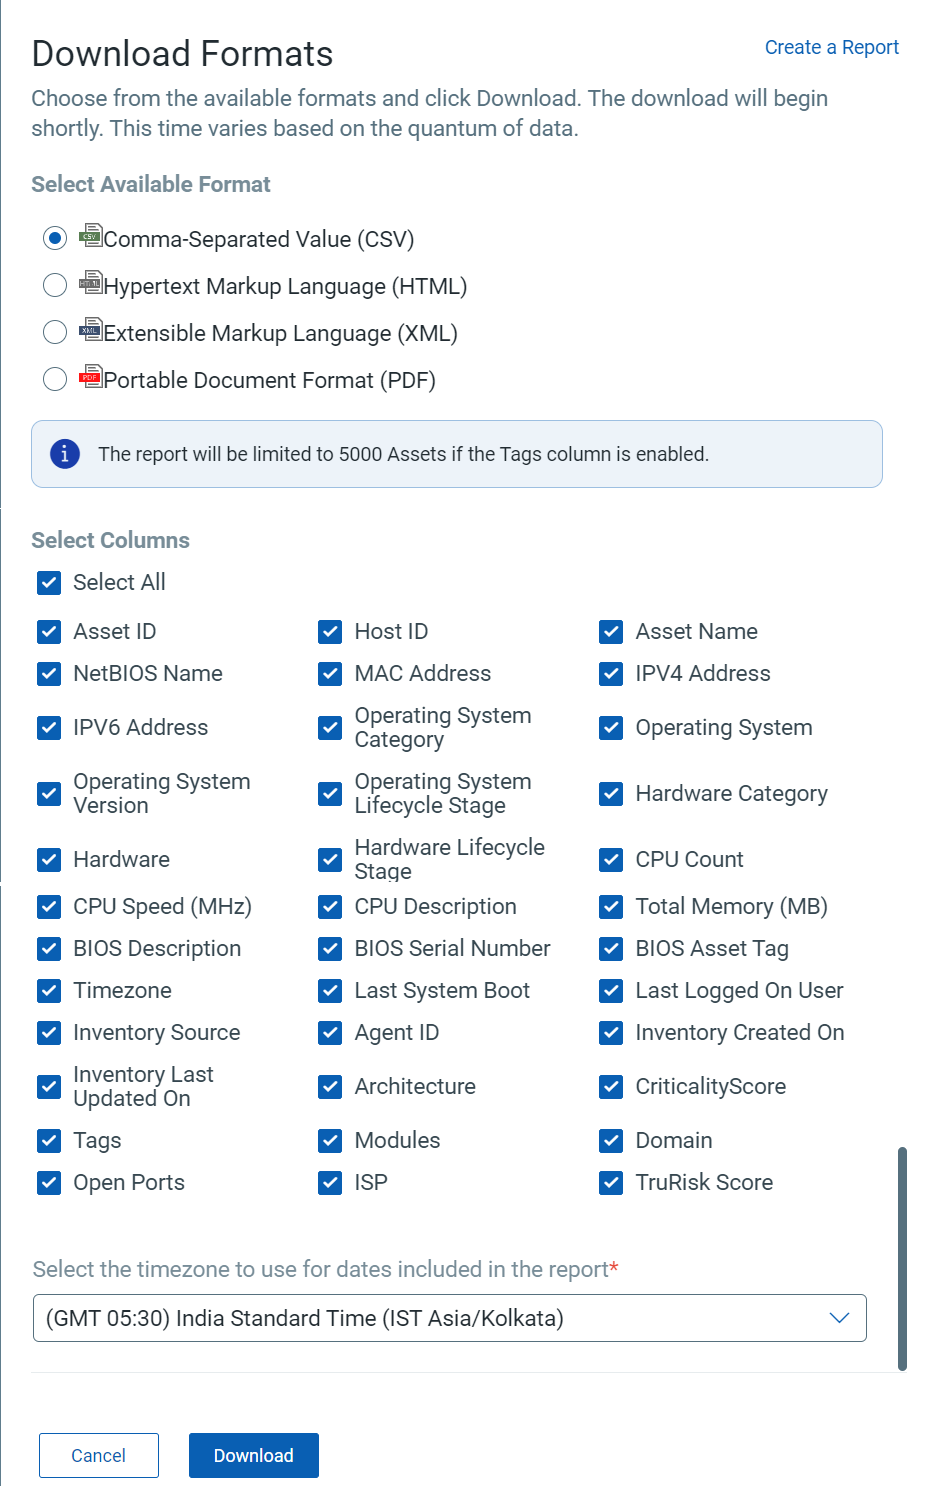
- Click Download.
To build a software details report instead, click the Create a Report link.
Choose the timezone that matches the team who reads the report, so that the install dates in the downloaded file need no conversion.