Exporting Your QFlows
The export feature allows you to download QFlows in JSON format, which can be imported. It is easier to export QFlows from one account and import them in another account than re-creating the same QFlows manually. Once the QFlows are imported, the connectors and any such HTTP authentication details need to be re-configured and saved. It is possible to export up to 10 QFlows in a single JSON file.
You can use the Export function to download your QFlows to your local machine.
When exporting, we remove authentication information from the HTTP node to ensure security best practices are followed.
Follow these steps to export QFlows:
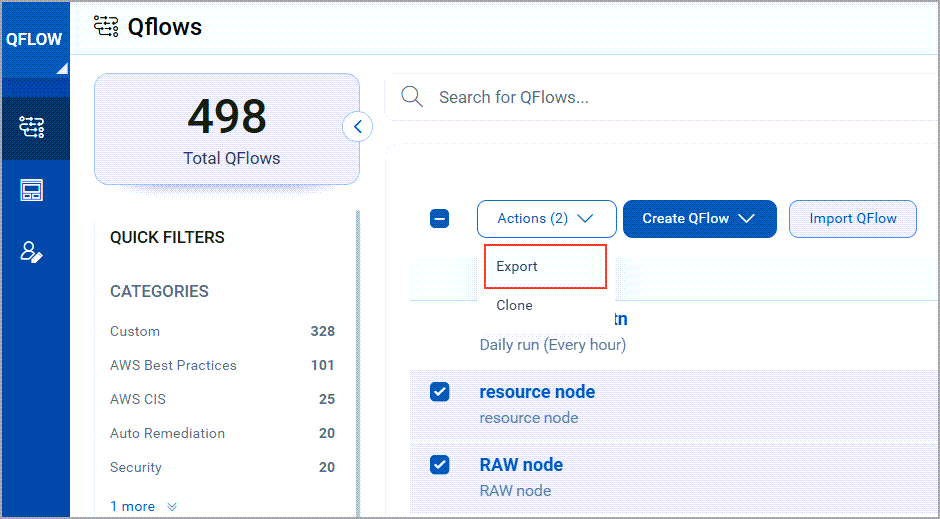
- Navigate to the QFlows tab, select the QFlows you want to export, and click Export from the Actions menu.
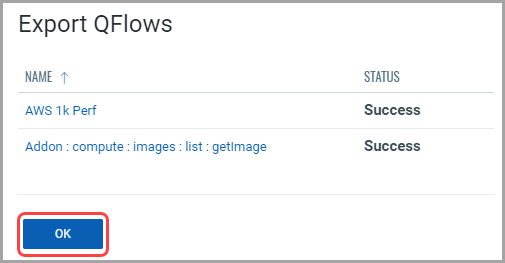
A list of QFlows that are exported is displayed.
- Click OK to continue the export process.
QFlows are exported in JSON format.
- Save the file in a suitable location on your machine.
Now that you have exported your QFlows, you can use these QFlows using the import function. You need to configure connectors and HTTP authentication details after importing the QFlows. The exported QFlows JSON file is named as the qualys_export-timestamp appended (for example qflows-export-1696589891052.json). To know more about Importing, refer to the section Importing Your QFlows.
Related Topics
Creating QFlows from a Template