Configure the Anti-malware Profile from EDR UI
The default antivirus configurations are also downloaded on the endpoint asset, as the virus definitions are downloaded on the endpoint asset.
Before configuring a New Anti-malware profile, all the Asset(s) are attached to the existing Default profile. Also, the Default profile will be an ultimate fallback profile for Asset(s) without tags or fallouts from Tag-Profile manipulations.
Do not disable the Anti-Malware option from the target host. Disabling this option will remove the quarantine folder, which cannot be recovered. You can disable the OnAccess and Behavioral Scan options.
Create a New Anti-Malware Profile
You can create 15 Anti-malware Profiles and add up to 10 tags to each Anti-malware Profile. Navigate to the EDR > Configuration tab and click New Anti-malware Profile.

The New Anti-malware Profile window is displayed with the following settings:
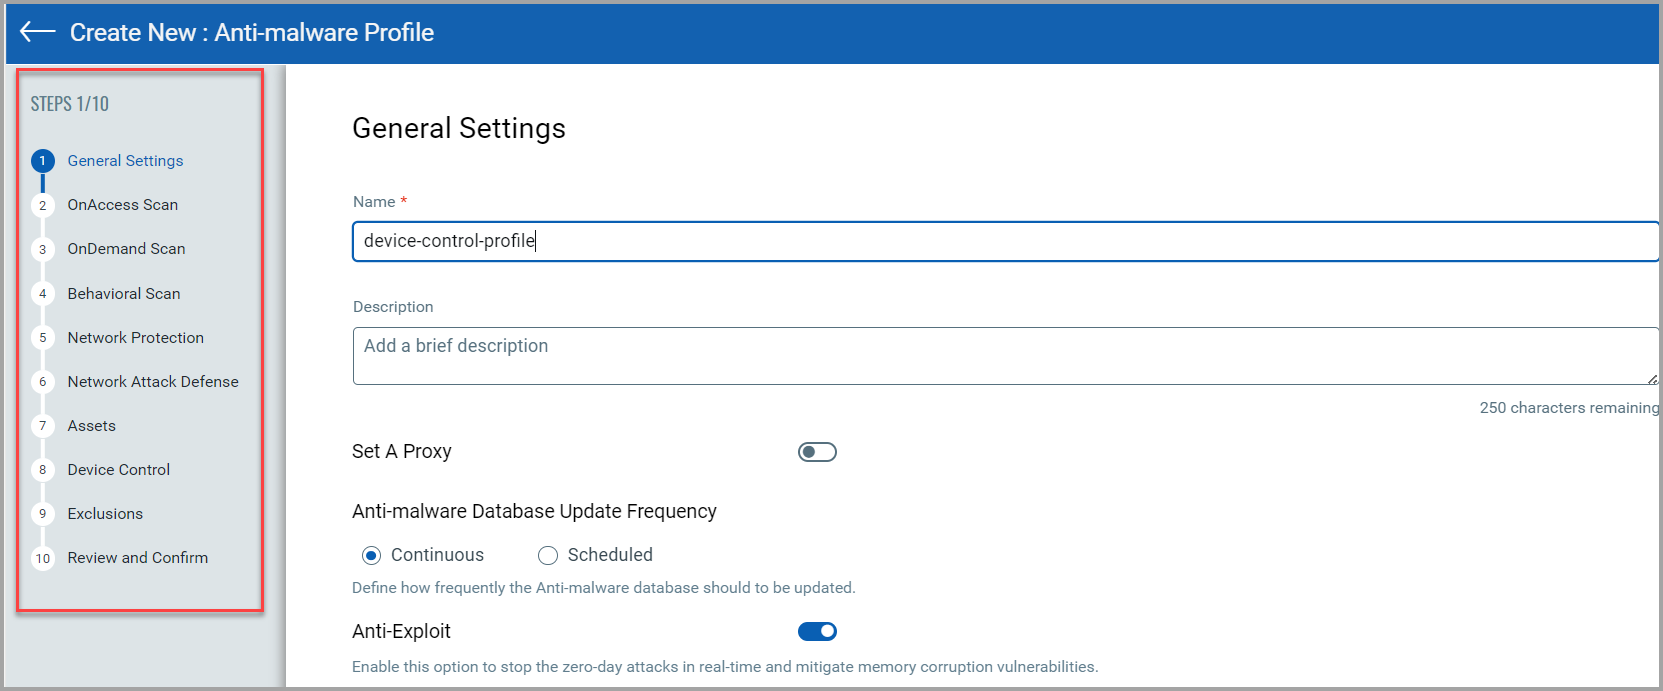
General Settings | OnAccess Scan | OnDemand Scan | Behavioral Scan | Network Protection | Network Attack Defense | Content Control | Create and Assign Tags | Device Control Support | Exclusion Support | Review and Confirm
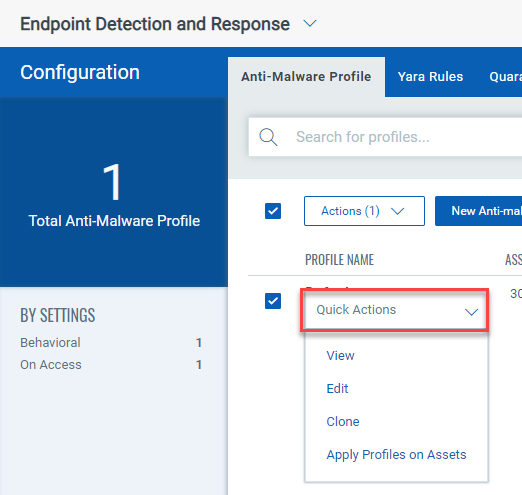
View, Edit, or Clone Profile
You can View, Edit, or Clone an existing Anti-malware Profile from the Quick Actions menu. Perform the following steps to perform these actions:
- Navigate to the EDR > Configuration tab.
- Hover the mouse over the profile you want to perform the View, Edit, or Clone action.
- Click the drop-down arrow, select View, Edit, or Clone from the Quick Actions menu, and follow the onscreen wizard to configure your profile.
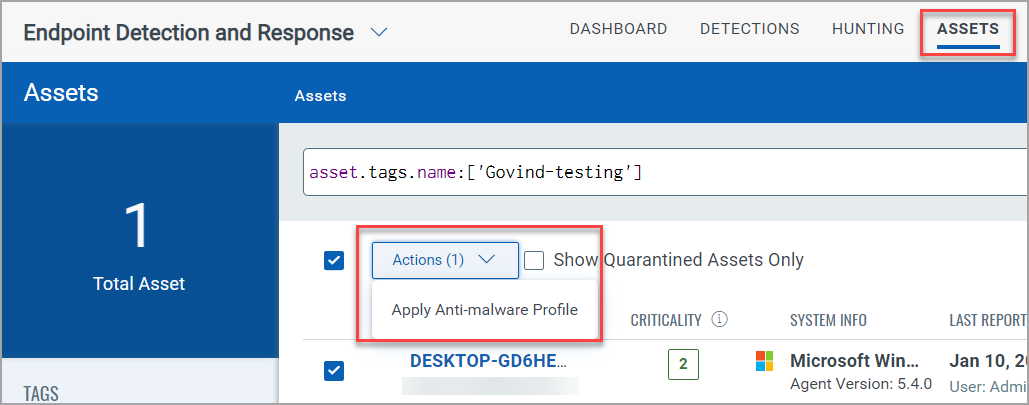
Apply Profiles on Assets
You can Apply the new or an existing Profile on your assets from the Quick Actions menu. Perform the following steps to apply profiles on assets:
- Navigate to the EDR > Configuration tab.
- Hover the mouse over the profile you want to apply on Assets.
- Click the drop-down arrow, and select Apply Profiles on Assets from the Quick Actions menu.
If a Tag is not added to the Anti-malware Profile, the Apply Profiles on Assets option is disabled.
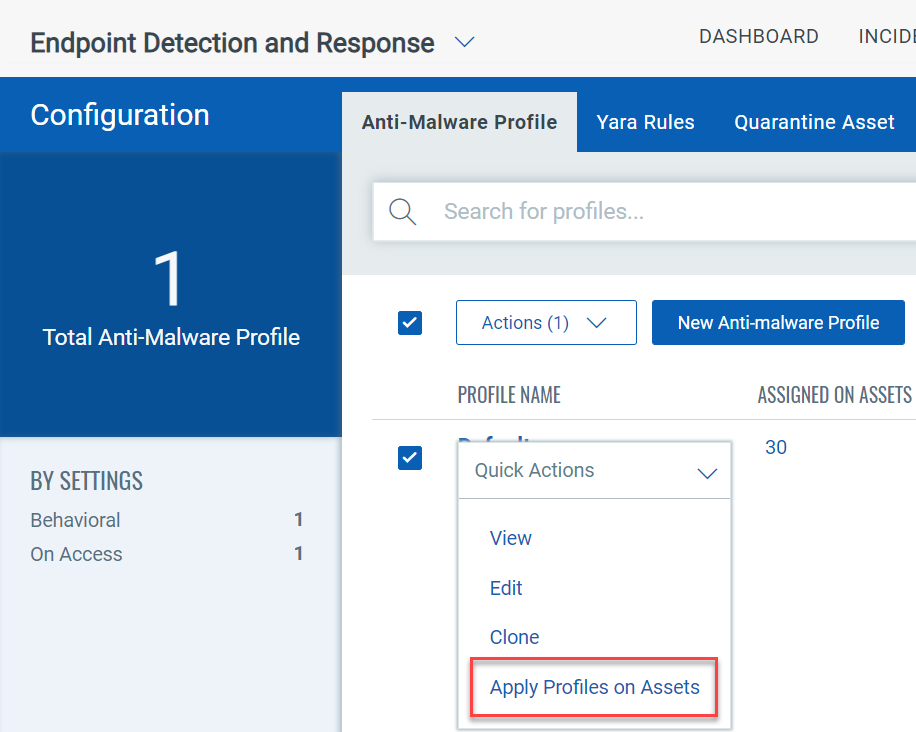
- You will be directed to the Assets tab. From the Actions menu, select Apply Anti-malware Profile.
- Once the profile is applied to the asset(s), you are redirected to the Configuration tab.
A notification is generated once the profile is applied to the Assets.
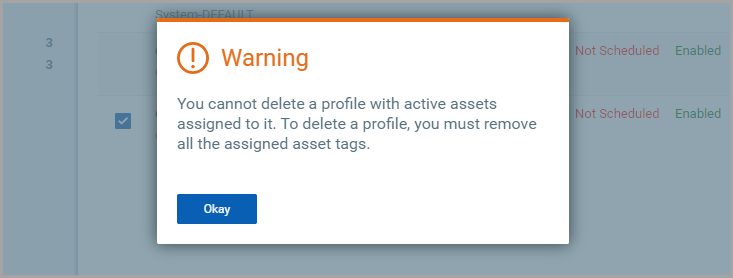
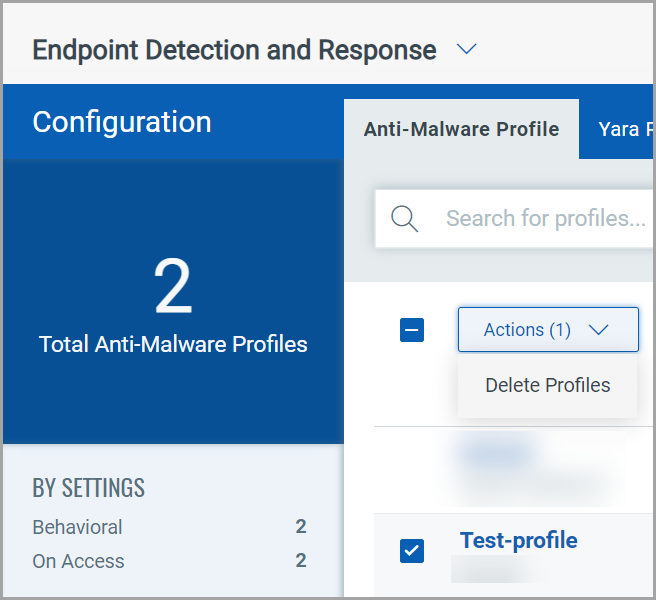
Delete a Profile
You can Delete a Profile from the Actions menu.
- Navigate to the EDR > Configuration tab.
- Select the checkbox to the left of the Profile Name column.
- The Actions button is enabled. Click the drop-down arrow and select Delete Profiles.
A confirmation window is displayed.
- Click Yes if you want to delete the profile.
A Warning window is displayed if you delete a profile with active Assets attached.